原文地址:http://www.javacodegeeks.com/2013/07/spring-jta-multiple-resource-transactions-in-tomcat-with-atomikos-example.html
In this tutorial we shall show you how to implement JTA multiple resource transactions in a Tomcat server, using Atomikos Transaction Manager. Atomicos transaction manager provides support for distributed transactions. These are multi-phased transactions, often using multiple databases, that must be committed in a coordinated way. The distributed transactions are described by the XA standard. XA governs how a transaction manager (such as Atomikos) can tell a database what work is going on as part of what transaction, and how to conduct the two-phase commit (2PC) protocol at the end of each transaction.
Here, we will create simple Entity classes mapped to two different databases and we will try to persist objects of the classes to the databases using one distributed transaction. We will also see what happens when one of the underlying transactions rollbacks.
Our preferred development environment is Eclipse. We are using Eclipse Juno (4.2) version, along with Maven Integration plugin version 3.1.0. You can download Eclipse from here and Maven Plugin for Eclipse from here. The installation of Maven plugin for Eclipse is out of the scope of this tutorial and will not be discussed. We are also using Spring version 3.2.3 and the JDK 7_u_21.
Tomcat 7 is the application server used. Hibernate version is 4.1.9, and the database used in the example is MySQL Database Server 5.6.
Let’s begin,
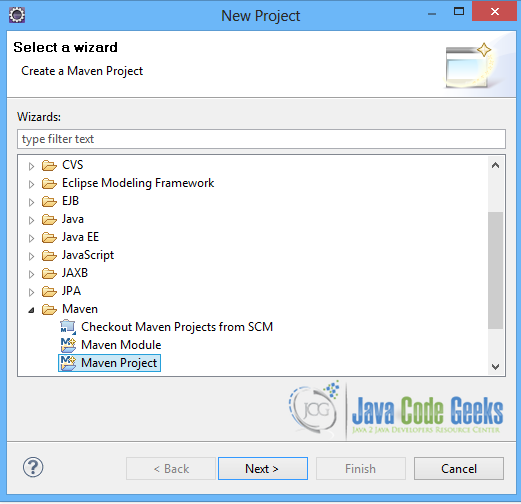
1. Create a new Maven project
Go to File -> Project ->Maven -> Maven Project.
In the “Select project name and location” page of the wizard, make sure that “Create a simple project (skip archetype selection)” option is unchecked, hit “Next” to continue with default values.

Here the maven archetype for creating a web application must be added. Click on “Add Archetype” and add the archetype. Set the “Archetype Group Id” variable to "org.apache.maven.archetypes", the “Archetype artifact Id” variable to "maven-archetype-webapp" and the “Archetype Version” to "1.0". Click on “OK” to continue.

In the “Enter an artifact id” page of the wizard, you can define the name and main package of your project. Set the “Group Id” variable to "com.javacodegeeks.snippets.enterprise" and the “Artifact Id” variable to "springexample". The aforementioned selections compose the main project package as "com.javacodegeeks.snippets.enterprise.springexample" and the project name as "springexample". Set the “Package” variable to "war", so that a war file will be created to be deployed to tomcat server. Hit “Finish” to exit the wizard and to create your project.

The Maven project structure is shown below:

It consists of the following folders:
- /src/main/java folder, that contains source files for the dynamic content of the application,
- /src/test/java folder contains all source files for unit tests,
- /src/main/resources folder contains configurations files,
- /target folder contains the compiled and packaged deliverables,
- /src/main/resources/webapp/WEB-INF folder contains the deployment descriptors for the Web application ,
- the pom.xml is the project object model (POM) file. The single file that contains all project related configuration.
2. Add Spring 3.2.3 dependency
- Locate the “Properties” section at the “Overview” page of the POM editor and perform the following changes:
Create a new property with name org.springframework.version and value 3.2.3.RELEASE.
- Navigate to the “Dependencies” page of the POM editor and create the following dependencies (you should fill the “GroupId”, “Artifact Id” and “Version” fields of the “Dependency Details” section at that page):
Group Id : org.springframework Artifact Id : spring-web Version : ${org.springframework.version}
Alternatively, you can add the Spring dependencies in Maven’s pom.xml file, by directly editing it at the “Pom.xml” page of the POM editor, as shown below:
pom.xml:
03 |
<modelVersion>4.0.0</modelVersion> |
04 |
<groupId>com.javacodegeeks.snippets.enterprise</groupId> |
05 |
<artifactId>springexample</artifactId> |
06 |
<version>0.0.1-SNAPSHOT</version> |
10 |
<groupId>org.springframework</groupId> |
11 |
<artifactId>spring-core</artifactId> |
12 |
<version>${spring.version}</version> |
15 |
<groupId>org.springframework</groupId> |
16 |
<artifactId>spring-context</artifactId> |
17 |
<version>${spring.version}</version> |
22 |
<spring.version>3.2.3.RELEASE</spring.version> |
As you can see Maven manages library dependencies declaratively. A local repository is created (by default under {user_home}/.m2 folder) and all required libraries are downloaded and placed there from public repositories. Furthermore intra – library dependencies are automatically resolved and manipulated.
3. Add all required dependencies
All dependencies needed to set up atomicos transaction manager are set here.
pom.xml
003 |
<modelVersion>4.0.0</modelVersion> |
004 |
<groupId>com.javacodegeeks.snippets.enterprise</groupId> |
005 |
<artifactId>springexample</artifactId> |
006 |
<packaging>war</packaging> |
007 |
<version>0.0.1</version> |
008 |
<name>springexample Maven Webapp</name> |
011 |
<finalName>springexample</finalName> |
015 |
<groupId>org.springframework</groupId> |
016 |
<artifactId>spring-core</artifactId> |
017 |
<version>${spring.version}</version> |
021 |
<groupId>org.springframework</groupId> |
022 |
<artifactId>spring-context</artifactId> |
023 |
<version>${spring.version}</version> |
027 |
<groupId>org.springframework</groupId> |
028 |
<artifactId>spring-tx</artifactId> |
029 |
<version>${spring.version}</version> |
033 |
<groupId>org.springframework</groupId> |
034 |
<artifactId>spring-orm</artifactId> |
035 |
<version>${spring.version}</version> |
039 |
<groupId>org.springframework</groupId> |
040 |
<artifactId>spring-web</artifactId> |
041 |
<version>${spring.version}</version> |
045 |
<groupId>org.springframework</groupId> |
046 |
<artifactId>spring-webmvc</artifactId> |
047 |
<version>${spring.version}</version> |
051 |
<groupId>org.hibernate</groupId> |
052 |
<artifactId>hibernate-entitymanager</artifactId> |
053 |
<version>${hibernate.version}</version> |
056 |
<groupId>cglib</groupId> |
057 |
<artifactId>cglib</artifactId> |
060 |
<groupId>dom4j</groupId> |
061 |
<artifactId>dom4j</artifactId> |
067 |
<groupId>javax.servlet</groupId> |
068 |
<artifactId>javax.servlet-api</artifactId> |
069 |
<version>3.0.1</version> |
070 |
<scope>provided</scope> |
074 |
<groupId>com.atomikos</groupId> |
075 |
<artifactId>transactions-jta</artifactId> |
076 |
<version>${atomikos.version}</version> |
080 |
<groupId>com.atomikos</groupId> |
081 |
<artifactId>transactions-jdbc</artifactId> |
082 |
<version>${atomikos.version}</version> |
086 |
<groupId>com.atomikos</groupId> |
087 |
<artifactId>transactions-hibernate3</artifactId> |
088 |
<version>${atomikos.version}</version> |
091 |
<artifactId>hibernate</artifactId> |
092 |
<groupId>org.hibernate</groupId> |
098 |
<groupId>dom4j</groupId> |
099 |
<artifactId>dom4j</artifactId> |
100 |
<version>1.6.1</version> |
104 |
<groupId>mysql</groupId> |
105 |
<artifactId>mysql-connector-java</artifactId> |
106 |
<version>5.1.25</version> |
111 |
<spring.version>3.2.3.RELEASE</spring.version> |
112 |
<hibernate.version>4.1.9.Final</hibernate.version> |
113 |
<atomikos.version>3.8.0</atomikos.version> |
4. Create the Entity classes
EmployeeA.java and EmployeeB.java are the Entity classes. They use the javax.persistence annotations to be mapped to a table, EMPLOYEEA and EMPLOYEEB in different databases. In particular, the @Entity annotation specifies that each class is an entity. The @Table annotation specifies the primary table for the annotated entity. The @Column annotation is used to specify a mapped column for the persistent field, whereas the @Id annotation specifies the primary key field of each entity.
EmployeeA.java
01 |
package com.javacodegeeks.snippets.enterprise.model; |
03 |
import javax.persistence.Column; |
04 |
import javax.persistence.Entity; |
05 |
import javax.persistence.Id; |
06 |
import javax.persistence.Table; |
09 |
@Table(name = "EMPLOYEEA") |
10 |
public class EmployeeA { |
13 |
@Column(name = "ID", nullable = false) |
16 |
@Column(name = "NAME", nullable = false) |
19 |
@Column(name = "AGE", nullable = false) |
25 |
public String getId() { |
29 |
public void setId(String id) { |
33 |
public String getName() { |
37 |
public void setName(String name) { |
41 |
public long getAge() { |
45 |
public void setAge(long age) { |
EmployeeB.java
01 |
package com.javacodegeeks.snippets.enterprise.model; |
03 |
import javax.persistence.Column; |
04 |
import javax.persistence.Entity; |
05 |
import javax.persistence.Id; |
06 |
import javax.persistence.Table; |
09 |
@Table(name = "EMPLOYEEB") |
10 |
public class EmployeeB { |
13 |
@Column(name = "ID", nullable = false) |
16 |
@Column(name = "NAME", nullable = false) |
19 |
@Column(name = "AGE", nullable = false) |
25 |
public String getId() { |
29 |
public void setId(String id) { |
33 |
public String getName() { |
37 |
public void setName(String name) { |
41 |
public long getAge() { |
45 |
public void setAge(long age) { |
5. Create the DAO classes
The Data Access Obejcts implemented are the EmployeeADAOImpl.java and EmployeeBDAOImpl.java classes. They are annotated with the @Service annotation, dictating that they are Spring Beans and thus allowing Spring to auto-detect them. They both use thejavax.persistence.EntityManager to interact with the databases.
An EntityManager instance is associated with a persistence context. A persistence context is a set of entity instances in which for any persistent entity identity there is a unique entity instance. Within the persistence context, the entity instances and their lifecycle are managed. The EntityManager API is used to create and remove persistent entity instances, to find entities by their primary key, and to query over entities. The EntityManager is configured in persistence.xml file, that is described
in paragraph 8.1.
The set of entities that can be managed by a given EntityManager instance is defined by a persistence unit. A persistence unit defines the set of all classes that are related or grouped by the application, and which must be colocated in their mapping to a single database.
The EntityManager is injected in each DAO with the @PersistenceContext annotation, where the name of each persistence unit is set, as defined in the persistence.xml file.
A basic persist method is implemented in both DAOs, using the persist(Object entity) API method of EntityManager to create an object to the database.
The DAOs and their interfaces are shown below:
EmployeeADAO.java
1 |
package com.javacodegeeks.snippets.enterprise.dao; |
3 |
import com.javacodegeeks.snippets.enterprise.model.EmployeeA; |
5 |
public interface EmployeeADAO { |
7 |
void persistEmployee(EmployeeA employee); |
EmployeeADAO Impl.java
01 |
package com.javacodegeeks.snippets.enterprise.dao; |
03 |
import javax.persistence.EntityManager; |
04 |
import javax.persistence.PersistenceContext; |
06 |
import org.springframework.stereotype.Service; |
08 |
import com.javacodegeeks.snippets.enterprise.model.EmployeeA; |
11 |
public class EmployeeADAOImpl implements EmployeeADAO { |
13 |
@PersistenceContext(unitName="PersistenceUnitA") |
14 |
private EntityManager entityManager; |
16 |
public void persistEmployee(EmployeeA employee) { |
17 |
entityManager.persist(employee); |
EmployeeBDAO .java
1 |
package com.javacodegeeks.snippets.enterprise.dao; |
3 |
import com.javacodegeeks.snippets.enterprise.model.EmployeeB; |
5 |
public interface EmployeeBDAO { |
7 |
void persistEmployee(EmployeeB employee) throws Exception; |
EmployeeBDAO Impl.java
01 |
package com.javacodegeeks.snippets.enterprise.dao; |
04 |
import javax.persistence.EntityManager; |
05 |
import javax.persistence.PersistenceContext; |
07 |
import org.springframework.stereotype.Service; |
09 |
import com.javacodegeeks.snippets.enterprise.model.EmployeeB; |
12 |
public class EmployeeBDAOImpl implements EmployeeBDAO { |
14 |
@PersistenceContext(unitName="PersistenceUnitB") |
15 |
private EntityManager entityManager; |
17 |
public void persistEmployee(EmployeeB employee) throws Exception { |
18 |
entityManager.persist(employee); |
6. Create the Service class
The EmployeeADAOImpl.java and EmployeeBDAOImpl.java classes are injected in the EmployeeServiceImpl.java class. Thus, in thepersistEmployees(EmployeeA employeeA, EmployeeB employeeB) method implemented here, the DAOs’ methods are invoked to perform the basic interaction with the database. The EmployeeServiceImpl.java class is also annotated with the @Serviceannotation, dictating that it is a Spring Bean and thus allowing Spring to auto-detect it.
The @Transactional annotation is placed before the method, to denote that a transaction is created when the method is invoked. The transaction is a global container managed transaction and will be configured in Spring configuration file.
EmployeeService.java
01 |
package com.javacodegeeks.snippets.enterprise.service; |
03 |
import com.javacodegeeks.snippets.enterprise.model.EmployeeA; |
04 |
import com.javacodegeeks.snippets.enterprise.model.EmployeeB; |
06 |
public interface EmployeeService { |
08 |
void persistEmployees(EmployeeA employeeA, EmployeeB employeeB) throws Exception; |
EmployeeServiceImpl.java
01 |
package com.javacodegeeks.snippets.enterprise.service; |
03 |
import org.springframework.beans.factory.annotation.Autowired; |
04 |
import org.springframework.stereotype.Service; |
05 |
import org.springframework.transaction.annotation.Transactional; |
07 |
import com.javacodegeeks.snippets.enterprise.dao.EmployeeADAO; |
08 |
import com.javacodegeeks.snippets.enterprise.dao.EmployeeBDAO; |
09 |
import com.javacodegeeks.snippets.enterprise.model.EmployeeA; |
10 |
import com.javacodegeeks.snippets.enterprise.model.EmployeeB; |
12 |
@Service("employeeService") |
13 |
public class EmployeeServiceImpl implements EmployeeService{ |
16 |
EmployeeADAO employeeADAO; |
19 |
EmployeeBDAO employeeBDAO; |
21 |
@Transactional(rollbackFor=Exception.class) |
22 |
public void persistEmployees(EmployeeA employeeA, EmployeeB employeeB) throws Exception { |
23 |
System.out.println("Persist A"); |
24 |
employeeADAO.persistEmployee(employeeA); |
25 |
System.out.println("Persist A OK - persist B"); |
26 |
employeeBDAO.persistEmployee(employeeB); |
27 |
System.out.println("Persist B okk"); |
7. Create a servlet to run the application
The AppServlet.java class is a simple servlet, that implements the org.springframework.web.HttpRequestHandler and overrides itshandleRequest(HttpServletRequest req, HttpServletResponse resp) API method. The EmployeeService is injected here, via the@Autowire annotation. It is used in the handleRequest(HttpServletRequest req, HttpServletResponse resp) API method to persist a new EmployeeA and a new EmployeeB object. The method also returns a success message if the method returns succesfully and rollback message if the method throws an exception.
AppServlet.java
01 |
package com.javacodegeeks.snippets.enterprise.servlet; |
03 |
import java.io.IOException; |
04 |
import java.io.PrintWriter; |
06 |
import javax.servlet.ServletException; |
07 |
import javax.servlet.http.HttpServletRequest; |
08 |
import javax.servlet.http.HttpServletResponse; |
10 |
import org.springframework.beans.factory.annotation.Autowired; |
11 |
import org.springframework.stereotype.Component; |
12 |
import org.springframework.web.HttpRequestHandler; |
14 |
import com.javacodegeeks.snippets.enterprise.model.EmployeeA; |
15 |
import com.javacodegeeks.snippets.enterprise.model.EmployeeB; |
16 |
import com.javacodegeeks.snippets.enterprise.service.EmployeeService; |
18 |
@Component("appServlet") |
19 |
public class AppServlet implements HttpRequestHandler { |
22 |
private EmployeeService employeeService; |
24 |
public void handleRequest(HttpServletRequest req, HttpServletResponse resp) |
25 |
throws ServletException, IOException { |
26 |
EmployeeA em1 = new EmployeeA(); |
30 |
EmployeeB em2 = new EmployeeB(); |
36 |
employeeService.persistEmployees(em1, em2); |
37 |
resp.setContentType("text/html"); |
38 |
PrintWriter out = resp.getWriter(); |
39 |
out.println("<html>"); |
40 |
out.println("<head>"); |
41 |
out.println("<title>Hello World!</title>"); |
42 |
out.println("</head>"); |
43 |
out.println("<body>"); |
44 |
out.println("<h1>Java Code Geeks </h1>"); |
45 |
out.println("<h2>Both employees are inserted!</h2>"); |
46 |
out.println("</body>"); |
47 |
out.println("</html>"); |
48 |
} catch (Exception e) { |
49 |
resp.setContentType("text/html"); |
50 |
PrintWriter out = resp.getWriter(); |
51 |
out.println("<html>"); |
52 |
out.println("<head>"); |
53 |
out.println("<title>Hello World!</title>"); |
54 |
out.println("</head>"); |
55 |
out.println("<body>"); |
56 |
out.println("<h1>Java Code Geeks </h1>"); |
57 |
out.println("<h2>Transaction Rollback!</h2>"); |
58 |
out.println("</body>"); |
59 |
out.println("</html>"); |
8. Configure the application
8.1 Configure the persistence units
As mentioned above, the entityManager and the persistence unit associated with it for every database is configured inpersistence.xml file. Here we define two persistence units. In every persistence-unit element, we define the entity class associated to the persistence-unit. The hibernate.transaction.manager_lookup_class property is set tocom.atomikos.icatch.jta.hibernate3.TransactionManagerLookup. The hibernate.transaction.factory_class property is set toorg.hibernate.transaction.CMTTransactionFactory.
persistence.xml
01 |
<?xml version="1.0" encoding="UTF-8"?> |
02 |
<persistence version="2.0" |
09 |
<persistence-unit name="PersistenceUnitA" transaction-type="JTA"> |
10 |
<class>com.javacodegeeks.snippets.enterprise.model.EmployeeA</class> |
12 |
<property name="hibernate.transaction.manager_lookup_class" |
13 |
value="com.atomikos.icatch.jta.hibernate3.TransactionManagerLookup" /> |
14 |
<property name="hibernate.transaction.factory_class" |
15 |
value="org.hibernate.transaction.CMTTransactionFactory" /> |
19 |
<persistence-unit name="PersistenceUnitB" transaction-type="JTA"> |
20 |
<class>com.javacodegeeks.snippets.enterprise.model.EmployeeB</class> |
22 |
<property name="hibernate.transaction.manager_lookup_class" |
23 |
value="com.atomikos.icatch.jta.hibernate3.TransactionManagerLookup" /> |
24 |
<property name="hibernate.transaction.factory_class" |
25 |
value="org.hibernate.transaction.CMTTransactionFactory" /> |
8.2 Configure Spring container
The applicationContext.xml file is the configuration file of Spring.
The <context:component-scan/> element is used to set the package that contains all classes that the container must scan to detect the Spring beans.
The <tx:annotation-driven/> element is also used so that Spring is @Transactional-aware and can detect the @Transactionalannotations to configure the appropriate beans with transactional behavior.
The <jta-transaction-manager/> element is used to detect the underlying server and choose the transaction manager available for the platform.
In dataSourceA and dataSourceB beans we define the datasources. The com.atomikos.jdbc.AtomikosDataSourceBean is the class set here. It uses Atomikos JTA-enabled connection pooling. It has two properties to configure. Thecom.mysql.jdbc.jdbc2.optional.MysqlXADataSource class is set to the xaDataSourceClass property, whereas in thexaProperties we can set the properties (name,value pairs) to configure the XADataSource.
In entityManagerFactoryA and entityManagerFactoryB beans we set theorg.springframework.orm.jpa.LocalContainerEntityManagerFactoryBean class. It is a FactoryBean that creates a JPAEntityManagerFactory according to JPA’s standard container bootstrap contract. We can set the persistence.xml location in itspersistenceXmlLocation property. We can set the name of the persistence unit used to create this EntityManagerFactory, inpersistenceUnitName property. The datasource property is reference to the appropriate dataSource bean. ThejpaVendorAdapter property is set to the org.springframework.orm.jpa.vendor.HibernateJpaVendorAdapter, that is an implementation for Hibernate EntityManager.
Finally, the transactionManager bean is defined, using the org.springframework.transaction.jta.JtaTransactionManager. It holds two properties to configure. The transactionManager, and the atomikosTransactionManager. They are references to two beans of com.atomikos.icatch.jta.UserTransactionManager class and com.atomikos.icatch.jta.J2eeUserTransactionclass respectively.
applicationContext.xml
08 |
<context:component-scan base-package="com.javacodegeeks.snippets.enterprise.*" /> |
09 |
<tx:annotation-driven /> |
10 |
<tx:jta-transaction-manager /> |
12 |
<bean id="dataSourceA" class="com.atomikos.jdbc.AtomikosDataSourceBean" init-method="init"destroy-method="close"> |
13 |
<property name="uniqueResourceName"><value>DataSourceA</value></property> |
14 |
<property name="xaDataSourceClassName"><value>com.mysql.jdbc.jdbc2.optional.MysqlXADataSource</value></property> |
15 |
<property name="xaProperties"> |
17 |
<prop key="databaseName">companyA</prop> |
18 |
<prop key="serverName">localhost</prop> |
19 |
<prop key="port">3306</prop> |
20 |
<prop key="user">root</prop> |
21 |
<prop key="password">root</prop> |
25 |
<property name="minPoolSize"><value>1</value></property> |
28 |
<bean id="dataSourceB" class="com.atomikos.jdbc.AtomikosDataSourceBean" init-method="init"destroy-method="close"> |
29 |
<property name="uniqueResourceName"><value>DataSourceB</value></property> |
30 |
<property name="xaDataSourceClassName"><value>com.mysql.jdbc.jdbc2.optional.MysqlXADataSource</value></property> |
31 |
<property name="xaProperties"> |
33 |
<prop key="databaseName">companyB</prop> |
34 |
<prop key="serverName">localhost</prop> |
35 |
<prop key="port">3306</prop> |
36 |
<prop key="user">root</prop> |
37 |
<prop key="password">root</prop> |
41 |
<property name="minPoolSize"><value>1</value></property> |
44 |
<bean id="entityManagerFactoryA"class="org.springframework.orm.jpa.LocalContainerEntityManagerFactoryBean"> |
45 |
<property name="persistenceXmlLocation"> |
46 |
<value>classpath*:persistence.xml</value> |
48 |
<property name="persistenceUnitName" value="PersistenceUnitA" /> |
49 |
<property name="dataSource" ref="dataSourceA" /> |
50 |
<property name="jpaVendorAdapter"> |
51 |
<bean class="org.springframework.orm.jpa.vendor.HibernateJpaVendorAdapter"> |
52 |
<property name="showSql" value="true" /> |
53 |
<property name="databasePlatform"value="org.hibernate.dialect.MySQL5InnoDBDialect" /> |
57 |
<bean id="entityManagerFactoryB"class="org.springframework.orm.jpa.LocalContainerEntityManagerFactoryBean"> |
58 |
<property name="persistenceXmlLocation"> |
59 |
<value>classpath*:persistence.xml</value> |
61 |
<property name="persistenceUnitName" value="PersistenceUnitB" /> |
62 |
<property name="dataSource" ref="dataSourceB" /> |
63 |
<property name="jpaVendorAdapter"> |
64 |
<bean class="org.springframework.orm.jpa.vendor.HibernateJpaVendorAdapter"> |
65 |
<property name="showSql" value="true" /> |
66 |
<property name="databasePlatform"value="org.hibernate.dialect.MySQL5InnoDBDialect" /> |
71 |
<bean id="atomikosTransactionManager"class="com.atomikos.icatch.jta.UserTransactionManager" init-method="init" destroy-method="close"> |
72 |
<property name="forceShutdown" value="false" /> |
75 |
<bean id="atomikosUserTransaction" class="com.atomikos.icatch.jta.J2eeUserTransaction"> |
76 |
<property name="transactionTimeout" value="300" /> |
79 |
<bean id="transactionManager"class="org.springframework.transaction.jta.JtaTransactionManager" |
80 |
depends-on="atomikosTransactionManager,atomikosUserTransaction"> |
81 |
<property name="transactionManager" ref="atomikosTransactionManager" /> |
82 |
<property name="userTransaction" ref="atomikosUserTransaction" /> |
83 |
<property name="allowCustomIsolationLevels" value="true" /> |
8.3 Configure Web Application Deployment Descriptor
The web.xml file is the file that defines everything about your application that a server needs to know. Servlets and other components like filters or listeners, initialization parameters, container-managed security constraints, resources, welcome pages, etc are set here.
The servlet element declares the AppServlet, and the org.springframework.web.context.support.HttpRequestHandlerServletclass that implements it. The servlet-mapping element specifies the /appServlet URL pattern that invokes the servlet in a browser. In the context-param element we set the contextConfigLocation parameter, where the applicationContext.xml file location is defined. In listener element the Bootstrap listener is set to start up Spring’s applicationContext.xml. The resource-ref element is set in both datasources to define a reference lookup name to the resources. This allows the servlet code to look up the resources by a “virtual” name that is mapped to the actual location at deployment time.
web.xml
01 |
<?xml version="1.0" encoding="UTF-8"?> |
05 |
id="WebApp_ID" version="3.0"> |
07 |
<display-name>javacodegeeks</display-name> |
10 |
<param-name>contextConfigLocation</param-name> |
12 |
/WEB-INF/applicationContext.xml |
17 |
<listener-class>org.springframework.web.context.ContextLoaderListener</listener-class> |
21 |
<display-name>AppServlet</display-name> |
22 |
<servlet-name>appServlet</servlet-name> |
23 |
<servlet-class>org.springframework.web.context.support.HttpRequestHandlerServlet</servlet-class> |
27 |
<servlet-name>appServlet</servlet-name> |
28 |
<url-pattern>/appServlet</url-pattern> |
32 |
<description>MySQL DS</description> |
33 |
<res-ref-name>jdbc/DataSourceA</res-ref-name> |
34 |
<res-type>javax.sql.DataSource</res-type> |
35 |
<res-auth>Container</res-auth> |
39 |
<description>MySQL DS</description> |
40 |
<res-ref-name>jdbc/DataSourceB</res-ref-name> |
41 |
<res-type>javax.sql.DataSource</res-type> |
42 |
<res-auth>Container</res-auth> |
9. Run the application in Tomcat
In order to run the application in tomcat we first have to build the project. The war produced is placed at webapps folder of tomcat. Then, we startup the server. After hitting on
localhost:8080/springexample/appServlet
in a browser, we can check on MySQL, that in both databases, companyA and companyB the tables EmployeeA and EmployeeB have one record. The message returned in the browser is the one below:

10. Rollback case
Now, let’s see what happens if one of the two transactions fail. We will change the persistEmployee(EmployeeB employee) method ofEmployeeBDAOImpl.java class so as to throw an Exception.
EmployeeBDAO Impl.java
01 |
package com.javacodegeeks.snippets.enterprise.dao; |
03 |
import javax.persistence.EntityManager; |
04 |
import javax.persistence.PersistenceContext; |
06 |
import org.springframework.stereotype.Service; |
08 |
import com.javacodegeeks.snippets.enterprise.model.EmployeeB; |
11 |
public class EmployeeBDAOImpl implements EmployeeBDAO { |
13 |
@PersistenceContext(unitName="PersistenceUnitB") |
14 |
private EntityManager entityManager; |
16 |
public void persistEmployee(EmployeeB employee) throws Exception { |
18 |
throw new Exception(); |
We build the project again and place the new war file in webapps file of tomcat. After starting up tomcat again, the result is the one below:

This is caused because since one of the transactions throws an exception the distributed transaction rolls back too.
This was an example of JTA multiple resource transactions in a Tomcat server, using Atomikos Transaction Manager.
Download the Eclipse project of this tutorial : SpringJTAatomicosTomcatExample.zip


 浙公网安备 33010602011771号