

使用霍夫变换检测虹膜内圆的注意事项
前些天用霍夫变换来检测虹膜的内圆的时候发现霍夫变换对噪声非常敏感,有的时候阈值设置的小了,就会画出很多的圆,就很微妙,然后想了一下改进的方法,具体有两种。
第一种:因为霍夫变换检测圆会生成一个array类型的三维数组,这个数组里的每一对值都包含了检测出的圆的圆心横纵坐标和半径,这时我们找到图像的中心点,就是height/2和width/2的那个点,计算检测出的n个点的圆心和中心点的距离,选取距离中心点最近的那个点的坐标和半径作为最终的圆心和半径。
第二种:先大概的估计瞳孔的灰度值,即将虹膜图像进行二值化,我们知道人眼图像瞳孔部分的灰度值是最低的,预估它并不难,你可以使用opencv中的cv.imshow()函数将它显示出来,再将光标滑动到窗口上,就能查看灰度值了,然后使用canny边缘检测将瞳孔的边缘检测出来,再用霍夫变换来检测圆就比较精确了,基本上每次都能成功检测。但是圆的大小差那么一点,没办法,霍夫变换就这样,不过准度很好,基本上没大问题的话都能成功检测到圆形的瞳孔。
下面是第一种方法的代码
import cv2 as cv
import numpy as np
import math

def perfect_circles(circles,half_width,half_height):
    distances=[]
    min_=0
    for index in range(len(circles)):
        distance=math.sqrt((circles[index][0]-half_width)**2+(circles[index][1]-half_height)**2)
        distances.append(distance)
    print(distances)
    min_=distances.index(min(distances))
    return circles[min_]

def edge_demo(image):
    height=image.shape[0]
    width=image.shape[1]
    blurred=cv.medianBlur(image,3)
    gray=cv.cvtColor(blurred,cv.COLOR_BGR2GRAY)
    circles1 = cv.HoughCircles(gray, cv.HOUGH_GRADIENT, 1, 100, param1=110, param2=30, minRadius=50, maxRadius=110)
    circles = circles1[0, :, :]
    circles = np.uint16(np.around(circles))  # 四舍五入,取整
    half_height=int(height/2)
    half_width=int(width/2)
    circles=perfect_circles(circles,half_width,half_height)
    # print(circles[0])
    # for i in len(circles):
    #     if circles[0]>height or i[1]>width:
    #         continue
    #     else:
    print(circles)
    cv.circle(image, (circles[0], circles[1]), circles[2], (0, 0, 255), 1)  # 画圆
    cv.circle(image, (circles[0], circles[1]), 2, (0, 0, 255), 1)  # 画圆心
    # cv.circle(image, (236, 240), 82, (0, 0, 255), 1)  # 画圆
    # cv.circle(image, (236, 240), 2, (0, 0, 255), 2)  # 画圆心
    cv.imshow('circles',image)


img = cv.imread('/Users/wenyu/Desktop/demo/people_1/5.bmp')
gray=cv.cvtColor(img,cv.COLOR_BGR2GRAY)
cv.namedWindow('iris',cv.WINDOW_AUTOSIZE)
cv.imshow('iris',gray)
edge_demo(img)
cv.waitKey(0)
cv.destroyAllWindows()
第二种方法的代码:
import cv2 as cv
import numpy as np

img = cv.imread('/Users/wenyu/Desktop/demo/people_1/5.bmp')
height=img.shape[0]
width=img.shape[1]
image=cv.GaussianBlur(img,(3,3),0)
gray=cv.cvtColor(image,cv.COLOR_BGR2GRAY)
ret,thresh1=cv.threshold(gray,cv.THRESH_OTSU,255,cv.THRESH_BINARY)
edge_output=cv.Canny(thresh1,45,110)
circles1=cv.HoughCircles(edge_output,cv.HOUGH_GRADIENT,1,50,param1=110,param2=20,minRadius=50,maxRadius=130)
# print(circles1)
circles=circles1[0, :, :]
circles = np.uint16(np.around(circles))
for i in circles[:]:
    if i[0]>height or i[1]>width:
           continue
    else:
        print(i)
        cv.circle(image, (i[0], i[1]), i[2], (0, 0, 255), 1)  # 画圆
        cv.circle(image, (i[0], i[1]), 2, (0, 0, 255), 3)  # 画圆心
    cv.imshow('circles',image)
cv.namedWindow('iris',cv.WINDOW_AUTOSIZE)
cv.imshow('iris',edge_output)
cv.waitKey(0)
cv.destroyAllWindows()
第一种方法画出来的圆的效果图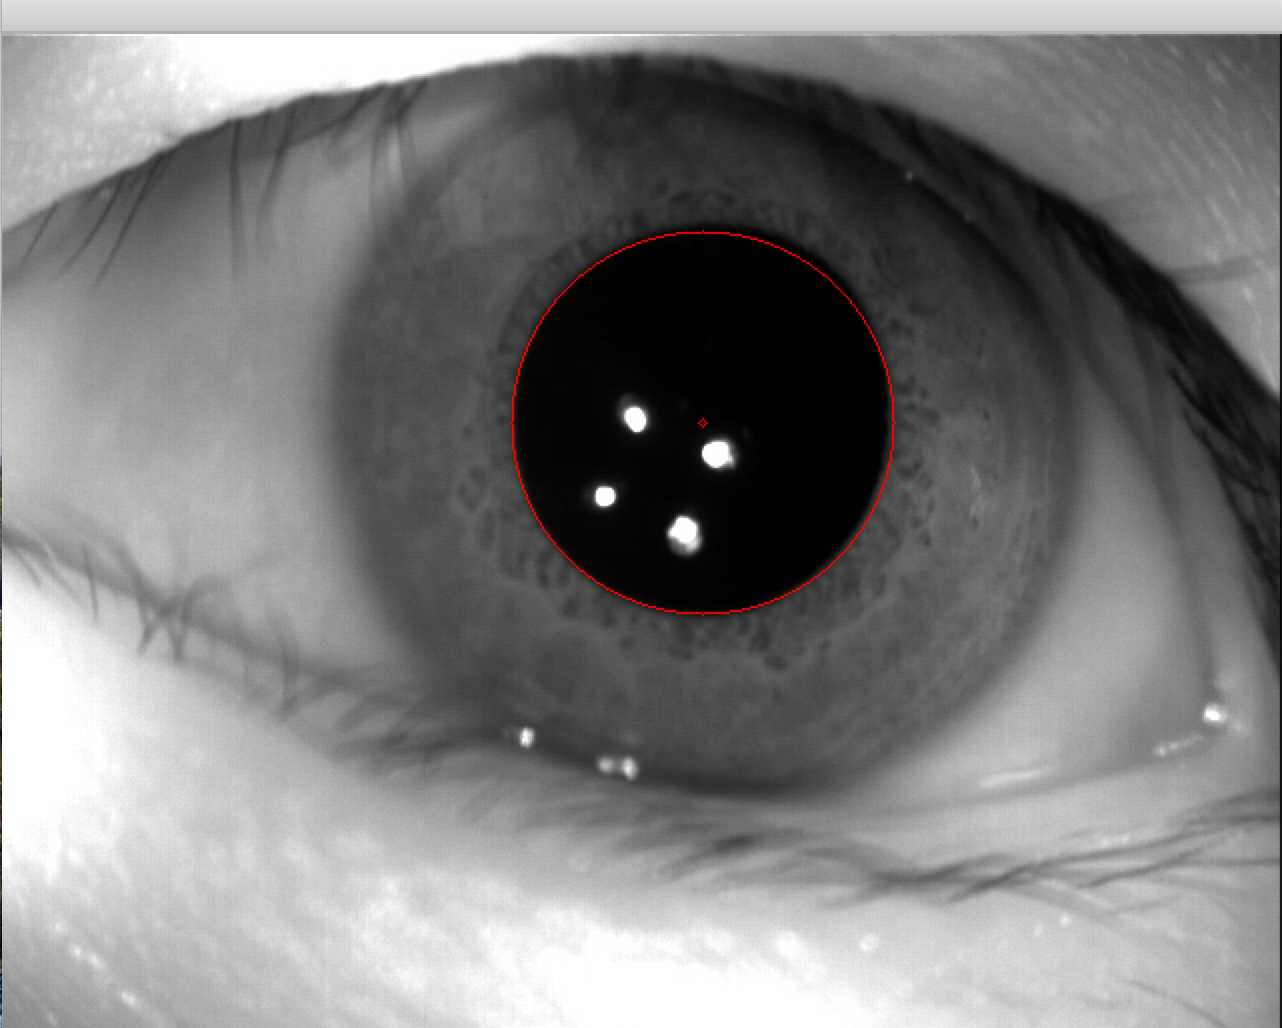
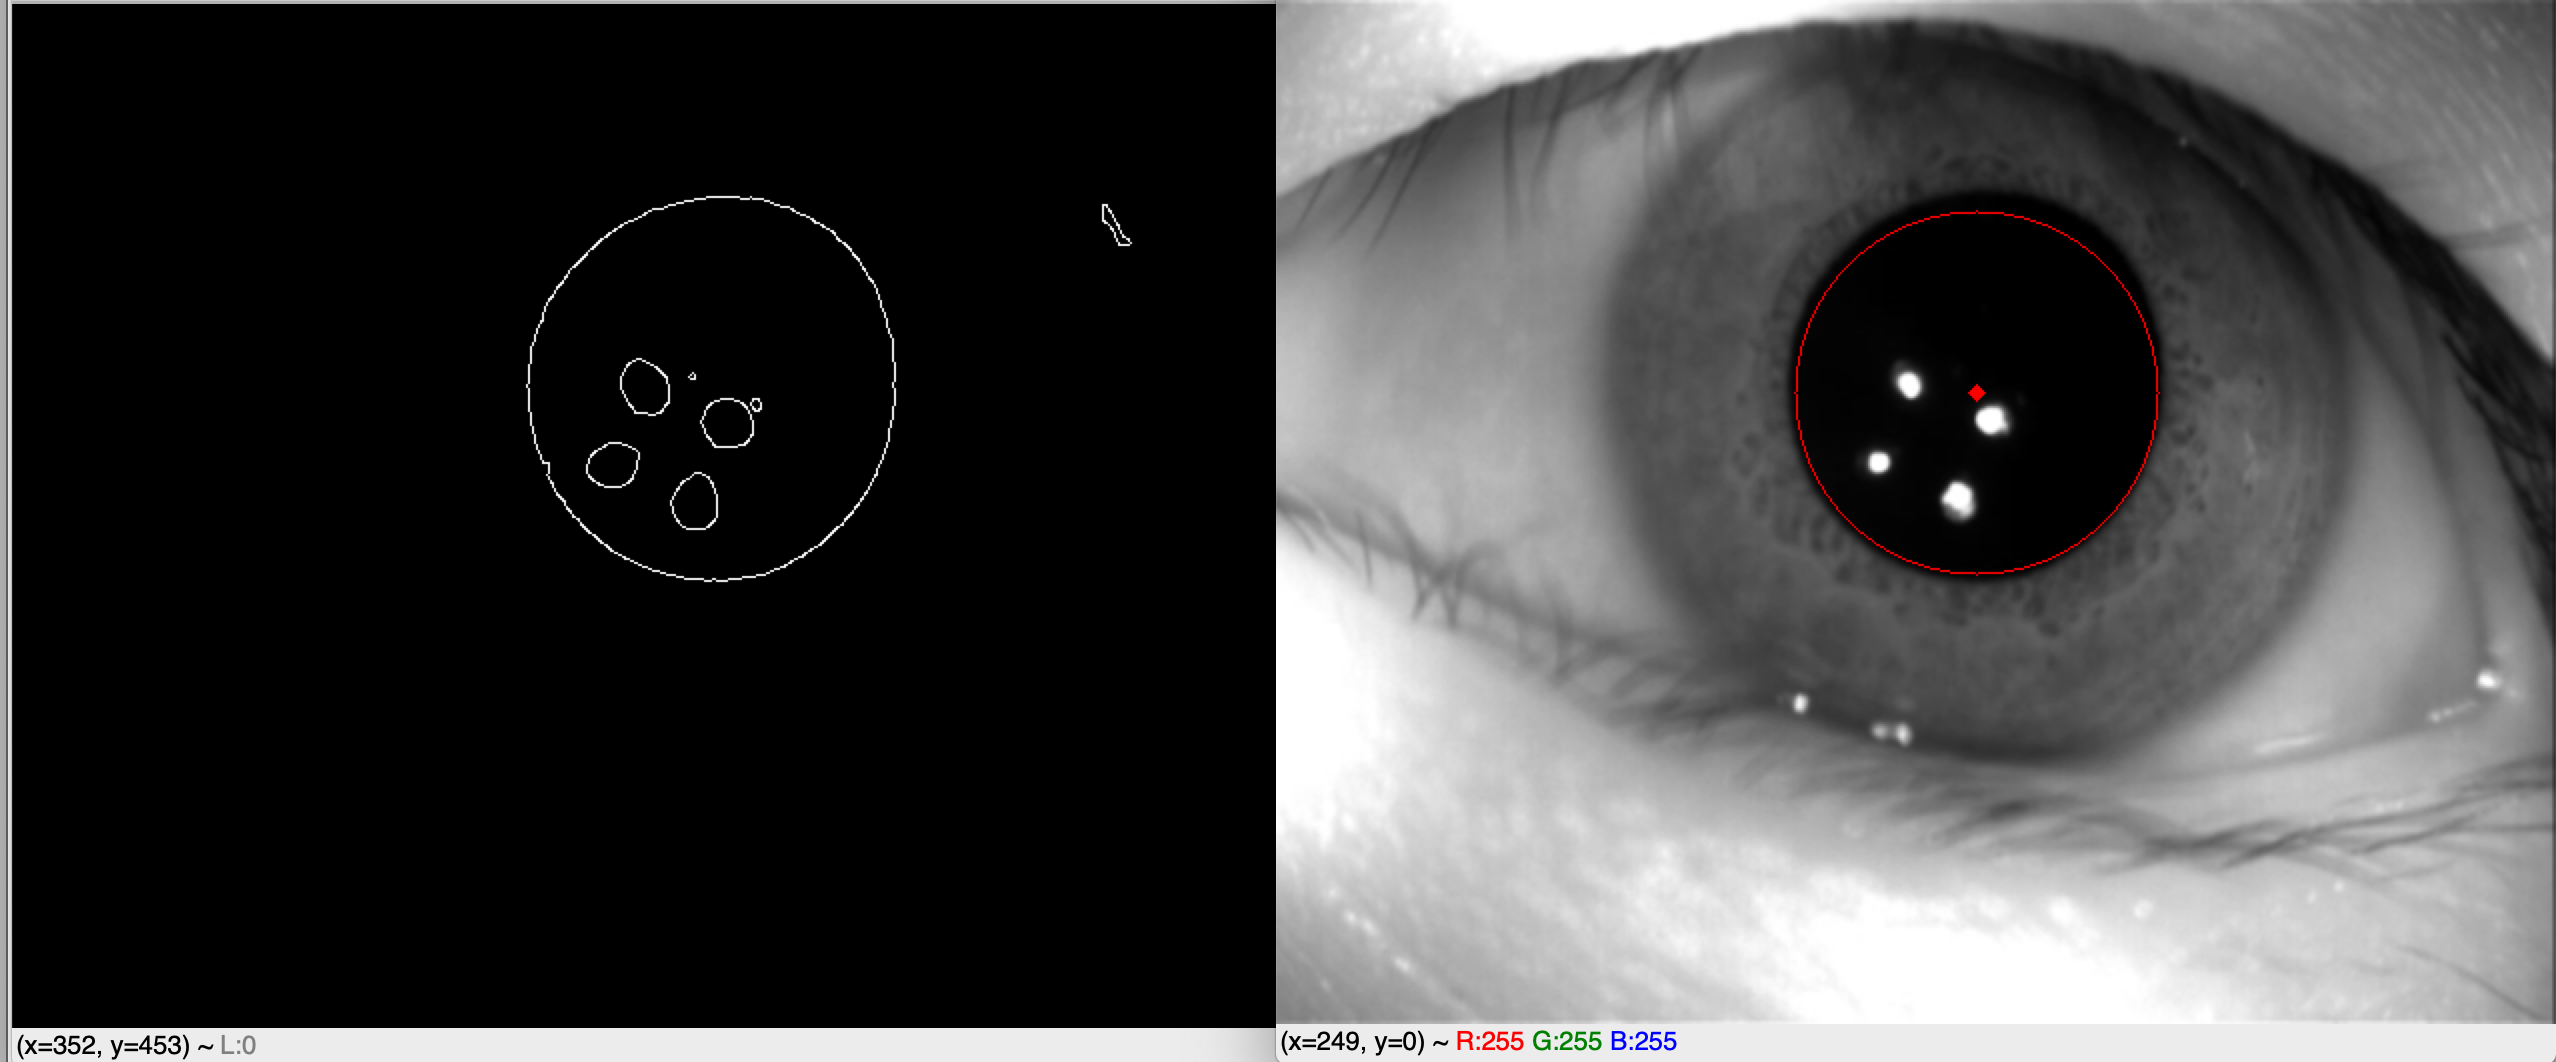
第二种方法画出的效果图:先是边缘检测图,然后是画圆
两种方法各有千秋,都还可以
然后外圆的定位方法,我这几天看了一些文献,我还没有看到我比较喜欢的觉得还不错的,我挨个试试吧,要是效果好的话我会再更新,因为太难了外圆。
ps:转载注明出处哦,就酱

 浙公网安备 33010602011771号