
通过源码看android系列之multidex库
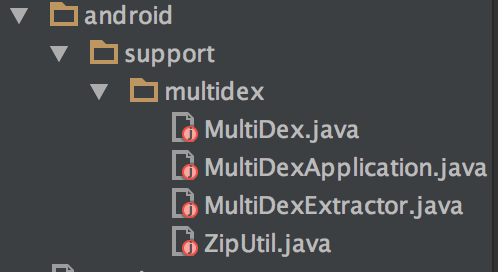
我们在开发项目时,喜欢引入好多的第三方包,大大的方便了我们的开发,但同时,因为android方法总数的限制,不能超过65k,然而呢,随着我们的开发,65k最终还是会超过,所以,google就给出了这个解决方案,但一直好奇它是内部是怎么实现的,我们今天就来根据源码来看看这个包到底做了什么,怎么把多个dex读取出来的。先看下这个包里面都有哪些类:
我们首先看MultiDexApplication,只要我们我们自己的Application继承MultiDexApplication就可以解决问题,那我们就来看看,它里面做了什么,只有一个方法,重写了attachBaseContext()。
1 protected void attachBaseContext(Context base) {
2     super.attachBaseContext(base);
3     MultiDex.install(this);
4 }
我们看到,具体的实现是直接调用的Multidex,随后我们来看下install()里面有些什么(关键代码):
 1     public static void install(Context context) {
 2         try {
 3               .
 4               .
 5               .
 6                 /* The patched class loader is expected to be a descendant of
 7                  * dalvik.system.BaseDexClassLoader. We modify its
 8                  * dalvik.system.DexPathList pathList field to append additional DEX
 9                  * file entries.
10                  */
11                 ClassLoader loader;
12                 try {
13                     loader = context.getClassLoader();
14                 } catch (RuntimeException e) {
15                 }
16
17                 File dexDir = new File(applicationInfo.dataDir, SECONDARY_FOLDER_NAME);
18                 List<File> files = MultiDexExtractor.load(context, applicationInfo, dexDir, false);
19                 if (checkValidZipFiles(files)) {
20                     installSecondaryDexes(loader, dexDir, files);
21                 } else {
22                   .
23                   .
24                   .
25                 }
26             }
27         } catch (Exception e) {
28         }
29     }
通过ClassLoader的注释我们已经知道,主dex文件的路径被存储在BaseDexClassLoader中的pathList,这样就清楚了,下面所要做的就是把其它的dex文件路径也找出来,添加到pathList上面即可。这里面的loader就是BaseDexClassLoader的实例
行18 MultiDexExtractor这个类,从字面上即可知道它是提取dex信息的,load方法即会根据dex命名规则从指定路径下提取其它dex文件(不包含主dex),具体实现可自行看实现,这样,所有的次dex文件都被提取出来,赋值给了files
行19 会检查所有以上文件是否是有效的zip文件,如果有一个false,就会重新提取dex文件
行20 检查没有问题后,就会执行installSecondaryDexes(),已经很明显知道接下来要做什么了,我们来看这个方法里面都做了什么。
 1     private static void installSecondaryDexes(ClassLoader loader, File dexDir, List<File> files)
 2             throws IllegalArgumentException, IllegalAccessException, NoSuchFieldException,
 3             InvocationTargetException, NoSuchMethodException, IOException {
 4         if (!files.isEmpty()) {
 5             if (Build.VERSION.SDK_INT >= 19) {
 6                 V19.install(loader, files, dexDir);
 7             } else if (Build.VERSION.SDK_INT >= 14) {
 8                 V14.install(loader, files, dexDir);
 9             } else {
10                 V4.install(loader, files);
11             }
12         }
13     }
代码写的很明显,我们来单看V19的实现
 1         private static void install(ClassLoader loader, List<File> additionalClassPathEntries,
 2                 File optimizedDirectory)
 3                         throws IllegalArgumentException, IllegalAccessException,
 4                         NoSuchFieldException, InvocationTargetException, NoSuchMethodException {
 5             /* The patched class loader is expected to be a descendant of
 6              * dalvik.system.BaseDexClassLoader. We modify its
 7              * dalvik.system.DexPathList pathList field to append additional DEX
 8              * file entries.
 9              */
10             Field pathListField = findField(loader, "pathList");
11             Object dexPathList = pathListField.get(loader);
12             ArrayList<IOException> suppressedExceptions = new ArrayList<IOException>();
13             expandFieldArray(dexPathList, "dexElements", makeDexElements(dexPathList,
14                     new ArrayList<File>(additionalClassPathEntries), optimizedDirectory,
15                     suppressedExceptions));
16             .
17             .
18             .
19         }
我们前面说的注释又出现了,看来,具体的实现操作就在这里了,主要是用反射来修改它的值,我们主要来看几个主要的操作方法:
行13 这里面有两个方法需要注意makeDexElements()和expandFieldArray(),先来说第一个,我们知道在实例化BaseDexClassLoader时,会把主dex的路径信息存放到pathList里面,而DexPathList内部其它是把dex的路径存储在了一个Element数组中,所以,看makeDexElements()就知道,这个方法,会把传入的dex文件通过反射组装成适合DexPathList内部用的Element数组。
 1         private static Object[] makeDexElements(
 2                 Object dexPathList, ArrayList<File> files, File optimizedDirectory,
 3                 ArrayList<IOException> suppressedExceptions)
 4                         throws IllegalAccessException, InvocationTargetException,
 5                         NoSuchMethodException {
 6             Method makeDexElements =
 7                     findMethod(dexPathList, "makeDexElements", ArrayList.class, File.class,
 8                             ArrayList.class);
 9
10             return (Object[]) makeDexElements.invoke(dexPathList, files, optimizedDirectory,
11                     suppressedExceptions);
12         }
看它代码是反射调用DexPathList里面的makeDexElements(),但我一直没有找到这个方法,不知道是代码版本的问题还是其它原因,望知道的大神告诉一下。接下来我们再看expandFieldArray()
    private static void expandFieldArray(Object instance, String fieldName,
            Object[] extraElements) throws NoSuchFieldException, IllegalArgumentException,
            IllegalAccessException {
        Field jlrField = findField(instance, fieldName);
        Object[] original = (Object[]) jlrField.get(instance);
        Object[] combined = (Object[]) Array.newInstance(
                original.getClass().getComponentType(), original.length + extraElements.length);
        System.arraycopy(original, 0, combined, 0, original.length);
        System.arraycopy(extraElements, 0, combined, original.length, extraElements.length);
        jlrField.set(instance, combined);
    }
可看出,又重新建立了一个Element[],把原来和新的数据都放上去,最后赋给dexElements。这样就可以把所有的dex都读取出来了。

 浙公网安备 33010602011771号