
Jmeter+selenium实现分布式测试
JMeter Selenium load testing for web
This post describes how to perform load testing with apache JMeter, selenium web driver and chrome for web.
We won’t discuss a lot regarding how to setup the environment, how to use JMeter, how to write selenium script, if you want to know more details, please refer to https://www.swtestacademy.com/performance-testing-jmeter-selenium-grid/
https://jmeter-plugins.org/wiki/WebDriverSampler/
This script is design for the simplest load testing, so if any basis data updated in GIAS side, script also need to be updated accordingly.
Before starting
- Download and install Java 8 or 9 from http://www.oracle.com/technetwork/java/javase/downloads/index.html.
- Download and install the latest JMeter from http://jmeter.apache.org/download_jmeter.cgi.
- Download and install Chrome from https://www.google.com/chrome/.
- Download CBS load testing.zip from FTP site /Client Data/CBS load testing.zip.
- Download plugins-manager.jar
How to use it
Extract CBS load testing/selenium.zip to D drive, you can put it to anywhere, but the default batch scripts (startServer.bat and addNode.bat) are hard coded with D drive.
Install WDS plugin
Put plugins-manager.jar into {jmeter_home} /lib/ext, then start JMeter
Click Options / Plugins Manager from toolbar
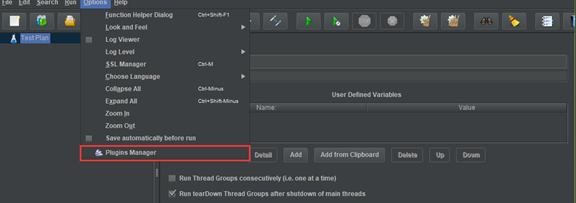
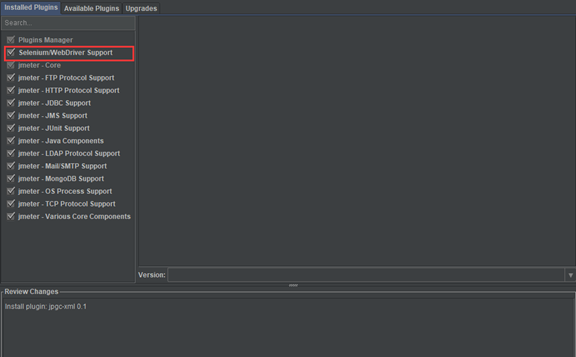
Switch to Available Plugins, then select Selenium/WebDriver support, click Apply Changes and Restart JMeter. Once installed, you can find the plugin from Installed Plugins tab.
Start selenium standalone server
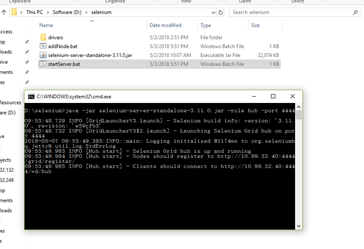
Update startServer.bat if needed and run it, once started up successfully, you can see the snapshot like below.
Register selenium node to server
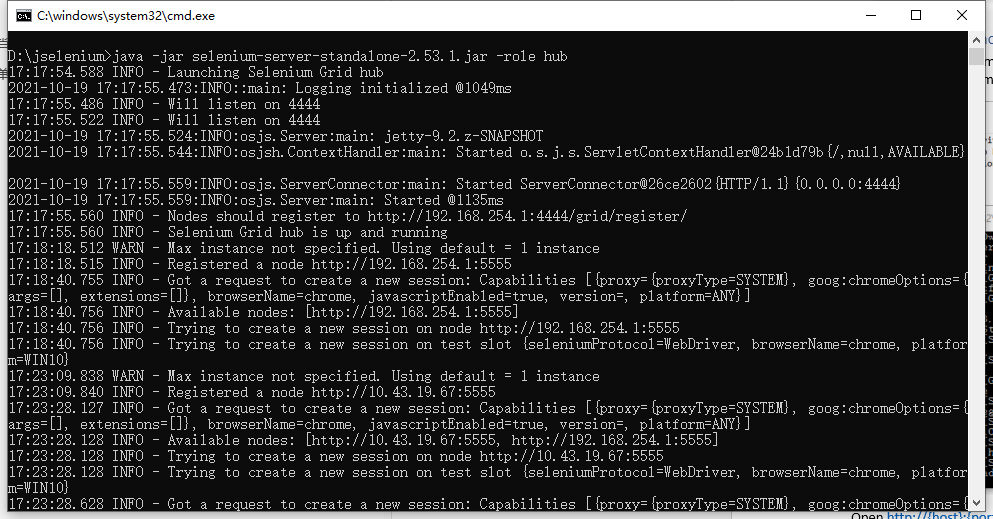
Update addNode.bat, modify the host and port then run it, once successfully connect to the server, you can see something like below.
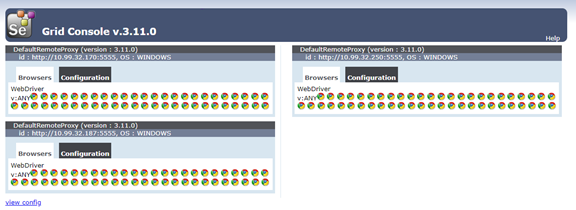
Open http://{host}:{port} /grid/console of the standalone server, you can see all of the registered nodes here.
Update JMeter script configurations
Open JMeter GUI, then open CBS load testing/script.jmx.
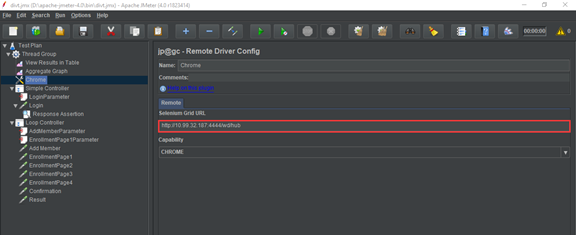
Update Selenium Grid URL
Click Test Plan / Thread Group / Chrome, modify Selenium Grid URL to where you’ve started the server.
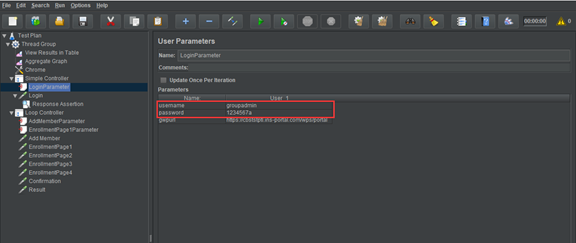
Update username and password for login module
Click Test Plan / Thread Group / Simple Controller / LoginParameter, you can add, modify or delete login users from this panel.
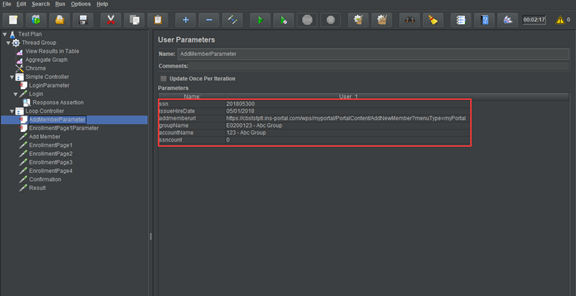
Update SSN, Issue Hire Date, Group and Account
Click Test Plan / Thread Group / Loop Controller / AddMemberParameter, you can modify ssn, issueHireDate,groupName and accountName that will be used on Add New Member page.
ssn is self-incremental, please modify the start value before you start the testing.
Update Personal Information
Switch to Test Plan / Thread Group / Loop Controller / EnrollmentPage1Parameter, you can modify the data that will be used on enrollment page one.
The format of firstName is {firstName}{sequence}, sequence is self-incremental.
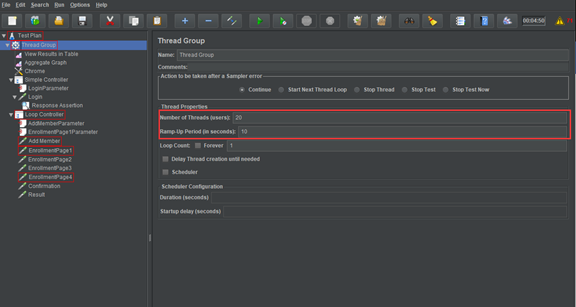
Startup strategy
JMeter can setup how many threads (browsers), ramp-up period for all the threads, loop count etc.
Switch to Test Plan / Thread Group, you can adjust the parameters. Don’t adjust loop count in this panel, the script right now doesn’t support loop execution on thread level.
Switch to Test Plan / Thread Group / Loop Controller
You can adjust the loop count of new enrollment from this panel.
Scaling Nodes
It depends on the CPU and Memory of the workstation, for example, we are using Intel Core i5-3550 3.30GHz 4Cores, per chrome cost 3-5% on CPU, 80m on Memory.
Start testing
You can start testing from GUI mode, but JMeter recommended to use Non-GUI mode.
Start in GUI
Click Start button on toolbar
Start in Non-GUI mode
Perform the below commend in CMD.
jmeter -n -t {script_file_path} -l {csv_result_file_path} -j {log_file_path} -e -o {html_output _result_path}

You can review the test result from {html_output_result_path}/index.html


 浙公网安备 33010602011771号