springboot使用初体验
${...} 变量表达式,Variable Expressions
@{...} 链接表达式,Link URL Expressions
#{...} 消息表达式,Message Expressions
~{...} 代码块表达式,Fragment Expressions
*{...} 选择变量表达式,Selection Variable Expressions
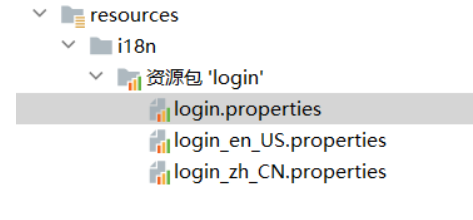
1.配置i18n文件
2.按钮自动切换,自定义一个组件LocaleResolver
public class MyLocaleResolver implements LocaleResolver {
//解析请求
3.组件配置到spring容器@Bean
4.#{}
 <!--如果msg消息为空,不显示-->
 <p style="color: red" th:text="${msg}" th:if="${!#strings.isEmpty(msg)}"></p>
登录
1.登录页设置name
<input type="text" name="username" class="form-control" th:placeholder="#{login.username}" required="" autofocus="">
2.contraller接受
3.@RequestParam
@RequestParam:将请求参数绑定到你控制器的方法参数上(是springmvc中接收普通参数的注解)
语法:
1、转发
方式一:使用 “forword” 关键字(不是指java关键字),注意:类的注解不能使用@RestController 要用@Controller
方式二:使用servlet 提供的API,注意:类的注解可以使用@RestController,也可以使用@Controller
2、重定向
方式一:使用 “redirect” 关键字(不是指java关键字),注意:类的注解不能使用@RestController,要用@Controller
@RequestMapping(value="/test/test01/{name}" , method = RequestMethod.GET)
public String test(@PathVariable String name) {
    return "redirect:/ceng/hello.html";
}
方式二:使用servlet 提供的API,注意:类的注解可以使用@RestController,也可以使用@Controller
@RequestMapping(value="/test/test01/{name}" , method = RequestMethod.GET)
public void test(@PathVariable String name, HttpServletResponse response) throws IOException {
    response.sendRedirect("/ceng/hello.html");
}
使用API进行重定向时,一般会在url之前加上:request.getContextPath()
登陆拦截器
1.写一个LoginHandlerInterceptor配置类
public class LoginHandlerInterceptor implements HandlerInterceptor {
    @Override
    public boolean preHandle(HttpServletRequest request, HttpServletResponse response, Object handler) throws Exception {
        //登陆成功有用户session
        String loginUser = (String) request.getSession().getAttribute("loginUser");
        if (loginUser == null) {//没有登陆
            request.setAttribute("msg","没有权限,请先登录");
            request.getRequestDispatcher("/index.html").forward(request,response);
            return false;
        }else {
            return true;
        }
    }
}
2.登录中加入session
@Controller
public class LoginController {
    @RequestMapping("/user/login")
    public String login(@RequestParam("username") String username,
                        @RequestParam("password") String password,
                        Model model, HttpSession session){
        //具体业务
        if (!StringUtils.isEmpty(username)&&"123456".equals(password)) {
            session.setAttribute("loginUser",username);
            return "redirect:/main.html";
        }else{
            model.addAttribute("msg","用户名或者密码错误!!!");
            return "index";
        }
    }

}
3.在配置类加入拦截器
//登录拦截器
@Override
public void addInterceptors(InterceptorRegistry registry) {
        registry.addInterceptor(new LoginHandlerInterceptor())
                .addPathPatterns("/**").excludePathPatterns("/index.html","/","/user/login","/css/**","/js/**","/img/**");


    }
员工列表
1.提取公共页面
-
th: fragment="sidebar"
-
th: rep1ace="~{commons/commons: :topbar}"
-
如果要传递参数,可以直接使用() 传参,接收判断即可!
2.列表循环展示
<div class="table-responsive">
						<table class="table table-striped table-sm">
							<thead>
								<tr>
									<th>id</th>
									<th>lastName</th>
									<th>email</th>
									<th>gender</th>
									<th >department</th>
									<th>birth</th>
									<th>操作</th>
								</tr>
							</thead>
							<tbody>
								<tr th:each="emp:${emps}">
									<td th:text="${emp.getId()}"></td>
									<td th:text="${emp.getLastName()}"></td>
									<td th:text="${emp.getEmail()}"></td>
									<td th:text="${emp.getGender()==0?'女':'男'}"></td>
									<td th:text="${emp.getDepartment().getDepartmentName()}"></td>
									<td th:text="${#dates.format(emp.getBirth(),'yyyy-MM-dd HH-mm-ss')}"></td>
									<td>
										<button class="btn btn-sm btn-primary">编辑</button>
										<button class="btn btn-sm btn-danger">删除</button>
									</td>
								</tr>
							</tbody>
						</table>
					</div>
添加员工
-
按钮提交
<h2><a class="btn btn-sm btn-success" th:href="@{/emp}">添加员工</a></h2> -
跳转到添加成功页面
    @GetMapping("/emp")
    public String toAdd(Model model){
        //查出部门所有信息
        Collection<Department> departments = departmentDao.getdepartments();
        model.addAttribute("deps",departments);
        return "emp/add";
    }
-
返回首页
  @PostMapping("/emp")
    public String addEmp(Employee employee){
        employeeDao.save(employee);
        return "redirect:/emps";
    }
ps:传递的是th:value="${dep.getId()}"
<div class="form-group">
    <label>department</label>
    <select class="form-control" name="department.id" >
        <option th:each="dep:${deps}" th:text="${dep.getDepartmentName()}" th:value="${dep.getId()}"></option>
    </select>
</div>
修改员工
thymeleaf使用restful风格编写url
<a th:href="@{'/emp/' + ${emp.getId()}}">编辑</a>
隐藏域
<input name="id" type="hidden" th:value="${emp.getId()}" >
单选框和下拉框
 <div class="form-group">
                    <label>Gender</label>
                    <br>
                    <div class="form-check form-check-inline">
                        <input th:checked="${emp.getGender()==1}" class="form-check-input" type="radio" name="gender" value=1>
                        <label class="form-check-label">男</label>
                    </div>
                    <div class="form-check form-check-inline">
                        <input th:checked="${emp.getGender()==0}" class="form-check-input" type="radio" name="gender" value=0>
                        <label class="form-check-label">女</label>
                    </div>
                </div>
                <div class="form-group">
                    <label>department</label>
                    <select class="form-control" name="department.id" >
                        <option th:selected="${dep.getId()==emp.getDepartment().getId()}" th:each="dep:${deps}" th:text="${dep.getDepartmentName()}"
                                th:value="${dep.getId()}"></option>
                    </select>
                </div>
删除员工
  //删除员工
    @RequestMapping("/delemp/{id}")
    public String deleteEmp(@PathVariable("id") Integer id){
        employeeDao.delete(id);
        return "redirect:/emps";
    }
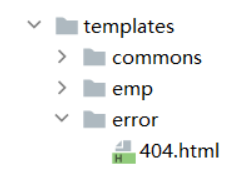
404
templates下建立error文件夹放404页面即可

 浙公网安备 33010602011771号