webpack 开发loader和plugin
1、了解loader和plugin分别是做什么的
loader:它是一个转换器,将A文件进行编译成B文件,比如:将A.less转换为A.css,单纯的文件转换过程。
plugin:是一个扩展器,它丰富了webpack本身,针对是loader结束后,webpack打包的整个过程,它并不直接操作文件,而是基于事件机制工作,会监听webpack打包过程中的某些节点,执行广泛的任务
2、开发loader
新建一个和webpack同级的名为loaders的文件夹
- loaders
...
-- html-plugin.js
-- image-plugin.js
-- less-plugin.js
-- style-plugin.js
-- typescript-plugin.js
-- vue-plugin.js
html-plugin实例代码如下
function htmlLoader (source) {
// const context = this;
console.log(context.request, source);
return source;
};

module.exports = htmlLoader;
第一种 webpack如何调用通过动态进入调用
...
{
  test:/\.html?$/i,
  use:[
     {
      loader: path.resolve(__dirname,'./loaders/html-loader.js'),
      options: {
        typescript: false
      }
    }
  ]
}
第二种 webpack设置resolveLoader
...
resolveLoader: {
  modules: [
    'node_modules',
    path.resolve(__dirname, '../loaders')
  ]
}

{
  test:/\.html?$/i,
  use:[
     {
      loader: 'html-loader',
      options: {
        typescript: false
      }
    }
  ]
}
第三种 通过plugin动态注入loader,下面plugin中详细说
3、开发plugin
我们开发一个动态注入loader的plugin,方便我们简化webpack配置
plugin需要手动声明一个apply的方法,webpack会把参数回调给这个方法
webpack-plugin有自己的生命周期这个自己看就行了
新建pulgin文件夹
- plugin
-- inject-plugin
代码如下
const path = require('path');

class InjectPlugin {
  constructor (options) {
    this.loaders = {
      'test.html': {
        loader: path.resolve(__dirname, '../../loaders/html-loader/index.js'),
        options: {
          html: false
        }
      },
      'test.png': {
        loader: path.resolve(__dirname, '../../loaders/image-loader/index.js'),
        options: {
          html: false
        }
      },
      'test.js': {
        loader: path.resolve(__dirname, '../../loaders/javascript-loader/index.js'),
        options: {
          html: false
        }
      },
      'test.sass': {
        loader: path.resolve(__dirname, '../../loaders/scss-loader/index.js'),
        options: {
          html: false
        }
      },
      'test.vue': {
        loader: path.resolve(__dirname, '../../loaders/vue-loader/index.js'),
        options: {
          html: false
        }
      },
      'test.ts': {
        loader: path.resolve(__dirname, '../../loaders/typescript-loader/index.js'),
        options: {
          typescript: false
        }
      },
      'test.less': {
        loader: path.resolve(__dirname, '../../loaders/less-loader/index.js'),
        options: {}
      },
      'style.less': {
        loader: path.resolve(__dirname, '../../loaders/style-loader/index.js'),
        options: {
          style: true
        }
      }
    };
  }

  apply (compiler) {
    this.compiler = compiler;
    const rules = compiler.options.module.rules;
    rules.forEach(rule => {
      Object.entries(this.loaders).forEach(([file, item]) => {
        if (rule.test.test(file) === true) {
          if (typeof rule.use === 'string') {
            rule.use = [rule.use, item];
          } else {
            rule.use = [...rule.use, item];
          }
        }
      });
    });
    // console.log(rules);
  }
}

module.exports = InjectPlugin;
如何在webpack中引用
const InjectPlugin = require('../plugin/webpack-plugin');

...
plugins:[
   new InjectPlugin({title:'test'}),
]
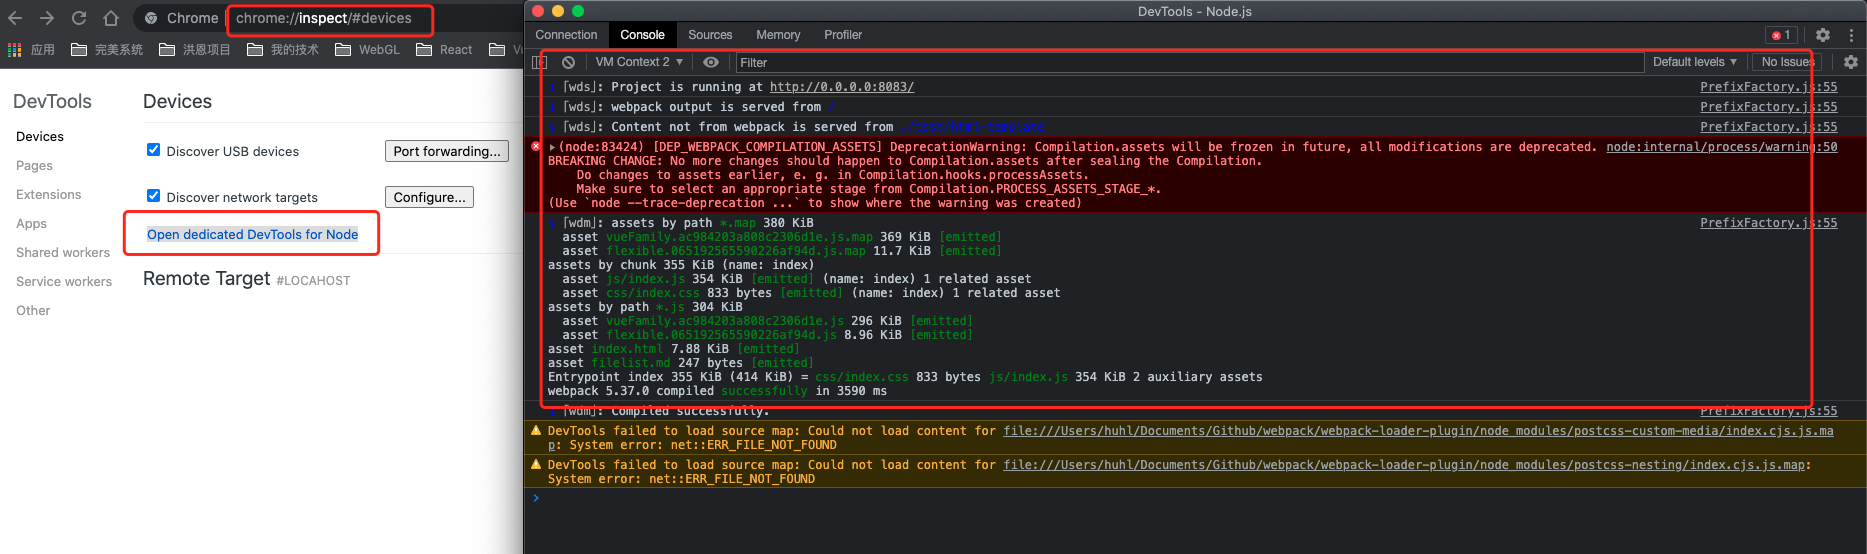
4、如何debug 调试
package.json 中新增脚本
"debug": "cross-env BUILD_ENV=development node --inspect node_modules/webpack-dev-server/bin/webpack-dev-server.js --config webpack/webpack.config.js",
npm run debug后打开谷歌调试 chrome://inspect/#devices -> Open dedicated DevTools for Node

 浙公网安备 33010602011771号