如何部署一个本地的web项目到服务器-搭建linux环境(2)?
前面我们已经把linux环境部署好了,在这里我们可以把我们需要的上线的html文件或者其他发布到服务器上。
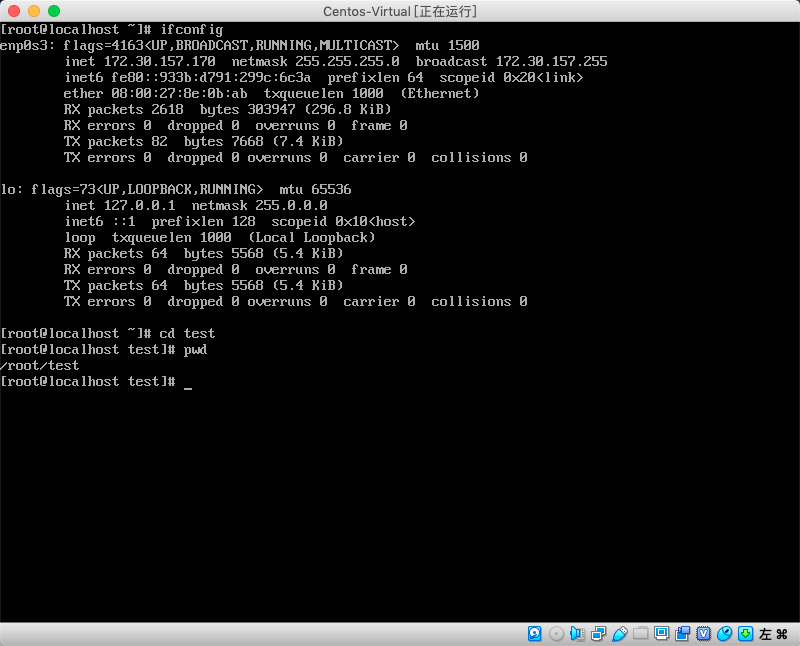
先说一下linux基础命令:ls,cd,mkdir,vim,等等
具体参考:这位大神的博客
然后先创建一个文件夹放置我们需要上线的html文件;
mkdir test
这里我们事先准备好我们要上线的文件,比如react,vue经过webpack打包后的文件都可以;
使用Transmit进行文件传输,
首先查看服务器ip,sftp传输文件需要ip
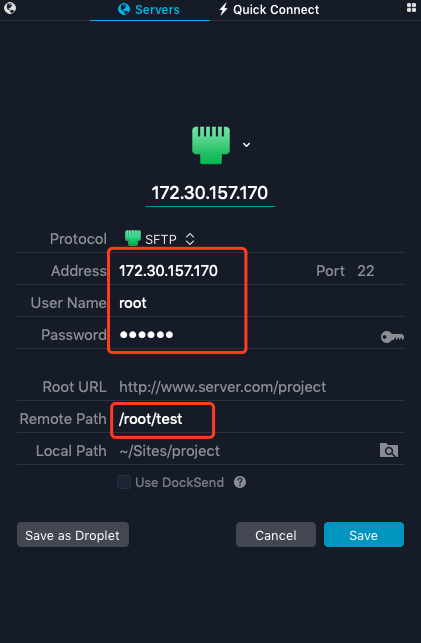
使用Tansmit软件新建一个SFTP服务,
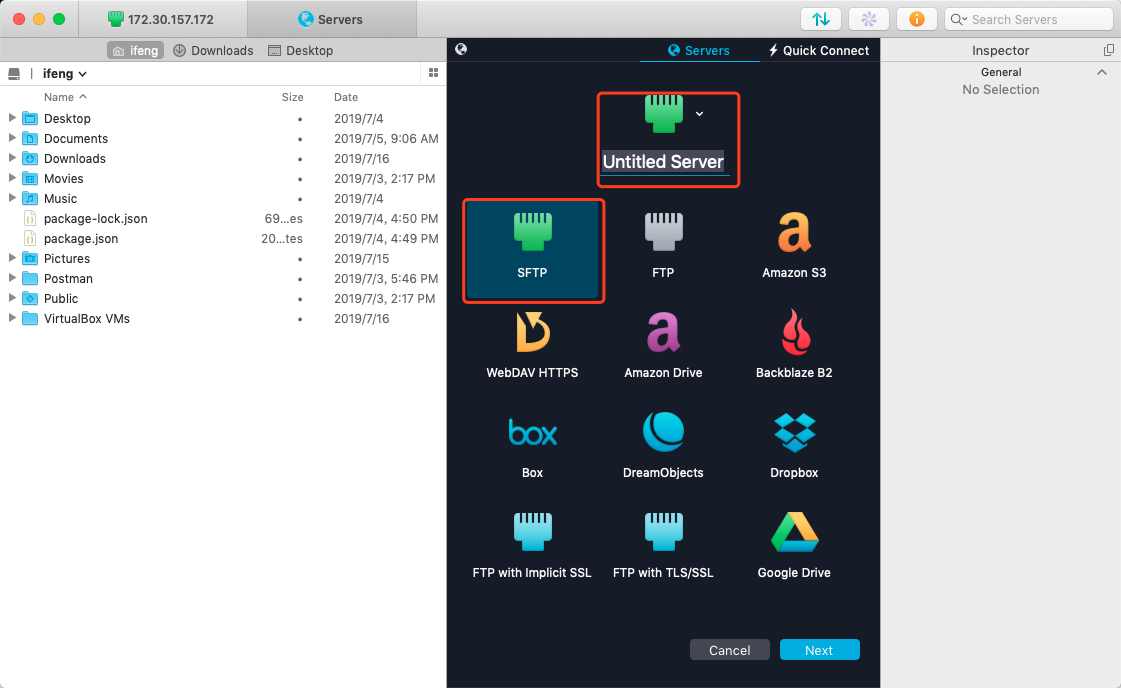
具体设置如下:
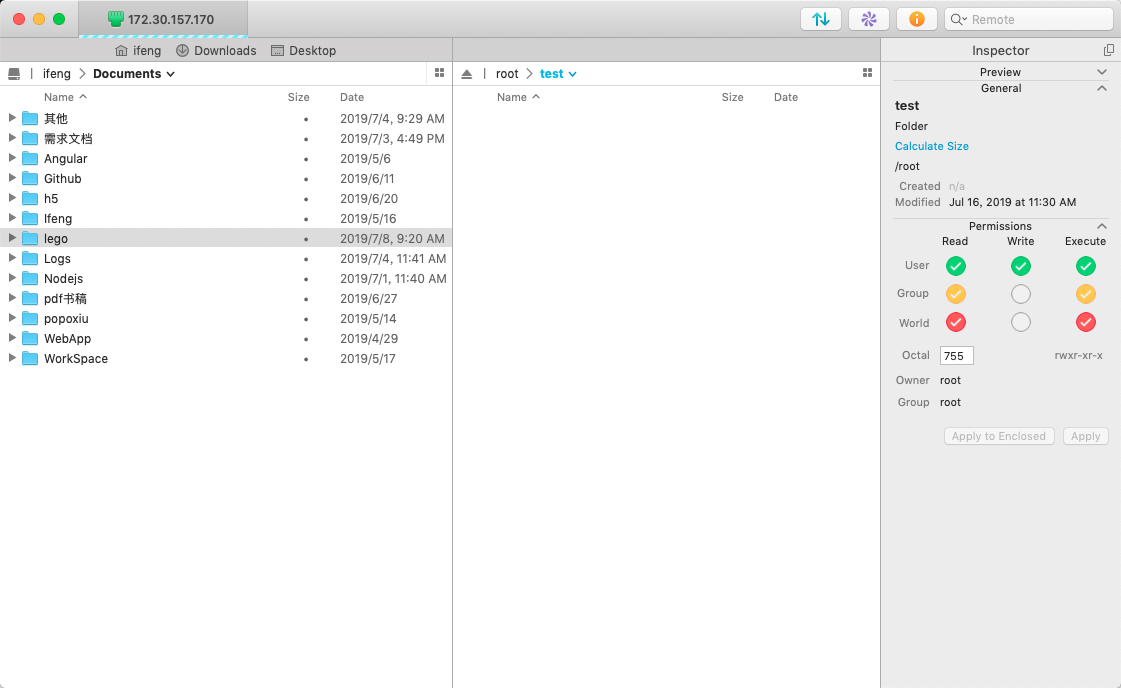
成功链接就会出现下面的页面,这样我们就可以进行文件拷贝了,离成功很快了;
接下来就是nginx相关的配置,有一些比较恶心的配置,新手可能会遇到,
例如
- nginx启动不了
- server配置错误
- 防火墙没有关闭,linux和centos都需要关闭
- 没有给与文件夹读取权限
首先我们先说一下nginx的配置:
- ps -ef | grep nginx 查看nginx安装目录
- nginx -t 查看nginx.conf配置文件目录(每个人配置nginx路径可能不一样)
 1 # For more information on conf configuretion, see;
 2 #   * Official English Documention: http://nginx.org/en/docs
 3 #   * Official Russian Documention: http://nginx.org/ru/docs
 4
 5 user root;                  //操作账户
 6 worker_processes auto;
 7 error_log  /var/log/nginx/error.log;
 8 pid /run/nginx.pid;
 9
10 # Load dynamic modules. See /usr/share/nginx/rename.dynamic
11 include /usr/share/nginx/module/*.conf
12
13 events {
14     worker_connentions 1024;
15 }
16
17 http {
18     log_format main     '$remote_addr - $remote_user [$time_local] "$request"'
19                         '$status $body_bytes_sent "$http_referer"'
20                         '"http_user_agent" "$http_x_forwarded_for"'
21
22     access_log          /var/log/nginx/access.log   main;
23
24     sendfile            on;
25     tcp_nopush          on;
26     tcp_nodelay         on;
27     keepalive_timeout   65;
28     types_hash_max_size 2048;
29     include             /etc/nginx/mine.types;
30     default_type        application/octet-stream;
31
32     # Load modular configureation files from the /etc/nginx/conf.d directory.
33     # See http://nginx.org/en/docs/ngx_core_module.html#include
34     # for more information
35
36     server {
37         listen      80 default_server;
38         server_name ifeng.lego.com;
39         root        /root/test/build;
40         # Load configuration files the dafault server block;
41         include     /etc/nginx/default.d/*.conf;
42
43         location = / {
44             root /root/test/build/;         //指定目录存放位置
45             index index.htmkl index.html    //指定打开文件
         try_files $uri $uri/ /index.html;
46         }
47
48         error_page 404 /404.html;
49             location = /40x.html{
50
51         }
52
53         error_page 500 502 503 504 /50x.html
54             location = /50x.html{
55
56             }
57     }
58 }
配置完之后,我么需要关闭linxu防火墙和centos防火墙
centons后使用systemctl代替service
具体如下,
- systemctl start firewalld 开启防火墙
- systemctl stop firewalld 关闭防火墙
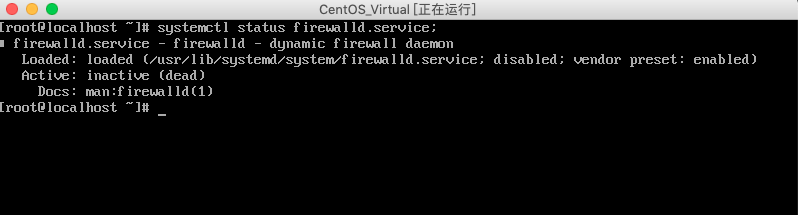
- systemctl status firewalld 检查防火墙状态
安装iptables-services
- systemctl enable iptables 设置开机启动
- systemctl [start|restart|stop] 开启,重启,关闭防火墙
- service iptables save 保存设置
接下来我们需要给我们访问的目录"/root/test/build"授予访问权限,也是出现403的原因
- chmod -R 777 /root/test/build 授予web目录文件夹操作权限
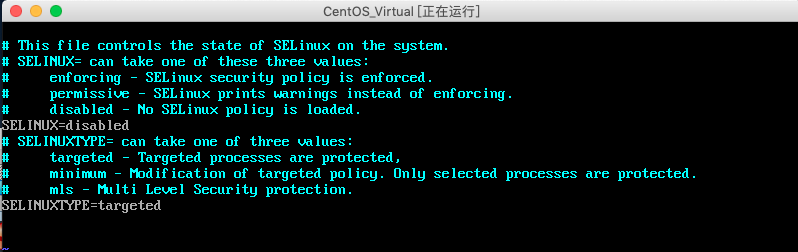
然后设置nginx的SELinux设置为disabled
- vim /etc/selinux/config
- SELINUX = disabled
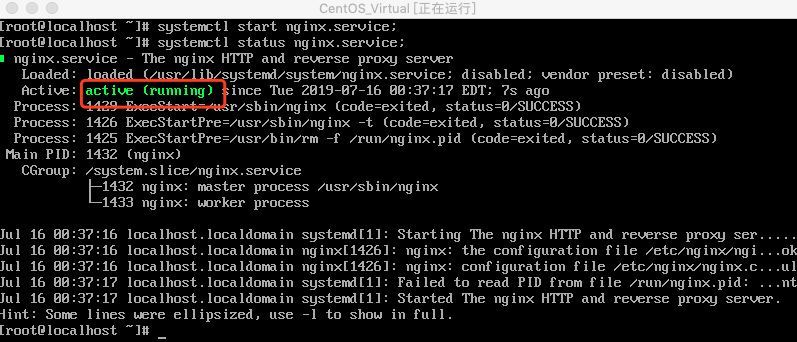
然后启动nginx服务,访问index.html,
- systemctl [start|restart|stop] nginx.service 启动,重启,停止nginx服务
- systemctl reload nginx.service 重启nginx服务
讲道理到这来我们就可能访问我们之前打包好的静态文件了,
*后续我们需要的mysql,node等服务跟前面server的配置大致相同,这里不做过多阐述,根据不同情况不同分析,
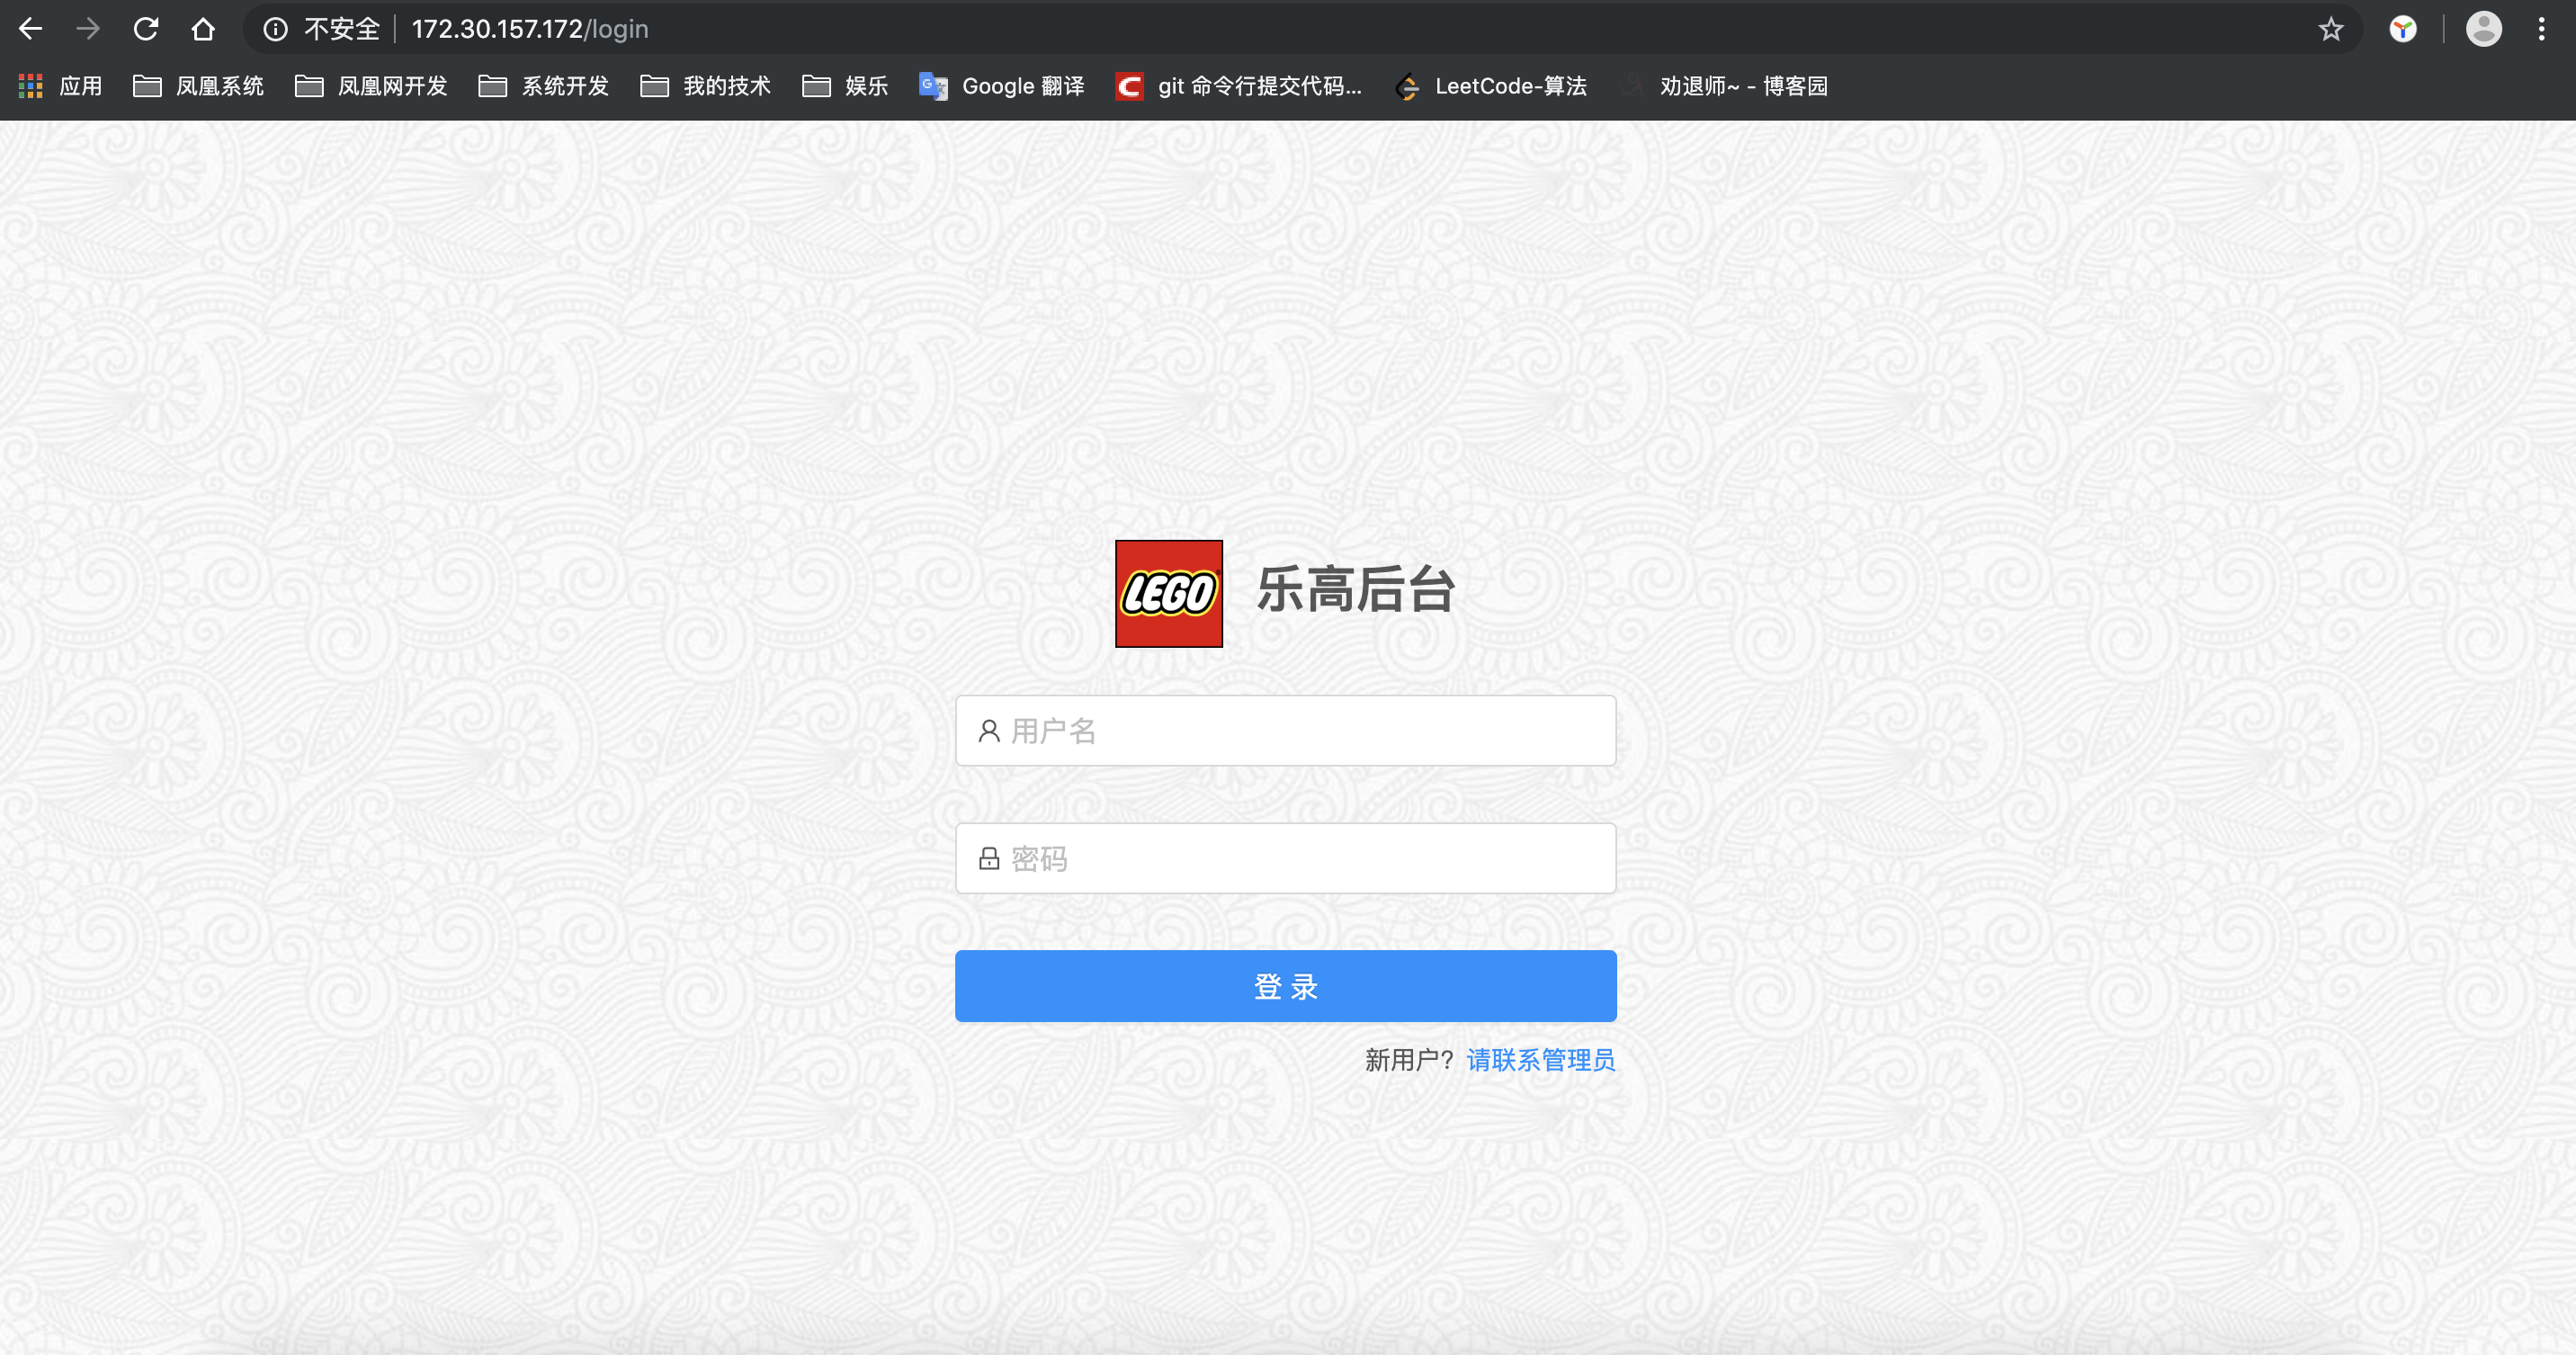
最后看效果
以上就是搭建一个基本的服务的全部过程,对于新手学习linux,nginx有一定帮助,如有疑问请提出。

 浙公网安备 33010602011771号