
less和reset.css的引用及首页活动、商品推荐模块的建立及flex布局
❤记在前面
人生最大的希望在于:自己值得自己等待
先打开运行项目:


一、less和reset.css的使用
1.less的引用:
安装less和less-loader(之前补充过了)传送地址:https://www.cnblogs.com/crystral/p/9117161.html
2.reset.css的引用
①去这个网站(https://cssreset.com/)下载一个reset.css文件,然后copy到src目录下:
(这个我没有下载下来,点击没反应,所以去老师那里copy了一份,代码我放下面)
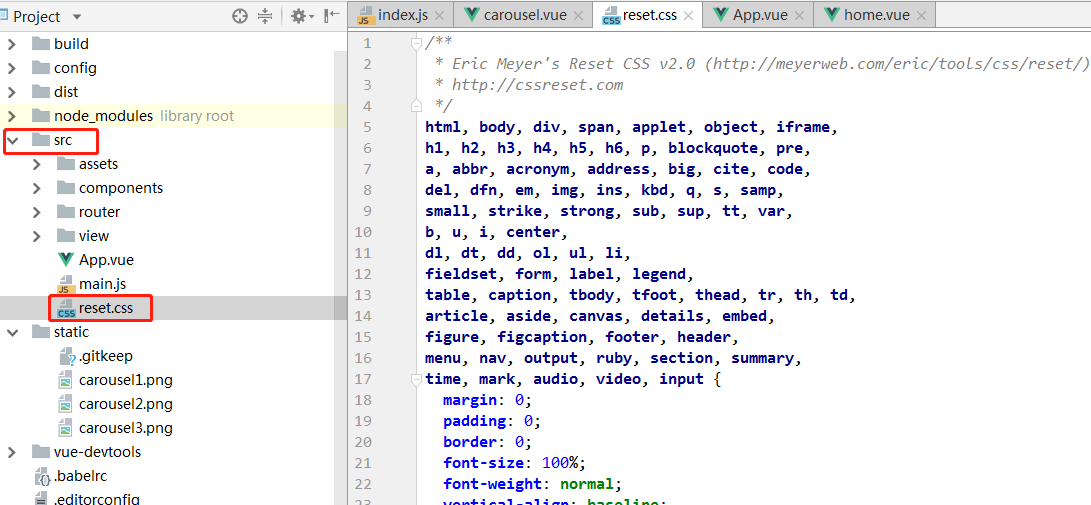
reset.css
/**
 * Eric Meyer's Reset CSS v2.0 (http://meyerweb.com/eric/tools/css/reset/)
 * http://cssreset.com
 */
html, body, div, span, applet, object, iframe,
h1, h2, h3, h4, h5, h6, p, blockquote, pre,
a, abbr, acronym, address, big, cite, code,
del, dfn, em, img, ins, kbd, q, s, samp,
small, strike, strong, sub, sup, tt, var,
b, u, i, center,
dl, dt, dd, ol, ul, li,
fieldset, form, label, legend,
table, caption, tbody, tfoot, thead, tr, th, td,
article, aside, canvas, details, embed,
figure, figcaption, footer, header,
menu, nav, output, ruby, section, summary,
time, mark, audio, video, input {
  margin: 0;
  padding: 0;
  border: 0;
  font-size: 100%;
  font-weight: normal;
  vertical-align: baseline;
}

/* HTML5 display-role reset for older browsers */
article, aside, details, figcaption, figure,
footer, header, menu, nav, section {
  display: block;
}

body {
  line-height: 1;
}

blockquote, q {
  quotes: none;
}

blockquote:before, blockquote:after,
q:before, q:after {
  content: none;
}

table {
  border-collapse: collapse;
  border-spacing: 0;
}

/* custom */
a {
  color: #7e8c8d;
  text-decoration: none;
  -webkit-backface-visibility: hidden;
}

li {
  list-style: none;
}

::-webkit-scrollbar {
  width: 5px;
  height: 5px;
}

::-webkit-scrollbar-track-piece {
  background-color: rgba(0, 0, 0, 0.2);
  -webkit-border-radius: 6px;
}

::-webkit-scrollbar-thumb:vertical {
  height: 5px;
  background-color: rgba(125, 125, 125, 0.7);
  -webkit-border-radius: 6px;
}

::-webkit-scrollbar-thumb:horizontal {
  width: 5px;
  background-color: rgba(125, 125, 125, 0.7);
  -webkit-border-radius: 6px;
}

html, body {
  width: 100%;
}

body {
  -webkit-text-size-adjust: none;
  -webkit-tap-highlight-color: rgba(0, 0, 0, 0);
}
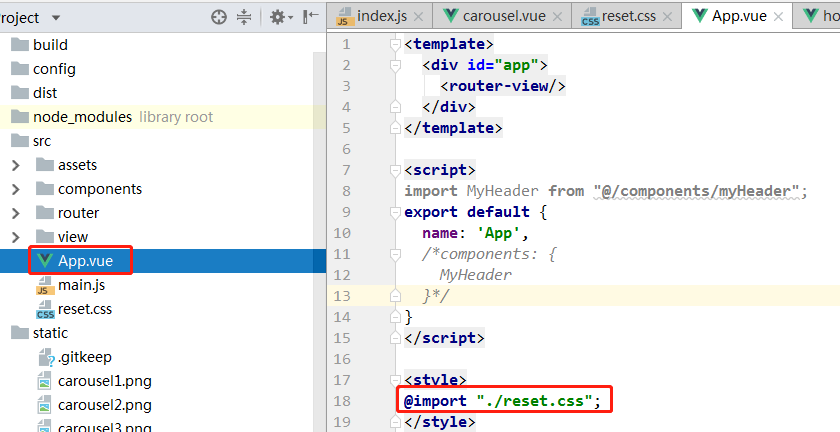
②在App.vue中引入:
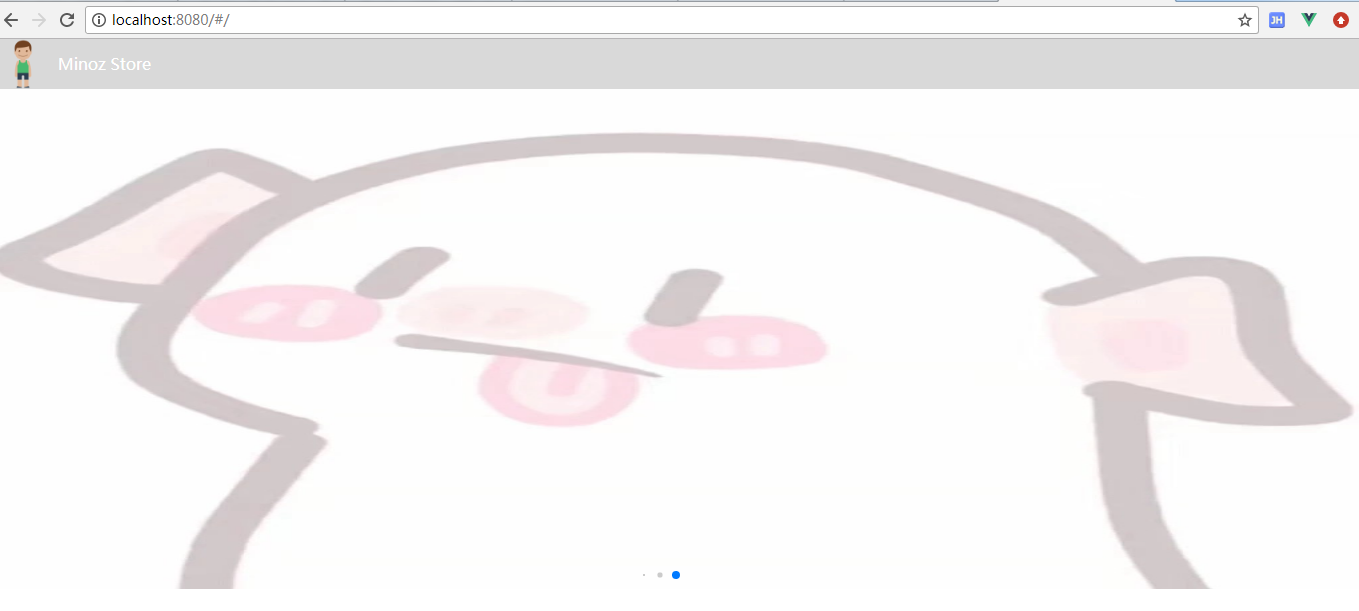
③最后,可以去浏览器中看看是不是引用成功了,比如h3块级元素的margin值都为0了
二、新建活动、商品推荐组件
1.进入components文件下,新建活动(active)、商品推荐(recommend)的组件
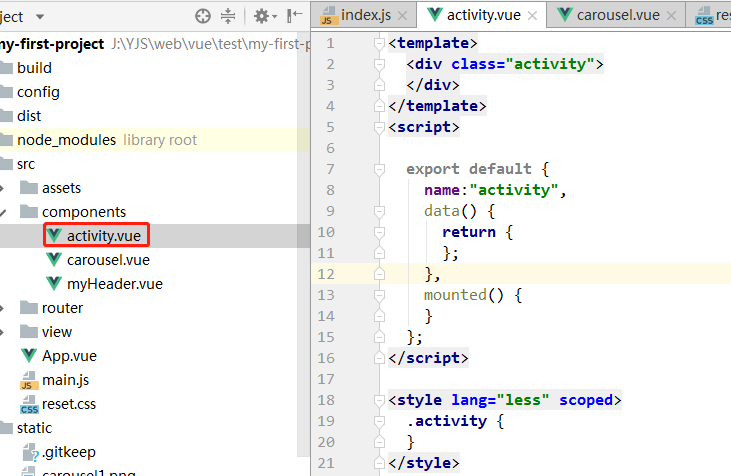
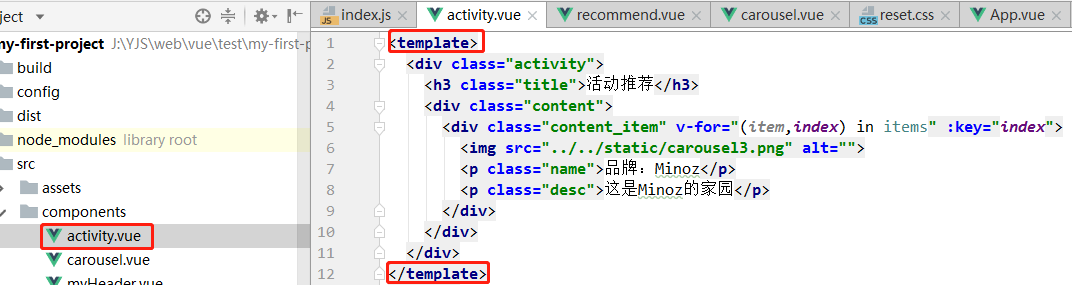
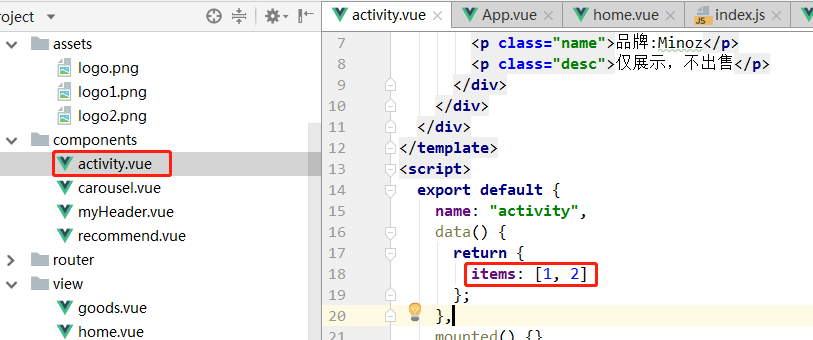
2.activity.vue的构建
①template
②style
<style lang="less" scoped>
  .activity {
    background: #eee;
    .title {
      width: 100%;
      height: 50px;
      line-height: 50px;
      text-align: center;
      color: gray;
      border-bottom: 1px solid #000;
      background: #fff;
    }
    .content {
      .content_item {
        background: #fff;
        margin-bottom: 10px;
        img {
          width: 100%;
          height: 150px;
        }
      }
      .name {
        font-size: 15px;
        color: #000;
        margin-bottom: 5px;
      }
      .desc {
        font-size: 13px;
        color: #000;
      }
    }
  }
</style>
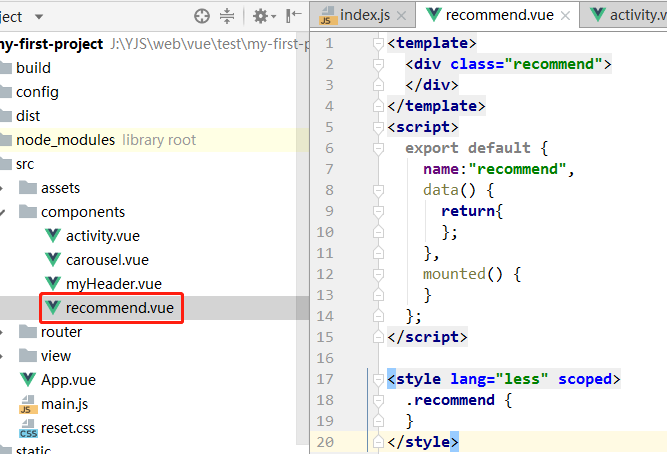
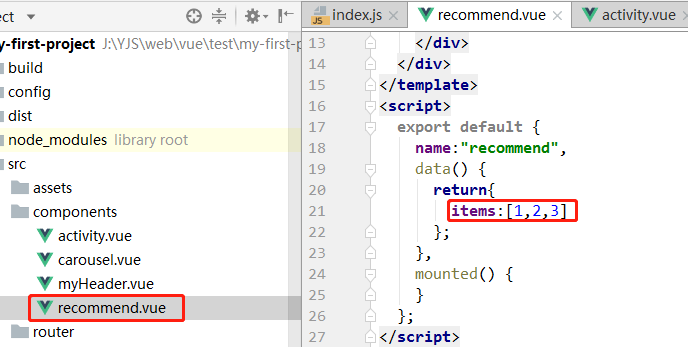
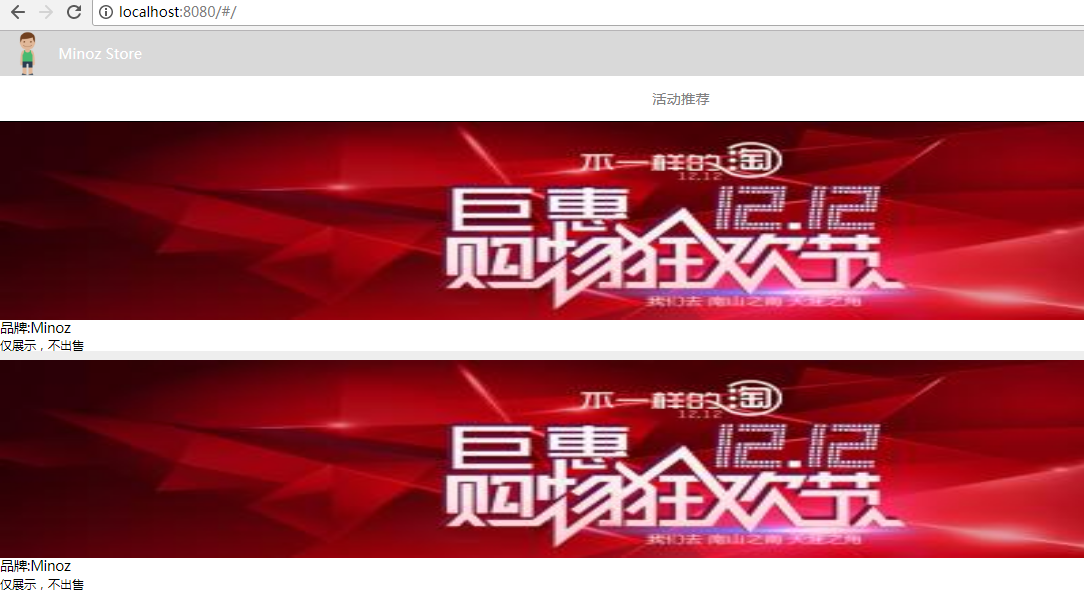
3.recommend.vue的构建
跟activity.vue的结构大同小异,主要是用了一个flex的布局
在这里抛送个阮大神的flex布局的链接:http://www.ruanyifeng.com/blog/2015/07/flex-grammar.html
①template

②style
.recommend {
    background: #eee;
    .title {
      width: 100%;
      height: 50px;
      line-height: 50px;
      text-align: center;
      color: gray;
      border-bottom: 1px solid #000;
      background: #fff;
    }
    .content {
      display: flex;
      flex-direction: row;
      flex-wrap: wrap;
      justify-content: space-between;
      .content_item {
        background: #fff;
        margin-bottom: 5px;
        width: 200px;
        img {
          width: 100%;
          height: 200px;
        }
        .name {
          padding: 0 5px;
          font-size: 15px;
        }
        .desc {
          padding: 0 5px;
          overflow: hidden;
          font-size: 13px;
          .price {
            color: red;
          }
          .price_pre {
            color: #8e8e8e;
            text-decoration: line-through;
          }
        }
      }
    }
}
做完以上之后,刷新浏览器是没有反应的,所以看了一下,少了上一节讲的组件的引入
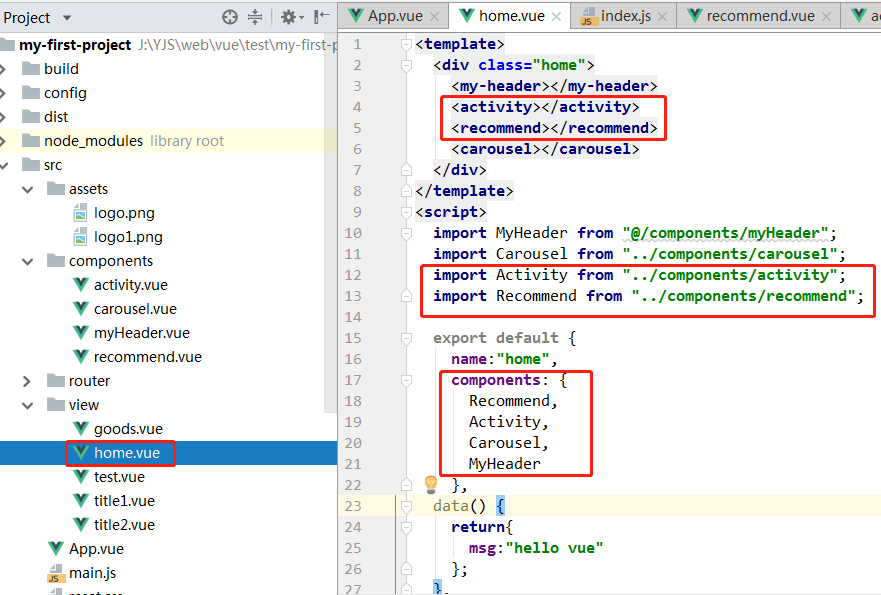
三、看效果
这就是我们首页的活动推荐和商品推荐模块
以上,完成~~~

 浙公网安备 33010602011771号