基于Vue和Quasar的前端SPA项目实战之用户登录(二)
基于Vue和Quasar的前端SPA项目实战之用户登录(二)
回顾
通过上一篇文章 基于Vue和Quasar的前端SPA项目实战之环境搭建(一)的介绍,我们已经搭建好本地开发环境并且运行成功了,今天主要介绍登录功能。
简介
通常为了安全考虑,需要用户登录之后才可以访问。crudapi admin web项目也需要引入登录功能,用户登录成功之后,跳转到管理页面,否则提示没有权限。
技术调研
SESSION
SESSION通常会用到Cookie,Cookie有时也用其复数形式Cookies。类型为“小型文本文件”,是某些网站为了辨别用户身份,进行Session跟踪而储存在用户本地终端上的数据(通常经过加密),由用户客户端计算机暂时或永久保存的信息。
用户登录成功后,后台服务记录登录状态,并用SESSIONID进行唯一识别。浏览器通过Cookie记录了SESSIONID之后,下一次访问同一域名下的任何网页的时候会自动带上包含SESSIONID信息的Cookie,这样后台就可以判断用户是否已经登录过了,从而进行下一步动作。优点是使用方便,浏览器自动处理Cookie,缺点是容易受到XSS攻击。
JWT Token
Json web token (JWT), 是为了在网络应用环境间传递声明而执行的一种基于JSON的开放标准((RFC 7519).该token被设计为紧凑且安全的,特别适用于分布式站点的单点登录(SSO)场景。JWT的声明一般被用来在身份提供者和服务提供者间传递被认证的用户身份信息,以便于从资源服务器获取资源,也可以增加一些额外的其它业务逻辑所必须的声明信息,该token也可直接被用于认证,也可被加密。
JWT校验方式更加简单便捷化,无需通过缓存,而是直接根据token取出保存的用户信息,以及对token可用性校验,单点登录更为简单。缺点是注销不是很方便,并且因为JWT Token是base64加密,可能有安全方面隐患。
因为目前系统主要是在浏览器环境中使用,所以选择了SESSION的登录方式,后续考虑使用JWT登录方式,JWT更适合APP和小程序场景。
登录流程

主要流程如下:
- 用户打开页面的时候,首先判断是否属于白名单列表,如果属于,比如/login, /403, 直接放行。
- 本地local Storage如果保存了登录信息,说明之前登录过,直接放行。
- 如果没有登录过,本地local Storage为空,跳转到登录页面。
- 虽然本地登录过了,但是可能过期了,这时候访问任意一个API时候,会自动根据返回结果判断是否登录。
UI界面

登录页面比较简单,主要包括用户名、密码输入框和登录按钮,点击登录按钮会调用登录API。
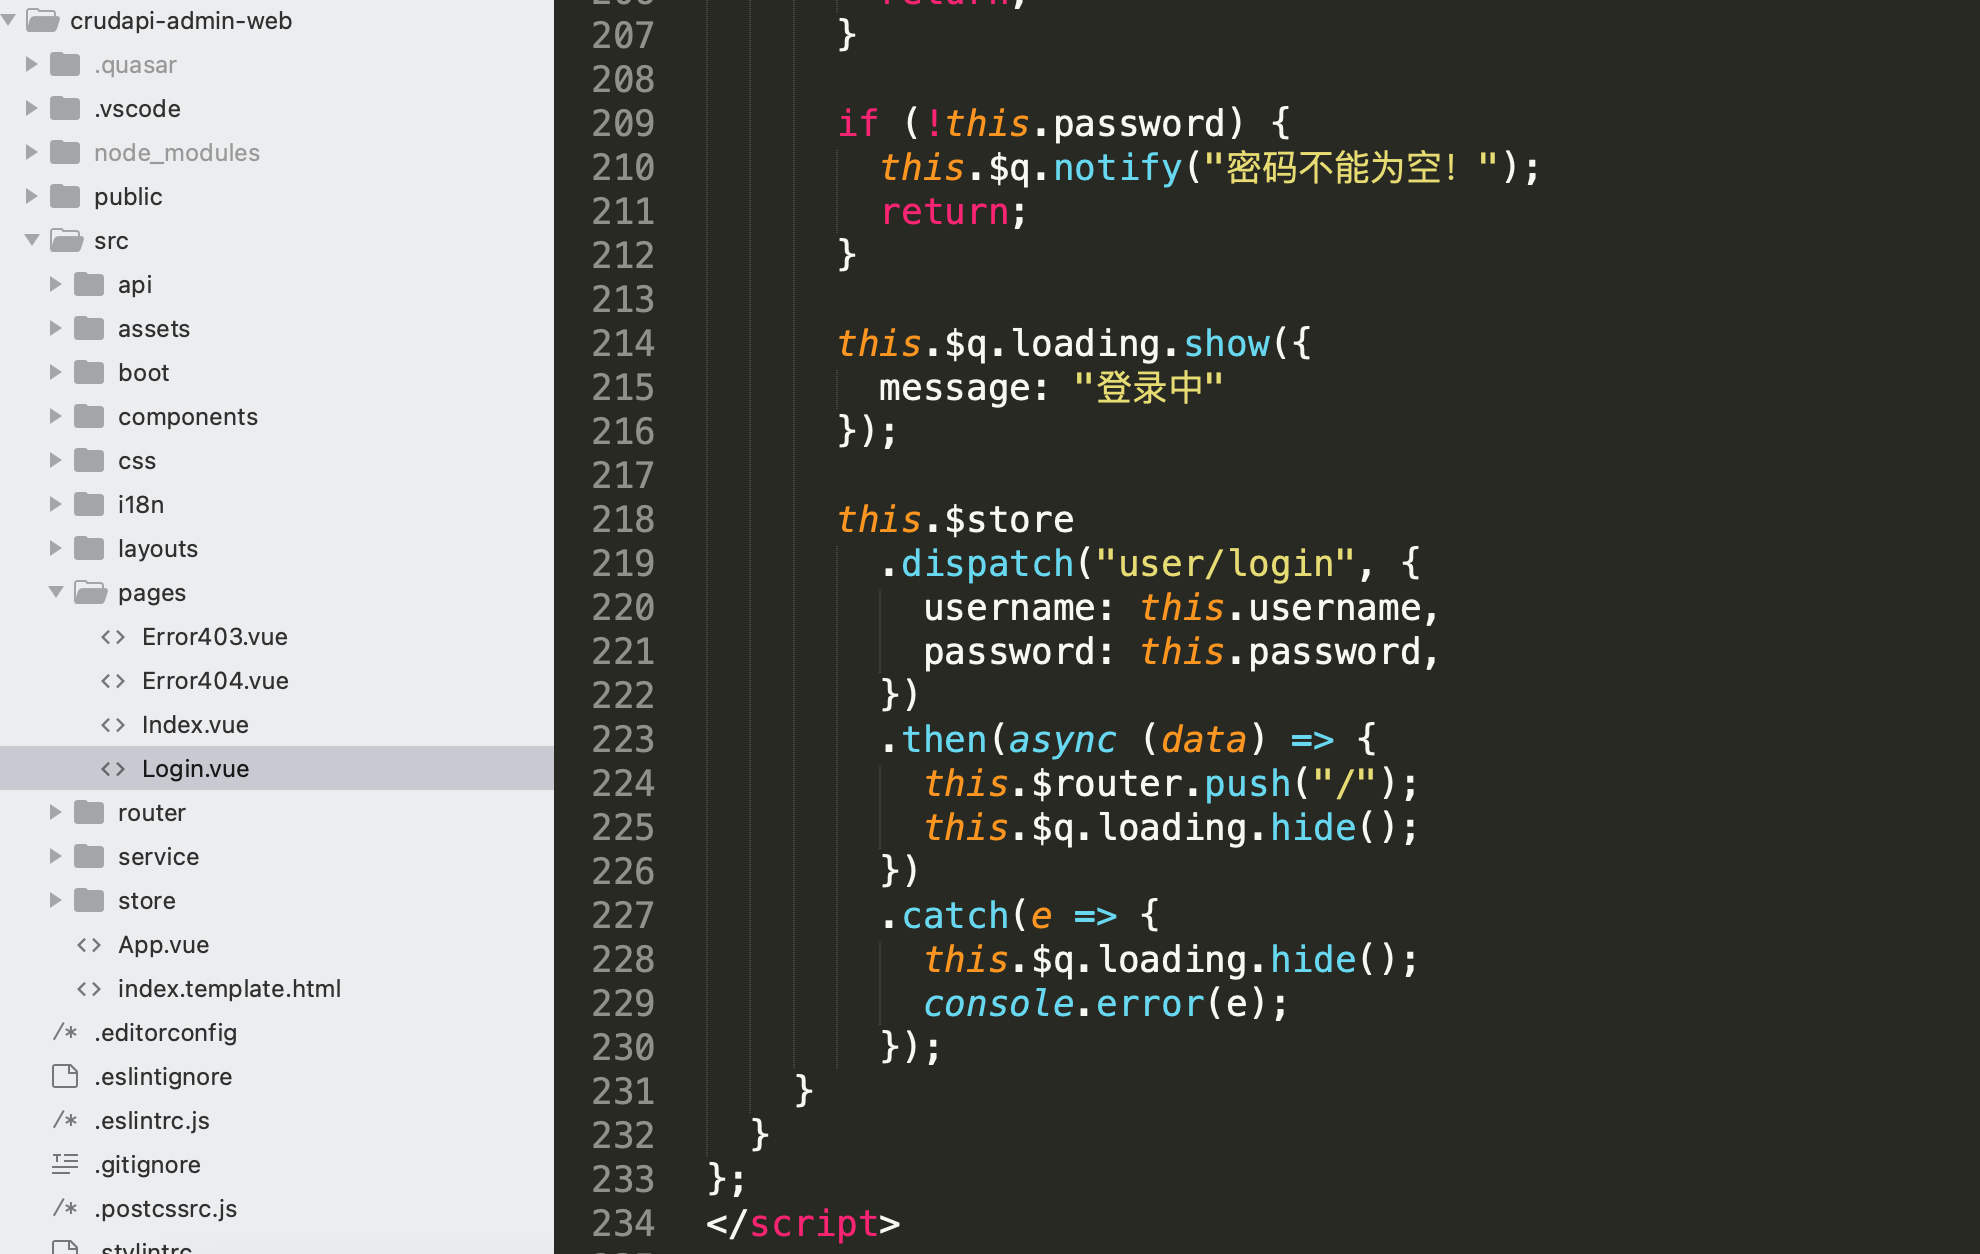
代码结构
- api: 通过axios与后台api交互
- assets:主要是一些图片之类的
- boot:动态加载库,比如axios、i18n等
- components:自定义组件
- css:css样式
- i18n:多语言信息
- layouts:布局
- pages:页面,包括了html,css和js三部分内容
- router:路由相关
- service:业务service,对api进行封装
- store:Vuex状态管理,Vuex 是实现组件全局状态(数据)管理的一种机制,可以方便的实现组件之间数据的共享
配置文件
quasar.conf.js是全局配置文件,所有的配置相关内容都可以这个文件里面设置。
核心代码
配置quasar.conf.js
plugins: [
    'LocalStorage',
    'Notify',
    'Loading'
]
因为需要用到本地存储LocalStorage,消息提示Notify和等待提示Loading插件,所以在plugins里面添加。
配置全局样式
修改文件quasar.variables.styl和app.styl, 比如设置主颜色为淡蓝色
$primary = #35C8E8
封装axios
import Vue from 'vue'
import axios from 'axios'
import { Notify } from "quasar";
import qs from "qs";
import Router from "../router/index";
import { permissionService } from "../service";

Vue.prototype.$axios = axios

// We create our own axios instance and set a custom base URL.
// Note that if we wouldn't set any config here we do not need
// a named export, as we could just `import axios from 'axios'`
const axiosInstance = axios.create({
  baseURL: process.env.API
});

axiosInstance.defaults.transformRequest = [
  function(data, headers) {
    // Do whatever you want to transform the data
    let contentType = headers["Content-Type"] || headers["content-type"];
    if (!contentType) {
      contentType = "application/json";
      headers["Content-Type"] = "application/json";
    }

    if (contentType.indexOf("multipart/form-data") >= 0) {
      return data;
    } else if (contentType.indexOf("application/x-www-form-urlencoded") >= 0) {
      return qs.stringify(data);
    }

    return JSON.stringify(data);
  }
];

// Add a request interceptor
axiosInstance.interceptors.request.use(
  function(config) {
    if (config.permission && !permissionService.check(config.permission)) {
      throw {
        message: "403 forbidden"
      };
    }

    return config;
  },
  function(error) {
    // Do something with request error
    return Promise.reject(error);
  }
);

function login() {
  setTimeout(() => {
    Router.push({
      path: "/login"
    });
  }, 1000);
}

// Add a response interceptor
axiosInstance.interceptors.response.use(
  function(response) {
    // Any status code that lie within the range of 2xx cause this function to trigger
    // Do something with response data
    return response;
  },
  function(error) {
    // Any status codes that falls outside the range of 2xx cause this function to trigger
    // Do something with response error

    if (error.response) {
      if (error.response.status === 401) {
        Notify.create({
          message:  error.response.data.message,
          type: 'negative'
        });
        login();
      } else if (error.response.data && error.response.data.message) {
        Notify.create({
          message: error.response.data.message,
          type: 'negative'
        });
      } else {
        Notify.create({
          message: error.response.statusText || error.response.status,
          type: 'negative'
        });
      }
    } else if (error.message.indexOf("timeout") > -1) {
      Notify.create({
        message: "Network timeout",
        type: 'negative'
      });
    } else if (error.message) {
      Notify.create({
        message: error.message,
        type: 'negative'
      });
    } else {
      Notify.create({
        message: "http request error",
        type: 'negative'
      });
    }

    return Promise.reject(error);
  }
);

// for use inside Vue files through this.$axios
Vue.prototype.$axios = axiosInstance

// Here we define a named export
// that we can later use inside .js files:
export { axiosInstance }
axios配置一个实例,做一些统一处理,比如网络请求数据预处理,验证权限,401跳转,403提示等。
用户api和service
import { axiosInstance } from "boot/axios";

const HEADERS = {
  "Content-Type": "application/x-www-form-urlencoded"
};

const user = {
  login: function(data) {
    return axiosInstance.post("/api/auth/login",
      data,
      {
        headers: HEADERS
      }
    );
  },
  logout: function() {
    return axiosInstance.get("/api/auth/logout",
      {
        headers: HEADERS
      }
    );
  }
};

export { user };
登录api为/api/auth/login,注销api为/api/auth/logout
import { user} from "../api";
import { LocalStorage } from "quasar";

const userService = {
  login: async function(data) {
    var res = await user.login(data);
    return res.data;
  },
  logout: async function() {
    var res = await user.logout();
    return res.data;
  },
  getUserInfo: async function() {
    return LocalStorage.getItem("userInfo") || {};
  },
  setUserInfo: function(userInfo) {
    LocalStorage.set("userInfo", userInfo);
  }
};

export { userService };
用户service主要是对api的封装,然后还提供保存用户信息到LocalStorage接口
Vuex管理登录状态
import { userService } from "../../service";
import { permissionService } from "../../service";

export const login = ({ commit }, userInfo) => {
  return new Promise((resolve, reject) => {
    userService
      .login(userInfo)
      .then(data => {
          //session方式登录,其实不需要token,这里为了JWT登录预留,用username代替。
          //通过Token是否为空判断本地有没有登录过,方便后续处理。
          commit("updateToken", data.principal.username);

          const newUserInfo = {
            username: data.principal.username,
            realname: data.principal.realname,
            avatar: "",
            authorities: data.principal.authorities || [],
            roles: data.principal.roles || []
          };
          commit("updateUserInfo", newUserInfo);

          let permissions = data.authorities || [];
          let isSuperAdmin = false;
          if (permissions.findIndex(t => t.authority === "ROLE_SUPER_ADMIN") >= 0) {
            isSuperAdmin = true;
          }

          permissionService.set({
            permissions: permissions,
            isSuperAdmin: isSuperAdmin
          });

          resolve(newUserInfo);
      })
      .catch(error => {
        reject(error);
      });
  });
};

export const logout = ({ commit }) => {
  return new Promise((resolve, reject) => {
    userService
      .logout()
      .then(() => {
        resolve();
      })
      .catch(error => {
        reject(error);
      })
      .finally(() => {
        commit("updateToken", "");
        commit("updateUserInfo", {
          username: "",
          realname: "",
          avatar: "",
          authorities: [],
          roles: []
        });

        permissionService.set({
          permissions: [],
          isSuperAdmin: false
        });
      });
  });
};

export const getUserInfo = ({ commit }) => {
  return new Promise((resolve, reject) => {
    userService
      .getUserInfo()
      .then(data => {
        commit("updateUserInfo", data);
        resolve();
      })
      .catch(error => {
        reject(error);
      });
  });
};
登录成功之后,会把利用Vuex把用户和权限信息保存在全局状态中,然后LocalStorage也保留一份,这样刷新页面的时候会从LocalStorage读取到Vuex中。
路由跳转管理
import Vue from 'vue'
import VueRouter from 'vue-router'

import routes from './routes'
import { authService } from "../service";
import store from "../store";

Vue.use(VueRouter)

/*
 * If not building with SSR mode, you can
 * directly export the Router instantiation;
 *
 * The function below can be async too; either use
 * async/await or return a Promise which resolves
 * with the Router instance.
 */
const Router = new VueRouter({
  scrollBehavior: () => ({ x: 0, y: 0 }),
  routes,

  // Leave these as they are and change in quasar.conf.js instead!
  // quasar.conf.js -> build -> vueRouterMode
  // quasar.conf.js -> build -> publicPath
  mode: process.env.VUE_ROUTER_MODE,
  base: process.env.VUE_ROUTER_BASE
});

const whiteList = ["/login", "/403"];

function hasPermission(router) {
  if (whiteList.indexOf(router.path) !== -1) {
    return true;
  }

  return true;
}

Router.beforeEach(async (to, from, next) => {
  let token = authService.getToken();
  if (token) {
    let userInfo = store.state.user.userInfo;
    if (!userInfo.username) {
      try {
        await store.dispatch("user/getUserInfo");
        next();
      } catch (e) {
        if (whiteList.indexOf(to.path) !== -1) {
          next();
        } else {
          next("/login");
        }
      }
    } else {
      if (hasPermission(to)) {
        next();
      } else {
        next({ path: "/403", replace: true });
      }
    }
  } else {
    if (whiteList.indexOf(to.path) !== -1) {
      next();
    } else {
      next("/login");
    }
  }
});

export default Router;
通过复写Router.beforeEach方法,在页面跳转之前进行预处理,实现前面登录流程图里面的功能。
登录页面
submit() {
  if (!this.username) {
    this.$q.notify("用户名不能为空!");
    return;
  }

  if (!this.password) {
    this.$q.notify("密码不能为空!");
    return;
  }

  this.$q.loading.show({
    message: "登录中"
  });

  this.$store
    .dispatch("user/login", {
      username: this.username,
      password: this.password,
    })
    .then(async (data) => {
      this.$router.push("/");
      this.$q.loading.hide();
    })
    .catch(e => {
      this.$q.loading.hide();
      console.error(e);
    });
}
submit方法中执行this.$store.dispatch("user/login")进行登录,表示调用user store action里面的login方法,如果成功,执行this.$router.push("/")。
配置devServer代理
devServer: {
  https: false,
  port: 8080,
  open: true, // opens browser window automatically
  proxy: {
    "/api/*": {
      target: "xx.xx.xx.xx",
      changeOrigin: true
    }
  }
}
配置proxy之后,所有的api开头的请求就会转发到后台服务器,这样就可以解决了跨域访问的问题。
验证
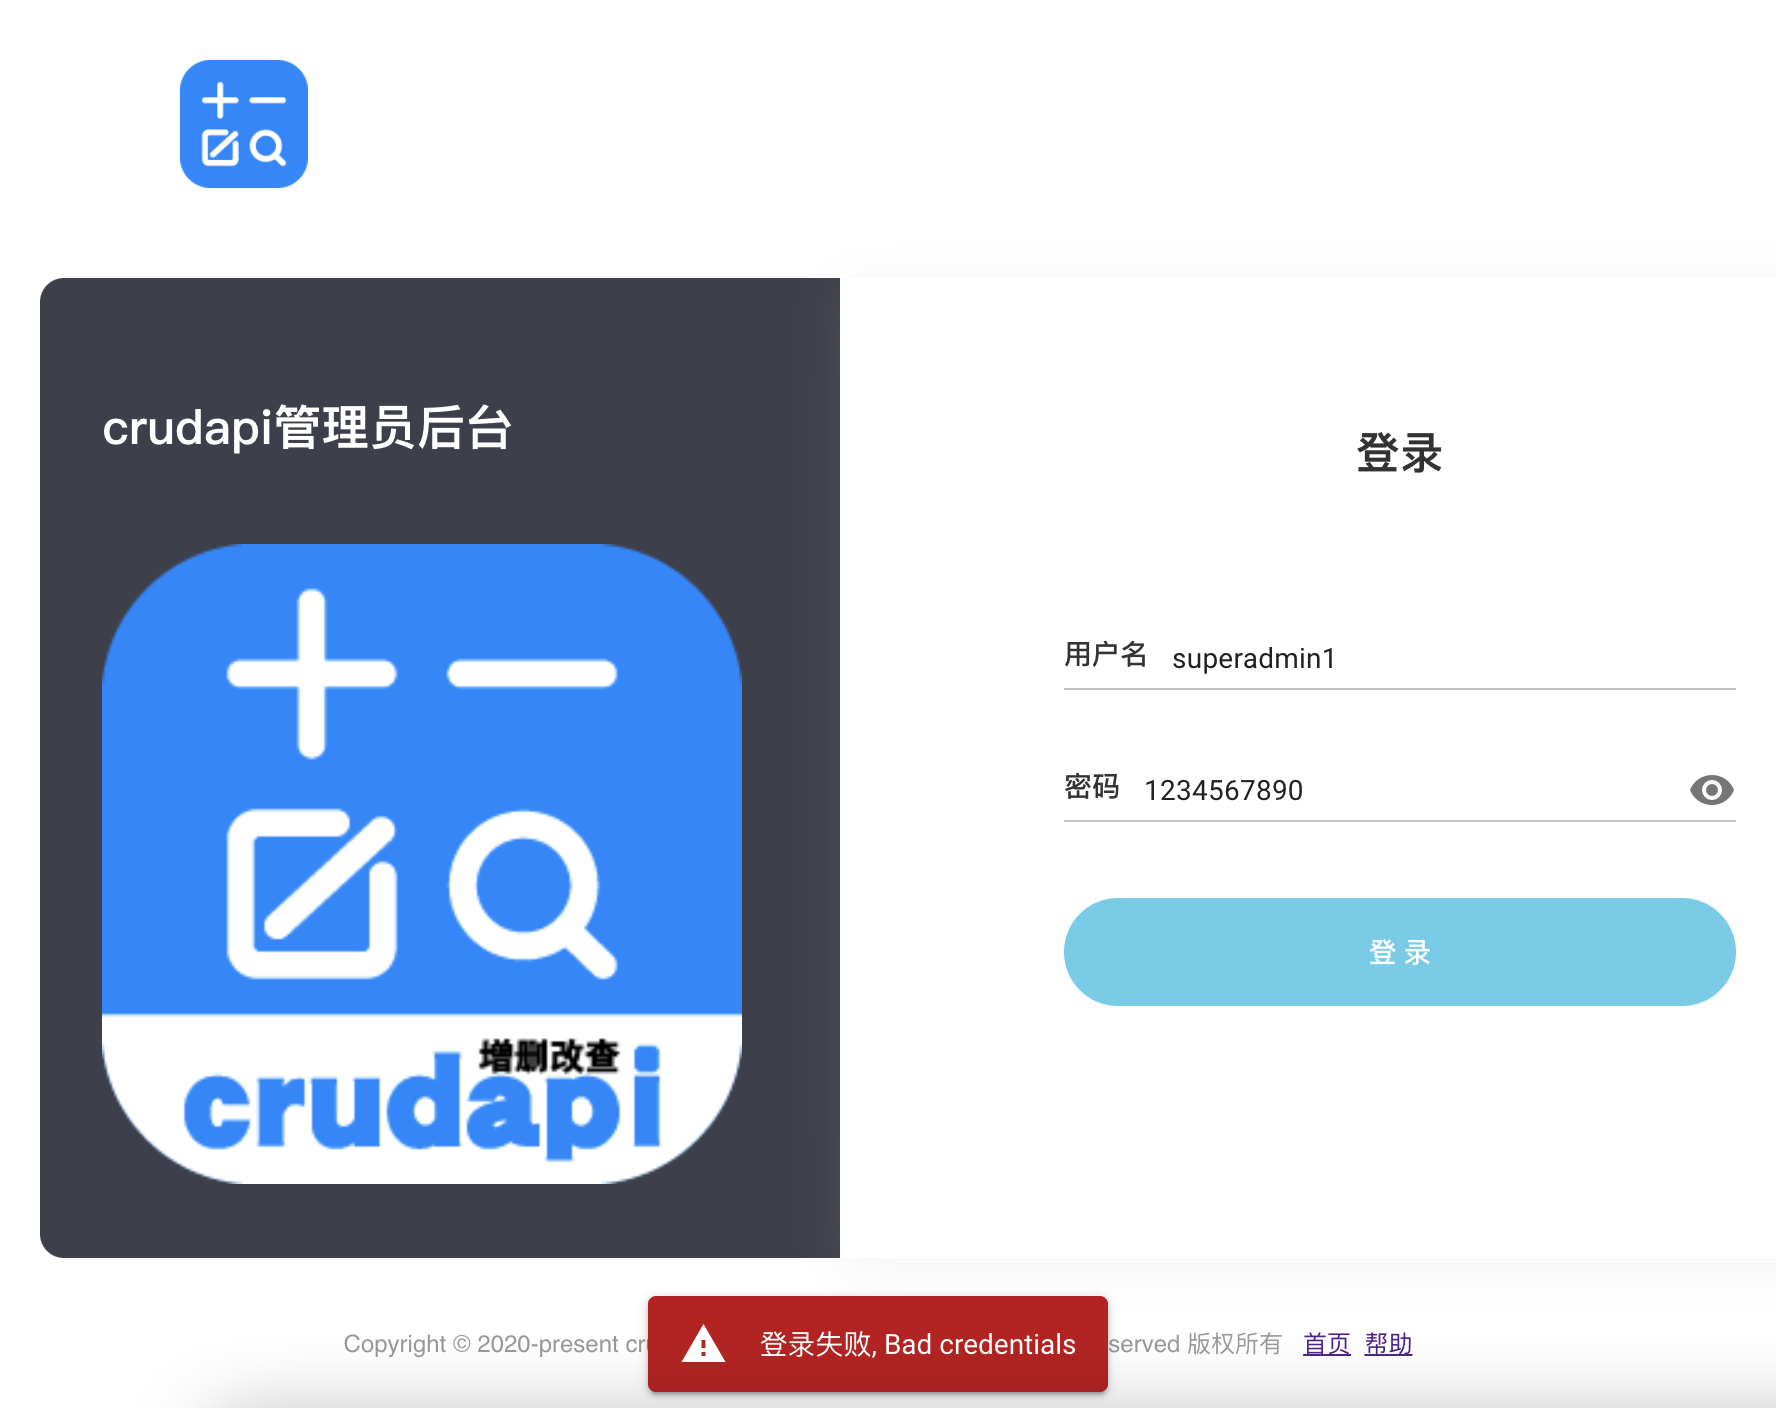
首先,故意输入一个错误的用户名,提示登录失败。
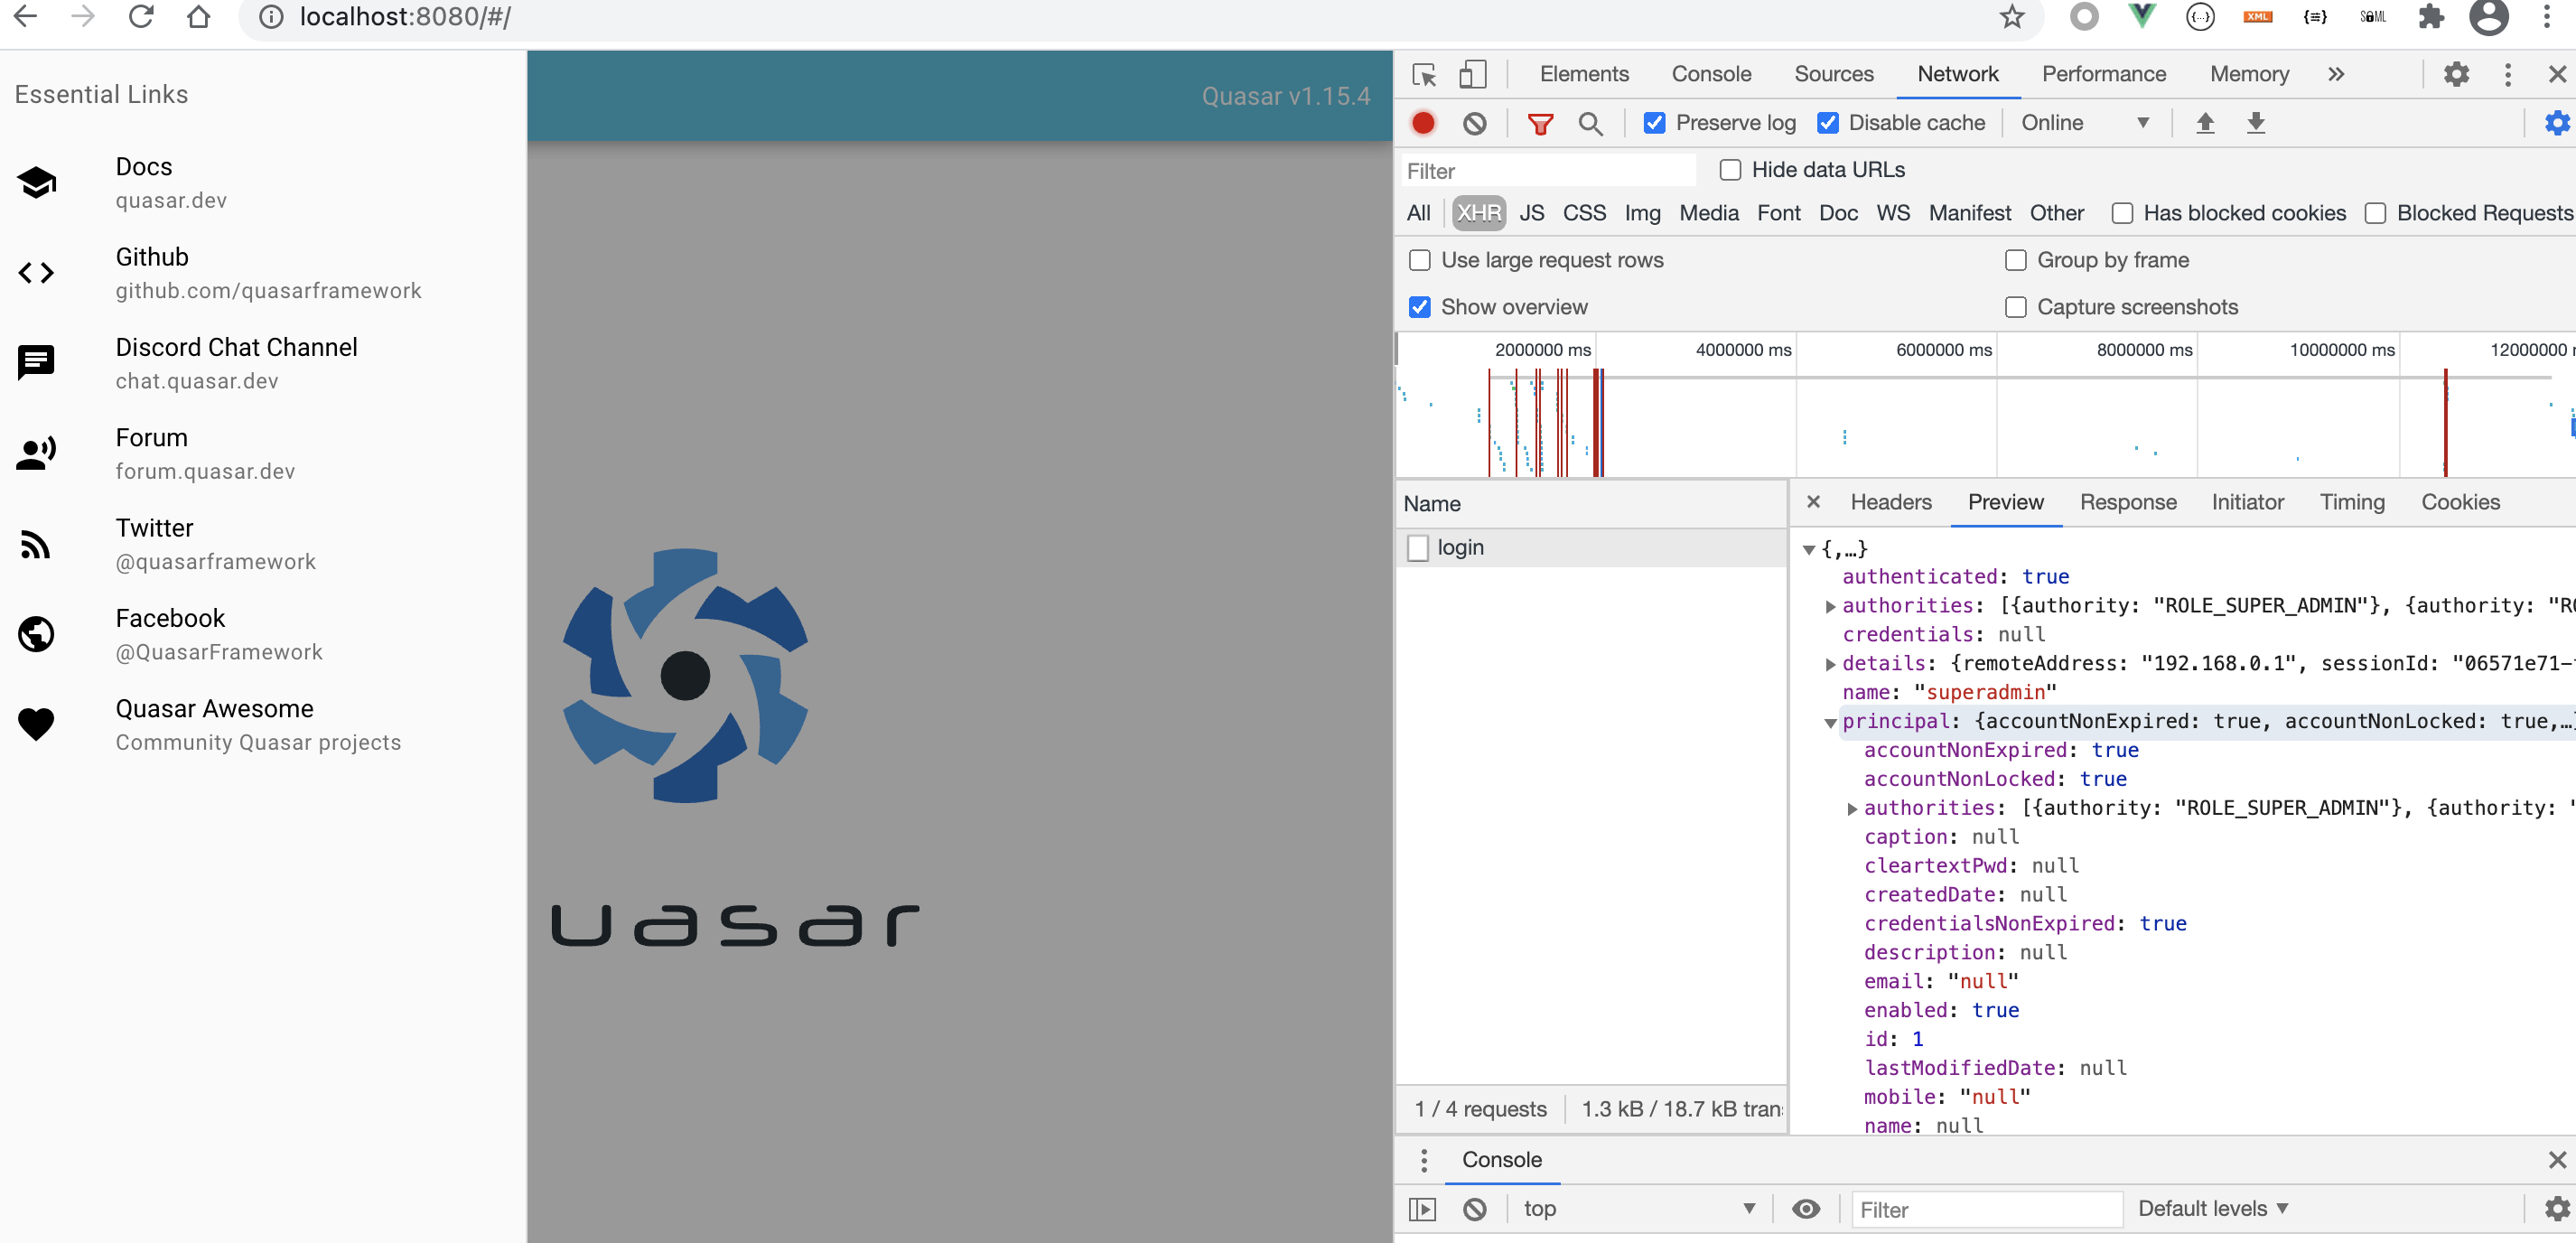
输入正确的用户名和密码,登录成功,自动跳转到后台管理页面。
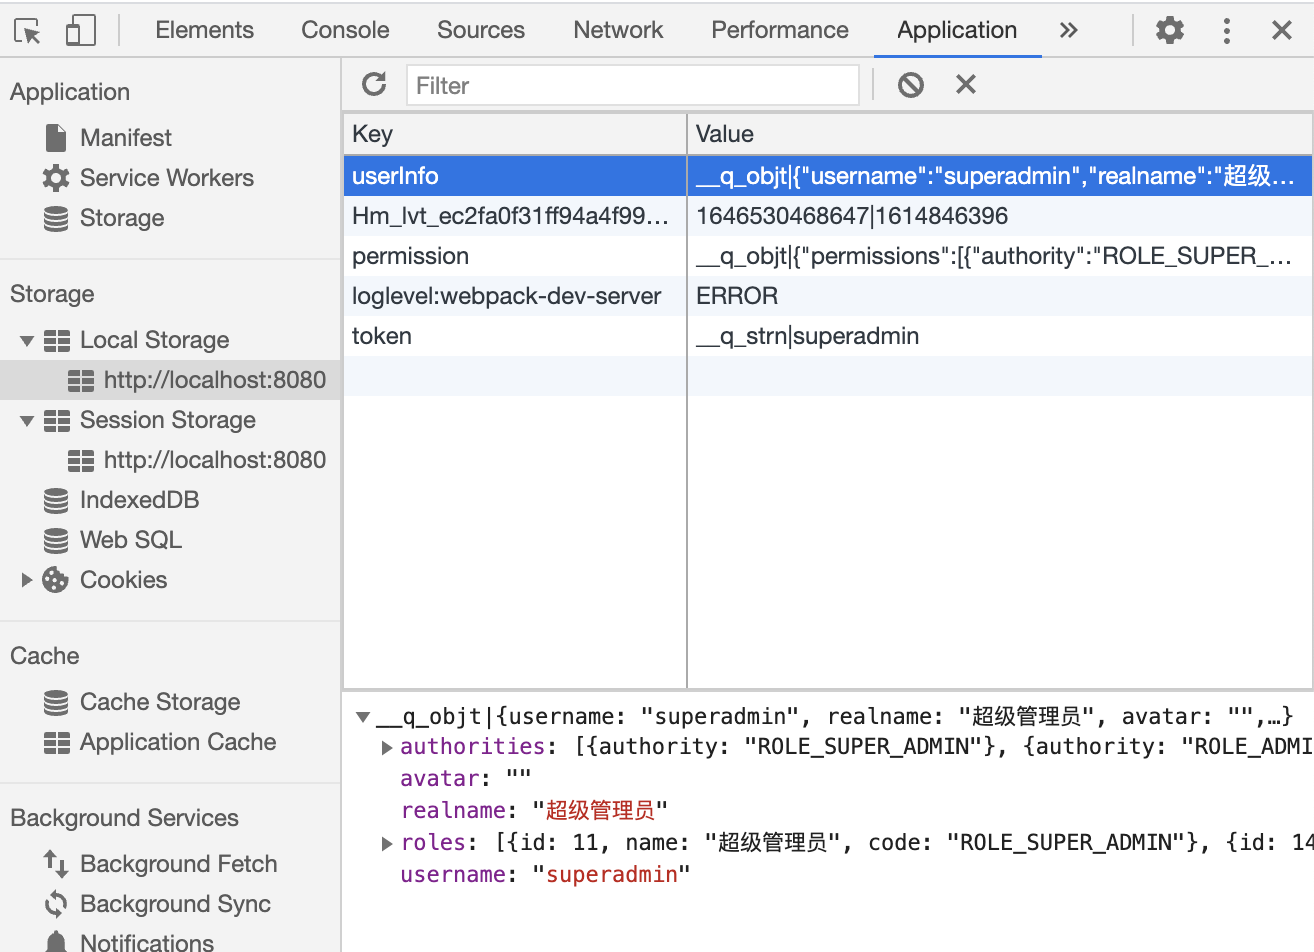
F12开启chrome浏览器debug模式,查看localstorage,发现userInfo,permission,token内容和预期一致,其中权限permission相关内容在后续rbac章节中详细介绍。
小结
本文主要介绍了用户登录功能,用到了axios网络请求,Vuex状态管理,Router路由,localStorage本地存储等Vue基本知识,然后还用到了Quasar的三个插件,LocalStorage, Notify和Loading。虽然登录功能比较简单,但是它完整地实现了前端到后端之间的交互过程。
完整可运行源码请在基于Vue和Quasar的前端SPA项目实战之环境搭建(一)中查看!

 浙公网安备 33010602011771号