常用Linux命令二(nl, more,less,head,tail,which,whereis,locate,find)
1.nl命令
nl命令在linux系统中用来计算文件中行号。nl 可以将输出的文件内容自动的加上行号!其默认的结果与 cat -n 有点不太一样, nl 可以将行号做比较多的显示设计,包括位数与是否自动补齐 0 等等的功能。 1.命令格式:nl [选项]... [文件]...2.命令参数:-b :指定行号指定的方式,主要有两种:-b a :表示不论是否为空行,也同样列出行号(类似 cat -n);-b t :如果有空行,空的那一行不要列出行号(默认值);-n :列出行号表示的方法,主要有三种:-n ln :行号在萤幕的最左方显示;-n rn :行号在自己栏位的最右方显示,且不加 0 ;-n rz :行号在自己栏位的最右方显示,且加 0 ;-w :行号栏位的占用的位数。-p 在逻辑定界符处不重新开始计算。 3.命令功能:nl 命 令读取 File 参数(缺省情况下标准输入),计算输入中的行号,将计算过的行号写入标准输出。 在输出中,nl 命令根据您在命令行中指定的标志来计 算左边的行。 输入文本必须写在逻辑页中。每个逻辑页有头、主体和页脚节(可以有空节)。 除非使用 -p 标志,nl 命令在每个逻辑页开始的地方重新 设置行号。 可以单独为头、主体和页脚节设置行计算标志(例如,头和页脚行可以被计算然而文本行不能)。4.使用实例:实例一:用 nl 列出 log2012.log 的内容命令:nl log2012.log输出:[root@localhost test]# nl log2012.log 1 2012-01 2 2012-02 3 ======[root@localhost test]#说明:文件中的空白行,nl 不会加上行号实例二:用 nl 列出 log2012.log 的内容,空本行也加上行号命令:nl -b a log2012.log输出:[root@localhost test]# nl -b a log2012.log 1 2012-01 2 2012-02 3 4 5 ======[root@localhost test]#实例3:让行号前面自动补上0,统一输出格式命令:输出:[root@localhost test]# nl -b a -n rz log2014.log 000001 2014-01000002 2014-02000003 2014-03000004 2014-04000005 2014-05000006 2014-06000007 2014-07000008 2014-08000009 2014-09000010 2014-10000011 2014-11000012 2014-12000013 =======[root@localhost test]# nl -b a -n rz -w 3 log2014.log 001 2014-01002 2014-02003 2014-03004 2014-04005 2014-05006 2014-06007 2014-07008 2014-08009 2014-09010 2014-10011 2014-11012 2014-12013 =======说明:nl -b a -n rz 命令行号默认为六位,要调整位数可以加上参数 -w 3 调整为3位2.more命令
more命令,功能类似 cat ,cat命令是整个文件的内容从上到下显示在屏幕上。 more会以一页一页的显示方便使用者逐页阅读,而最基本的指令就是按空白键(space)就往下一页显示,按 b 键就会往回(back)一页显示,而且还有搜寻字串的功能 。more命令从前向后读取文件,因此在启动时就加载整个文件。1.命令格式:more [-dlfpcsu ] [-num ] [+/ pattern] [+ linenum] [file ... ] 2.命令功能:more命令和cat的功能一样都是查看文件里的内容,但有所不同的是more可以按页来查看文件的内容,还支持直接跳转行等功能。3.命令参数:+n 从笫n行开始显示-n 定义屏幕大小为n行+/pattern 在每个档案显示前搜寻该字串(pattern),然后从该字串前两行之后开始显示 -c 从顶部清屏,然后显示-d 提示“Press space to continue,’q’ to quit(按空格键继续,按q键退出)”,禁用响铃功能-l 忽略Ctrl+l(换页)字符-p 通过清除窗口而不是滚屏来对文件进行换页,与-c选项相似-s 把连续的多个空行显示为一行-u 把文件内容中的下画线去掉4.常用操作命令:Enter 向下n行,需要定义。默认为1行Ctrl+F 向下滚动一屏空格键 向下滚动一屏Ctrl+B 返回上一屏= 输出当前行的行号:f 输出文件名和当前行的行号V 调用vi编辑器!命令 调用Shell,并执行命令 q 退出more5.命令实例:实例1:显示文件中从第3行起的内容命令:more +3 log2012.log输出:[root@localhost test]# cat log2012.log 2012-012012-022012-032012-04-day12012-04-day22012-04-day3======[root@localhost test]# more +3 log2012.log 2012-032012-04-day12012-04-day22012-04-day3======[root@localhost test]# 实例2:从文件中查找第一个出现"day3"字符串的行,并从该处前两行开始显示输出 命令: more +/day3 log2012.log输出:[root@localhost test]# more +/day3 log2012.log ...skipping2012-04-day12012-04-day22012-04-day32012-052012-05-day1======[root@localhost test]#实例3:设定每屏显示行数 命令:more -5 log2012.log输出:[root@localhost test]# more -5 log2012.log 2012-012012-022012-032012-04-day12012-04-day2说明:如下图所示,最下面显示了该屏展示的内容占文件总行数的比例,按 Ctrl+F 或者 空格键 将会显示下一屏5条内容,百分比也会跟着变化。 实例4:列一个目录下的文件,由于内容太多,我们应该学会用more来分页显示。这得和管道 | 结合起来 命令:ls -l | more -5输出:[root@localhost test]# ls -l | more -5总计 36-rw-r--r-- 1 root root 308 11-01 16:49 log2012.log-rw-r--r-- 1 root root 33 10-28 16:54 log2013.log-rw-r--r-- 1 root root 127 10-28 16:51 log2014.loglrwxrwxrwx 1 root root 7 10-28 15:18 log_link.log -> log.log-rw-r--r-- 1 root root 25 10-28 17:02 log.log-rw-r--r-- 1 root root 37 10-28 17:07 log.txtdrwxr-xr-x 6 root root 4096 10-27 01:58 scfdrwxrwxrwx 2 root root 4096 10-28 14:47 test3drwxrwxrwx 2 root root 4096 10-28 14:47 test4说明:每页显示5个文件信息,按 Ctrl+F 或者 空格键 将会显示下5条文件信息3.less命令
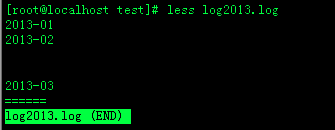
less 工 具也是对文件或其它输出进行分页显示的工具,应该说是linux正统查看文件内容的工具,功能极其强大。less 的用法比起 more 更加的有弹性。 在 more 的时候,我们并没有办法向前面翻, 只能往后面看,但若使用了 less 时,就可以使用 [pageup] [pagedown] 等按 键的功能来往前往后翻看文件,更容易用来查看一个文件的内容!除此之外,在 less 里头可以拥有更多的搜索功能,不止可以向下搜,也可以向上搜。1.命令格式:less [参数] 文件 2.命令功能:less 与 more 类似,但使用 less 可以随意浏览文件,而 more 仅能向前移动,却不能向后移动,而且 less 在查看之前不会加载整个文件。3.命令参数:-b <缓冲区大小> 设置缓冲区的大小-e 当文件显示结束后,自动离开-f 强迫打开特殊文件,例如外围设备代号、目录和二进制文件-g 只标志最后搜索的关键词-i 忽略搜索时的大小写-m 显示类似more命令的百分比-N 显示每行的行号-o <文件名> 将less 输出的内容在指定文件中保存起来-Q 不使用警告音-s 显示连续空行为一行-S 行过长时间将超出部分舍弃-x <数字> 将“tab”键显示为规定的数字空格/字符串:向下搜索“字符串”的功能?字符串:向上搜索“字符串”的功能n:重复前一个搜索(与 / 或 ? 有关)N:反向重复前一个搜索(与 / 或 ? 有关)b 向后翻一页d 向后翻半页h 显示帮助界面Q 退出less 命令u 向前滚动半页y 向前滚动一行空格键 滚动一行回车键 滚动一页[pagedown]: 向下翻动一页[pageup]: 向上翻动一页4.使用实例:实例1:查看文件命令:less log2013.log输出:![]() 实例2:ps查看进程信息并通过less分页显示 命令: ps -ef |less 输出:
实例2:ps查看进程信息并通过less分页显示 命令: ps -ef |less 输出:![]() 实例3:查看命令历史使用记录并通过less分页显示命令: history | less输出: [root@localhost test]# history | less 22 scp -r tomcat6.0.32 root@192.168.120.203:/opt/soft 23 cd .. 24 scp -r web root@192.168.120.203:/opt/ 25 cd soft 26 ls 27 scp -r jdk1.6.0_16/ root@192.168.120.203:/opt/soft 28 clear 29 vim /etc/profile 30 vim /etc/profile 31 cd tomcat6.0.32/bin/ 32 ls 33 ./shutdown.sh 34 ./startup.sh 35 vim startup.sh 36 ls 37 echo $JAVA_HOME 38 java 39 ls 40 ls 41 clear 42 cd /opt 43 ls 44 cp apache-tomcat-6.0.32.tar.gz soft/ 45 ls 46 rm -f apache-tomcat-6.0.32.tar.gz 47 ls 48 cd soft 49 ls 50 tar -vzf apache-tomcat-6.0.32.tar.gz 51 tar -vzfx apache-tomcat-6.0.32.tar.gz 52 tar -zxvf apache-tomcat-6.0.32.tar.gz 53 ls 54 cd apache-tomcat-6.0.32 55 ls 56 cd .. 57 mv apache-tomcat-6.0.32 tomcat6.0.32 58 ls 59 cd tomcat6.0.32/ 60 ls实例5:浏览多个文件 命令:Less log2013.log log2014.log输出:
实例3:查看命令历史使用记录并通过less分页显示命令: history | less输出: [root@localhost test]# history | less 22 scp -r tomcat6.0.32 root@192.168.120.203:/opt/soft 23 cd .. 24 scp -r web root@192.168.120.203:/opt/ 25 cd soft 26 ls 27 scp -r jdk1.6.0_16/ root@192.168.120.203:/opt/soft 28 clear 29 vim /etc/profile 30 vim /etc/profile 31 cd tomcat6.0.32/bin/ 32 ls 33 ./shutdown.sh 34 ./startup.sh 35 vim startup.sh 36 ls 37 echo $JAVA_HOME 38 java 39 ls 40 ls 41 clear 42 cd /opt 43 ls 44 cp apache-tomcat-6.0.32.tar.gz soft/ 45 ls 46 rm -f apache-tomcat-6.0.32.tar.gz 47 ls 48 cd soft 49 ls 50 tar -vzf apache-tomcat-6.0.32.tar.gz 51 tar -vzfx apache-tomcat-6.0.32.tar.gz 52 tar -zxvf apache-tomcat-6.0.32.tar.gz 53 ls 54 cd apache-tomcat-6.0.32 55 ls 56 cd .. 57 mv apache-tomcat-6.0.32 tomcat6.0.32 58 ls 59 cd tomcat6.0.32/ 60 ls实例5:浏览多个文件 命令:Less log2013.log log2014.log输出:![]() 说明:输入 :n后,切换到 log2014.log输入 :p 后,切换到log2013.log5.附加备注1.全屏导航ctrl + F - 向前移动一屏ctrl + B - 向后移动一屏ctrl + D - 向前移动半屏ctrl + U - 向后移动半屏 2.单行导航j - 向前移动一行k - 向后移动一行 3.其它导航G - 移动到最后一行g - 移动到第一行q / ZZ - 退出 less 命令 4.其它有用的命令v - 使用配置的编辑器编辑当前文件h - 显示 less 的帮助文档&pattern - 仅显示匹配模式的行,而不是整个文件 5.标记导航当使用 less 查看大文件时,可以在任何一个位置作标记,可以通过命令导航到标有特定标记的文本位置:ma - 使用 a 标记文本的当前位置'a - 导航到标记 a 处
说明:输入 :n后,切换到 log2014.log输入 :p 后,切换到log2013.log5.附加备注1.全屏导航ctrl + F - 向前移动一屏ctrl + B - 向后移动一屏ctrl + D - 向前移动半屏ctrl + U - 向后移动半屏 2.单行导航j - 向前移动一行k - 向后移动一行 3.其它导航G - 移动到最后一行g - 移动到第一行q / ZZ - 退出 less 命令 4.其它有用的命令v - 使用配置的编辑器编辑当前文件h - 显示 less 的帮助文档&pattern - 仅显示匹配模式的行,而不是整个文件 5.标记导航当使用 less 查看大文件时,可以在任何一个位置作标记,可以通过命令导航到标有特定标记的文本位置:ma - 使用 a 标记文本的当前位置'a - 导航到标记 a 处
 实例2:ps查看进程信息并通过less分页显示 命令: ps -ef |less 输出:
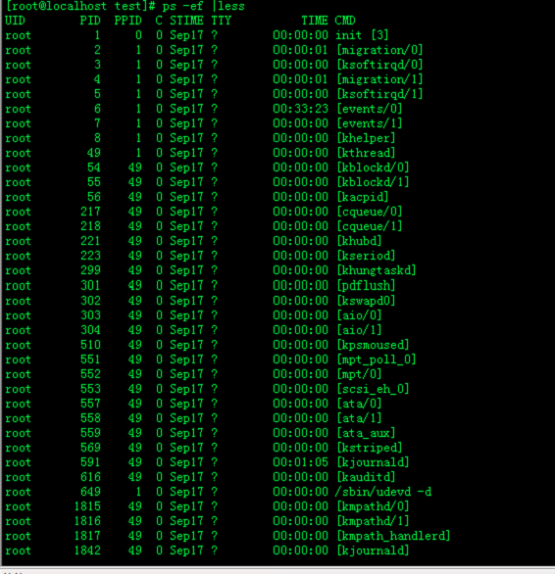 实例3:查看命令历史使用记录并通过less分页显示命令: history | less输出: [root@localhost test]# history | less 22 scp -r tomcat6.0.32 root@192.168.120.203:/opt/soft 23 cd .. 24 scp -r web root@192.168.120.203:/opt/ 25 cd soft 26 ls 27 scp -r jdk1.6.0_16/ root@192.168.120.203:/opt/soft 28 clear 29 vim /etc/profile 30 vim /etc/profile 31 cd tomcat6.0.32/bin/ 32 ls 33 ./shutdown.sh 34 ./startup.sh 35 vim startup.sh 36 ls 37 echo $JAVA_HOME 38 java 39 ls 40 ls 41 clear 42 cd /opt 43 ls 44 cp apache-tomcat-6.0.32.tar.gz soft/ 45 ls 46 rm -f apache-tomcat-6.0.32.tar.gz 47 ls 48 cd soft 49 ls 50 tar -vzf apache-tomcat-6.0.32.tar.gz 51 tar -vzfx apache-tomcat-6.0.32.tar.gz 52 tar -zxvf apache-tomcat-6.0.32.tar.gz 53 ls 54 cd apache-tomcat-6.0.32 55 ls 56 cd .. 57 mv apache-tomcat-6.0.32 tomcat6.0.32 58 ls 59 cd tomcat6.0.32/ 60 ls实例5:浏览多个文件 命令:Less log2013.log log2014.log输出:
 说明:输入 :n后,切换到 log2014.log输入 :p 后,切换到log2013.log5.附加备注1.全屏导航ctrl + F - 向前移动一屏ctrl + B - 向后移动一屏ctrl + D - 向前移动半屏ctrl + U - 向后移动半屏 2.单行导航j - 向前移动一行k - 向后移动一行 3.其它导航G - 移动到最后一行g - 移动到第一行q / ZZ - 退出 less 命令 4.其它有用的命令v - 使用配置的编辑器编辑当前文件h - 显示 less 的帮助文档&pattern - 仅显示匹配模式的行,而不是整个文件 5.标记导航当使用 less 查看大文件时,可以在任何一个位置作标记,可以通过命令导航到标有特定标记的文本位置:ma - 使用 a 标记文本的当前位置'a - 导航到标记 a 处
4.head命令
head 与 tail 就像它的名字一样的浅显易懂,它是用来显示开头或结尾某个数量的文字区块,head 用来显示档案的开头至标准输出中,而 tail 想当然尔就是看档案的结尾。 1.命令格式:head [参数]... [文件]... 2.命令功能:head 用来显示档案的开头至标准输出中,默认head命令打印其相应文件的开头10行。 3.命令参数:-q 隐藏文件名-v 显示文件名-c<字节> 显示字节数-n<行数> 显示的行数4.使用实例:实例1:显示文件的前n行命令:head -n 5 log2014.log输出:[root@localhost test]# cat log2014.log 2014-012014-022014-032014-042014-052014-062014-072014-082014-092014-102014-112014-12==============================[root@localhost test]# head -n 5 log2014.log 2014-012014-022014-032014-042014-05[root@localhost test]#实例2:显示文件前n个字节命令:head -c 20 log2014.log输出:[root@localhost test]# head -c 20 log2014.log2014-012014-022014[root@localhost test]#实例3:文件的除了最后n个字节以外的内容 命令:head -c -32 log2014.log输出:[root@localhost test]# head -c -32 log2014.log2014-012014-022014-032014-042014-052014-062014-072014-082014-092014-102014-112014-12[root@localhost test]#实例4:输出文件除了最后n行的全部内容命令:head -n -6 log2014.log输出:[root@localhost test]# head -n -6 log2014.log2014-012014-022014-032014-042014-052014-062014-07[root@localhost test]#
5. tail 命令
tail 命令从指定点开始将文件写到标准输出.使用tail命令的-f选项可以方便的查阅正在改变的日志文件,tail -f filename会把filename里最尾部的内容显示在屏幕上,并且不但刷新,使你看到最新的文件内容. 1.命令格式;tail[必要参数][选择参数][文件] 2.命令功能:用于显示指定文件末尾内容,不指定文件时,作为输入信息进行处理。常用查看日志文件。3.命令参数:-f 循环读取-q 不显示处理信息-v 显示详细的处理信息-c<数目> 显示的字节数-n<行数> 显示行数--pid=PID 与-f合用,表示在进程ID,PID死掉之后结束. -q, --quiet, --silent 从不输出给出文件名的首部 -s, --sleep-interval=S 与-f合用,表示在每次反复的间隔休眠S秒 4.使用实例:实例1:显示文件末尾内容命令:tail -n 5 log2014.log输出:[root@localhost test]# tail -n 5 log2014.log 2014-092014-102014-112014-12==============================[root@localhost test]#说明:显示文件最后5行内容实例2:循环查看文件内容命令:tail -f test.log输出:[root@localhost ~]# ping 192.168.120.204 > test.log &[1] 11891[root@localhost ~]# tail -f test.log PING 192.168.120.204 (192.168.120.204) 56(84) bytes of data.64 bytes from 192.168.120.204: icmp_seq=1 ttl=64 time=0.038 ms64 bytes from 192.168.120.204: icmp_seq=2 ttl=64 time=0.036 ms64 bytes from 192.168.120.204: icmp_seq=3 ttl=64 time=0.033 ms64 bytes from 192.168.120.204: icmp_seq=4 ttl=64 time=0.027 ms64 bytes from 192.168.120.204: icmp_seq=5 ttl=64 time=0.032 ms64 bytes from 192.168.120.204: icmp_seq=6 ttl=64 time=0.026 ms64 bytes from 192.168.120.204: icmp_seq=7 ttl=64 time=0.030 ms64 bytes from 192.168.120.204: icmp_seq=8 ttl=64 time=0.029 ms64 bytes from 192.168.120.204: icmp_seq=9 ttl=64 time=0.044 ms64 bytes from 192.168.120.204: icmp_seq=10 ttl=64 time=0.033 ms64 bytes from 192.168.120.204: icmp_seq=11 ttl=64 time=0.027 ms[root@localhost ~]#说明:ping 192.168.120.204 > test.log & //在后台ping远程主机。并输出文件到test.log;这种做法也使用于一个以上的档案监视。用Ctrl+c来终止。 实例3:从第5行开始显示文件命令:tail -n +5 log2014.log输出:[root@localhost test]# cat log2014.log 2014-012014-022014-032014-042014-052014-062014-072014-082014-092014-102014-112014-12==============================[root@localhost test]# tail -n +5 log2014.log2014-052014-062014-072014-082014-092014-102014-112014-12==============================
6. which命令
我们经常在linux要查找某个文件,但不知道放在哪里了,可以使用下面的一些命令来搜索:
which 查看可执行文件的位置。
whereis 查看文件的位置。
locate 配合数据库查看文件位置。
find 实际搜寻硬盘查询文件名称。which命令的作用是,在PATH变量指定的路径中,搜索某个系统命令的位置,并且返回第一个搜索结果。也就是说,使用which命令,就可以看到某个系统命令是否存在,以及执行的到底是哪一个位置的命令。 1.命令格式:which 可执行文件名称 2.命令功能:which指令会在PATH变量指定的路径中,搜索某个系统命令的位置,并且返回第一个搜索结果。3.命令参数:-n 指定文件名长度,指定的长度必须大于或等于所有文件中最长的文件名。-p 与-n参数相同,但此处的包括了文件的路径。-w 指定输出时栏位的宽度。-V 显示版本信息4.使用实例:实例1:查找文件、显示命令路径命令:which lsmod输出:[root@localhost ~]# which pwd/bin/pwd[root@localhost ~]# which adduser/usr/sbin/adduser[root@localhost ~]#说明:which 是根据使用者所配置的 PATH 变量内的目录去搜寻可运行档的!所以,不同的 PATH 配置内容所找到的命令当然不一样的!实例2:用 which 去找出 which命令: which which输出:[root@localhost ~]# which whichalias which='alias | /usr/bin/which --tty-only --read-alias --show-dot --show-tilde' /usr/bin/which[root@localhost ~]#说明:竟然会有两个 which ,其中一个是 alias 这就是所谓的『命令别名』,意思是输入 which 会等於后面接的那串命令!实例3:找出 cd 这个命令命令: which cd输出:![]() 说明:cd 这个常用的命令竟然找不到啊!为什么呢?这是因为 cd 是bash 内建的命令! 但是 which 默认是找 PATH 内所规范的目录,所以当然一定找不到的!
说明:cd 这个常用的命令竟然找不到啊!为什么呢?这是因为 cd 是bash 内建的命令! 但是 which 默认是找 PATH 内所规范的目录,所以当然一定找不到的!
which 查看可执行文件的位置。
whereis 查看文件的位置。
locate 配合数据库查看文件位置。
find 实际搜寻硬盘查询文件名称。which命令的作用是,在PATH变量指定的路径中,搜索某个系统命令的位置,并且返回第一个搜索结果。也就是说,使用which命令,就可以看到某个系统命令是否存在,以及执行的到底是哪一个位置的命令。 1.命令格式:which 可执行文件名称 2.命令功能:which指令会在PATH变量指定的路径中,搜索某个系统命令的位置,并且返回第一个搜索结果。3.命令参数:-n 指定文件名长度,指定的长度必须大于或等于所有文件中最长的文件名。-p 与-n参数相同,但此处的包括了文件的路径。-w 指定输出时栏位的宽度。-V 显示版本信息4.使用实例:实例1:查找文件、显示命令路径命令:which lsmod输出:[root@localhost ~]# which pwd/bin/pwd[root@localhost ~]# which adduser/usr/sbin/adduser[root@localhost ~]#说明:which 是根据使用者所配置的 PATH 变量内的目录去搜寻可运行档的!所以,不同的 PATH 配置内容所找到的命令当然不一样的!实例2:用 which 去找出 which命令: which which输出:[root@localhost ~]# which whichalias which='alias | /usr/bin/which --tty-only --read-alias --show-dot --show-tilde' /usr/bin/which[root@localhost ~]#说明:竟然会有两个 which ,其中一个是 alias 这就是所谓的『命令别名』,意思是输入 which 会等於后面接的那串命令!实例3:找出 cd 这个命令命令: which cd输出:
7.whereis命令
whereis命令只能用于程序名的搜索,而且只搜索二进制文件(参数-b)、man说明文件(参数-m)和源代码文件(参数-s)。如果省略参数,则返回所有信息。和 find相比,whereis查找的速度非常快,这是因为linux系统会将 系统内的所有文件都记录在一个数据库文件中,当使用whereis和下面即 将介绍的locate时,会从数据库中查找数据,而不是像find命令那样,通 过遍历硬盘来查找,效率自然会很高。 但是该数据库文件并不是实时更新,默认情况下时一星期更新一次,因此,我们在用whereis和locate 查找文件时,有时会找到已经被删除的数据,或者刚刚建立文件,却无法查找到,原因就是因为数据库文件没有被更新。 1.命令格式:whereis [-bmsu] [BMS 目录名 -f ] 文件名2.命令功能:whereis命令是定位可执行文件、源代码文件、帮助文件在文件系统中的位置。这些文件的属性应属于原始代码,二进制文件,或是帮助文件。whereis 程序还具有搜索源代码、指定备用搜索路径和搜索不寻常项的能力。3.命令参数:-b 定位可执行文件。
-m 定位帮助文件。
-s 定位源代码文件。
-u 搜索默认路径下除可执行文件、源代码文件、帮助文件以外的其它文件。
-B 指定搜索可执行文件的路径。
-M 指定搜索帮助文件的路径。
-S 指定搜索源代码文件的路径。
4.使用实例:
实例1:将和**文件相关的文件都查找出来
命令:
whereis svn
输出:
[root@localhost ~]# whereis tomcat
tomcat:
[root@localhost ~]# whereis svn
svn: /usr/bin/svn /usr/local/svn /usr/share/man/man1/svn.1.gz
说明:
tomcat没安装,找不出来,svn安装找出了很多相关文件
实例2:只将二进制文件 查找出来
命令:
whereis -b svn
输出:
[root@localhost ~]# whereis -b svn
svn: /usr/bin/svn /usr/local/svn
[root@localhost ~]# whereis -m svn
svn: /usr/share/man/man1/svn.1.gz
[root@localhost ~]# whereis -s svn
svn:
[root@localhost ~]#
说明:
whereis -m svn 查出说明文档路径,whereis -s svn 找source源文件。8.locate命令
locate 让使用者可以很快速的搜寻档案系统内是否有指定的档案。其方法是先建立一个包括系统内所有档案名称及路径的数据库,之后当寻找时就只需查询这个数据库,而不必实际深入档案系统之中了。在一般的 distribution 之中,数据库的建立都被放在 crontab 中自动执行。1.命令格式:Locate [选择参数] [样式]2.命令功能:locate 命令可以在搜寻数据库时快速找到档案,数据库由updatedb程序来更新,updatedb是由cron daemon周期性建立的,locate命令 在搜寻数据库时比由整个由硬盘资料来搜寻资料来得快,但较差劲的是locate所找到的档案若是最近才建立或 刚更名的,可能会找不到,在内定值 中,updatedb每天会跑一次,可以由修改crontab来更新设定值。(etc/crontab)locate 指定用在搜寻符合条件的档案,它会去储存档案与目录名称的数据库内,寻找合乎范本样式条件的档案或目录录,可以使用特殊字元(如”*” 或”?”等)来指 定范本样式,如指定范本为kcpa*ner, locate会找出所有起始字串为kcpa且结尾为ner的档案或目录,如名称为kcpartner若目录 录名称为kcpa_ner则会列出该目录下包括 子目录在内的所有档案。locate 指令和find找寻档案的功能类似,但locate是透过update程序将硬盘中的所有档案和目录资料先建立一个索引数据库,在 执行loacte时直 接找该索引,查询速度会较快,索引数据库一般是由操作系统管理,但也可以直接下达update强迫系统立即修改索引数据库。3.命令参数:-e 将排除在寻找的范围之外。-1 如果 是 1.则启动安全模式。在安全模式下,使用者不会看到权限无法看到 的档案。这会始速度减慢,因为 locate 必须至实际的档案系统中取得档案的 权限资料。-f 将特定的档案系统排除在外,例如我们没有到理要把 proc 档案系统中的档案 放在资料库中。-q 安静模式,不会显示任何错误讯息。-n 至多显示 n个输出。-r 使用正规运算式 做寻找的条件。-o 指定资料库存的名称。-d 指定资料库的路径-h 显示辅助讯息-V 显示程式的版本讯息4.使用实例:实例1:查找和pwd相关的所有文件命令:locate pwd输出:peida-VirtualBox ~ # locate pwd/bin/pwd/etc/.pwd.lock/sbin/unix_chkpwd/usr/bin/pwdx/usr/include/pwd.h/usr/lib/python2.7/dist-packages/twisted/python/fakepwd.py/usr/lib/python2.7/dist-packages/twisted/python/fakepwd.pyc/usr/lib/python2.7/dist-packages/twisted/python/test/test_fakepwd.py/usr/lib/python2.7/dist-packages/twisted/python/test/test_fakepwd.pyc/usr/lib/syslinux/pwd.c32/usr/share/help/C/empathy/irc-join-pwd.page/usr/share/help/ca/empathy/irc-join-pwd.page/usr/share/help/cs/empathy/irc-join-pwd.page/usr/share/help/de/empathy/irc-join-pwd.page/usr/share/help/el/empathy/irc-join-pwd.page实例2: 搜索etc目录下所有以sh开头的文件 命令:locate /etc/sh输出:peida-VirtualBox ~ # locate /etc/sh/etc/shadow/etc/shadow-/etc/shellspeida-VirtualBox ~ #实例3:搜索etc目录下,所有以m开头的文件命令:locate /etc/m输出:peida-VirtualBox ~ # locate /etc/m/etc/magic/etc/magic.mime/etc/mailcap/etc/mailcap.order/etc/manpath.config/etc/mate-settings-daemon
9.find命令
Linux 下find命令在目录结构中搜索文件,并执行指定的操作。Linux下find命令提供了相当多的查找条件,功能很强大。由于find具有强大的功能,所 以它的选项也很多,其中大部分选项都值得我们花时间来了解一下。即使系统中含有网络文件系统( NFS),find命令在该文件系统中同样有效,只你具有 相应的权限。 在运行一个非常消耗资源的find命令时,很多人都倾向于把它放在后台执行,因为遍历一个大的文件系统可能会花费很长的时间(这里是指 30G字节以上的文件系统)。1.命令格式:find pathname -options [-print -exec -ok ...]2.命令功能:用于在文件树种查找文件,并作出相应的处理 3.命令参数:pathname: find命令所查找的目录路径。例如用.来表示当前目录,用/来表示系统根目录。 -print: find命令将匹配的文件输出到标准输出。 -exec: find命令对匹配的文件执行该参数所给出的shell命令。相应命令的形式为'command' { } \;,注意{ }和\;之间的空格。 -ok: 和-exec的作用相同,只不过以一种更为安全的模式来执行该参数所给出的shell命令,在执行每一个命令之前,都会给出提示,让用户来确定是否执行。4.命令选项:-name 按照文件名查找文件。-perm 按照文件权限来查找文件。-prune 使用这一选项可以使find命令不在当前指定的目录中查找,如果同时使用-depth选项,那么-prune将被find命令忽略。-user 按照文件属主来查找文件。-group 按照文件所属的组来查找文件。-mtime -n +n 按照文件的更改时间来查找文件, - n表示文件更改时间距现在n天以内,+ n表示文件更改时间距现在n天以前。find命令还有-atime和-ctime 选项,但它们都和-m time选项。-nogroup 查找无有效所属组的文件,即该文件所属的组在/etc/groups中不存在。-nouser 查找无有效属主的文件,即该文件的属主在/etc/passwd中不存在。-newer file1 ! file2 查找更改时间比文件file1新但比文件file2旧的文件。-type 查找某一类型的文件,诸如:b - 块设备文件。d - 目录。c - 字符设备文件。p - 管道文件。l - 符号链接文件。f - 普通文件。-size n:[c] 查找文件长度为n块的文件,带有c时表示文件长度以字节计。-depth:在查找文件时,首先查找当前目录中的文件,然后再在其子目录中查找。-fstype:查找位于某一类型文件系统中的文件,这些文件系统类型通常可以在配置文件/etc/fstab中找到,该配置文件中包含了本系统中有关文件系统的信息。-mount:在查找文件时不跨越文件系统mount点。-follow:如果find命令遇到符号链接文件,就跟踪至链接所指向的文件。-cpio:对匹配的文件使用cpio命令,将这些文件备份到磁带设备中。另外,下面三个的区别:-amin n 查找系统中最后N分钟访问的文件-atime n 查找系统中最后n*24小时访问的文件-cmin n 查找系统中最后N分钟被改变文件状态的文件-ctime n 查找系统中最后n*24小时被改变文件状态的文件-mmin n 查找系统中最后N分钟被改变文件数据的文件-mtime n 查找系统中最后n*24小时被改变文件数据的文件5.使用实例:实例1:查找指定时间内修改过的文件 命令: find -atime -2输出:[root@peidachang ~]# find -atime -2../logs/monitor./.bashrc./.bash_profile./.bash_history说明:超找48小时内修改过的文件 实例2:根据关键字查找 命令:find . -name "*.log"输出:[root@localhost test]# find . -name "*.log" ./log_link.log./log2014.log./test4/log3-2.log./test4/log3-3.log./test4/log3-1.log./log2013.log./log2012.log./log.log./test5/log5-2.log./test5/log5-3.log./test5/log.log./test5/log5-1.log./test5/test3/log3-2.log./test5/test3/log3-3.log./test5/test3/log3-1.log./test3/log3-2.log./test3/log3-3.log./test3/log3-1.log说明:在当前目录查找 以.log结尾的文件。 ". "代表当前目录 实例3:按照目录或文件的权限来查找文件命令:find /opt/soft/test/ -perm 777输出:[root@localhost test]# find /opt/soft/test/ -perm 777/opt/soft/test/log_link.log/opt/soft/test/test4/opt/soft/test/test5/test3/opt/soft/test/test3说明: 查找/opt/soft/test/目录下 权限为 777的文件实例4:按类型查找 命令:find . -type f -name "*.log"输出:[root@localhost test]# find . -type f -name "*.log"./log2014.log./test4/log3-2.log./test4/log3-3.log./test4/log3-1.log./log2013.log./log2012.log./log.log./test5/log5-2.log./test5/log5-3.log./test5/log.log./test5/log5-1.log./test5/test3/log3-2.log./test5/test3/log3-3.log./test5/test3/log3-1.log./test3/log3-2.log./test3/log3-3.log./test3/log3-1.log[root@localhost test]#说明:查找当目录,以.log结尾的普通文件 实例5:查找当前所有目录并排序命令:find . -type d | sort输出:[root@localhost test]# find . -type d | sort../scf./scf/bin./scf/doc./scf/lib./scf/service./scf/service/deploy./scf/service/deploy/info./scf/service/deploy/product./test3./test4./test5./test5/test3[root@localhost test]#实例6:按大小查找文件命令:find . -size +1000c -print输出:[root@localhost test]# find . -size +1000c -print../test4./scf./scf/lib./scf/service./scf/service/deploy./scf/service/deploy/product./scf/service/deploy/info./scf/doc./scf/bin./log2012.log./test5./test5/test3./test3[root@localhost test]#说明:查找当前目录大于1K的文件find命令之execfind是我们很常用的一个Linux命令,但是我们一般查找出来的并不仅仅是看看而已,还会有进一步的操作,这个时候exec的作用就显现出来了。 exec解释:-exec 参数后面跟的是command命令,它的终止是以;为结束标志的,所以这句命令后面的分号是不可缺少的,考虑到各个系统中分号会有不同的意义,所以前面加反斜杠。{} 花括号代表前面find查找出来的文件名。使用find时,只要把想要的操作写在一个文件里,就可以用exec来配合find查找,很方便的。在 有些操作系统中只允许-exec选项执行诸如l s或ls -l这样的命令。大多数用户使用这一选项是为了查找旧文件并删除它们。建议在真正执行rm命令 删除文件之前,最好先用ls命令看一下,确认它们是所要删除的文件。 exec选项后面跟随着所要执行的命令或脚本,然后是一对儿{ },一个空格和一 个\,最后是一个分号。为了使用exec选项,必须要同时使用print选项。如果验证一下find命令,会发现该命令只输出从当前路径起的相对路径及文 件名。实例1:ls -l命令放在find命令的-exec选项中 命令:find . -type f -exec ls -l {} \;输出: [root@localhost test]# find . -type f -exec ls -l {} \; -rw-r--r-- 1 root root 127 10-28 16:51 ./log2014.log-rw-r--r-- 1 root root 0 10-28 14:47 ./test4/log3-2.log-rw-r--r-- 1 root root 0 10-28 14:47 ./test4/log3-3.log-rw-r--r-- 1 root root 0 10-28 14:47 ./test4/log3-1.log-rw-r--r-- 1 root root 33 10-28 16:54 ./log2013.log-rw-r--r-- 1 root root 302108 11-03 06:19 ./log2012.log-rw-r--r-- 1 root root 25 10-28 17:02 ./log.log-rw-r--r-- 1 root root 37 10-28 17:07 ./log.txt-rw-r--r-- 1 root root 0 10-28 14:47 ./test3/log3-2.log-rw-r--r-- 1 root root 0 10-28 14:47 ./test3/log3-3.log-rw-r--r-- 1 root root 0 10-28 14:47 ./test3/log3-1.log[root@localhost test]#说明: 上面的例子中,find命令匹配到了当前目录下的所有普通文件,并在-exec选项中使用ls -l命令将它们列出。实例2:在目录中查找更改时间在n日以前的文件并删除它们命令:find . -type f -mtime +14 -exec rm {} \; 输出:[root@localhost test]# ll总计 328-rw-r--r-- 1 root root 302108 11-03 06:19 log2012.log-rw-r--r-- 1 root root 33 10-28 16:54 log2013.log-rw-r--r-- 1 root root 127 10-28 16:51 log2014.loglrwxrwxrwx 1 root root 7 10-28 15:18 log_link.log -> log.log-rw-r--r-- 1 root root 25 10-28 17:02 log.log-rw-r--r-- 1 root root 37 10-28 17:07 log.txtdrwxr-xr-x 6 root root 4096 10-27 01:58 scfdrwxrwxrwx 2 root root 4096 10-28 14:47 test3drwxrwxrwx 2 root root 4096 10-28 14:47 test4[root@localhost test]# find . -type f -mtime +14 -exec rm {} \;[root@localhost test]# ll总计 312-rw-r--r-- 1 root root 302108 11-03 06:19 log2012.loglrwxrwxrwx 1 root root 7 10-28 15:18 log_link.log -> log.logdrwxr-xr-x 6 root root 4096 10-27 01:58 scfdrwxrwxrwx 2 root root 4096 11-12 19:32 test3drwxrwxrwx 2 root root 4096 11-12 19:32 test4[root@localhost test]# 说明:在shell中用任何方式删除文件之前,应当先查看相应的文件,一定要小心!当使用诸如mv或rm命令时,可以使用-exec选项的安全模式。它将在对每个匹配到的文件进行操作之前提示你。 实例3:在目录中查找更改时间在n日以前的文件并删除它们,在删除之前先给出提示命令:find . -name "*.log" -mtime +5 -ok rm {} \;输出:[root@localhost test]# ll总计 312-rw-r--r-- 1 root root 302108 11-03 06:19 log2012.loglrwxrwxrwx 1 root root 7 10-28 15:18 log_link.log -> log.logdrwxr-xr-x 6 root root 4096 10-27 01:58 scfdrwxrwxrwx 2 root root 4096 11-12 19:32 test3drwxrwxrwx 2 root root 4096 11-12 19:32 test4[root@localhost test]# find . -name "*.log" -mtime +5 -ok rm {} \;< rm ... ./log_link.log > ? y< rm ... ./log2012.log > ? n[root@localhost test]# ll总计 312-rw-r--r-- 1 root root 302108 11-03 06:19 log2012.logdrwxr-xr-x 6 root root 4096 10-27 01:58 scfdrwxrwxrwx 2 root root 4096 11-12 19:32 test3drwxrwxrwx 2 root root 4096 11-12 19:32 test4[root@localhost test]#说明:在上面的例子中, find命令在当前目录中查找所有文件名以.log结尾、更改时间在5日以上的文件,并删除它们,只不过在删除之前先给出提示。 按y键删除文件,按n键不删除。 实例4:-exec中使用grep命令命令:find /etc -name "passwd*" -exec grep "root" {} \;输出:[root@localhost test]# find /etc -name "passwd*" -exec grep "root" {} \;root:x:0:0:root:/root:/bin/bashroot:x:0:0:root:/root:/bin/bash[root@localhost test]#说明:任何形式的命令都可以在-exec选项中使用。 在上面的例子中我们使用grep命令。find命令首先匹配所有文件名为“ passwd*”的文件,例如passwd、passwd.old、passwd.bak,然后执行grep命令看看在这些文件中是否存在一个root用户。实例5:查找文件移动到指定目录 命令:find . -name "*.log" -exec mv {} .. \;输出:[root@localhost test]# ll总计 12drwxr-xr-x 6 root root 4096 10-27 01:58 scfdrwxrwxr-x 2 root root 4096 11-12 22:49 test3drwxrwxr-x 2 root root 4096 11-12 19:32 test4[root@localhost test]# cd test3/[root@localhost test3]# ll总计 304-rw-r--r-- 1 root root 302108 11-03 06:19 log2012.log-rw-r--r-- 1 root root 61 11-12 22:44 log2013.log-rw-r--r-- 1 root root 0 11-12 22:25 log2014.log[root@localhost test3]# find . -name "*.log" -exec mv {} .. \;[root@localhost test3]# ll总计 0[root@localhost test3]# cd ..[root@localhost test]# ll总计 316-rw-r--r-- 1 root root 302108 11-03 06:19 log2012.log-rw-r--r-- 1 root root 61 11-12 22:44 log2013.log-rw-r--r-- 1 root root 0 11-12 22:25 log2014.logdrwxr-xr-x 6 root root 4096 10-27 01:58 scfdrwxrwxr-x 2 root root 4096 11-12 22:50 test3drwxrwxr-x 2 root root 4096 11-12 19:32 test4[root@localhost test]#实例6:用exec选项执行cp命令 命令:find . -name "*.log" -exec cp {} test3 \;输出:[root@localhost test3]# ll总计 0[root@localhost test3]# cd ..[root@localhost test]# ll总计 316-rw-r--r-- 1 root root 302108 11-03 06:19 log2012.log-rw-r--r-- 1 root root 61 11-12 22:44 log2013.log-rw-r--r-- 1 root root 0 11-12 22:25 log2014.logdrwxr-xr-x 6 root root 4096 10-27 01:58 scfdrwxrwxr-x 2 root root 4096 11-12 22:50 test3drwxrwxr-x 2 root root 4096 11-12 19:32 test4[root@localhost test]# find . -name "*.log" -exec cp {} test3 \;cp: “./test3/log2014.log” 及 “test3/log2014.log” 为同一文件cp: “./test3/log2013.log” 及 “test3/log2013.log” 为同一文件cp: “./test3/log2012.log” 及 “test3/log2012.log” 为同一文件[root@localhost test]# cd test3[root@localhost test3]# ll总计 304-rw-r--r-- 1 root root 302108 11-12 22:54 log2012.log-rw-r--r-- 1 root root 61 11-12 22:54 log2013.log-rw-r--r-- 1 root root 0 11-12 22:54 log2014.log[root@localhost test3]# find命令之xargs
在 使用 find命令的-exec选项处理匹配到的文件时, find命令将所有匹配到的文件一起传递给exec执行。但有些系统对能够传递给exec的命 令长度有限制,这样在find命令运行几分钟之后,就会出现溢出错误。错误信息通常是“参数列太长”或“参数列溢出”。这就是xargs命令的用处所在, 特别是与find命令一起使用。 find命令把匹配到的文件传递给xargs命令,而xargs命令每次只获取一部分文件而不是全部,不像-exec选项那样。这样它可以先处理最先获取的一部分文件,然后是下一批,并如此继续下去。 在 有些系统中,使用-exec选项会为处理每一个匹配到的文件而发起一个相应的进程,并非将匹配到的文件全部作为参数一次执行;这样在有些情况下就会出现进 程过多,系统性能下降的问题,因而效率不高; 而使用xargs命令则只有一个进程。另外,在使用xargs命令时,究竟是一次获取所有的参数,还是分批 取得参数,以及每一次获取参数的数目都会根据该命令的选项及系统内核中相应的可调参数来确定。使用实例:实例1: 查找系统中的每一个普通文件,然后使用xargs命令来测试它们分别属于哪类文件 命令:find . -type f -print | xargs file输出:[root@localhost test]# ll总计 312-rw-r--r-- 1 root root 302108 11-03 06:19 log2012.log-rw-r--r-- 1 root root 0 11-12 22:25 log2013.log-rw-r--r-- 1 root root 0 11-12 22:25 log2014.logdrwxr-xr-x 6 root root 4096 10-27 01:58 scfdrwxrwxrwx 2 root root 4096 11-12 19:32 test3drwxrwxrwx 2 root root 4096 11-12 19:32 test4[root@localhost test]# find . -type f -print | xargs file./log2014.log: empty./log2013.log: empty./log2012.log: ASCII text[root@localhost test]#实例2:在整个系统中查找内存信息转储文件(core dump) ,然后把结果保存到/tmp/core.log 文件中命令: find / -name "core" -print | xargs echo "" >/tmp/core.log输出:[root@localhost test]# find / -name "core" -print | xargs echo "" >/tmp/core.log[root@localhost test]# cd /tmp[root@localhost tmp]# ll总计 16-rw-r--r-- 1 root root 1524 11-12 22:29 core.logdrwx------ 2 root root 4096 11-12 22:24 ssh-TzcZDx1766drwx------ 2 root root 4096 11-12 22:28 ssh-ykiRPk1815drwx------ 2 root root 4096 11-03 07:11 vmware-root实例3:在当前目录下查找所有用户具有读、写和执行权限的文件,并收回相应的写权限命令:find . -perm -7 -print | xargs chmod o-w输出:[root@localhost test]# ll总计 312-rw-r--r-- 1 root root 302108 11-03 06:19 log2012.log-rw-r--r-- 1 root root 0 11-12 22:25 log2013.log-rw-r--r-- 1 root root 0 11-12 22:25 log2014.logdrwxr-xr-x 6 root root 4096 10-27 01:58 scfdrwxrwxrwx 2 root root 4096 11-12 19:32 test3drwxrwxrwx 2 root root 4096 11-12 19:32 test4[root@localhost test]# find . -perm -7 -print | xargs chmod o-w[root@localhost test]# ll总计 312-rw-r--r-- 1 root root 302108 11-03 06:19 log2012.log-rw-r--r-- 1 root root 0 11-12 22:25 log2013.log-rw-r--r-- 1 root root 0 11-12 22:25 log2014.logdrwxr-xr-x 6 root root 4096 10-27 01:58 scfdrwxrwxr-x 2 root root 4096 11-12 19:32 test3drwxrwxr-x 2 root root 4096 11-12 19:32 test4[root@localhost test]#说明:执行命令后,文件夹scf、test3和test4的权限都发生改变实例4:用grep命令在所有的普通文件中搜索hostname这个词命令:find . -type f -print | xargs grep "hostname"输出:[root@localhost test]# find . -type f -print | xargs grep "hostname"./log2013.log:hostnamebaidu=baidu.com./log2013.log:hostnamesina=sina.com./log2013.log:hostnames=true[root@localhost test]#实例5:用grep命令在当前目录下的所有普通文件中搜索hostnames这个词命令:find . -name \* -type f -print | xargs grep "hostnames"输出:[root@peida test]# find . -name \* -type f -print | xargs grep "hostnames"./log2013.log:hostnamesina=sina.com./log2013.log:hostnames=true[root@localhost test]#说明:注意,在上面的例子中, \用来取消find命令中的*在shell中的特殊含义。 实例6:使用xargs执行mv 命令:find . -name "*.log" | xargs -i mv {} test4输出:[root@localhost test]# ll总计 316-rw-r--r-- 1 root root 302108 11-03 06:19 log2012.log-rw-r--r-- 1 root root 61 11-12 22:44 log2013.log-rw-r--r-- 1 root root 0 11-12 22:25 log2014.logdrwxr-xr-x 6 root root 4096 10-27 01:58 scfdrwxrwxr-x 2 root root 4096 11-12 22:54 test3drwxrwxr-x 2 root root 4096 11-12 19:32 test4[root@localhost test]# cd test4/[root@localhost test4]# ll总计 0[root@localhost test4]# cd ..[root@localhost test]# find . -name "*.log" | xargs -i mv {} test4[root@localhost test]# ll总计 12drwxr-xr-x 6 root root 4096 10-27 01:58 scfdrwxrwxr-x 2 root root 4096 11-13 05:50 test3drwxrwxr-x 2 root root 4096 11-13 05:50 test4[root@localhost test]# cd test4/[root@localhost test4]# ll总计 304-rw-r--r-- 1 root root 302108 11-12 22:54 log2012.log-rw-r--r-- 1 root root 61 11-12 22:54 log2013.log-rw-r--r-- 1 root root 0 11-12 22:54 log2014.log[root@localhost test4]#实例7:find后执行xargs提示xargs: argument line too long解决方法:命令:find . -type f -atime +0 -print0 | xargs -0 -l1 -t rm -f输出:[root@pd test4]# find . -type f -atime +0 -print0 | xargs -0 -l1 -t rm -frm -f [root@pdtest4]#说明:-l1是一次处理一个;-t是处理之前打印出命令 实例8:使用-i参数默认的前面输出用{}代替,-I参数可以指定其他代替字符,如例子中的[] 命令:输出:[root@localhost test]# ll总计 12drwxr-xr-x 6 root root 4096 10-27 01:58 scfdrwxrwxr-x 2 root root 4096 11-13 05:50 test3drwxrwxr-x 2 root root 4096 11-13 05:50 test4[root@localhost test]# cd test4[root@localhost test4]# find . -name "file" | xargs -I [] cp [] ..[root@localhost test4]# ll总计 304-rw-r--r-- 1 root root 302108 11-12 22:54 log2012.log-rw-r--r-- 1 root root 61 11-12 22:54 log2013.log-rw-r--r-- 1 root root 0 11-12 22:54 log2014.log[root@localhost test4]# cd ..[root@localhost test]# ll总计 316-rw-r--r-- 1 root root 302108 11-13 06:03 log2012.log-rw-r--r-- 1 root root 61 11-13 06:03 log2013.log-rw-r--r-- 1 root root 0 11-13 06:03 log2014.logdrwxr-xr-x 6 root root 4096 10-27 01:58 scfdrwxrwxr-x 2 root root 4096 11-13 05:50 test3drwxrwxr-x 2 root root 4096 11-13 05:50 test4[root@localhost test]#说明:使用-i参数默认的前面输出用{}代替,-I参数可以指定其他代替字符,如例子中的[] 实例9:xargs的-p参数的使用 命令:find . -name "*.log" | xargs -p -i mv {} ..输出:[root@localhost test3]# ll总计 0-rw-r--r-- 1 root root 0 11-13 06:06 log2015.log[root@localhost test3]# cd ..[root@localhost test]# ll总计 316-rw-r--r-- 1 root root 302108 11-13 06:03 log2012.log-rw-r--r-- 1 root root 61 11-13 06:03 log2013.log-rw-r--r-- 1 root root 0 11-13 06:03 log2014.logdrwxr-xr-x 6 root root 4096 10-27 01:58 scfdrwxrwxr-x 2 root root 4096 11-13 06:06 test3drwxrwxr-x 2 root root 4096 11-13 05:50 test4[root@localhost test]# cd test3[root@localhost test3]# find . -name "*.log" | xargs -p -i mv {} ..mv ./log2015.log .. ?...y[root@localhost test3]# ll总计 0[root@localhost test3]# cd ..[root@localhost test]# ll总计 316-rw-r--r-- 1 root root 302108 11-13 06:03 log2012.log-rw-r--r-- 1 root root 61 11-13 06:03 log2013.log-rw-r--r-- 1 root root 0 11-13 06:03 log2014.log-rw-r--r-- 1 root root 0 11-13 06:06 log2015.logdrwxr-xr-x 6 root root 4096 10-27 01:58 scfdrwxrwxr-x 2 root root 4096 11-13 06:08 test3drwxrwxr-x 2 root root 4096 11-13 05:50 test4[root@localhost test]#说明:-p参数会提示让你确认是否执行后面的命令,y执行,n不执行。find命令参数详解
find一些常用参数的一些常用实例和一些具体用法和注意事项。1.使用name选项:文 件名选项是find命令最常用的选项,要么单独使用该选项,要么和其他选项一起使用。 可以使用某种文件名模式来匹配文件,记住要用引号将文件名模式引 起来。 不管当前路径是什么,如果想要在自己的根目录$HOME中查找文件名符合*.log的文件,使用~作为 'pathname'参数,波浪号~代 表了你的$HOME目录。find ~ -name "*.log" -print 想要在当前目录及子目录中查找所有的‘ *.log‘文件,可以用: find . -name "*.log" -print 想要的当前目录及子目录中查找文件名以一个大写字母开头的文件,可以用: find . -name "[A-Z]*" -print 想要在/etc目录中查找文件名以host开头的文件,可以用: find /etc -name "host*" -print 想要查找$HOME目录中的文件,可以用: find ~ -name "*" -print 或find . -print 要想让系统高负荷运行,就从根目录开始查找所有的文件。 find / -name "*" -print 如果想在当前目录查找文件名以一个个小写字母开头,最后是4到9加上.log结束的文件: 命令:find . -name "[a-z]*[4-9].log" -print输出:[root@localhost test]# ll总计 316-rw-r--r-- 1 root root 302108 11-13 06:03 log2012.log-rw-r--r-- 1 root root 61 11-13 06:03 log2013.log-rw-r--r-- 1 root root 0 11-13 06:03 log2014.log-rw-r--r-- 1 root root 0 11-13 06:06 log2015.logdrwxr-xr-x 6 root root 4096 10-27 01:58 scfdrwxrwxr-x 2 root root 4096 11-13 06:08 test3drwxrwxr-x 2 root root 4096 11-13 05:50 test4[root@localhost test]# find . -name "[a-z]*[4-9].log" -print./log2014.log./log2015.log./test4/log2014.log[root@localhost test]#2.用perm选项:按照文件权限模式用-perm选项,按文件权限模式来查找文件的话。最好使用八进制的权限表示法。 如在当前目录下查找文件权限位为755的文件,即文件属主可以读、写、执行,其他用户可以读、执行的文件,可以用: [root@localhost test]# find . -perm 755 -print../scf./scf/lib./scf/service./scf/service/deploy./scf/service/deploy/product./scf/service/deploy/info./scf/doc./scf/bin[root@localhost test]# 还有一种表达方法:在八进制数字前面要加一个横杠-,表示都匹配,如-007就相当于777,-005相当于555,命令:find . -perm -005输出:[root@localhost test]# ll总计 316-rw-r--r-- 1 root root 302108 11-13 06:03 log2012.log-rw-r--r-- 1 root root 61 11-13 06:03 log2013.log-rw-r--r-- 1 root root 0 11-13 06:03 log2014.log-rw-r--r-- 1 root root 0 11-13 06:06 log2015.logdrwxr-xr-x 6 root root 4096 10-27 01:58 scfdrwxrwxr-x 2 root root 4096 11-13 06:08 test3drwxrwxr-x 2 root root 4096 11-13 05:50 test4[root@localhost test]# find . -perm -005../test4./scf./scf/lib./scf/service./scf/service/deploy./scf/service/deploy/product./scf/service/deploy/info./scf/doc./scf/bin./test3[root@localhost test]#3.忽略某个目录:如 果在查找文件时希望忽略某个目录,因为你知道那个目录中没有你所要查找的文件,那么可以使用-prune选项来指出需要忽略的目录。在使用-prune选 项时要当心,因为如果你同时使用了-depth选项,那么-prune选项就会被find命令忽略。如果希望在test目录下查找文件,但不希望在 test/test3目录下查找,可以用: 命令:find test -path "test/test3" -prune -o -print输出:[root@localhost soft]# find test -path "test/test3" -prune -o -printtesttest/log2014.logtest/log2015.logtest/test4test/test4/log2014.logtest/test4/log2013.logtest/test4/log2012.logtest/scftest/scf/libtest/scf/servicetest/scf/service/deploytest/scf/service/deploy/producttest/scf/service/deploy/infotest/scf/doctest/scf/bintest/log2013.logtest/log2012.log[root@localhost soft]#4.使用find查找文件的时候怎么避开某个文件目录: 实例1:在test 目录下查找不在test4子目录之内的所有文件命令:find test -path "test/test4" -prune -o -print输出:[root@localhost soft]# find testtesttest/log2014.logtest/log2015.logtest/test4test/test4/log2014.logtest/test4/log2013.logtest/test4/log2012.logtest/scftest/scf/libtest/scf/servicetest/scf/service/deploytest/scf/service/deploy/producttest/scf/service/deploy/infotest/scf/doctest/scf/bintest/log2013.logtest/log2012.logtest/test3[root@localhost soft]# find test -path "test/test4" -prune -o -printtesttest/log2014.logtest/log2015.logtest/scftest/scf/libtest/scf/servicetest/scf/service/deploytest/scf/service/deploy/producttest/scf/service/deploy/infotest/scf/doctest/scf/bintest/log2013.logtest/log2012.logtest/test3[root@localhost soft]#说明:find [-path ..] [expression] 在路径列表的后面的是表达式 -path "test" -prune -o -print 是 -path "test" -a -prune -o -print 的简写表达式按顺序求值, -a 和 -o 都是短路求值,与 shell 的 && 和 || 类似如果 -path "test" 为 真,则求值 -prune , -prune 返回真,与逻辑表达式为真;否则不求值 -prune,与逻辑表达式为假。如 果 -path "test" -a -prune 为假,则求值 -print ,-print返回真,或逻辑表达式为真;否则不求值 -print, 或逻辑表达式为真。 这个表达式组合特例可以用伪码写为:if -path "test" then -prune else -print 实例2:避开多个文件夹:命令:find test \( -path test/test4 -o -path test/test3 \) -prune -o -print 输出:[root@localhost soft]# find test \( -path test/test4 -o -path test/test3 \) -prune -o -printtesttest/log2014.logtest/log2015.logtest/scftest/scf/libtest/scf/servicetest/scf/service/deploytest/scf/service/deploy/producttest/scf/service/deploy/infotest/scf/doctest/scf/bintest/log2013.logtest/log2012.log[root@localhost soft]# 说明:圆括号表示表达式的结合。 \ 表示引用,即指示 shell 不对后面的字符作特殊解释,而留给 find 命令去解释其意义。 实例3:查找某一确定文件,-name等选项加在-o 之后命令:find test \(-path test/test4 -o -path test/test3 \) -prune -o -name "*.log" -print输出:[root@localhost soft]# find test \( -path test/test4 -o -path test/test3 \) -prune -o -name "*.log" -printtest/log2014.logtest/log2015.logtest/log2013.logtest/log2012.log[root@localhost soft]#5.使用user和nouser选项:按文件属主查找文件:实例1:在$HOME目录中查找文件属主为peida的文件 命令:find ~ -user peida -print 实例2:在/etc目录下查找文件属主为peida的文件: 命令:find /etc -user peida -print 说明:实例3:为了查找属主帐户已经被删除的文件,可以使用-nouser选项。在/home目录下查找所有的这类文件命令:find /home -nouser -print说明:这样就能够找到那些属主在/etc/passwd文件中没有有效帐户的文件。在使用-nouser选项时,不必给出用户名; find命令能够为你完成相应的工作。6.使用group和nogroup选项:就像user和nouser选项一样,针对文件所属于的用户组, find命令也具有同样的选项,为了在/apps目录下查找属于gem用户组的文件,可以用: find /apps -group gem -print 要查找没有有效所属用户组的所有文件,可以使用nogroup选项。下面的find命令从文件系统的根目录处查找这样的文件:find / -nogroup-print7.按照更改时间或访问时间等查找文件:如果希望按照更改时间来查找文件,可以使用mtime,atime或ctime选项。如果系统突然没有可用空间了,很有可能某一个文件的长度在此期间增长迅速,这时就可以用mtime选项来查找这样的文件。 用减号-来限定更改时间在距今n日以内的文件,而用加号+来限定更改时间在距今n日以前的文件。 希望在系统根目录下查找更改时间在5日以内的文件,可以用:find / -mtime -5 -print为了在/var/adm目录下查找更改时间在3日以前的文件,可以用:find /var/adm -mtime +3 -print8.查找比某个文件新或旧的文件:如果希望查找更改时间比某个文件新但比另一个文件旧的所有文件,可以使用-newer选项。它的一般形式为: newest_file_name ! oldest_file_name 其中,!是逻辑非符号。 实例1:查找更改时间比文件log2012.log新但比文件log2017.log旧的文件命令:find -newer log2012.log ! -newer log2017.log输出:[root@localhost test]# ll总计 316-rw-r--r-- 1 root root 302108 11-13 06:03 log2012.log-rw-r--r-- 1 root root 61 11-13 06:03 log2013.log-rw-r--r-- 1 root root 0 11-13 06:03 log2014.log-rw-r--r-- 1 root root 0 11-13 06:06 log2015.log-rw-r--r-- 1 root root 0 11-16 14:41 log2016.log-rw-r--r-- 1 root root 0 11-16 14:43 log2017.logdrwxr-xr-x 6 root root 4096 10-27 01:58 scfdrwxrwxr-x 2 root root 4096 11-13 06:08 test3drwxrwxr-x 2 root root 4096 11-13 05:50 test4[root@localhost test]# find -newer log2012.log ! -newer log2017.log../log2015.log./log2017.log./log2016.log./test3[root@localhost test]#实例2:查找更改时间在比log2012.log文件新的文件 命令:find . -newer log2012.log -print输出:[root@localhost test]# find -newer log2012.log../log2015.log./log2017.log./log2016.log./test3[root@localhost test]#9.使用type选项:实例1:在/etc目录下查找所有的目录 命令:find /etc -type d -print 实例2:在当前目录下查找除目录以外的所有类型的文件 命令:find . ! -type d -print 实例3:在/etc目录下查找所有的符号链接文件命令:find /etc -type l -print10.使用size选项:可以按照文件长度来查找文件,这里所指的文件长度既可以用块(block)来计量,也可以用字节来计量。以字节计量文件长度的表达形式为N c;以块计量文件长度只用数字表示即可。 在按照文件长度查找文件时,一般使用这种以字节表示的文件长度,在查看文件系统的大小,因为这时使用块来计量更容易转换。 实例1:在当前目录下查找文件长度大于1 M字节的文件 命令:find . -size +1000000c -print实例2:在/home/apache目录下查找文件长度恰好为100字节的文件: 命令:find /home/apache -size 100c -print 实例3:在当前目录下查找长度超过10块的文件(一块等于512字节) 命令:find . -size +10 -print11.使用depth选项:在使用find命令时,可能希望先匹配所有的文件,再在子目录中查找。使用depth选项就可以使find命令这样做。这样做的一个原因就是,当在使用find命令向磁带上备份文件系统时,希望首先备份所有的文件,其次再备份子目录中的文件。 实例1:find命令从文件系统的根目录开始,查找一个名为CON.FILE的文件。 命令:find / -name "CON.FILE" -depth -print说明:它将首先匹配所有的文件然后再进入子目录中查找12.使用mount选项: 在当前的文件系统中查找文件(不进入其他文件系统),可以使用find命令的mount选项。实例1:从当前目录开始查找位于本文件系统中文件名以XC结尾的文件 命令:find . -name "*.XC" -mount -print

 浙公网安备 33010602011771号