koa 项目实战(四)注册接口和调试工具(postman)
1.安装模块
npm install koa-bodyparser --save

npm install bcryptjs --save
2.引入模块
根目录/app.js
const bodyParser = require('koa-bodyparser');

// 实例化koa
const app = new Koa();

app.use(bodyParser());
3.注册接口
根目录/routes/api/users.js
const Router = require('koa-router');
const router = new Router();
const bcrypt = require('bcryptjs');

// 引入User
const User = require('../../models/User');

/**
 * @route GET api/users/test
 * @desc 测试接口地址
 * @access 接口是公开的
 */
router.get('/test', async ctx => {
  ctx.status = 200;
  ctx.body = { msg: 'users works...' };
});

/**
 * @route POST api/users/register
 * @desc 注册接口地址
 * @access 接口是公开的
 */
router.post('/register', async ctx => {
  // console.log(ctx.request.body);

  // 通过邮箱判读是否注册过
  const findResult = await User.find({ email: ctx.request.body.email });
  // console.log(findResult);
  if (findResult.length > 0) {
    ctx.status = 500;
    ctx.body = { email: '邮箱已被占用 ' };
  } else {
    // 没查到
    const newUser = new User({
      name: ctx.request.body.name,
      email: ctx.request.body.email,
      password: ctx.request.body.password
    });

    await bcrypt.genSalt(10, (err, salt) => {
      bcrypt.hash(newUser.password, salt, (err, hash) => {
        // console.log(hash);
        if (err) throw err;
        newUser.password = hash;
      })
    })

    // console.log(newUser);
    // 存储到数据库
    await newUser.save().then(user => {
      ctx.body = user;
    }).catch(err => {
      console.log(err);
    });

    // 返回json数据
    ctx.body = newUser;
  }
});

module.exports = router.routes();
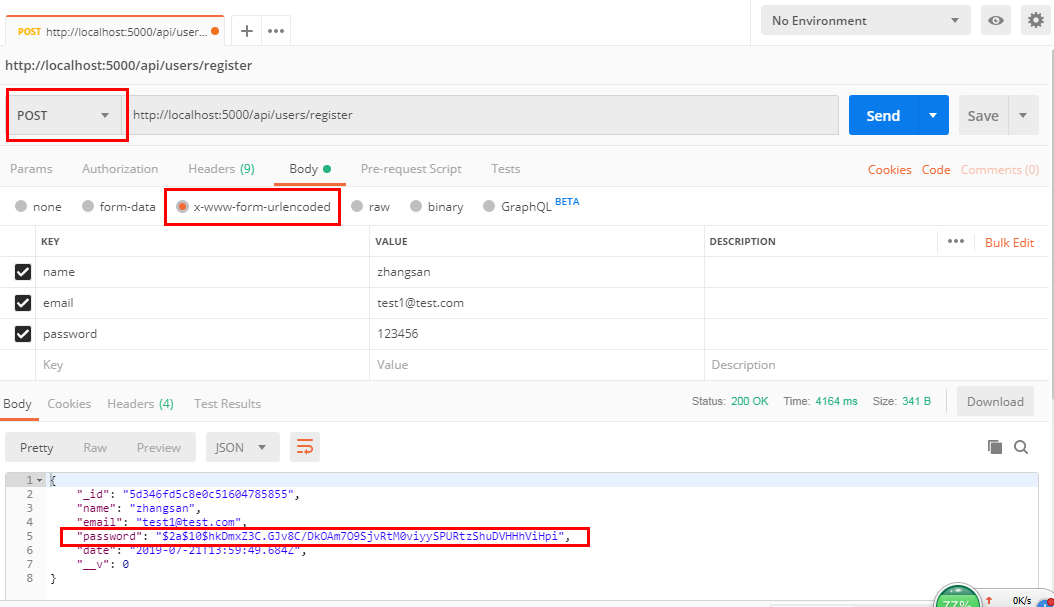
4.测试
.

 浙公网安备 33010602011771号