kubernetes权威指南读书笔记-第2章Kubernetes安装——个人实践
在书本上提到了kubernetes的两种安装方式,分别为kubeadm工具安装和二进制方式安装。下面分别来实践一下;
当然这些都不是必须的,如果你仅仅想简单使用下kubernetes,建议直接使用minikube和k3s,绕过这些繁琐的安装操作,更快上手。
注意:本次安装的kubernetes版本为v1.21。如果想要安装更高版本的,如v1.24及以后的版本,需要注意docker-shim被废弃所引发的问题,本文所提到的安装方法需要调整,额外安装cri-dockerd作为适配,并在安装时指定cri-socket为cri-dockerd。
IP地址规划:
| HOSTNAME | IP | 角色 | 操作系统 |
|---|---|---|---|
| K8S-node1 | 172.30.10.11 | master | centos-8.3 |
| K8S-node2 | 172.30.10.12 | worker | centos-8.3 |
| K8S-node3 | 172.30.10.13 | worker | centos-8.3 |
准备阶段:
#设置每个机器自己的hostname
hostnamectl set-hostname xxx

# 将 SELinux 设置为 permissive 模式(相当于将其禁用)
sudo setenforce 0
sudo sed -i 's/^SELINUX=enforcing$/SELINUX=permissive/' /etc/selinux/config

#关闭swap
swapoff -a
sed -ri 's/.*swap.*/#&/' /etc/fstab

#允许 iptables 检查桥接流量
cat <<EOF | sudo tee /etc/modules-load.d/k8s.conf
br_netfilter
EOF

cat <<EOF | sudo tee /etc/sysctl.d/k8s.conf
net.bridge.bridge-nf-call-ip6tables = 1
net.bridge.bridge-nf-call-iptables = 1
EOF
sudo sysctl --system

#设置时区,并同步时间(非必要)
timedatectl set-timezone Asia/Shanghai
yum -y install chrony
chronyd -q 'server ntp.sjtu.edu.cn iburst'
hwclock -w
kubeadm方式安装
安装docker
需要在三台设备上分别安装docker
sudo yum remove docker*
sudo yum install -y yum-utils

#配置docker的yum地址
wget -O /etc/yum.repos.d/docker-ce.repo http://mirrors.aliyun.com/docker-ce/linux/centos/docker-ce.repo


#安装指定版本
sudo yum install -y docker-ce-20.10.12 docker-ce-cli-20.10.12 containerd.io-1.4.12

#	启动&开机启动docker
systemctl enable docker --now

# docker加速配置
sudo mkdir -p /etc/docker
sudo tee /etc/docker/daemon.json <<-'EOF'
{
  "registry-mirrors": ["https://ke9h1pt4.mirror.aliyuncs.com"],
  "exec-opts": ["native.cgroupdriver=systemd"],  #设置cgroup为systemd,保持和kubelet的配置一致
  "log-driver": "json-file",
  "log-opts": {
    "max-size": "100m"
  },
  "storage-driver": "overlay2"
}
EOF
sudo systemctl daemon-reload
sudo systemctl restart docker
注意,配置“exec-opts”选项,是因为kebernetes默认设置cgroup驱动为systemd,而docker服务的cgroup驱动为cgroupfs,从而导致后序kuberlet服务无法正常启动
registry-mirrors为镜像加速地址:可以通过阿里云的容器镜像服务,获取自己的加速器地址。
[root@k8s-node3 ~]#  yum list installed |grep docker
containerd.io.x86_64                1.4.12-3.1.el8                          @docker-ce-stable
docker-ce.x86_64                    3:20.10.12-3.el8                        @docker-ce-stable
docker-ce-cli.x86_64                1:20.10.12-3.el8                        @docker-ce-stable
docker-ce-rootless-extras.x86_64    20.10.12-3.el8                          @docker-ce-stable
docker-scan-plugin.x86_64           0.12.0-3.el8                            @docker-ce-stable
[root@k8s-node3 ~]#
配置k8s yum源
#配置k8s的yum源地址,这里指定为阿里云的yum源
cat <<EOF | sudo tee /etc/yum.repos.d/kubernetes.repo
[kubernetes]
name=Kubernetes
baseurl=http://mirrors.aliyun.com/kubernetes/yum/repos/kubernetes-el7-x86_64
enabled=1
gpgcheck=0
repo_gpgcheck=0
gpgkey=http://mirrors.aliyun.com/kubernetes/yum/doc/yum-key.gpg
   http://mirrors.aliyun.com/kubernetes/yum/doc/rpm-package-key.gpg
EOF
在master上安装kubeadm kubelet和kubectl
yum -y install kubeadm-1.21.8 kubelet-1.21.8 kubectl-1.21.8 --disableexcludes=kubernetes
systemctl enable --now kubelet
kubelet 现在每隔几秒就会重启,因为它陷入了一个等待 kubeadm 指令的死循环
查看安装的版本:
点击查看代码
[root@k8s-node1 ~]#  yum list installed |grep kube*
cri-tools.x86_64                    1.19.0-0                                @kubernetes
kubeadm.x86_64                      1.21.8-0                                @kubernetes
kubectl.x86_64                      1.21.8-0                                @kubernetes
kubelet.x86_64                      1.21.8-0                                @kubernetes
kubernetes-cni.x86_64               0.8.7-0                                 @kubernetes
[root@k8s-node1 ~]#
修改kubeadm的默认配置文件
kubeadm config print init-defaults > init-config.yaml
修改“init-config.yaml”配置文件内容:
apiVersion: kubeadm.k8s.io/v1beta2
bootstrapTokens:
- groups:
  - system:bootstrappers:kubeadm:default-node-token
  token: abcdef.0123456789abcdef
  ttl: 24h0m0s
  usages:
  - signing
  - authentication
kind: InitConfiguration
localAPIEndpoint:
  advertiseAddress: 172.30.10.11 #需要修改为master的IP地址
  bindPort: 6443
nodeRegistration:
  criSocket: /var/run/dockershim.sock
  name: k8s-node1 #修改注册的node名称为master所在设备的主机名,这里为k8s-node1
  taints: null
---
apiServer:
  timeoutForControlPlane: 4m0s
apiVersion: kubeadm.k8s.io/v1beta2
certificatesDir: /etc/kubernetes/pki
clusterName: kubernetes
controllerManager: {}
dns:
  type: CoreDNS
etcd:
  local:
    dataDir: /var/lib/etcd
imageRepository: registry.aliyuncs.com/google_containers #修改默认拉取镜像的地址
kind: ClusterConfiguration
kubernetesVersion: 1.21.0
networking:
  dnsDomain: cluster.local
  serviceSubnet: 10.96.0.0/12
  podSubnet: 192.168.0.0/16 #指定POD的子网地址,这里需要注意的是pod的子网范围一定不能和node节点处于同一个子网下
scheduler: {}
下载kubernetes的相关镜像
查看需要下载哪些镜像:
[root@k8s-node1 ~]# kubeadm config images list
k8s.gcr.io/kube-apiserver:v1.21.8
k8s.gcr.io/kube-controller-manager:v1.21.8
k8s.gcr.io/kube-scheduler:v1.21.8
k8s.gcr.io/kube-proxy:v1.21.8
k8s.gcr.io/pause:3.4.1
k8s.gcr.io/etcd:3.4.13-0
k8s.gcr.io/coredns/coredns:v1.8.0
下载镜像:
[root@k8s-node1 ~]#  kubeadm config images pull --config=init-config.yaml
[config/images] Pulled registry.aliyuncs.com/google_containers/kube-apiserver:v1.21.0
[config/images] Pulled registry.aliyuncs.com/google_containers/kube-controller-manager:v1.21.0
[config/images] Pulled registry.aliyuncs.com/google_containers/kube-scheduler:v1.21.0
[config/images] Pulled registry.aliyuncs.com/google_containers/kube-proxy:v1.21.0
[config/images] Pulled registry.aliyuncs.com/google_containers/pause:3.4.1
[config/images] Pulled registry.aliyuncs.com/google_containers/etcd:3.4.13-0
[config/images] Pulled registry.aliyuncs.com/google_containers/coredns:v1.8.0
运行kubeadm init命令安装master节点
kubeadm init --config=init-config.yaml
查看输出:
[root@k8s-node1 ~]# kubeadm init --config=init-config.yaml
[init] Using Kubernetes version: v1.21.0
[preflight] Running pre-flight checks
        [WARNING FileExisting-tc]: tc not found in system path
[preflight] Pulling images required for setting up a Kubernetes cluster
[preflight] This might take a minute or two, depending on the speed of your internet connection
[preflight] You can also perform this action in beforehand using 'kubeadm config images pull'
[certs] Using certificateDir folder "/etc/kubernetes/pki"
[certs] Generating "ca" certificate and key
[certs] Generating "apiserver" certificate and key
[certs] apiserver serving cert is signed for DNS names [k8s-node1 kubernetes kubernetes.default kubernetes.default.svc kubernetes.default.svc.cluster.local] and IPs [10.96.0.1 172.30.10.11]
[certs] Generating "apiserver-kubelet-client" certificate and key
[certs] Generating "front-proxy-ca" certificate and key
[certs] Generating "front-proxy-client" certificate and key
[certs] Generating "etcd/ca" certificate and key
[certs] Generating "etcd/server" certificate and key
[certs] etcd/server serving cert is signed for DNS names [k8s-node1 localhost] and IPs [172.30.10.11 127.0.0.1 ::1]
[certs] Generating "etcd/peer" certificate and key
[certs] etcd/peer serving cert is signed for DNS names [k8s-node1 localhost] and IPs [172.30.10.11 127.0.0.1 ::1]
[certs] Generating "etcd/healthcheck-client" certificate and key
[certs] Generating "apiserver-etcd-client" certificate and key
[certs] Generating "sa" key and public key
[kubeconfig] Using kubeconfig folder "/etc/kubernetes"
[kubeconfig] Writing "admin.conf" kubeconfig file
[kubeconfig] Writing "kubelet.conf" kubeconfig file
[kubeconfig] Writing "controller-manager.conf" kubeconfig file
[kubeconfig] Writing "scheduler.conf" kubeconfig file
[kubelet-start] Writing kubelet environment file with flags to file "/var/lib/kubelet/kubeadm-flags.env"
[kubelet-start] Writing kubelet configuration to file "/var/lib/kubelet/config.yaml"
[kubelet-start] Starting the kubelet
[control-plane] Using manifest folder "/etc/kubernetes/manifests"
[control-plane] Creating static Pod manifest for "kube-apiserver"
[control-plane] Creating static Pod manifest for "kube-controller-manager"
[control-plane] Creating static Pod manifest for "kube-scheduler"
[etcd] Creating static Pod manifest for local etcd in "/etc/kubernetes/manifests"
[wait-control-plane] Waiting for the kubelet to boot up the control plane as static Pods from directory "/etc/kubernetes/manifests". This can take up to 4m0s
[apiclient] All control plane components are healthy after 17.010233 seconds
[upload-config] Storing the configuration used in ConfigMap "kubeadm-config" in the "kube-system" Namespace
[kubelet] Creating a ConfigMap "kubelet-config-1.21" in namespace kube-system with the configuration for the kubelets in the cluster
[upload-certs] Skipping phase. Please see --upload-certs
[mark-control-plane] Marking the node k8s-node1 as control-plane by adding the labels: [node-role.kubernetes.io/master(deprecated) node-role.kubernetes.io/control-plane node.kubernetes.io/exclude-from-external-load-balancers]
[mark-control-plane] Marking the node k8s-node1 as control-plane by adding the taints [node-role.kubernetes.io/master:NoSchedule]
[bootstrap-token] Using token: abcdef.0123456789abcdef
[bootstrap-token] Configuring bootstrap tokens, cluster-info ConfigMap, RBAC Roles
[bootstrap-token] configured RBAC rules to allow Node Bootstrap tokens to get nodes
[bootstrap-token] configured RBAC rules to allow Node Bootstrap tokens to post CSRs in order for nodes to get long term certificate credentials
[bootstrap-token] configured RBAC rules to allow the csrapprover controller automatically approve CSRs from a Node Bootstrap Token
[bootstrap-token] configured RBAC rules to allow certificate rotation for all node client certificates in the cluster
[bootstrap-token] Creating the "cluster-info" ConfigMap in the "kube-public" namespace
[kubelet-finalize] Updating "/etc/kubernetes/kubelet.conf" to point to a rotatable kubelet client certificate and key
[addons] Applied essential addon: CoreDNS
[addons] Applied essential addon: kube-proxy

Your Kubernetes control-plane has initialized successfully!

To start using your cluster, you need to run the following as a regular user:

  mkdir -p $HOME/.kube
  sudo cp -i /etc/kubernetes/admin.conf $HOME/.kube/config
  sudo chown $(id -u):$(id -g) $HOME/.kube/config

Alternatively, if you are the root user, you can run:

  export KUBECONFIG=/etc/kubernetes/admin.conf

You should now deploy a pod network to the cluster.
Run "kubectl apply -f [podnetwork].yaml" with one of the options listed at:
  https://kubernetes.io/docs/concepts/cluster-administration/addons/

Then you can join any number of worker nodes by running the following on each as root:

kubeadm join 172.30.10.11:6443 --token abcdef.0123456789abcdef \
        --discovery-token-ca-cert-hash sha256:5c2f663d590a536137758c858cdbbaefa93120d3660c640453e68cb428e2717f
ps:若在初始化master节点过程中,出现如下错误信息:
[kubelet-check] The HTTP call equal to 'curl -sSL http://localhost:10248/healthz' failed with error: Get "http://localhost:10248/healthz": dial tcp [::1]:10248: connect: connection refused.请检查kubelet服务是否正常运行:
[root@k8s-node1 ~]# systemctl status kubelet
● kubelet.service - kubelet: The Kubernetes Node Agent
  Loaded: loaded (/usr/lib/systemd/system/kubelet.service; disabled; vendor preset: disabled)
 Drop-In: /usr/lib/systemd/system/kubelet.service.d
          └─10-kubeadm.conf
  Active: activating (auto-restart) (Result: exit-code) since Tue 2021-12-21 02:49:05 UTC; 4s ago
    Docs: https://kubernetes.io/docs/
 Process: 27301 ExecStart=/usr/bin/kubelet $KUBELET_KUBECONFIG_ARGS $KUBELET_CONFIG_ARGS $KUBELET_KUBEADM_ARGS $KUBELET_EXTRA_ARGS (code=exited, statu>
Main PID: 27301 (code=exited, status=1/FAILURE)
lines 1-8/8 (END)
如上面就是处于异常状态,可以通过查看服务运行日志获取更为详细的信息:
server.go:302] "Failed to run kubelet" err="failed to run Kubelet: misconfiguration: kubelet cgroup driver: \"systemd\" is different from docker cgroup driver: \"cgroupfs\""
Dec 21 02:54:18 k8s-node1 systemd[1]: kubelet.service: Main process exited, code=exited, status=1/FAILURE
"kubelet cgroup driver: "systemd" is different from docker cgroup driver: "cgroupfs",前面配置/etc/docker/daemon.json时,已经添加,可能没有生效,重启docker、kubelet
systemctl restart {docker,kubelet}再次进行初始化,先执行kubeadm reset,重置一下
如果初始化正常,则需要使用以下命令创建kubeconfig,用作与集群交互时的身份认证
  mkdir -p $HOME/.kube
  sudo cp -i /etc/kubernetes/admin.conf $HOME/.kube/config
  sudo chown $(id -u):$(id -g) $HOME/.kube/config
ps:关于kuberconfig的更多信息见:kubernetes中kubeconfig的用法
也可也导出为环境变量,即:
[root@k8s-node1 ~]# echo "export KUBECONFIG=/etc/kubernetes/admin.conf" >> /etc/profile ;source /etc/profile
此时查看nodes能够看到只有一个节点:
[root@k8s-node1 ~]# kubectl get nodes
NAME        STATUS     ROLES                  AGE   VERSION
k8s-node1   NotReady   control-plane,master   65s   v1.21.8
将新的node加入集群
(1)在两台Worker上安装kubeadm和kubelet
yum -y install kubeadm-1.21.8 kubelet-1.21.8 --disableexcludes=kubernetes
运行systemctl start命令启动kubelet服务,并设置为开机启动:
systemctl start kubelet
systemctl enable kubelet
(2)在两台worker上,使用kubeadm join命令加入到集群
[root@k8s-node2 ~]# kubeadm join 172.30.10.11:6443 --token abcdef.0123456789abcdef         --discovery-token-ca-cert-hash sha256:5c2f663d590a536137758c858cdbbaefa93120d3660c640453e68cb428e2717f
[preflight] Running pre-flight checks
        [WARNING FileExisting-tc]: tc not found in system path
[preflight] Reading configuration from the cluster...
[preflight] FYI: You can look at this config file with 'kubectl -n kube-system get cm kubeadm-config -o yaml'
[kubelet-start] Writing kubelet configuration to file "/var/lib/kubelet/config.yaml"
[kubelet-start] Writing kubelet environment file with flags to file "/var/lib/kubelet/kubeadm-flags.env"
[kubelet-start] Starting the kubelet
[kubelet-start] Waiting for the kubelet to perform the TLS Bootstrap...

This node has joined the cluster:
* Certificate signing request was sent to apiserver and a response was received.
* The Kubelet was informed of the new secure connection details.

Run 'kubectl get nodes' on the control-plane to see this node join the cluster.

[root@k8s-node2 ~]#
ps:在将节点node3加入到集群过程中,出现了kubelet异常,导致join过程超时, journalctl -xeu kubelet.service 错误信息如下:
"failed to run Kubelet: misconfiguration: kubelet cgroup driver: \"cgroupfs\" is different from docker cgroup driver: \"systemd\""
表明kubelet的cgroup和docker的不一致。修改一致即可。
修改方式见:kuberlet服务启动报错:"Failed to run kubelet" err="failed to run Kubelet: misconfiguration: kubelet cgroup driver: "systemd" is different from docker cgroup driver: "cgroupfs""
此时再次在master上查看node节点:
[root@k8s-node1 ~]# kubectl get nodes
NAME        STATUS     ROLES                  AGE     VERSION
k8s-node1   NotReady   control-plane,master   7m4s    v1.21.8
k8s-node2   NotReady   <none>                 3m49s   v1.21.8
k8s-node3   NotReady   <none>                 11s     v1.21.8
现在三个节点,已经出现了,但是状态都是NotReady,这是因为我们还没有安装网络插件
describe node1,可以看到network plugin is not ready: cni config uninitialized
# kubectl describe node k8s-node1
Conditions:
  Type             Status  LastHeartbeatTime                 LastTransitionTime                Reason                       Message
  ----             ------  -----------------                 ------------------                ------                       -------
  MemoryPressure   False   Mon, 09 Jan 2023 19:26:18 +0800   Mon, 09 Jan 2023 19:15:59 +0800   KubeletHasSufficientMemory   kubelet has sufficient memory available
  DiskPressure     False   Mon, 09 Jan 2023 19:26:18 +0800   Mon, 09 Jan 2023 19:15:59 +0800   KubeletHasNoDiskPressure     kubelet has no disk pressure
  PIDPressure      False   Mon, 09 Jan 2023 19:26:18 +0800   Mon, 09 Jan 2023 19:15:59 +0800   KubeletHasSufficientPID      kubelet has sufficient PID available
  Ready            False   Mon, 09 Jan 2023 19:26:18 +0800   Mon, 09 Jan 2023 19:15:59 +0800   KubeletNotReady              container runtime network not ready: NetworkReady=false reason:NetworkPluginNotReady message:docker: network plugin is not ready: cni config uninitialized
安装CNI网络插件
网络插件有很多种(calico、flannel等),这里选择Calico CNI插件。
只需要在master设备上安装calico cni即可
由于版本的变化,最新的安装方式,可能会有些变化,详情参照在kubernetes上安装calico,不过务必要注意podCIDR,要和上面kubeadm init初始化时的podCIDR保持一致。
[root@k8s-node1 ~]# kubectl apply -f "https://docs.projectcalico.org/manifests/calico.yaml"
configmap/calico-config created
customresourcedefinition.apiextensions.k8s.io/bgpconfigurations.crd.projectcalico.org created
customresourcedefinition.apiextensions.k8s.io/bgppeers.crd.projectcalico.org created
customresourcedefinition.apiextensions.k8s.io/blockaffinities.crd.projectcalico.org created
customresourcedefinition.apiextensions.k8s.io/caliconodestatuses.crd.projectcalico.org created
customresourcedefinition.apiextensions.k8s.io/clusterinformations.crd.projectcalico.org created
customresourcedefinition.apiextensions.k8s.io/felixconfigurations.crd.projectcalico.org created
customresourcedefinition.apiextensions.k8s.io/globalnetworkpolicies.crd.projectcalico.org created
customresourcedefinition.apiextensions.k8s.io/globalnetworksets.crd.projectcalico.org created
customresourcedefinition.apiextensions.k8s.io/hostendpoints.crd.projectcalico.org created
customresourcedefinition.apiextensions.k8s.io/ipamblocks.crd.projectcalico.org created
customresourcedefinition.apiextensions.k8s.io/ipamconfigs.crd.projectcalico.org created
customresourcedefinition.apiextensions.k8s.io/ipamhandles.crd.projectcalico.org created
customresourcedefinition.apiextensions.k8s.io/ippools.crd.projectcalico.org created
customresourcedefinition.apiextensions.k8s.io/ipreservations.crd.projectcalico.org created
customresourcedefinition.apiextensions.k8s.io/kubecontrollersconfigurations.crd.projectcalico.org created
customresourcedefinition.apiextensions.k8s.io/networkpolicies.crd.projectcalico.org created
customresourcedefinition.apiextensions.k8s.io/networksets.crd.projectcalico.org created
clusterrole.rbac.authorization.k8s.io/calico-kube-controllers created
clusterrolebinding.rbac.authorization.k8s.io/calico-kube-controllers created
clusterrole.rbac.authorization.k8s.io/calico-node created
clusterrolebinding.rbac.authorization.k8s.io/calico-node created
daemonset.apps/calico-node created
serviceaccount/calico-node created
deployment.apps/calico-kube-controllers created
serviceaccount/calico-kube-controllers created
Warning: policy/v1beta1 PodDisruptionBudget is deprecated in v1.21+, unavailable in v1.25+; use policy/v1 PodDisruptionBudget
poddisruptionbudget.policy/calico-kube-controllers created
[root@k8s-node1 ~]#
在master上再次查看Node状态:
[root@k8s-node1 ~]# kubectl get nodes
NAME        STATUS   ROLES                  AGE   VERSION
k8s-node1   Ready    control-plane,master   31m   v1.21.8
k8s-node2   Ready    <none>                 28m   v1.21.8
k8s-node3   Ready    <none>                 24m   v1.21.8
ps:如果pod状态一直都是NotReady,请检查calico-kube-controllers和calico-node的相关pod是否处于正常运行状态。
[root@k8s-node1 ~]# kubectl get pod -A |grep calico
kube-system   calico-kube-controllers-647d84984b-2vn8d   1/1     Running   0               7m37s
kube-system   calico-node-8mc6b                          1/1     Running   0               7m37s
kube-system   calico-node-qjwsx                          1/1     Running   0               7m37s
kube-system   calico-node-rt6l4                          1/1     Running   0               7m37s
[root@k8s-node1 ~]#
如果状态pending或Error等,请查看pod的事件.kubectl describe pod pod名称 -n kube-system
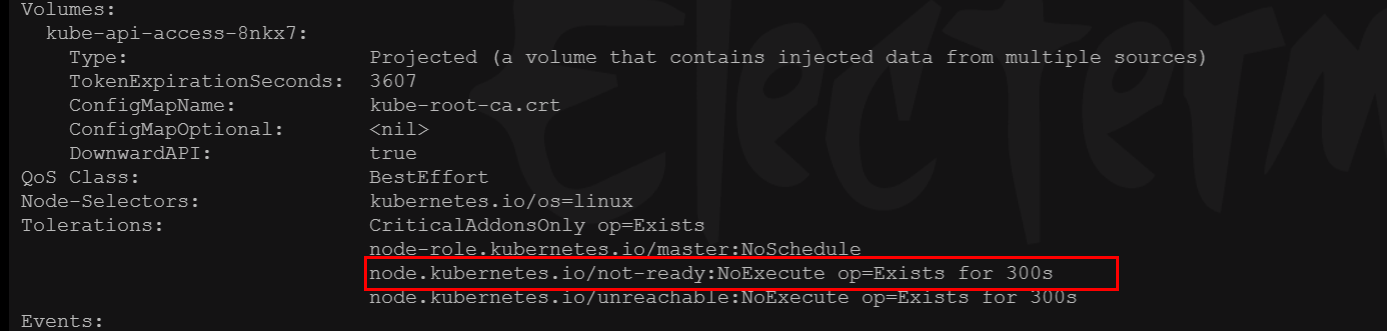
如果出现了“nodes are available: 3 node(s) had taint {node.kubernetes.io/not-ready: }, that the pod didn't tolerate.”,kubernetes会自动给pod添加这种torleration,并配置tolerationSeconds=300,所以等待5分钟后,可以再看看calico的运行状况,node是否为ready状态。
至此,已经完成了kubeadm方式安装kubernetes。
另外,为了操作方便,可以安装图形化界面dashboard或者使用kubesphere。
针对于两者的安装操作,下面给出了操作实例:
参考文献:
(1) kubernetes权威指南(第五版)龚正 吴治辉 闫健勇 编著
(2) kubeadm创建集群

 浙公网安备 33010602011771号