
【赵渝强老师】基于Hudi的大数据湖仓一体架构

Apache Hudi(Hadoop Upserts Delete and Incremental)是下一代流数据湖平台。Apache Hudi将核心仓库和数据库功能直接引入数据湖。Hudi提供了表、事务、高效的upserts/delete、高级索引、流摄取服务、数据集群/压缩优化和并发,同时保持数据的开源文件格式。
Apache Hudi不仅非常适合于流工作负载,而且还允许创建高效的增量批处理管道。Apache Hudi可以轻松地在任何云存储平台上使用。Hudi的高级性能优化,使分析工作负载更快的任何流行的查询引擎,包括Apache Spark、Flink、Presto、Trino、Hive等。
基于Hudi的大数据湖仓一体架构如下图所示:

 |
|---|
| 点击这里查看视频讲解:【赵渝强老师】基于Hudi的大数据湖仓一体架构 |
一、 Hudi发展历史
- 2015年:发表了增量处理的核心思想/原则(O'reilly 文章)。
- 2016年:由 Uber 创建并为所有数据库/关键业务提供支持。
- 2017年:由 Uber 开源,并支撑 100PB 数据湖。
- 2018年:吸引大量使用者,并因云计算普及。
- 2019年:成为 ASF 孵化项目,并增加更多平台组件。
- 2020年:毕业成为 Apache 顶级项目,社区、下载量、采用率增长超过 10 倍。
- 2021年:支持 Uber 500PB 数据湖,SQL DML、Flink 集成、索引、元服务器、缓存。
二、 Hudi的特性
- 可插拔索引机制支持快速Upsert/Delete。
- 支持增量拉取表变更以进行处理。
- 支持事务提交及回滚,并发控制。
- 支持Spark、Presto、Trino、Hive、Flink等引擎的SQL读写。
- 自动管理小文件,数据聚簇,压缩,清理。
- 流式摄入,内置CDC源和工具。
- 内置可扩展存储访问的元数据跟踪。
- 向后兼容的方式实现表结构变更的支持。
三、 编译安装Hudi
这里使用的版本信息如下:
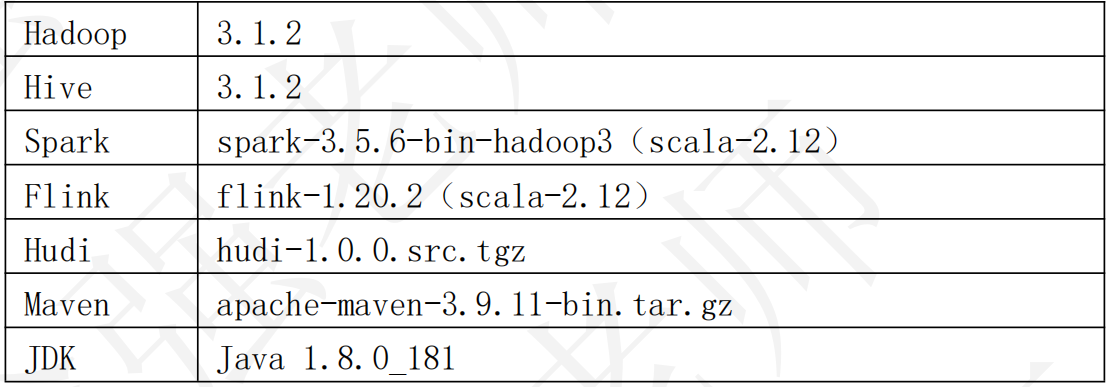
下面是具体的操作步骤。
(1)安装Maven并修改setting.xml指定Maven仓库地址
<mirror>
	<id>alimaven</id>
	<name>aliyun maven</name>
	<url>http://maven.aliyun.com/nexus/content/groups/public/</url>
	<mirrorOf>central</mirrorOf>
</mirror>

<mirror>
	<id>confluent</id>
	<name>confluent maven</name>
	<url>http://packages.confluent.io/maven/</url>
	<mirrorOf>confluent</mirrorOf>
</mirror>
(2)解压Hudi源码包
tar -zxvf hudi-1.0.0.src.tgz
(3)修改Hudi源码文件
hudi-1.0.0/hudi-sync/hudi-hive-sync/src/test/java/org/apache/hudi/hive/testutils/HiveTestUtil.java文件
第250行把 zkServer.shutdown(true);改为 zkServer.shutdown();
(4)修改hudi-1.0.0/pom.xml,注释或去掉410行内容;并指定Hadoop和Hive的版本
<!--
<exclude>ch.qos.logback:logback-classic</exclude>
-->
<hadoop.version>3.1.2</hadoop.version>
<hive.version>3.1.2</hive.version>
(5)安装Maven的confluent(Kafka)库。
# 下载Confluent Kafka库
wget http://packages.confluent.io/archive/5.5/confluent-5.5.0-2.12.zip

unzip confluent-5.5.0-2.12.zip

# 安装Confluent Kafka库
mvn install:install-file -DgroupId=io.confluent -DartifactId=common-config -Dversion=5.5.0 -Dpackaging=jar -Dfile=./confluent-5.5.0/share/java/confluent-common/common-config-5.5.0.jar

mvn install:install-file -DgroupId=io.confluent -DartifactId=ommon-utils -Dversion=5.5.0 -Dpackaging=jar -Dfile=./confluent-5.5.0/share/java/confluent-common/common-utils-5.5.0.jar

mvn install:install-file -DgroupId=io.confluent -DartifactId=common-utils -Dversion=5.5.0 -Dpackaging=jar -Dfile=./confluent-5.5.0/share/java/confluent-common/common-utils-5.5.0.jar

mvn install:install-file -DgroupId=io.confluent -DartifactId=kafka-avro-serializer -Dversion=5.5.0 -Dpackaging=jar -Dfile=./confluent-5.5.0/share/java/kafka-rest/kafka-avro-serializer-5.5.0.jar

mvn install:install-file -DgroupId=io.confluent -DartifactId=kafka-schema-registry-client -Dversion=5.5.0 -Dpackaging=jar -Dfile=./confluent-5.5.0/share/java/kafka-rest/kafka-schema-registry-client-5.5.0.jar

mvn install:install-file -DgroupId=io.confluent -DartifactId=kafka-json-schema-serializer -Dversion=5.5.0 -Dpackaging=jar -Dfile=./confluent-5.5.0/share/java/kafka-rest/kafka-json-schema-serializer-5.5.0.jar
(6)修改以下两个pom文件:
hudi-1.0.0/packaging/hudi-spark-bundle/pom.xml
hudi-1.0.0/packaging/hudi-utilities-bundle/pom.xml

# 添加如下内容:
    <!-- 增加hudi配置版本的jetty -->
    <dependency>
      <groupId>org.eclipse.jetty</groupId>
      <artifactId>jetty-server</artifactId>
      <version>${jetty.version}</version>
    </dependency>

    <dependency>
      <groupId>org.eclipse.jetty</groupId>
      <artifactId>jetty-util</artifactId>
      <version>${jetty.version}</version>
    </dependency>

    <dependency>
      <groupId>org.eclipse.jetty</groupId>
      <artifactId>jetty-webapp</artifactId>
      <version>${jetty.version}</version>
    </dependency>

    <dependency>
      <groupId>org.eclipse.jetty</groupId>
      <artifactId>jetty-http</artifactId>
      <version>${jetty.version}</version>
    </dependency>
(7)执行编译
mvn clean package -Dcheckstyle.skip=true -DskipTests -Dspark3.5 -Dflink1.20 -Dscala-2.12 -Dhadoop.version=3.1.2 -Pflink-bundle-shade-hive3
四、 快速体验Hudi
在Hudi编译完成后,便可以使用Hudi提供的命令行工具来操作Hudi。下面通过具体的示例来演示如何使用Hudi CLI命令行工具。
(1)启动Hudi CLI命令行工具。
hudi-cli/hudi-cli.sh

# 启动成功后,将输出下面的信息。
===================================================================
*         ___                          ___                        *
*        /\__\          ___           /\  \           ___         *
*       / /  /         /\__\         /  \  \         /\  \        *
*      / /__/         / /  /        / /\ \  \        \ \  \       *
*     /  \  \ ___    / /  /        / /  \ \__\       /  \__\      *
*    / /\ \  /\__\  / /__/  ___   / /__/ \ |__|     / /\/__/      *
*    \/  \ \/ /  /  \ \  \ /\__\  \ \  \ / /  /  /\/ /  /         *
*         \  /  /    \ \  / /  /   \ \  / /  /   \  /__/          *
*         / /  /      \ \/ /  /     \ \/ /  /     \ \__\          *
*        / /  /        \  /  /       \  /  /       \/__/          *
*        \/__/          \/__/         \/__/    Apache Hudi CLI    *
*                                                                 *
===================================================================

Welcome to Apache Hudi CLI. Please type help if you are looking for help.
hudi->
(2)查看帮助信息
hudi->help
(3)查看create语句创建Hudi表的语法。
hudi->help create

# 输出的信息如下:
NAME
	create - Create a hoodie table if not present

SYNOPSIS
	create [--path String] [--tableName String] --tableType String --archiveLogFolder String --tableVersion Integer --payloadClass String

OPTIONS
	--path String
	Base Path of the table
	[Mandatory]

	--tableName String
	Hoodie Table Name
	[Mandatory]

	--tableType String
	Hoodie Table Type. Must be one of : COPY_ON_WRITE or MERGE_ON_READ
	[Optional, default = COPY_ON_WRITE]

	--archiveLogFolder String
	Folder Name for storing archived timeline
	[Optional]

	--tableVersion Integer
	Specific table Version to create table as
	[Optional]

	--payloadClass String
	Payload Class
	[Optional, default = org.apache.hudi.common.model.HoodieAvroPayload]
(4)创建一张名叫emp的表,并将其存储在HDFS上。
hudi->create --path hdfs://localhost:9000/hudi_db/emp --tableName emp

# 提示:
# 如果使用本地文件系统作为Hudi表的存储介质,可以使用下面的语句。
hudi->create --path file:///root/temp/hudi_db/emp --tableName emp
(5)查看emp表对应的HDFS目录。
hdfs dfs -ls -R /hudi_db/emp

# 输出的信息如下:
drwxr-xr-x   - root supergroup   0 2025-08-15 02:48 /hudi_db/emp/.hoodie
drwxr-xr-x   - root supergroup   0 2025-08-15 02:48 /hudi_db/emp/.hoodie/.aux
drwxr-xr-x   - root supergroup   0 2025-08-15 02:48 /hudi_db/emp/.hoodie/.aux/.bootstrap
drwxr-xr-x   - root supergroup   0 2025-08-15 02:48 /hudi_db/emp/.hoodie/.aux/.bootstrap/.fileids
drwxr-xr-x   - root supergroup   0 2025-08-15 02:48 /hudi_db/emp/.hoodie/.aux/.bootstrap/.partitions
drwxr-xr-x   - root supergroup   0 2025-08-15 02:48 /hudi_db/emp/.hoodie/.schema
drwxr-xr-x   - root supergroup   0 2025-08-15 02:48 /hudi_db/emp/.hoodie/.temp
-rw-r--r--   3 root supergroup 584 2025-08-15 02:48 /hudi_db/emp/.hoodie/hoodie.properties
drwxr-xr-x   - root supergroup   0 2025-08-15 02:48 /hudi_db/emp/.hoodie/timeline
drwxr-xr-x   - root supergroup   0 2025-08-15 02:48 /hudi_db/emp/.hoodie/timeline/history
(6)连接Hudi表。
hudi->connect --path hdfs://localhost:9000/hudi_db/emp

# 输出的信息如下:
Finished Loading Table of type COPY_ON_WRITE
(version=1, baseFileFormat=PARQUET)
from hdfs://localhost:9000/hudi_db1/emp
Metadata for table emp loaded
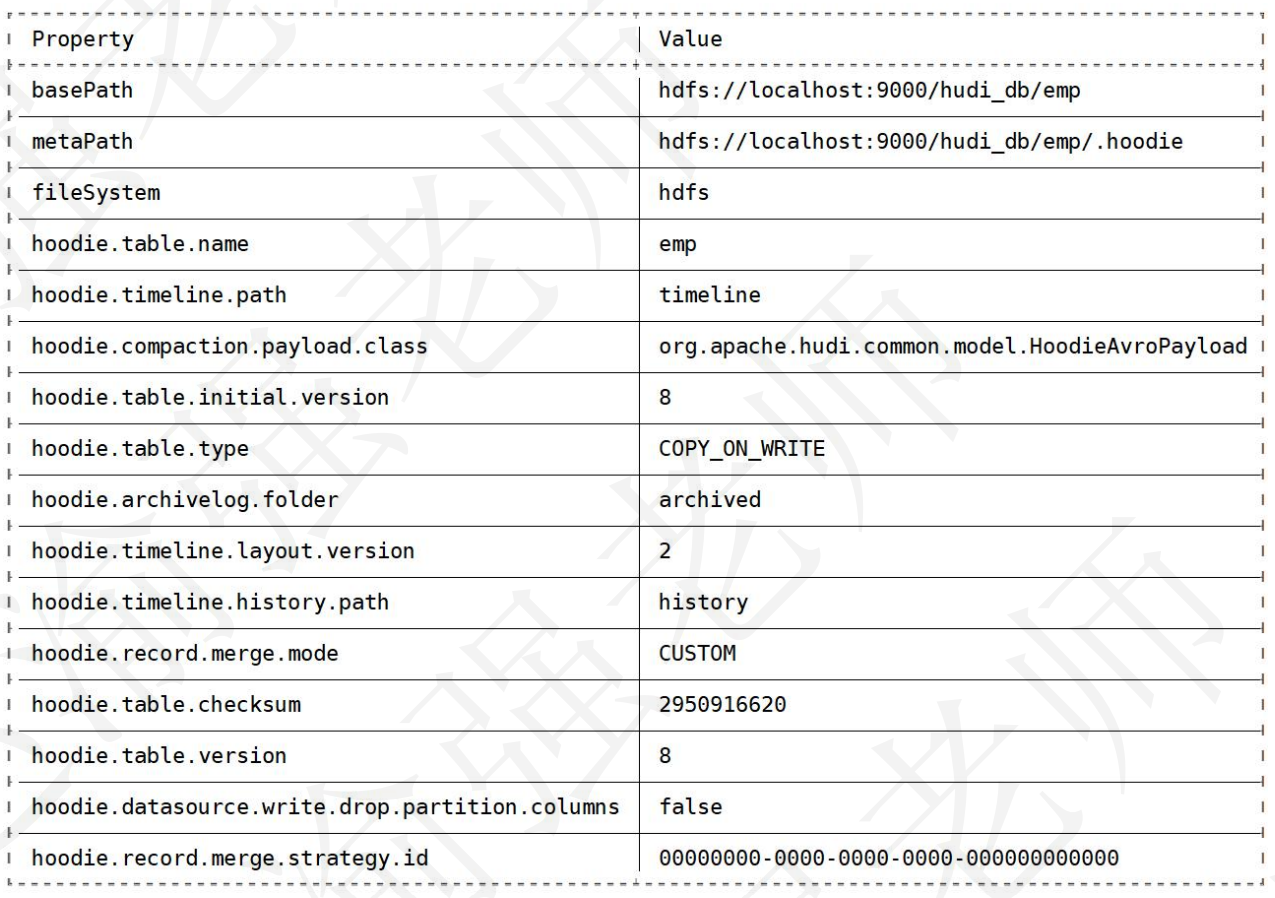
(7)查看Hudi表的详细信息。
hudi:emp->desc

# 输出的信息如下:

 浙公网安备 33010602011771号