
SSM框架整合【第三部分-Spring整合SpringMVC框架】
第三部分-Spring整合SpringMVC框架
1)搭建和测试SpringMVC的环境
A)在web.xml文件中添加配置DispatcherServlet前端控制器
 1 <!--配置前端控制器-->
 2 <servlet>
 3    <servlet-name>springmvc</servlet-name>
 4    <servlet-class>org.springframework.web.servlet.DispatcherServlet</servlet-class>
 5    <init-param>
 6        <param-name>contextConfigLocation</param-name>
 7        <param-value>classpath:springmvc-servlet.xml</param-value>
 8    </init-param>
 9    <!--启动服务器就立即创建该servlet-->
10    <load-on-startup>1</load-on-startup>
11 </servlet>
12 <servlet-mapping>
13    <servlet-name>springmvc</servlet-name>
14    <url-pattern>/</url-pattern>
15 </servlet-mapping>
B)在web.xml配置中配置字符编码过滤器解决中文乱码问题
 1 <!--配置字符编码过滤器-->
 2 <filter>
 3     <filter-name>encoding</filter-name>
 4     <filter-class>org.springframework.web.filter.CharacterEncodingFilter</filter-class>
 5     <init-param>
 6         <param-name>encoding</param-name>
 7         <param-value>utf-8</param-value>
 8     </init-param>
 9 </filter>
10 <filter-mapping>
11     <filter-name>encoding</filter-name>
12     <url-pattern>/*</url-pattern>
13 </filter-mapping>
C)创建SpringMVC的配置文件并配置
 1 <?xml version="1.0" encoding="UTF-8"?>
 2 <beans xmlns="http://www.springframework.org/schema/beans"
 3        xmlns:xsi="http://www.w3.org/2001/XMLSchema-instance"
 4        xmlns:context="http://www.springframework.org/schema/context"
 5        xmlns:mvc="http://www.springframework.org/schema/mvc"
 6        xsi:schemaLocation="http://www.springframework.org/schema/beans
 7         http://www.springframework.org/schema/beans/spring-beans.xsd
 8         http://www.springframework.org/schema/context
 9         https://www.springframework.org/schema/context/spring-context.xsd
10         http://www.springframework.org/schema/mvc
11         https://www.springframework.org/schema/mvc/spring-mvc.xsd">
12     <!-- 开启注解扫描,只扫描Controller注解 -->
13     <context:component-scan base-package="com.dream">
14         <!--只扫描Controller注解-->
15         <context:include-filter type="annotation" expression="org.springframework.stereotype.Controller"/>
16     </context:component-scan>
17     <!-- 视图解析器 -->
18     <bean class="org.springframework.web.servlet.view.InternalResourceViewResolver"
19           id="internalResourceViewResolver">
20         <!-- 前缀 -->
21         <property name="prefix" value="/WEB-INF/pages/"/>
22         <!-- 后缀 -->
23         <property name="suffix" value=".jsp"/>
24     </bean>
25     <!--设置静态资源不过滤-->
26     <mvc:resources location="/css/" mapping="/css/**" />
27     <mvc:resources location="/images/" mapping="/images/**" />
28     <mvc:resources location="/js/" mapping="/js/**" />
29     <mvc:annotation-driven/>
30 </beans>
D)测试SpringMVC的框架是否正确搭建
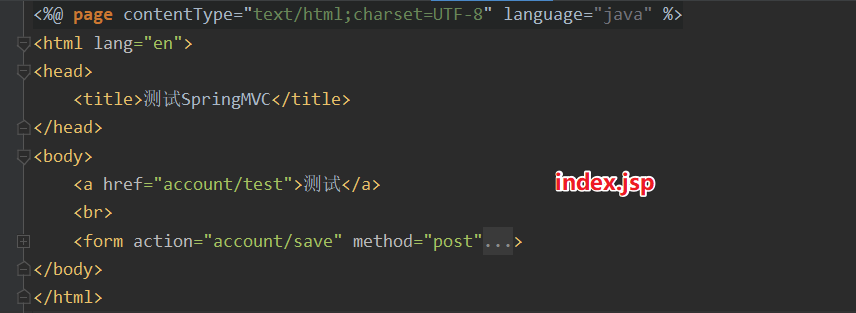
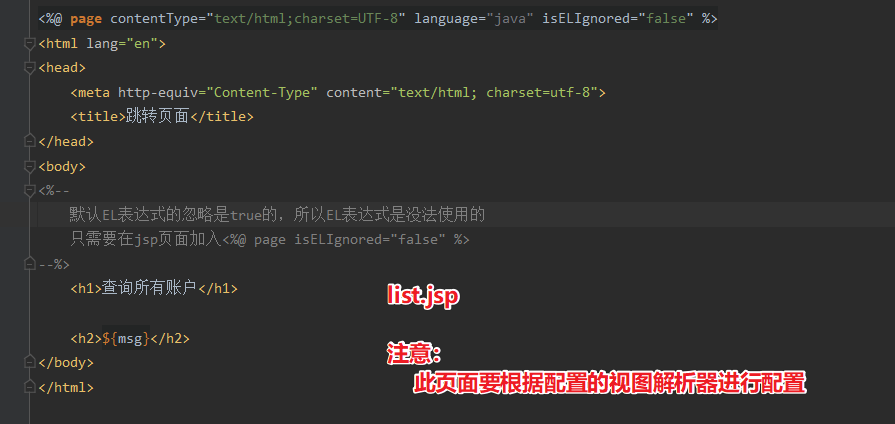
a)编写主页index.jsp和跳转的页面list.jsp
b)创建表现层AccountController类,编写方法,进行测试
 1 /**
 2  * @author ZhangJun
 3  * @date 2020-04-04
 4  * @description 表现层
 5  */
 6 @Controller
 7 @RequestMapping("/account")
 8 public class AccountController {
 9     private final IAccountService accountService;
10
11     public AccountController(IAccountService accountService) {
12         this.accountService = accountService;
13     }
14
15     /**
16      * 查询所有
17      * @param model
18      * @return
19      */
20     @RequestMapping("/test")
21     public String findAll(Model model){
22         System.out.println("表现层,查询所有账户信息");
23         //调用service的方法
24         List<Account> accounts = accountService.findAll();
25         model.addAttribute("msg", accounts);
26         return "list";
27     }
28 }
2)Spring整合SpringMVC框架
A)目的:在表现层中调用业务层的方法
B)分析:
在项目启动时,就去加载applicationContext.xml配置文件,在web.xml中配置ContextLoaderListener监听器
【该监听器只能加载WEB-INF目录下的配置文件,因为applicationContext.xml在类路径下,所以需要同时配置其加载位置】
 1 <!--=============================Spring整合SpringMVC框架======================================-->
 2 <!--配置Spring的监听器:默认只会在WEB-INF目录下的applicationContext.xml文件-->
 3 <listener>
 4     <listener-class>org.springframework.web.context.ContextLoaderListener</listener-class>
 5 </listener>
 6 <!--=======================================================================================-->
 7 <!--设置配置文件的路径:加载类路径的文件-->
 8 <context-param>
 9     <param-name>contextConfigLocation</param-name>
10     <param-value>classpath:applicationContext.xml</param-value>
11 </context-param>
C)在controller中注入service对象,调用service对象的方法进行相关测试
 1 @Controller
 2 @RequestMapping("/account")
 3 public class AccountController {
 4     private final IAccountService accountService;
 5
 6     public AccountController(IAccountService accountService) {
 7         this.accountService = accountService;
 8     }
 9
10     /**
11      * 查询所有
12      * @param model
13      * @return
14      */
15     @RequestMapping("/test")
16     public String findAll(Model model){
17         System.out.println("表现层,查询所有账户信息");
18         //调用service的方法
19         List<Account> accounts = accountService.findAll();
20         model.addAttribute("msg", accounts);
21         return "list";
22     }
23 }

 浙公网安备 33010602011771号