SVN Server on Ubuntu with https access
To install SVN server, run this command at the command prompt:
sudo apt-get install subversion apache2 libapache2-svn
Verify the installed version of Subversion software:
svn --version
We want to configure the apache in such a way that it’ll run on HTTPs and for this we need to enable ssl Apache2 module with a2enmod:
sudo a2enmod ssl
It will suggest you to restart apache;ignore that message for now.
Create a directory inside the /etc/apache2/ directory,where we’ll save the server key and certificate:
sudo mkdir /etc/apache2/ssl
Use this command for creating the self-signed SSL certificate and the server key that protects it, and save them into the new directory (/etc/apache2/ssl/):
sudo openssl req -new -x509 -days 365 -nodes -out /etc/apache2/ssl/apache.pem -keyout /etc/apache2/ssl/apache.key
Note: Fill the information accordingly!
Edit the ports.conf file:
sudo nano /etc/apache2/ports.conf
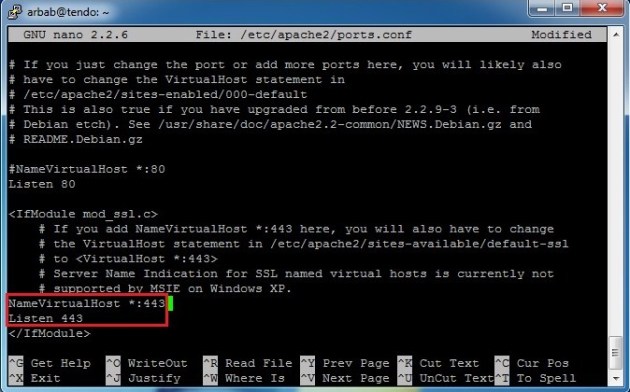
Ensure that port 443 is defined as follows and add the NameVirtualHost for port 443:
NameVirtualHost *:443
Listen 443
Open up the SSL config file:
sudo nano /etc/apache2/sites-available/default-ssl
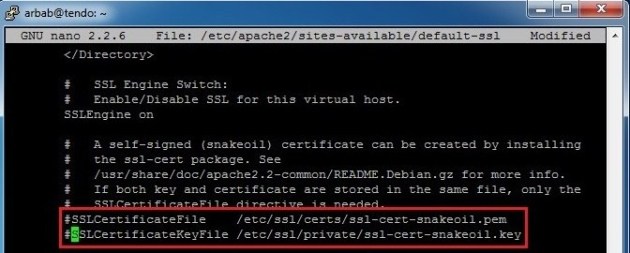
Comment out the default certificate and key:
#SSLCertificateFile /etc/ssl/certs/ssl-cert-snakeoil.pem
#SSLCertificateKeyFile /etc/ssl/private/ssl-cert-snakeoil.key
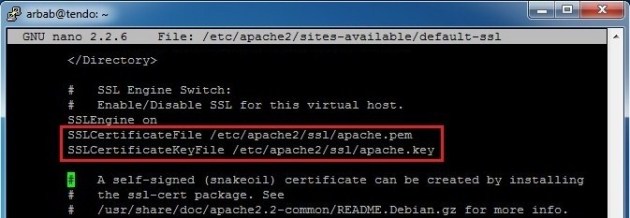
And add the newly created certificate and key:
SSLCertificateFile /etc/apache2/ssl/apache.pem
SSLCertificateKeyFile /etc/apache2/ssl/apache.key
Now we need to configure the SSL site:
sudo a2ensite default-ssl
Restart the Apache service:
sudo /etc/init.d/apache2 restart
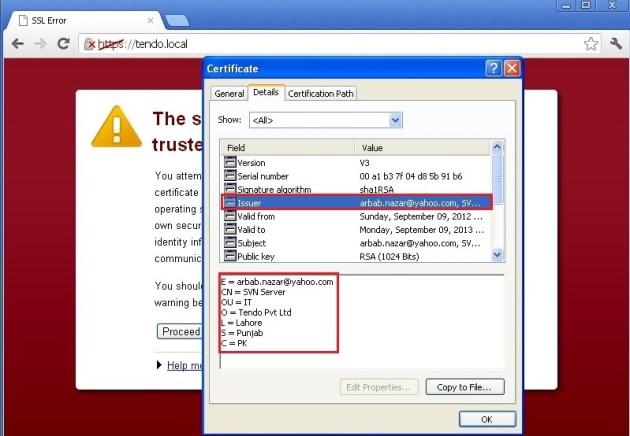
Now we should be able to connect to the server through SSL using Chrome or any other browser:
Verify the Certificate, that it’s the same that we created and configured:
Next, we need to configure the SVN Server for this, make a directory where you want to keep the svn repositories and edit the dav_svn.conf file:
sudo mkdir /svn
sudo nano /etc/apache2/mods-enabled/dav_svn.conf
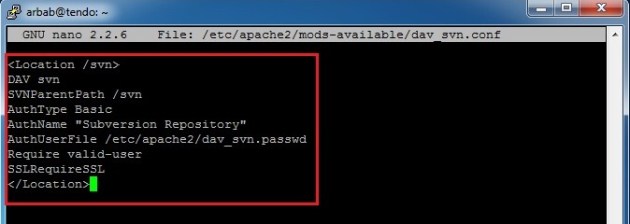
Delete all the data and make it simple like this:
<Location /svn>
DAV svn
SVNParentPath /svn
AuthType Basic
AuthName "Subversion Repository"
AuthUserFile /etc/apache2/dav_svn.passwd
Require valid-user
SSLRequireSSL
</Location>
To create a svn user , use the following command:
sudo htpasswd -cm /etc/apache2/dav_svn.passwd arbab
We only need to use the -c option for the FIRST TIME, when you create a user, after that you will only use the -moption.
Move to the folder, where you want to keep your repositories and create your first repository:
cd /svn
sudo svnadmin create myrepo
Make sure you set the permissions of the /svn directory to apache with the following command:
sudo chown -R www-data:www-data /svn
Restart the apache2 service:
sudo /etc/init.d/apache2 restart
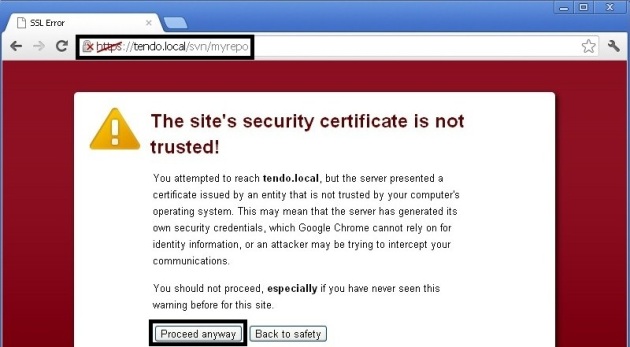
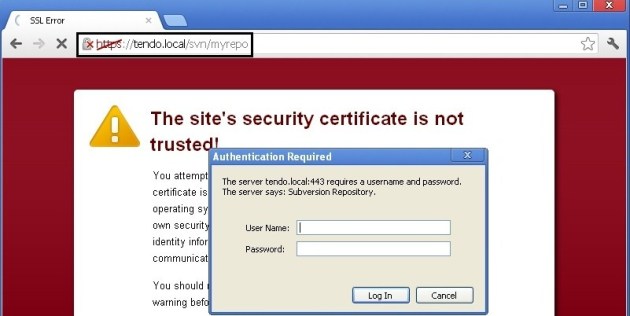
Let’s test with the browser that our svn repository is accessible now through HTTPs at following url:
https://tendo.local/svn/myrepo
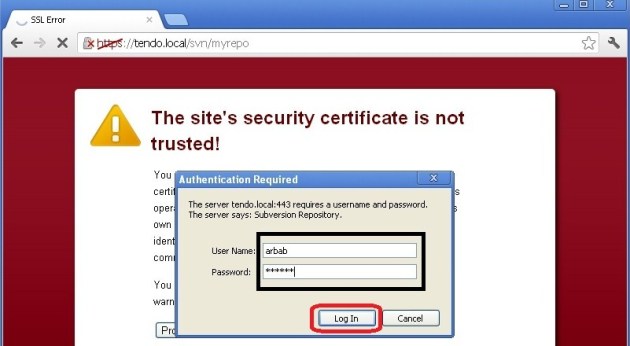
Click “Proceed anyway“, enter the username and password:
Yes, It is working
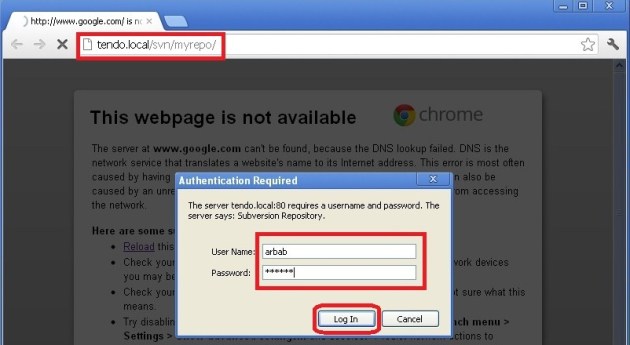
Note: Our SVN Server is also working with http:
But, we don’t want that users access it through http, we only want to access it through https. To fix this, we need to edit the ports.conf file:
sudo nano /etc/apache2/ports.conf
Comment these two lines:
#NameVirtualHost *:80
#Listen 80
Restart the apache2 service:
sudo /etc/init.d/apache2 restart
Now, try to access it through http, it’ll give us the rejection error:
But with https, we can still access the svn repositories:
Hope this will help you!
Please Remember me in your prayers!
Enjoy













 浙公网安备 33010602011771号