RabbitMQ入门demo
1.单机部署
我们在Centos7虚拟机中使用Docker来安装。
1.1.下载镜像
docker pull rabbitmq:3-management
1.2.安装MQ
执行下面的命令来运行MQ容器:
docker run \
 -e RABBITMQ_DEFAULT_USER=itcast \
 -e RABBITMQ_DEFAULT_PASS=123321 \
 --name mq \
 --hostname mq1 \
 -p 15672:15672 \
 -p 5672:5672 \
 -d \
 rabbitmq:3-management
入门案例
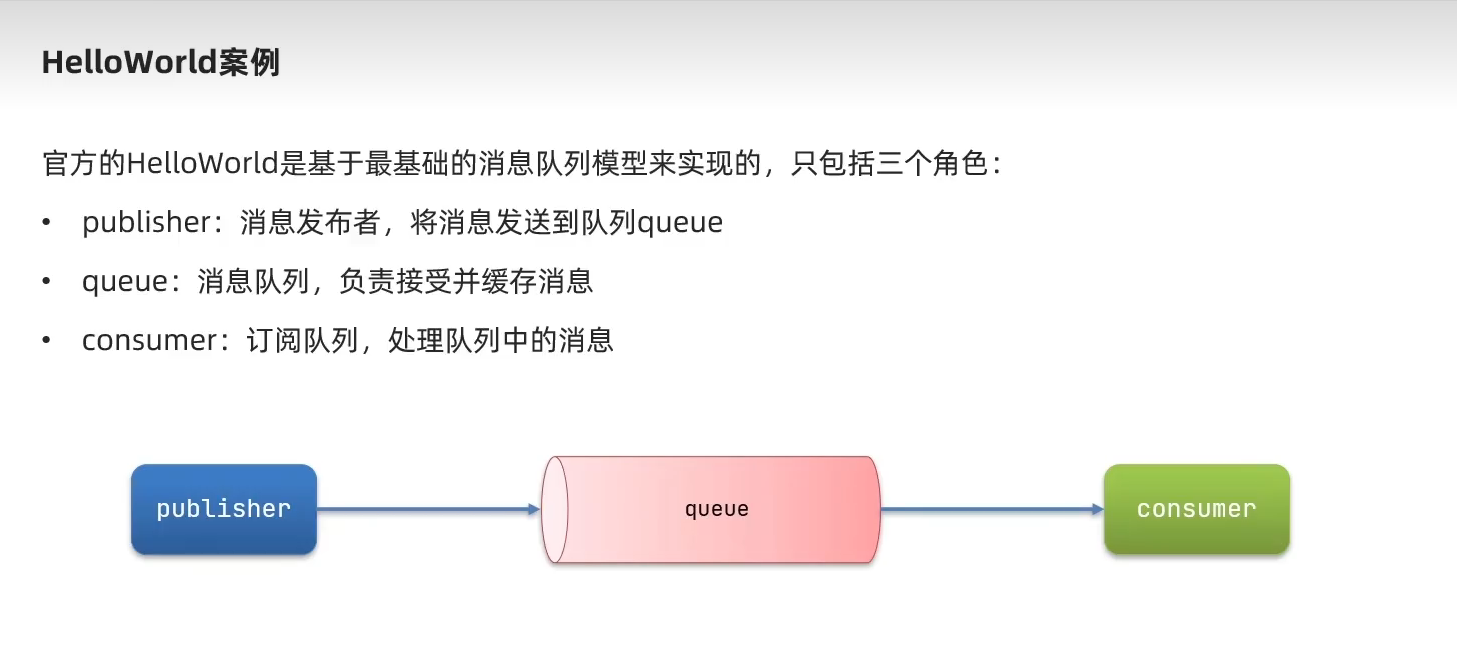
RabbitMQ官网:https://www.rabbitmq.com/getstarted.html

消息发布者
 @Test
    public void testSendMessage() throws IOException, TimeoutException {
        // 1.建立连接
        ConnectionFactory factory = new ConnectionFactory();
        // 1.1.设置连接参数,分别是:主机名、端口号、vhost、用户名、密码
        factory.setHost("192.168.217.134");
        factory.setPort(5672);
        factory.setVirtualHost("/");
        factory.setUsername("itcast");
        factory.setPassword("123321");
        // 1.2.建立连接
        Connection connection = factory.newConnection();

        // 2.创建通道Channel
        Channel channel = connection.createChannel();

        // 3.创建队列
        String queueName = "simple.queue";
        channel.queueDeclare(queueName, false, false, false, null);

        // 4.发送消息
        String message = "hello, rabbitmq!";
        channel.basicPublish("", queueName, null, message.getBytes());
        System.out.println("发送消息成功:【" + message + "】");

        // 5.关闭通道和连接
        channel.close();
        connection.close();

    }
消息消费者
public static void main(String[] args) throws IOException, TimeoutException {
        // 1.建立连接
        ConnectionFactory factory = new ConnectionFactory();
        // 1.1.设置连接参数,分别是:主机名、端口号、vhost、用户名、密码
        factory.setHost("192.168.217.134");
        factory.setPort(5672);
        factory.setVirtualHost("/");
        factory.setUsername("itcast");
        factory.setPassword("123321");
        // 1.2.建立连接
        Connection connection = factory.newConnection();

        // 2.创建通道Channel
        Channel channel = connection.createChannel();

        // 3.创建队列
        String queueName = "simple.queue";
        channel.queueDeclare(queueName, false, false, false, null);

        // 4.订阅消息
        channel.basicConsume(queueName, true, new DefaultConsumer(channel){
            @Override
            public void handleDelivery(String consumerTag, Envelope envelope,
                                       AMQP.BasicProperties properties, byte[] body) throws IOException {
                // 5.处理消息
                String message = new String(body);
                System.out.println("接收到消息:【" + message + "】");
            }
        });
        System.out.println("等待接收消息。。。。");
    }
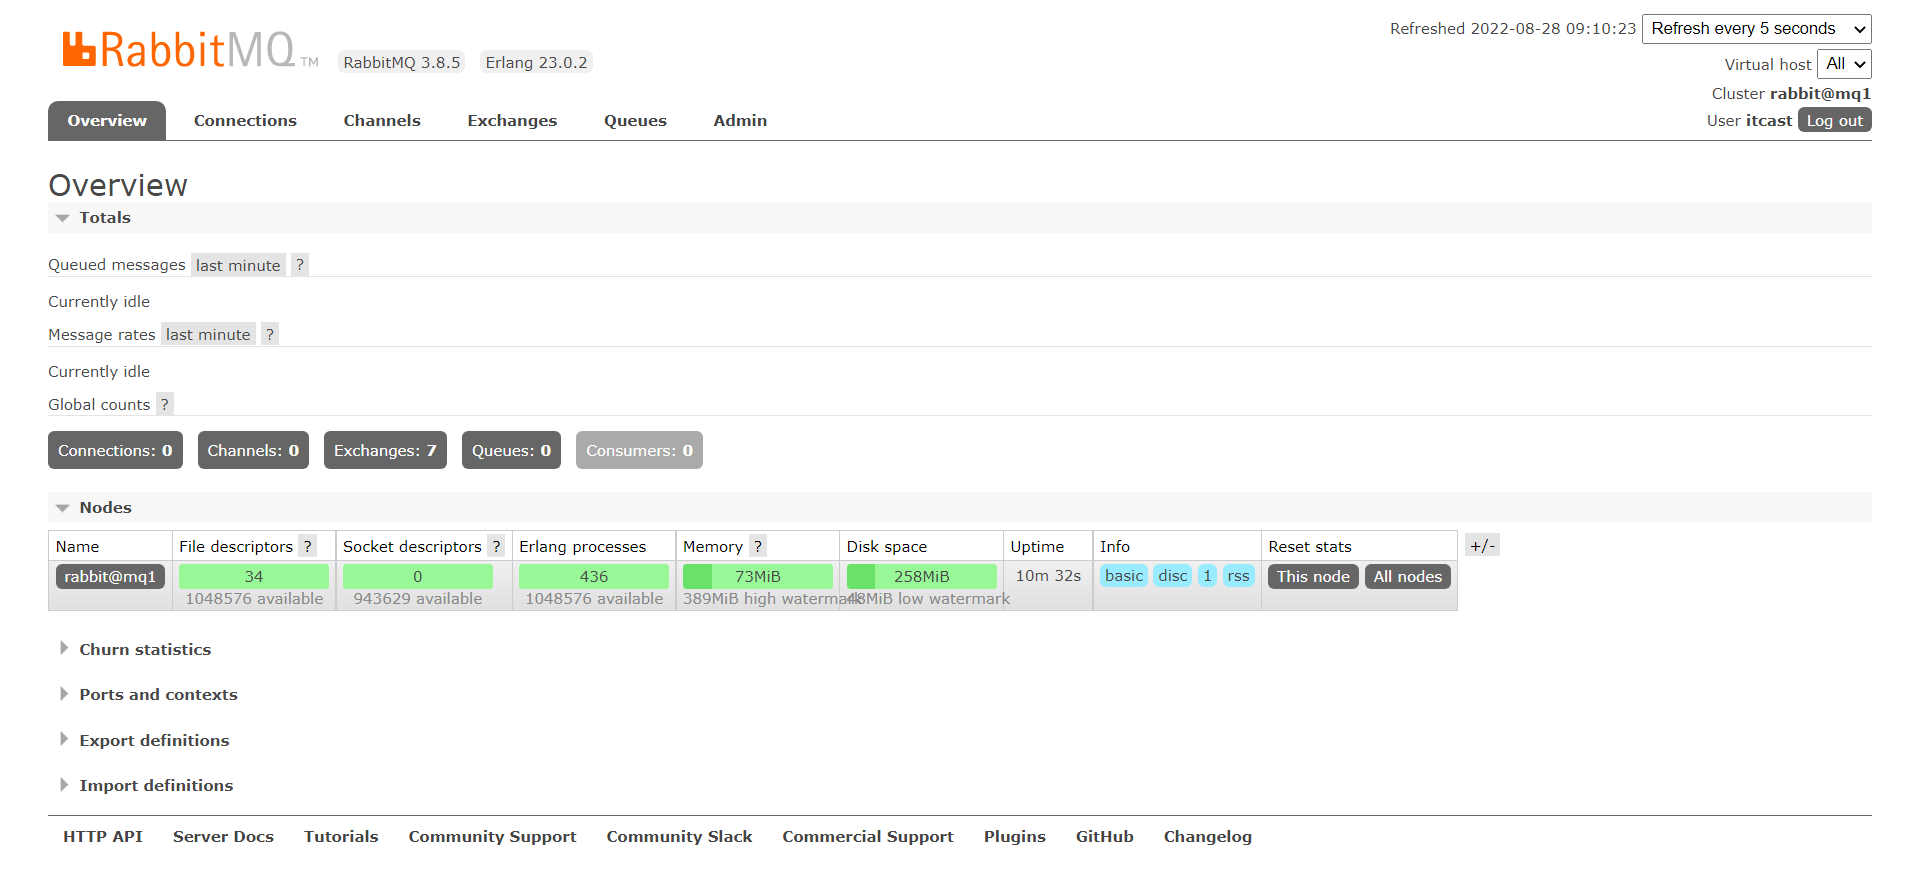
可以去RabbitMQ的管理页面去查看连接、通道、交换机等信息
1572端口是管理页面


 浙公网安备 33010602011771号