
关于Flowable的应用小结
目录
最近在研究流程引擎Flowable,遇到了一些关于部署和多数据源的问题,所以做出如下的总结。
1. Flowable-ui可视化界面部署和使用
1.1 拉取镜像
通过Docker方式部署和启用Flowable-ui,可以用以下的方式拉取镜像。
docker run -d --name flowable -p 9080:8080 flowable/flowable-ui启动后需要修改app/WEB-INF/classes/flowable-default.properties的数据源配置。
如果使用的DB是Docker部署的MySQL server可参考:
为了部署方便也可以使用如下的方式:
docker run -d --name flowable-ui -p 9080:8080 -e SPRING_PROFILES_ACTIVE=mysql -e SPRING_DATASOURCE_URL="jdbc:mysql://IP:3306/flowable?useUnicode=true&characterEncoding=UTF-8&serverTimezone=UTC&useSSL=false&allowPublicKeyRetrieval=true" -e SPRING_DATASOURCE_USERNAME=root -e SPRING_DATASOURCE_PASSWORD=123456 -e SPRING_DATASOURCE_DRIVER_CLASS_NAME=com.mysql.cj.jdbc.Driver -e flowable.database-schema-update=ignore flowable/flowable-ui:6.8.0但值得注意的是,其中的IP不能用localhost,甚至用Container name也不行,会导致Connection Refused的问题。
另外,如果需要部署Flowable-ui到Tomcat可以参考:Flowable UI Web应用搭建教程(图解)。
1.2 添加lib依赖
如果DB用的是MySQL,那么需要在Container的app/WEB-INF/lib目录上传MySQL connector。

上传完Restart就可以访问ui了。
http://127.0.0.1:9080/flowable-ui/#/
username: admin
password: test
如果登录显示invalid credentials,把镜像删掉重新pull就可以了。
2. 在多数据源业务背景下集成Flowable
2.1 添加maven依赖
	org.flowable
	flowable-spring-boot-starter
	6.8.0
2.2 flowable初始化指定schema
通常来说我们会在jdbc url里面指定schema,如:
spring:
  datasource:
    dynamic:
      druid:
        initial-size: 5
        min-idle: 5
        maxActive: 20
        maxWait: 60000
        connectTimeout: 30000
        socketTimeout: 60000
        timeBetweenEvictionRunsMillis: 60000
        minEvictableIdleTimeMillis: 300000
        validationQuery: SELECT 1 FROM DUAL
        testWhileIdle: true
        testOnBorrow: false
        testOnReturn: false
        poolPreparedStatements: true
        maxPoolPreparedStatementPerConnectionSize: 20
        filters: stat,slf4j
        connectionProperties: druid.stat.mergeSql\=true;druid.stat.slowSqlMillis\=5000
      datasource:
          # 主库数据源
          master:
            driver-class-name: com.mysql.cj.jdbc.Driver
            url: jdbc:mysql://127.0.0.1:3306/business?useUnicode=true&characterEncoding=utf8&zeroDateTimeBehavior=convertToNull&useSSL=true&serverTimezone=Asia/Shanghai&allowPublicKeyRetrieval=true&useServerPrepStmts=true&cachePrepStmts=true&prepStmtCacheSize=250&prepStmtCacheSqlLimit=2048&nullCatalogMeansCurrent=true
            username: root
            password: 123456
          # 从库数据源
          flowable_db:
            driver-class-name: com.mysql.cj.jdbc.Driver
            url: jdbc:mysql://127.0.0.1:3306/flowable?useUnicode=true&characterEncoding=utf8&zeroDateTimeBehavior=convertToNull&useSSL=true&serverTimezone=Asia/Shanghai&allowPublicKeyRetrieval=true&useServerPrepStmts=true&cachePrepStmts=true&prepStmtCacheSize=250&prepStmtCacheSqlLimit=2048&nullCatalogMeansCurrent=true
            username: root
            password: 123456
但Flowable启动的时候还是没办法用到指定的db flowable,具体源码分析和原因可以参考:Flowable多数据源配置以及指定schema
那如何指定呢?我们可以通过重写org.flowable.app.engine.AppEngineConfiguration.buildAppEngine()来实现。
package com.bas.config;
import com.baomidou.dynamic.datasource.DynamicRoutingDataSource;
import org.flowable.app.engine.AppEngine;
import org.flowable.app.spring.SpringAppEngineConfiguration;
import org.flowable.engine.ProcessEngine;
import org.flowable.engine.RepositoryService;
import org.flowable.engine.RuntimeService;
import org.flowable.engine.TaskService;
import org.springframework.beans.factory.annotation.Autowired;
import org.springframework.context.annotation.Bean;
import org.springframework.context.annotation.Configuration;
import org.springframework.context.annotation.Primary;
import org.springframework.transaction.PlatformTransactionManager;
import org.springframework.boot.context.event.ApplicationReadyEvent;
import org.springframework.context.event.EventListener;
import javax.annotation.PostConstruct;
import javax.sql.DataSource;
import org.flowable.spring.SpringProcessEngineConfiguration;
@Configuration
public class FlowableConfig {
    @Autowired
    private DynamicRoutingDataSource dynamicDataSource;
    @Autowired
    private PlatformTransactionManager transactionManager;
    @Bean
    @Primary
    public SpringAppEngineConfiguration appEngineConfiguration() {
        SpringAppEngineConfiguration config = new SpringAppEngineConfiguration();
        DataSource flowableDs = dynamicDataSource.getDataSource("flowable_db");
        config.setDataSource(flowableDs);
        config.setTransactionManager(transactionManager);
        return config;
    }
    @Bean
    @Primary
    public AppEngine appEngine() {
        return appEngineConfiguration().buildAppEngine();
    }
    @Bean
    @Primary
    public ProcessEngine processEngine() {
        SpringProcessEngineConfiguration config = new SpringProcessEngineConfiguration();
        config.setTransactionManager(transactionManager);
        DataSource flowableDs = dynamicDataSource.getDataSource("flowable_db");
        config.setDataSource(flowableDs);
        return config.buildProcessEngine();
    }
    @Bean
    public RuntimeService runtimeService() {
        return processEngine().getRuntimeService();
    }
    @Bean
    public TaskService taskService() {
        return processEngine().getTaskService();
    }
    @Bean
    public RepositoryService repositoryService() {
        return processEngine().getRepositoryService();
    }
//    @EventListener(ApplicationReadyEvent.class)
//    public void deployProcessDefinitions() {
//        RepositoryService repositoryService = repositoryService();
//        repositoryService.createDeployment()
//                .addClasspathResource("definitionFiles/*.bpmn20.xml")
//                .deploy();
//    }
}
3. Flowable常用Api
3.1 常用API
假设现在有个flowable process id是testRequest,包含一个分支让用户去approve/reject/complete,我们可以创建一个Controller结合postman来测试。
package com.bas.controller;
import com.bas.domain.AjaxResult;
import org.flowable.engine.RuntimeService;
import org.flowable.engine.TaskService;
import org.flowable.engine.runtime.ProcessInstance;
import org.flowable.task.api.Task;
import org.springframework.beans.factory.annotation.Autowired;
import org.springframework.web.bind.annotation.*;
import org.springframework.transaction.annotation.Transactional;
import java.util.HashMap;
import java.util.List;
import java.util.Map;
import java.util.stream.Collectors;
@RestController
@RequestMapping("/test")
public class TestController {
    @Autowired
    private RuntimeService runtimeService;
    @Autowired
    private TaskService taskService;
    @PostMapping("/request")
    public AjaxResult startTestRequest(@RequestBody Map variables) {
        ProcessInstance processInstance = runtimeService.startProcessInstanceByKey("testRequest", variables);
        return AjaxResult.success("test request started", processInstance.getId());
    }
    @GetMapping("/tasks")
    @Transactional
    public AjaxResult getPendingTasks() {
        List tasks = taskService.createTaskQuery()
                .taskCandidateGroup("managers")
                .list();
        List> taskData = tasks.stream().map(task -> {
            Map taskInfo = new HashMap<>();
            taskInfo.put("id", task.getId());
            taskInfo.put("name", task.getName());
            taskInfo.put("assignee", task.getAssignee());
            taskInfo.put("createTime", task.getCreateTime());
            taskInfo.put("processInstanceId", task.getProcessInstanceId());
            return taskInfo;
        }).collect(Collectors.toList());
        return AjaxResult.success(taskData);
    }
    @GetMapping("/tasks/employee")
    @Transactional
    public AjaxResult getEmployeeTasks(@RequestParam String employee) {
        List tasks = taskService.createTaskQuery()
                .taskAssignee(employee)
                .list();
        List> taskData = tasks.stream().map(task -> {
            Map taskInfo = new HashMap<>();
            taskInfo.put("id", task.getId());
            taskInfo.put("name", task.getName());
            taskInfo.put("assignee", task.getAssignee());
            taskInfo.put("createTime", task.getCreateTime());
            taskInfo.put("processInstanceId", task.getProcessInstanceId());
            return taskInfo;
        }).collect(Collectors.toList());
        return AjaxResult.success(taskData);
    }
    // approve
    @PostMapping("/approve/{taskId}")
    public AjaxResult approveTask(@PathVariable String taskId, @RequestParam boolean approved) {
        Map variables = new HashMap<>();
        variables.put("approved", approved);
        taskService.complete(taskId, variables);
        return AjaxResult.success("Task completed");
    }
    @PostMapping("/complete/{taskId}")
    public AjaxResult completeTask(@PathVariable String taskId) {
        taskService.complete(taskId);
        return AjaxResult.success("Task completed");
    }
    // reject
    @GetMapping("/tasks/rejected")
    public AjaxResult getRejectedTasks(@RequestParam String employee) {
        List tasks = taskService.createTaskQuery()
                .taskAssignee(employee)
                .taskName("Task rejected")
                .list();
        return AjaxResult.success(tasks);
    }
//    @PostMapping("/acknowledge/{taskId}")
//    public AjaxResult acknowledgeRejection(@PathVariable String taskId) {
//        taskService.complete(taskId);
//        return AjaxResult.success("Rejection acknowledged");
//    }
}
3.2 Postman测试
以下是API对应的Postman request。
postman request POST 'localhost:9000/test/request' \
--header 'Content-Type: application/json' \
--body '{
"employee": "Tester",
"startDate": "2025-12-11",
"endDate": "2025-12-12",
"reason": "Annual vacation",
"days": 1
}'
postman request 'localhost:9000/test/tasks' \
--body ''
postman request 'localhost:9000/test/tasks/employee?employee=manager' \
--body ''
postman request POST 'localhost:9000/test/approve/2514?approved=true' \
--body ''
postman request POST 'localhost:9000/test/complete/2523' \
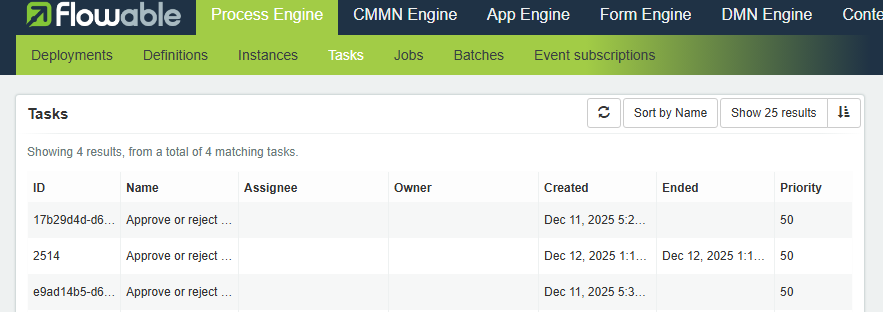
--body ''在Start process之后,具体的TaskID可以在这里查得到:http://127.0.0.1:9080/flowable-ui/admin/#/tasks

 浙公网安备 33010602011771号