Selenium 爬虫

相关资料
免责声明
本人承诺在使用爬虫程序时,仅出于学习和个人技术提升的目的,以了解互联网数据抓取和分析的工作原理。
本人郑重声明:
-
非商业用途:本人所使用的爬虫程序纯属个人学习之需,绝不用于商业目的或从事任何违法违规活动。
-
尊重网站规则:在使用爬虫程序时,本人将遵守所爬取网站的robots.txt协议或网站的访问规则,并尊重网站所有者对于爬虫程序的限制。
-
数据保护和隐私:本人承诺在爬取数据时不会获取、储存或利用任何个人隐私信息,且不会对所访问网站造成不必要的负担或干扰。
-
技术分享与合作:本人愿意遵守技术共享的原则,不会滥用所学知识,也愿意在合适的情况下与相关人士分享学习心得。
-
法律遵守:本人承诺遵守当地法律法规,并对于使用爬虫程序可能带来的风险和责任自行承担。
使用目的
这次我使用是为了爬取一个网站的数据,但是这个网站用普通的爬虫只能得到静态的网页,反爬做的比较好,于是我就找到了可以模拟点击浏览器的自动化工具Selenium
其可以通过代码自动打开浏览器,并进行点击,填写,跳转等操作,并可以通过内置方法获取HTML元素
代码
import traceback
from threading import Thread
import requests
from bs4 import BeautifulSoup
import time
import random
from helium import *
from selenium import webdriver
from selenium.webdriver.common.by import By
from selenium.webdriver.chrome.service import Service
from selenium.webdriver.support.wait import WebDriverWait
import pandas as pd
chrome_driver_path = r'C:\Users\86150\Documents\chrome-win64\chrome-win64\chrome.exe'
starturl = 'url'
def findQuestion(html01):
try:
# 查找问题
question = html01.find_element(By.CLASS_NAME, "com-mnks-question-detail") \
.find_element(By.CLASS_NAME, 'timu') \
.find_element(By.CLASS_NAME, 'timu-text')
question = str(question.text)
return question
except Exception as ex:
print(f"出现异常Question:f{ex}")
return "NaN"
def findSelect(html01):
try:
# 查找选择
selectOpt = html01.find_element(By.CLASS_NAME, "com-mnks-question-detail") \
.find_element(By.CLASS_NAME, 'answer-w') \
.find_element(By.CLASS_NAME, 'options-w') \
.find_elements(By.TAG_NAME, 'p')
selectlist = []
for p_element in selectOpt:
text = p_element.text
selectlist.append(text)
ans = "\n".join(selectlist)
return ans
except Exception as ex:
print(f"出现异常Select:f{ex}")
return "NaN"
def findImg(html01):
try:
# 查找图片
imageInf = html01.find_element(By.CLASS_NAME, "com-mnks-question-detail") \
.find_element(By.CLASS_NAME, 'answer-w') \
.find_element(By.CLASS_NAME, 'media-w') \
.find_element(By.TAG_NAME, 'img').get_attribute('src')
return str(imageInf)
except Exception as ex:
print(f"No Img")
return "NaN"
def findAns(html01, wait):
try:
ans_element = html01.find_element(By.CLASS_NAME, "com-shiti-xiangjie") \
.find_element(By.CLASS_NAME, "xiangjie") \
.find_element(By.CLASS_NAME, "content")
ans = str(ans_element.get_attribute("innerHTML"))
if ans == "":
ans = "Void"
return ans
except Exception as ex:
print(f"出现异常Ans:f{ex}")
return "NaN"
def getAns(html01):
try:
html01.find_element(By.CLASS_NAME, "tool-bar") \
.find_element(By.CLASS_NAME, "btn-bar") \
.find_element(By.CSS_SELECTOR, 'button.right.pt[ref="xiangqing"]').click()
except Exception as ex:
print(f'出现异常getAns:{ex}')
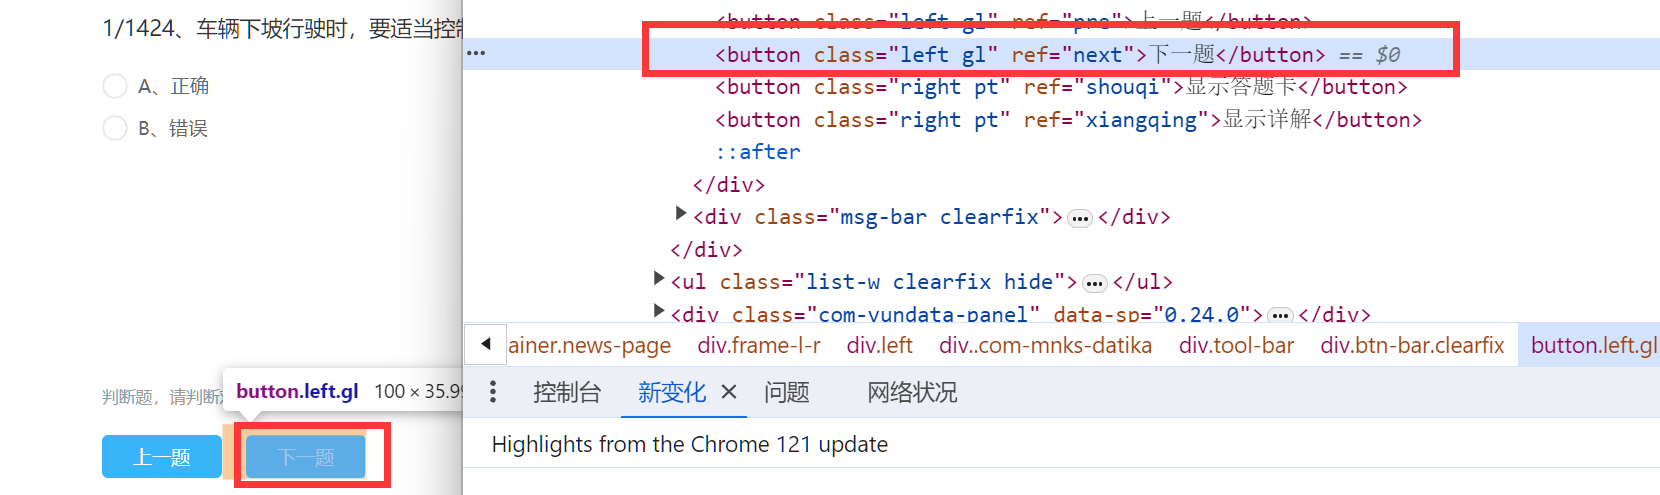
def nextOne(html01):
try:
html01.find_element(By.CLASS_NAME, "tool-bar") \
.find_element(By.CLASS_NAME, "btn-bar") \
.find_element(By.XPATH, "//button[text()='下一题']").click()
return True
except Exception as ex:
print(f"出现异常nextOne:f{ex}")
return False
def debug(df_train):
try:
print(df_train.shape)
print(df_train.tail(1))
print("***************************")
print()
except Exception as ex:
print(f"出现异常DEBUG:{ex}")
def getData(url):
startNum = 0
df_train = pd.DataFrame({'question': [], 'selectOption': [],
'imgUrl': [], 'answer': []})
# 打开主页
driver = webdriver.Chrome()
driver.get(url)
wait = WebDriverWait(driver, timeout=10)
time.sleep(10)
while startNum < 1424:
startNum = startNum + 1
try:
html01 = driver.find_element(By.CLASS_NAME, 'layout-article') \
.find_element(By.CLASS_NAME, 'news-page') \
.find_element(By.CLASS_NAME, 'left')
getAns(html01)
html01 = driver.find_element(By.CLASS_NAME, 'layout-article') \
.find_element(By.CLASS_NAME, 'news-page') \
.find_element(By.CLASS_NAME, 'left')
wait.until(lambda d: html01.is_displayed())
a1 = findQuestion(html01)
a2 = findSelect(html01)
a3 = findImg(html01)
a4 = findAns(html01, wait)
'''
print(a1)
print(a2)
print(a3)
print(a4)
'''
tdf = pd.DataFrame({'question': [a1], 'selectOption': [a2],
'imgUrl': [a3], 'answer': [a4]})
df_train = pd.concat([df_train, tdf])
debug(df_train)
flag = nextOne(html01)
if not flag:
break
except Exception as ex:
print("出现如下异常getData:%s" % ex)
traceback.print_exc()
driver.quit()
return df_train
Data_MONI = getData(starturl)
Data_MONI.to_csv("D:\\moni_Four-DataCsv.csv")
Data_MONI.to_excel('D:\\moni_Four-DataExcel.xlsx')
忠告:wait不能用太多了,否则会出现错误,但是没有提示,而且代码跑起来很慢
基于评论爬取,腾讯云NLP情绪分析,以及LDA主题分析
评论爬取
尝试用scrapy
scrapy的缺陷:
-
入门较难
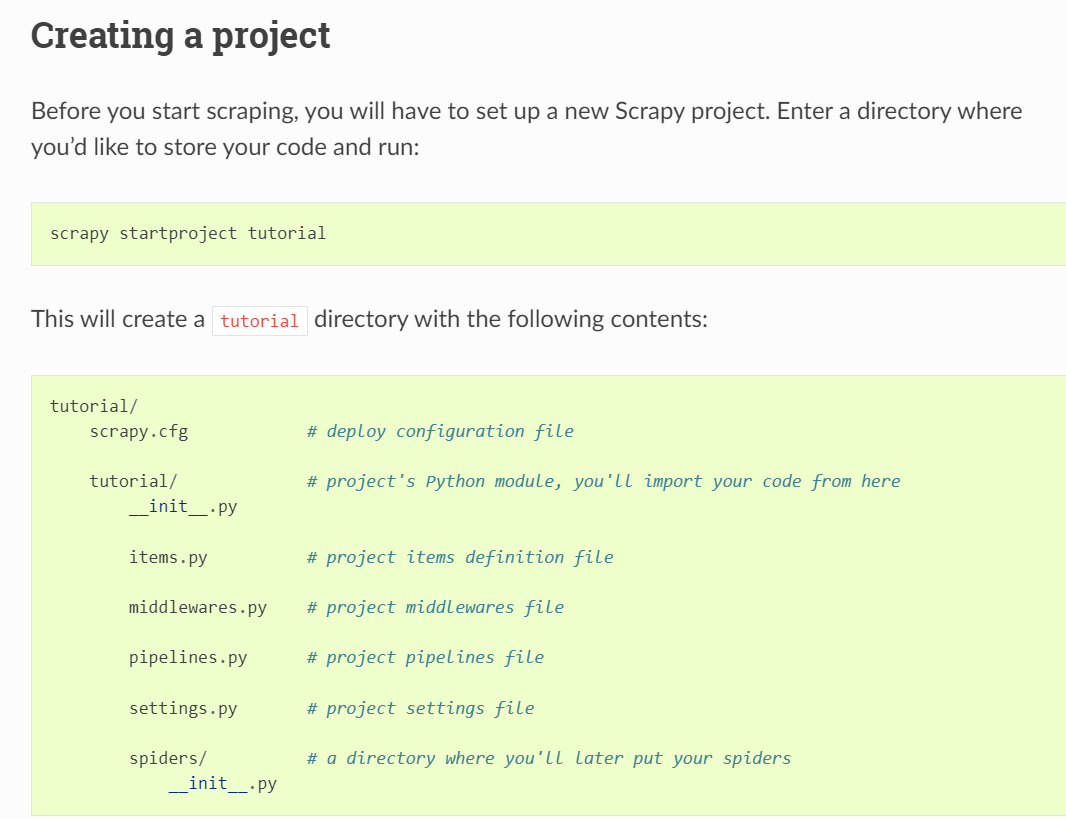
需要通过它的方法设置指定文件夹,同时在文件中的py文件中写各种方法/配置,才能够完善各种操作,
然后还要写命令行操作 -
遇到反爬没有selenium中那么好处理:
import scrapy


class QuotesSpider(scrapy.Spider):
    name = "quotes"
    start_urls = [
        "https://quotes.toscrape.com/page/1/",
    ]

    def parse(self, response):
        for quote in response.css("div.quote"):
            yield {
                "text": quote.css("span.text::text").get(),
                "author": quote.css("span small::text").get(),
                "tags": quote.css("div.tags a.tag::text").getall(),
            }

        next_page = response.css("li.next a::attr(href)").get()
        if next_page is not None:
            yield response.follow(next_page, callback=self.parse)
next_page = response.css("li.next a::attr(href)").get()
官网中的例子是
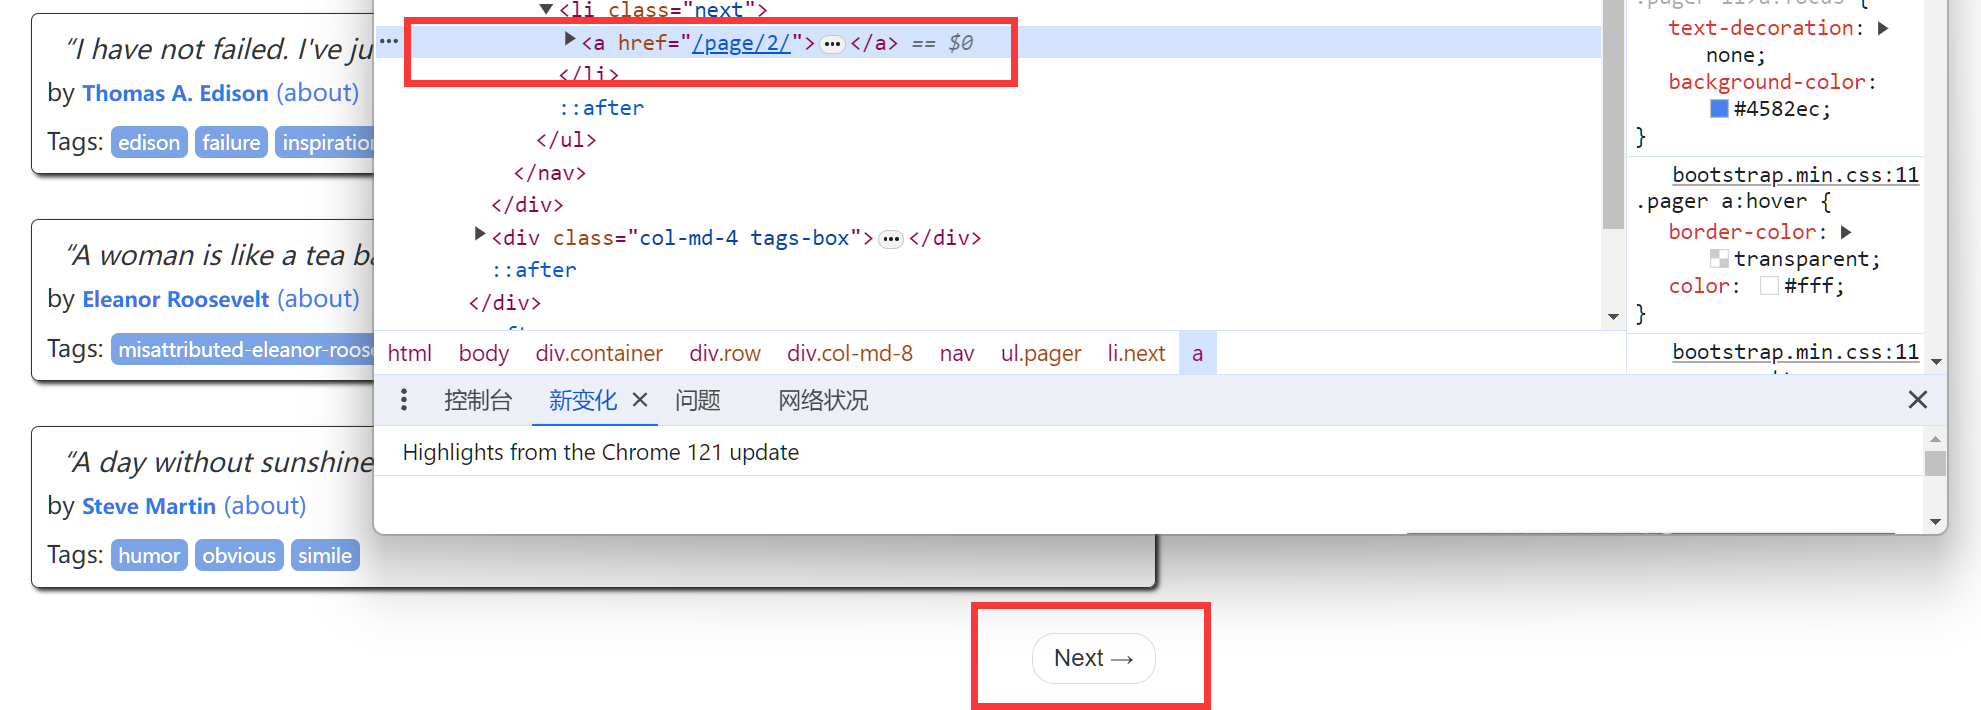
像这种a标签自带了下一个地址,但是如这种情况
完全由ajax临时申请的数据,scrapy实现爬取,应该比较难
selenium爬取代码
import traceback
import time
import re
from selenium import webdriver
from selenium.webdriver.common.by import By
from selenium.webdriver.support.wait import WebDriverWait
from selenium.webdriver.support import expected_conditions as EC
import pandas as pd
# chrome_driver_path = r'C:\Users\86150\Documents\chrome-win64\chrome-win64\chrome.exe'
chrome_driver_path = r'C:\Program Files\Google\Chrome\Application\chrome.exe'
starturls = ['https://you.ctrip.com/sight/jian876/140569.html#ctm_ref=www_hp_bs_lst',
'https://you.ctrip.com/sight/yanshan2389/70727.html',
'https://you.ctrip.com/sight/anyi2378/119888.html',
'https://you.ctrip.com/sight/guangchang2434/1979861.html#ctm_ref=www_hp_bs_lst',
'https://you.ctrip.com/sight/anyi2378/119888.html#ctm_ref=www_hp_bs_lst',
'https://you.ctrip.com/sight/lean2414/1703527.html',
'https://you.ctrip.com/sight/fuliang2420/61146.html#ctm_ref=www_hp_bs_lst',
'https://you.ctrip.com/sight/wuyuan446/140592.html',
'https://you.ctrip.com/sight/wuyuan446/72527.html',
'https://you.ctrip.com/sight/shicheng2415/109915.html',
'https://you.ctrip.com/sight/wuyuan446/127484.html',
'https://you.ctrip.com/sight/wuyuan446/141512.html']
fileName = "twoQuestion"
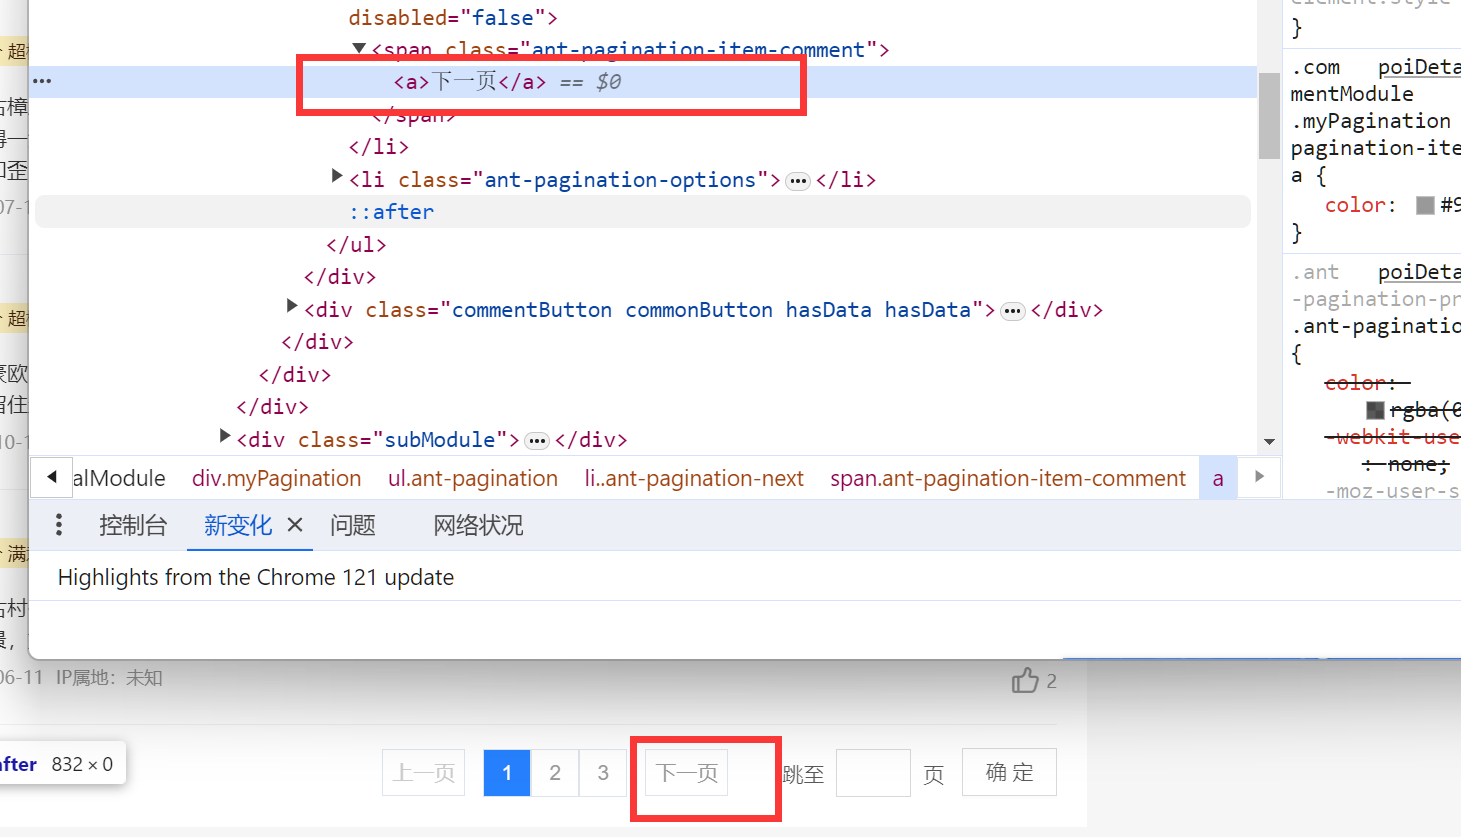
def nextOne(rootHtml, driver):
try:
nextButton = rootHtml.find_element(By.CLASS_NAME, "myPagination") \
.find_element(By.CLASS_NAME, "ant-pagination-next") \
.find_element(By.CLASS_NAME, 'ant-pagination-item-comment') \
.find_element(By.TAG_NAME, "a")
nextButtonClickable = WebDriverWait(driver, 2).until(EC.element_to_be_clickable(nextButton))
nextButtonClickable.click()
return True
except Exception as ex:
print(f"出现异常nextOne:f{ex}")
return False
def debug(df_train):
try:
print(df_train.shape)
print(df_train.tail(1).to_string())
print("***************************")
print()
except Exception as ex:
print(f"出现异常DEBUG:{ex}")
def getData(driver, url, df_train):
try:
countNum = 0
time.sleep(2)
driver.get(url)
wait = WebDriverWait(driver, timeout=10)
rootHtml = driver.find_element(By.CLASS_NAME, 'poiDetailPageWrap')
wait.until(lambda d: rootHtml.is_displayed())
position = rootHtml.find_element(By.CLASS_NAME, 'title') \
.find_element(By.TAG_NAME, 'h1')
position = str(position.text)
maxNum = rootHtml.find_element(By.CLASS_NAME, 'hover-underline')
maxNum = int(re.search(r'\d+', maxNum.text).group())
while True:
time.sleep(0.5)
rootHtml = driver.find_element(By.CLASS_NAME, 'poiDetailPageWrap')
wait.until(lambda d: rootHtml.is_displayed())
contents = rootHtml.find_elements(By.CLASS_NAME, 'commentDetail')
for content in contents:
content = str(content.text).encode('gbk', 'ignore').decode('gbk')
tdf = pd.DataFrame({'position': [position], 'content': [content]})
df_train = pd.concat([df_train, tdf])
countNum = countNum + 1
debug(df_train)
if not nextOne(rootHtml, driver) or countNum >= maxNum:
break
except Exception as ex:
print("出现如下异常getData:%s" % ex)
traceback.print_exc()
return df_train
def solve():
try:
# 打开主页
driver = webdriver.Chrome()
df_train = pd.DataFrame({'position': [], 'content': []})
for url in starturls:
df_train = getData(driver, url, df_train)
df_train.to_csv(f"D:\\爬虫\\tourism\\{fileName}.csv", index=False, encoding="gbk")
driver.quit()
except Exception as ex:
print("出现如下异常solve:%s" % ex)
solve()
使用腾讯云NLP云计算
基本思想是:
- pip 腾讯云的python库
- 准备好秘钥
- 利用腾讯云的库,发送请求
- 接收返回结果
import json
from tencentcloud.common import credential
from tencentcloud.common.profile.client_profile import ClientProfile
from tencentcloud.common.profile.http_profile import HttpProfile
from tencentcloud.common.exception.tencent_cloud_sdk_exception import TencentCloudSDKException
from tencentcloud.nlp.v20190408 import nlp_client, models


def get_sentiment(text):
    try:
        cred = credential.Credential("SecretId",
                                     "Secretkey")
        # 实例化一个http选项,可选的,没有特殊需求可以跳过
        httpProfile = HttpProfile()
        httpProfile.endpoint = "nlp.tencentcloudapi.com"

        # 实例化一个client选项,可选的,没有特殊需求可以跳过
        clientProfile = ClientProfile()
        clientProfile.httpProfile = httpProfile
        # 实例化要请求产品的client对象,clientProfile是可选的
        client = nlp_client.NlpClient(cred, "", clientProfile)

        # 实例化一个请求对象,每个接口都会对应一个request对象
        req = models.AnalyzeSentimentRequest()
        params = {
            "Text": text
        }
        req.from_json_string(json.dumps(params))

        # 返回的resp是一个AnalyzeSentimentResponse的实例,与请求对象对应
        resp = client.AnalyzeSentiment(req)
        resp = json.loads(resp.to_json_string())

        return [resp['Positive'], resp['Negative'], resp['Neutral'], resp['Sentiment']]
        # 输出json格式的字符串回包
        # print(resp.to_json_string())

    except TencentCloudSDKException as err:
        print(err)


import pandas as pd

df = pd.read_csv("D:\\爬虫\\tourism\\oneQuestion.csv", encoding='gbk')
df['情感分析'] = df['content'].apply(get_sentiment)
df[['积极', '消极', '中立', '情感倾向']] = df['情感分析'].apply(pd.Series)
df = df.drop('情感分析', axis=1)
df.to_csv("./sentiment_data.csv", index=False, encoding="gbk")
中文LDA主题分析
基本思想是:
- 对每一个评论句子进行中文分词,清洗掉停词
- 得到词频矩阵
- 调用LDA模型
中文分词 jieba
中文停词我用的是nltk的:
from nltk.corpus import stopwords

stop_words = stopwords.words('chinese') #选择英文停止词 去重 得到英文停止词表
custom_stop_words = ["好", "好好", "很", "不错","一个","不","去","都","挺","还","篁","岭","安义","没","婺源"]
# 扩展停词
stop_words.extend(custom_stop_words)
中文LDA
from sklearn.feature_extraction.text import TfidfVectorizer, CountVectorizer
from sklearn.decomposition import LatentDirichletAllocation
import numpy as np
#读取语料

def word_cut(text):
    stop_words = stopwords.words('chinese')
    custom_stop_words = ["好", "好好", "很", "不错","一个","不","去","都","挺","还","篁","岭","安义","没","婺源","瑶里"]
    stop_words.extend(custom_stop_words)

    # 结巴分词 cut_all=True 设置为全模式
    # 需要注意的是这里不需要" ".join(text),上面需要这么做是因为我得到的是Series中的values
    wordlist = jieba.cut(text)
    wordlist = [word for word in wordlist if word not in stop_words]
    # 使用空格连接 进行中文分词
    return " ".join(wordlist)

df['content_cut']=df['content'].apply(word_cut)

n_features = 2500 #提取1000个特征词语
tf_vectorizer = CountVectorizer(max_features=n_features,
                                max_df=0.5,
                                min_df = 10)
tf = tf_vectorizer.fit_transform(df['content_cut'])

# 计算每一行的最大值
#row_max_values = np.max(tf, axis=1)
# 计算每一行的最小值
#row_min_values = np.min(tf, axis=1)

#print("每一行的最大值:", row_max_values)
#print("每一行的最小值:", row_min_values)

#print(tf.toarray())

# 首先计算下困惑度曲线吧
plexs = []
n_max_topics = 12
for i in range(1,n_max_topics):
    print(i)
    lda = LatentDirichletAllocation(n_components=i, max_iter=50,
                                    learning_method='batch',
                                    learning_offset=50,random_state=0)
    lda.fit(tf)
    plexs.append(lda.perplexity(tf))


n_t=n_max_topics-1#区间最右侧的值。注意:不能大于n_max_topics
x=list(range(1,n_t))
plt.plot(x,plexs[1:n_t])
plt.xlabel("number of topics")
plt.ylabel("perplexity")
plt.show()


# 获取主题以及其下的单词
n_topics = 5
lda = LatentDirichletAllocation(n_components=n_topics, max_iter=50,
                                learning_method='batch',
                                learning_offset=50,
#                                 doc_topic_prior=0.1,
#                                 topic_word_prior=0.01,
                               random_state=0)
lda.fit(tf)


def print_top_words(model, feature_names, n_top_words):
    for index, topic in enumerate(model.components_):
        message = "\nTopic #{}:".format(index)
        # topic.argsort 是对这个主题下的单词按照权重从小到大排序,于是
        # 我们从默认的-1 开始(即最后一个单词),到第-40个单词为止,取出单词
        message += " ".join([feature_names[i]
                             for i in topic.argsort()[:-n_top_words - 1 :-1]])
        print(message)
        print("="*70)

n_top_words = 6
tf_feature_names = tf_vectorizer.get_feature_names_out()
topic_word = print_top_words(lda, tf_feature_names, n_top_words)

# pip install pyLDAvis
import pyLDAvis
import pyLDAvis.sklearn
pyLDAvis.enable_notebook(local=True)

pic = pyLDAvis.sklearn.prepare(lda,  tf, tf_vectorizer)

pyLDAvis.display(pic) #在notebook的output cell中显示
解决中文词云乱码问题
代码体现在:
# 对分词后的文本生成词云
my_wordcloud = WordCloud( background_color = 'white',
                            mask = nana_coloring,
                            max_words = 1000,
                            stopwords = stop_words,
                            max_font_size = 150,
                            random_state = 30,
                            font_path='msyh.ttc'
                            )
:font_path='msyh.ttc'
词云的全部代码为:
#coding=gbk
from os import path
from imageio import imread
import jieba
import sys
import matplotlib.pyplot as plt
from wordcloud import WordCloud, STOPWORDS, ImageColorGenerator
%matplotlib inline
from collections import Counter
import nltk
from nltk.corpus import stopwords

stop_words = stopwords.words('chinese') #选择英文停止词 去重 得到英文停止词表
custom_stop_words = ["好", "好好", "很", "不错","一个","不","去","都","挺","还","篁","岭","安义","没","婺源"]
stop_words.extend(custom_stop_words)

# 结巴分词 cut_all=True 设置为全模式
#t_pos_text=pos_text.tostring().decode("gbk", errors="ignore")
t_pos_text=" ".join(pos_text)
#print(t_pos_text)
#print(t_pos_text2)
wordlist = jieba.cut(t_pos_text)     #cut_all = True

# 使用空格连接 进行中文分词
wl_space_split = " ".join(wordlist)
#print(wl_space_split)

d = %pwd
nana_coloring = imread(path.join(d, "古叶.jpg"))
# 对分词后的文本生成词云
my_wordcloud = WordCloud( background_color = 'white',
                            mask = nana_coloring,
                            max_words = 1000,
                            stopwords = stop_words,
                            max_font_size = 150,
                            random_state = 30,
                            font_path='msyh.ttc'
                            )

my_wordcloud.generate(wl_space_split)

my_wordcloud = my_wordcloud.recolor(color_func=lambda *args, **kwargs: "green")

plt.figure(figsize=(10, 8))
plt.imshow(my_wordcloud)    # 显示词云图
plt.axis("off")             # 是否显示x轴、y轴下标
plt.show()
问题报错
selenium 获取元素错误
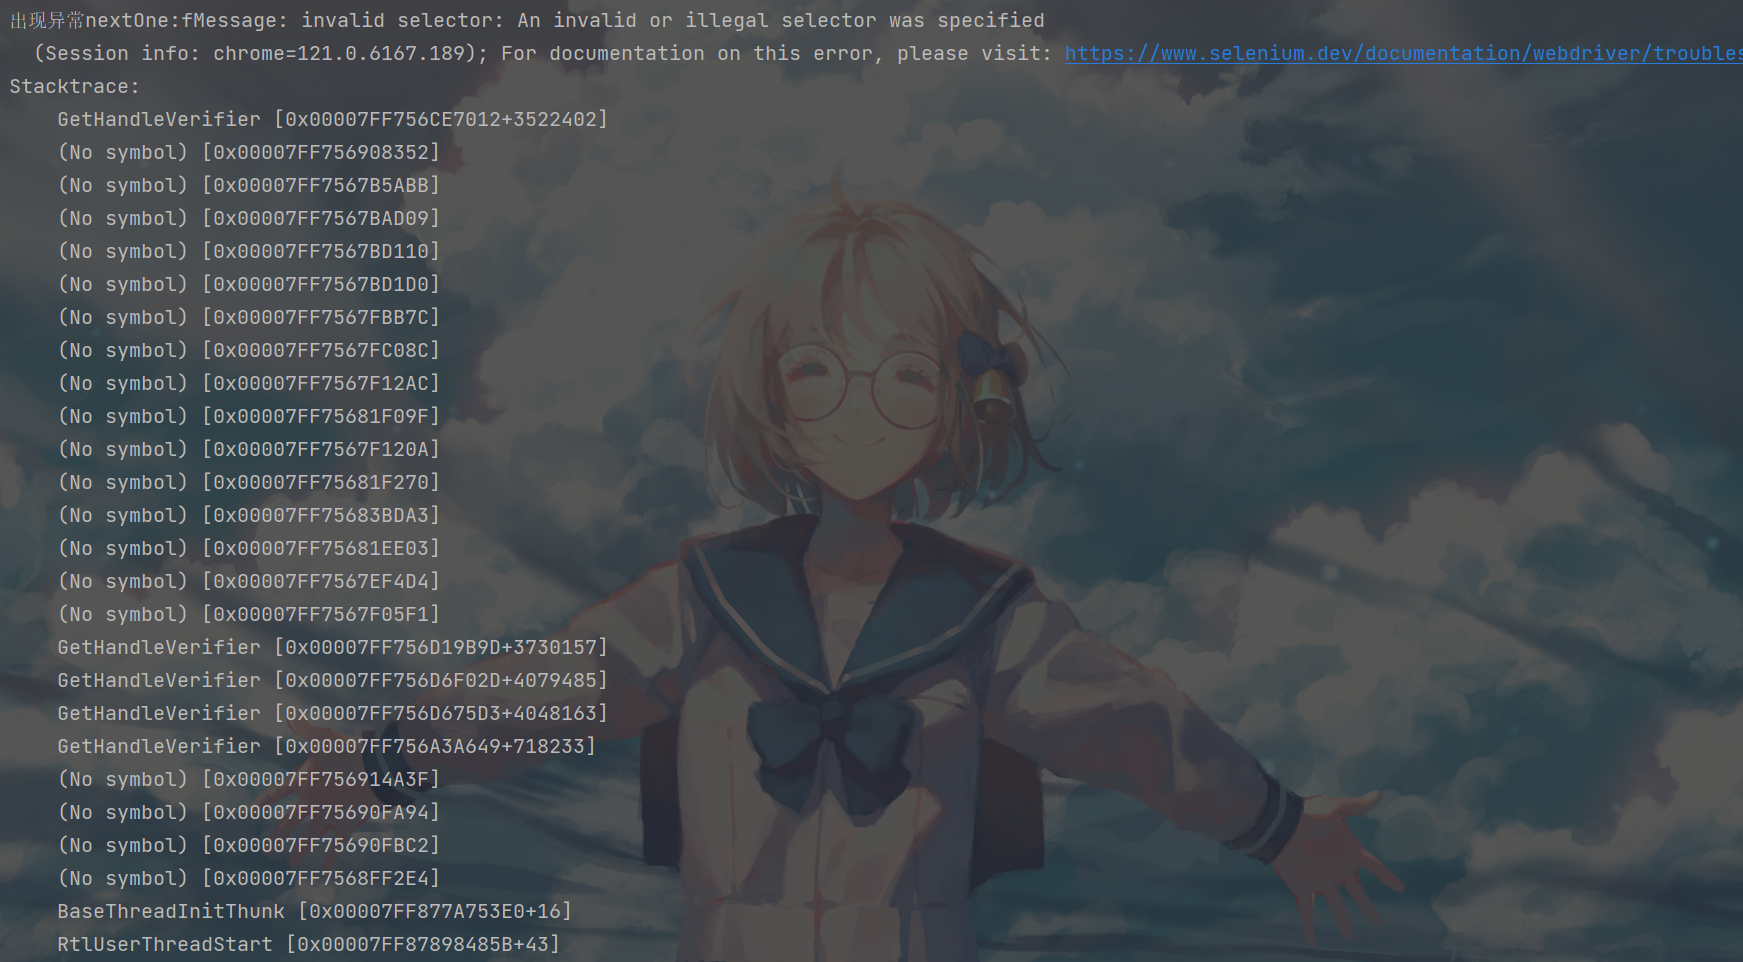
出现这种问题一般是.find_element寻找的不合理,比如:
- 按钮需要唯一确定才能够进行click,但是通过一系列的.find_element后,程序找到的按钮有多个以上.
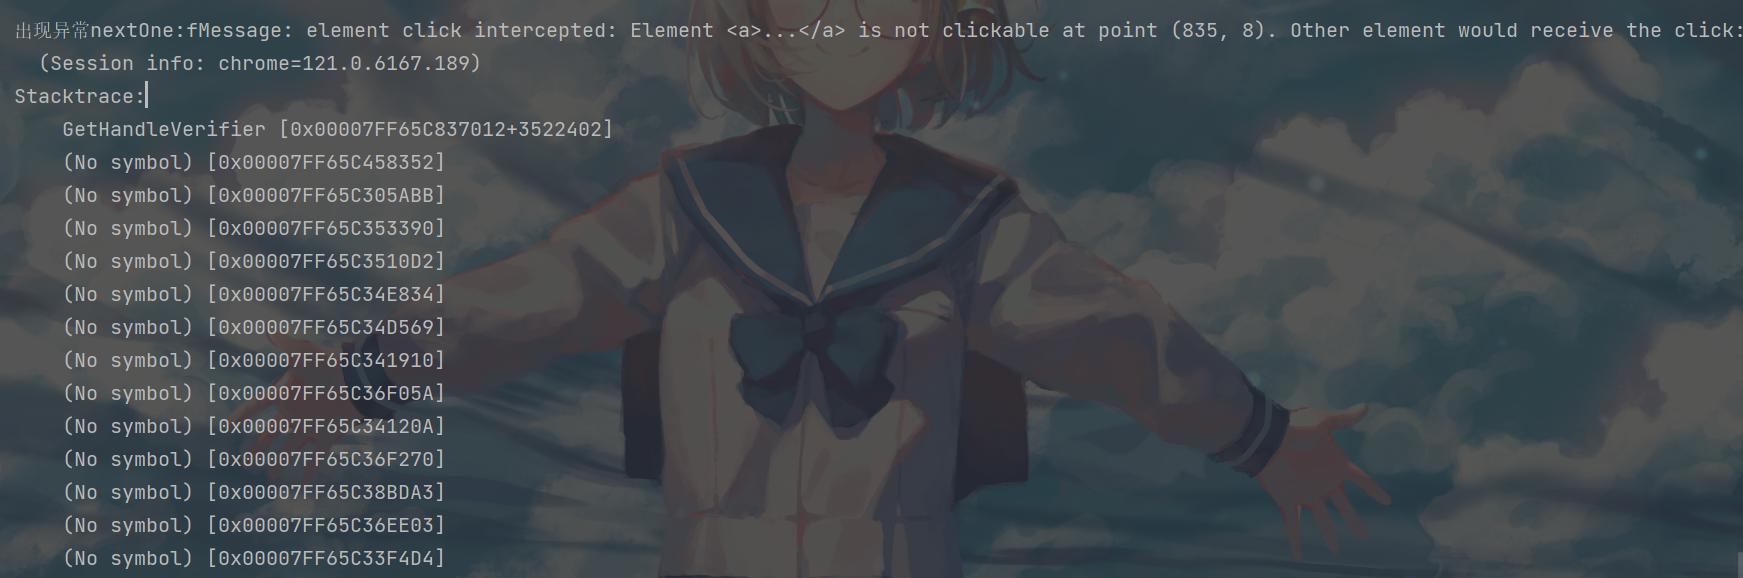
根据许多博客,这种现象都是按钮被挡住了
因为selenium本身就是模拟人类来点击鼠标之类的,当按钮被挡住了自然就点击不了
我这里除了博客上面提到的产生原因,还有是因为有时候浏览器窗口在加载的时候把按钮给"搞没"了
解决方法:调整窗口(但是我自动化的时候不可能时刻调整,结果还是未能解决)
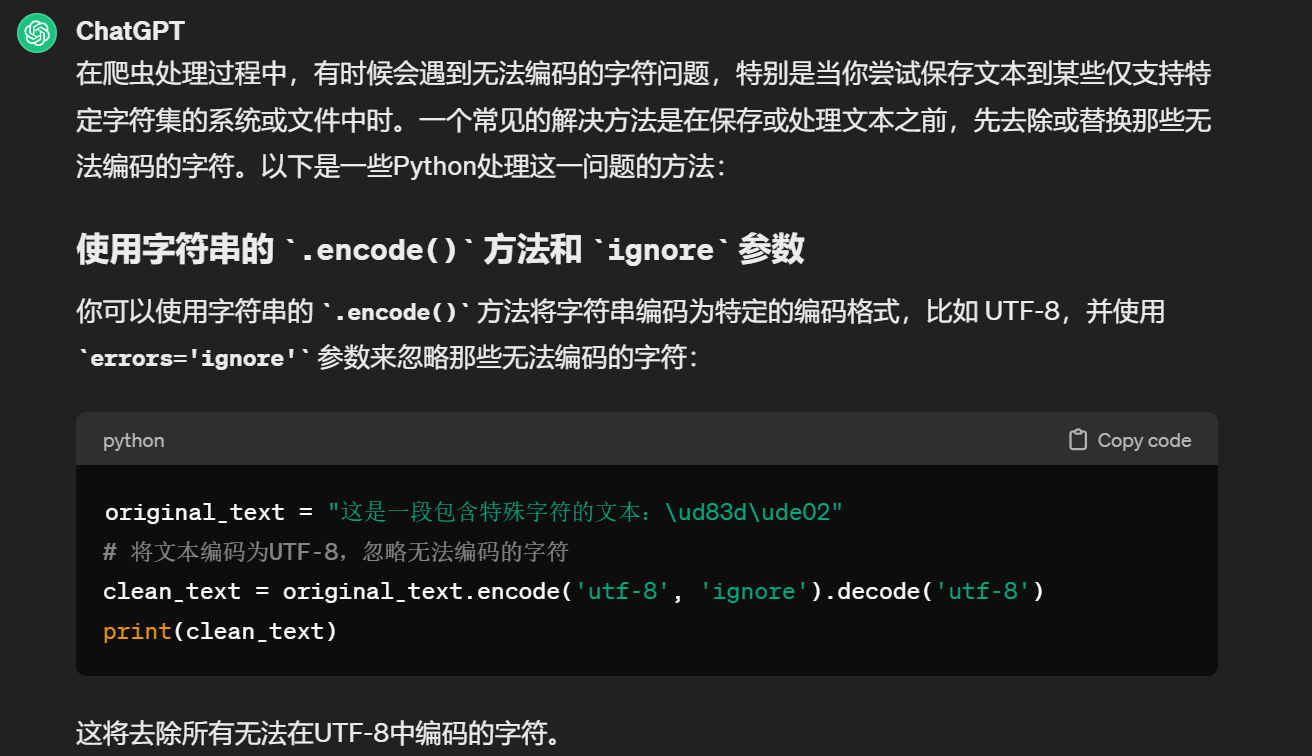
中文乱码:'gbk' codec can't encode character '\U0001f44d' in position 15: illegal multibyte sequence
这个是爬虫在爬取网页text的时候,text出现了can't encode character
- 解决方法
Selenium: 错误'chromedriver' executable needs to be in PATH如何解
- 解决方法
安装最新的selenium,否则要安装chromedriver,太麻烦了!
但是安装最新的selenium会有问题:
最开始加载贼慢,好像是最新版会自动开始访问外网,然后不行再回来
pyLDAvis报错
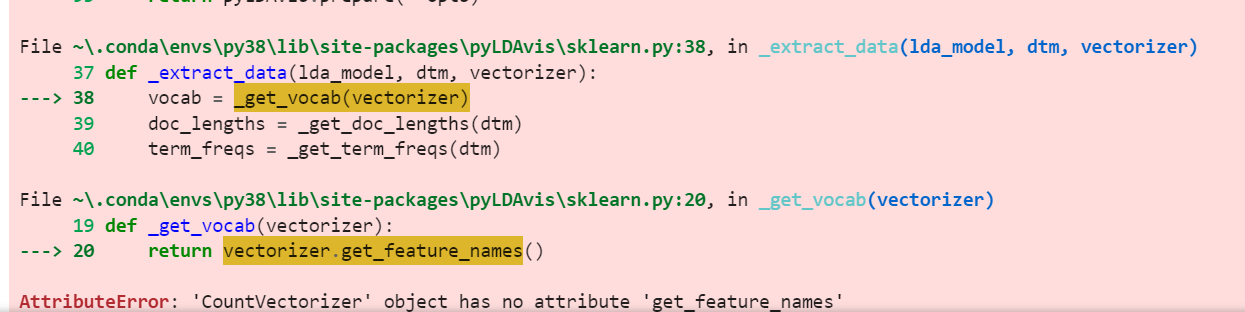
- 解决方法
博客
简单来说,他就是修改源码
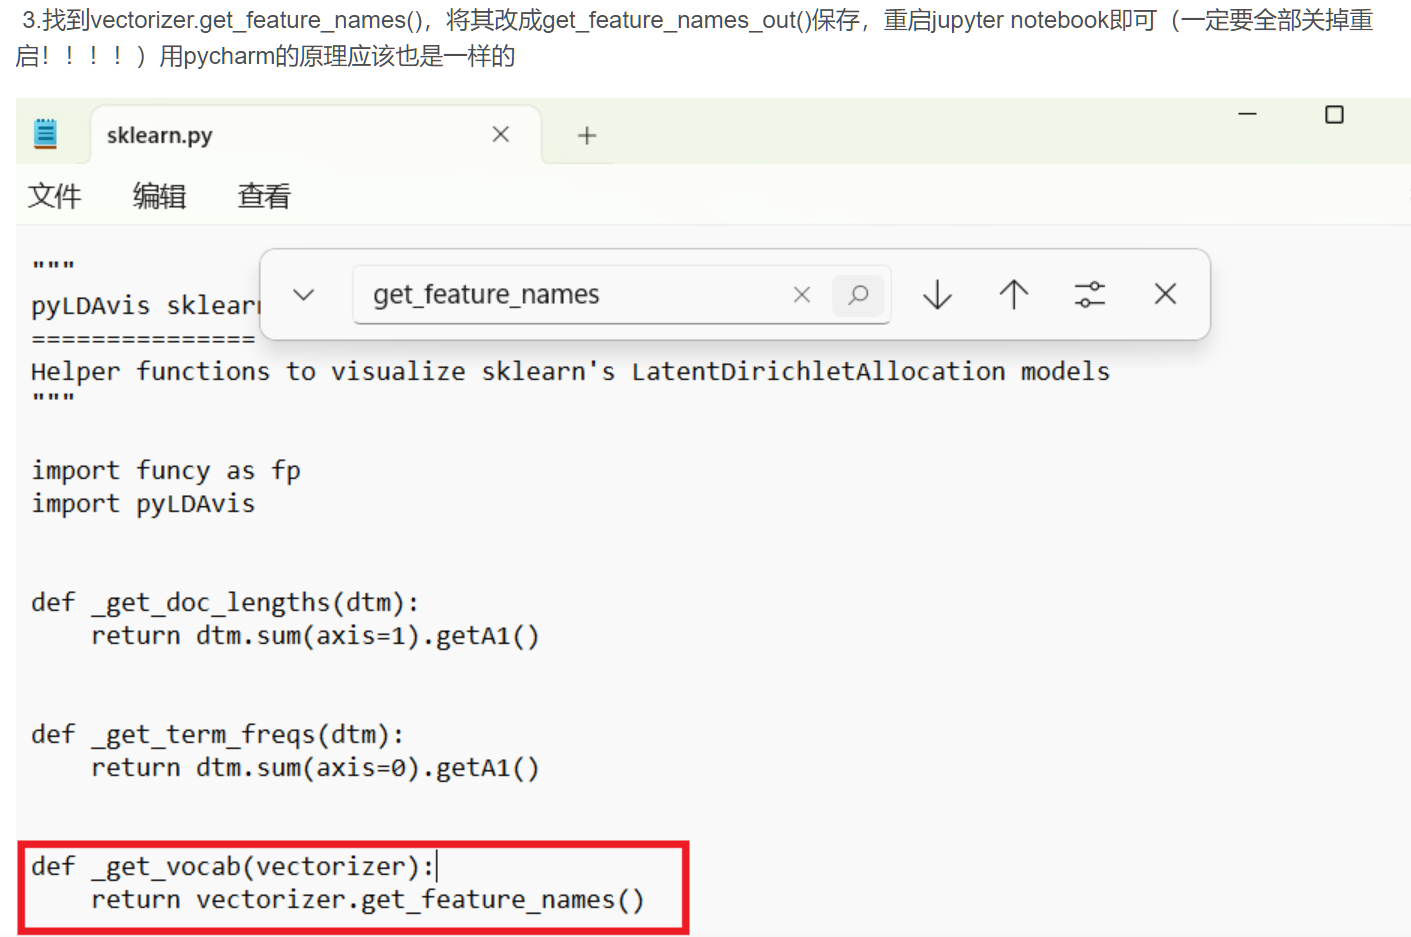
其中的问题是 我如何找到源码?File ~ 中的~是什么?
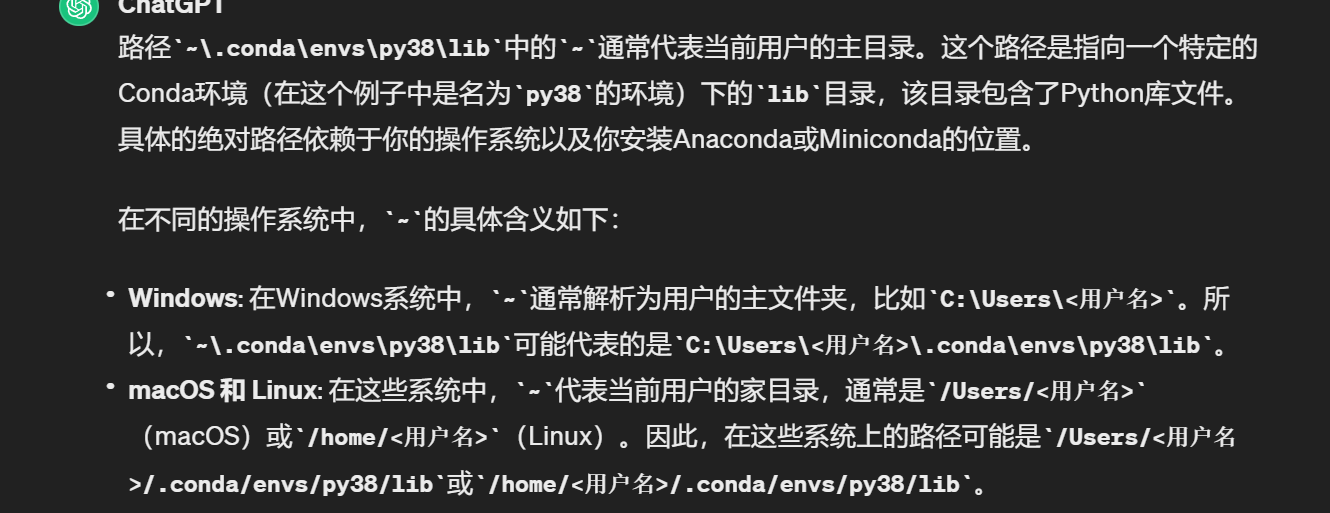
最终找的位置是这个:C:\Users\86150.conda\envs\py38\Lib\site-packages\pyLDAvis\sklearn.py
然后又报错了:
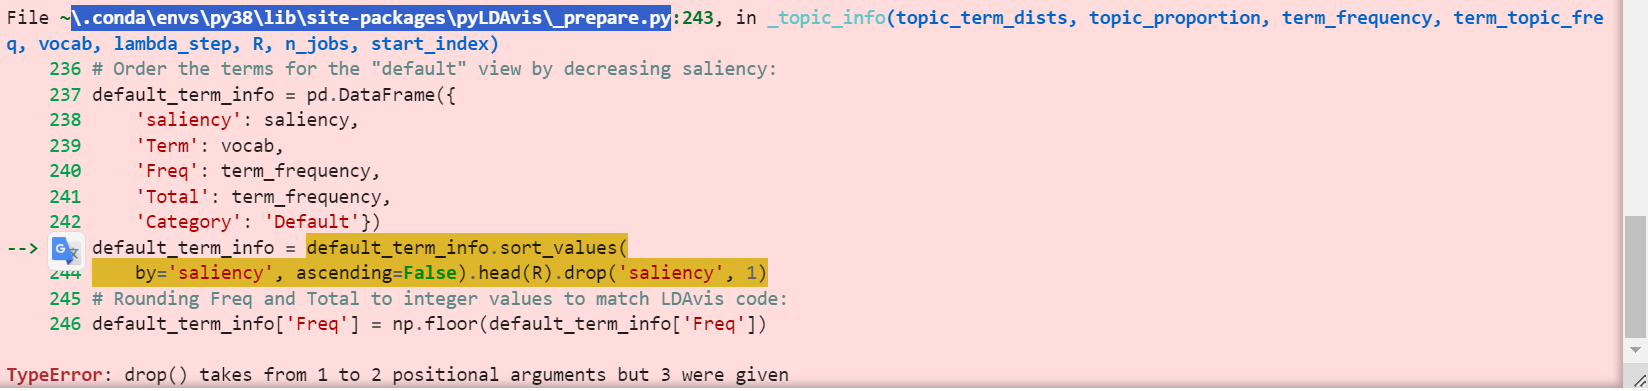
- 解决方法
博客

 浙公网安备 33010602011771号