

ubuntu 20 部署Seafile 8.0.3个人网盘过程记录
写在前面
这只是一个基于官方手册的流水帐式记录,目的不是提供一个攻略,并且也不保证其他人能成功部署。
个人一点不负责的总结&感想:Seafile这个网盘解决方案,可以分为两个部分,seafile和seahub,网盘的各种功能实现在前者,后者应该仅仅用作提供一个web界面。seafile的后端是用C语言写的,所以效率很好(看网上风评应该是碾压nextcloud);而seafile暴露出来的网络交互接口应该是用Python3写的,seahub的web服务器应该也是用的Python3,不然为啥这么多地方需要Python。
大致步骤如下:
- 准备环境
- 下载Seafile服务端
- 安装python3的各种包
- 安装MySQL(mariadb)
- 安装Seafile
- 启动Seafile
- 配置Nginx反向代理
- 设置上传下载文件的URL
- 启用HTTPS(可选)
看上去很复杂,其实每一步都挺容易的。
准备环境
我用的是Ubuntu 20,不过看官方手册应该别的版本或别的发行版也可以。准备好服务器资源后,看能否ssh它,后续全部在服务器的操作都是用远程shell操作。
下载Seafile服务端
先ssh服务器,然后身份切为root
sudo -i
本地浏览器打开Seafile下载页面,找到想要的版本的下载链接,这里以8.0.3为例子。复制下载链接,回到ssh,新建Seafile目录,然后下载到这里
mkdir /opt/seafile
cd /opt/seafile
wget https://seafile-downloads.oss-cn-shanghai.aliyuncs.com/seafile-server_8.0.3_x86-64.tar.gz
然后解压,并保留原始压缩包(暂时不是很清楚保留这个压缩包有什么用,但是手册上是这么写的,那就照做吧)
tar -xzf seafile-server_8.0.3_x86-64.tar.gz
mkdir installed
mv seafile-server_8.0.3_x86-64.tar.gz installed/
现在目录结构应该差不多长这样
root@VM-8-3-ubuntu:/opt/seafile# tree -L 2
.
├── installed
│   └── seafile-server_8.0.3_x86-64.tar.gz
└── seafile-server-8.0.3
    ├── check_init_admin.py
    ├── reset-admin.sh
    ├── runtime
    ├── seaf-fsck.sh
    ├── seaf-fuse.sh
    ├── seaf-gc.sh
    ├── seafile
    ├── seafile.sh
    ├── seahub
    ├── seahub.sh
    ├── setup-seafile-mysql.py
    ├── setup-seafile-mysql.sh
    ├── setup-seafile.sh
    ├── sql
    └── upgrade

7 directories, 11 files
安装python3的各种包
不是python专业用户,所以不是很懂每个包是拿来干嘛的,问题不大。
这里把手册里需要的包分开两部分安装,因为第一部分可以直接install成功,第二部分的包需要系统先安装memcached(一个高速缓存解决方案,估计是用来加速seafile的处理效率的 )和sqlclient。那么先安装第一部分
pip3 install Pillow captcha jinja2 sqlalchemy psd-tools django-simple-captcha future
OK,应该没有任何报错就搞掂了第一部分。接下来是第二部分,首先给系统安装memcached和mysqlclient,然后再安装第二部分Python包
apt update
apt install memcached
apt install libmemcached-dev
apt install libmysqlclient-dev

pip3 install pylibmc django-pylibmc mysqlclient
这样以来,应该所有的Python3包就安装完毕,进入下一步。
安装MySQL(mariadb)
数据库应该是用来保存用户信息之类的吧,因为Seafile也是有用户帐号系统的。首先一句话安装MySQL
apt install mariadb-server
MariaDB会带下来一个secure installation脚本,执行它
mysql_secure_installation
跟着提示走就行了,我这里全部回答都保持了默认的回答,轻轻松松配置完毕。注意设置的Root password需要牢记。
安装Seafile
官方已经有一个安装脚本了,只需运行它即可。脚本会提示你输入一些预设参数(比如你的服务器ip等),按照喜欢的输入就好。这里保持了seafile fileserver端口为默认的8082。
cd seafile-server-8.0.3/
./setup-seafile-mysql.sh
一顿操作之后,可以看到脚本在正式执行安装前会把你的设置展示一遍,给你一个反悔的机会(下面我把域名给码了)。
---------------------------------
This is your configuration
---------------------------------

    server name:            seafile
    server ip/domain:       mydomain.com

    seafile data dir:       /opt/seafile/seafile-data
    fileserver port:        8082

    database:               create new
    ccnet database:         ccnet-db
    seafile database:       seafile-db
    seahub database:        seahub-db
    database user:          seafile


---------------------------------
Press ENTER to continue, or Ctrl-C to abort
---------------------------------
回车之后,马上就可以看见安装成功提示:
-----------------------------------------------------------------
Your seafile server configuration has been finished successfully.
-----------------------------------------------------------------

run seafile server:     ./seafile.sh { start | stop | restart }
run seahub  server:     ./seahub.sh  { start <port> | stop | restart <port> }

-----------------------------------------------------------------
If you are behind a firewall, remember to allow input/output of these tcp ports:
-----------------------------------------------------------------

port of seafile fileserver:   8082
port of seahub:               8000

When problems occur, Refer to

        https://download.seafile.com/published/seafile-manual/home.md

for information.
现在的目录组织应该长这样
root@VM-8-3-ubuntu:/opt/seafile# tree -L 2
.
├── ccnet
├── conf
│   ├── ccnet.conf
│   ├── gunicorn.conf.py
│   ├── seafdav.conf
│   ├── seafile.conf
│   └── seahub_settings.py
├── installed
│   └── seafile-server_8.0.3_x86-64.tar.gz
├── seafile-data
│   └── library-template
├── seafile-server-8.0.3
│   ├── check_init_admin.py
│   ├── reset-admin.sh
│   ├── runtime
│   ├── seaf-fsck.sh
│   ├── seaf-fuse.sh
│   ├── seaf-gc.sh
│   ├── seafile
│   ├── seafile.sh
│   ├── seahub
│   ├── seahub.sh
│   ├── setup-seafile-mysql.py
│   ├── setup-seafile-mysql.sh
│   ├── setup-seafile.sh
│   ├── sql
│   └── upgrade
├── seafile-server-latest -> seafile-server-8.0.3
└── seahub-data
    └── avatars

14 directories, 16 files
启动Seafile
seafile-server-latest是一个软链接,指向了最新版seafile目录,这个软链接应该是为了后续升级时方便处理用的,先不纠结,反正这里只有一个刚刚安装的8.0.3版本。
cd到这个目录,先启动seafile。
root@VM-8-3-ubuntu:/opt/seafile/seafile-server-latest# ./seafile.sh start

Starting seafile server, please wait ...
** Message: 19:02:49.055: seafile-controller.c(535): No seafevents.

Seafile server started

Done.
启动成功!然后再启动seahub,前面说过这是一个有用户帐号系统的网盘,既然如此当然要有一个管理员,第一次启动seahub需要设置管理员帐号密码(下面我码掉了我的个人Email地址)。
root@VM-8-3-ubuntu:/opt/seafile/seafile-server-latest# ./seahub.sh start

LC_ALL is not set in ENV, set to en_US.UTF-8
Starting seahub at port 8000 ...

----------------------------------------
It's the first time you start the seafile server. Now let's create the admin account
----------------------------------------

What is the email for the admin account?
[ admin email ] myemail@example.com

What is the password for the admin account?
[ admin password ]

Enter the password again:
[ admin password again ]


----------------------------------------
Successfully created seafile admin
----------------------------------------


Seahub is started

Done.
注意,seahub是监听在localhost:8000上的,所以不能本地浏览器直接输入mydomain.com:8000访问,所以要继续下一步。
配置Nginx反向代理
这一步开始,就需要用到本地浏览器了。先把我自己之前踩过的坑写在最前面:修改nginx配置后(比如改端口、http换https等),有时本地浏览器访问网站却看不出修改后的效果,这是因为本地浏览器有缓存,发生这个问题时可以尝试清除浏览器本地缓存。
回到主题,首先安装Nginx。
apt install nginx
然后cd到 /etc/nginx/sites-available/ 这个目录下,这个目录保存的是网站的配置文件。在这个目录下新建一个文本文件seafile.conf,内容如下
server {
    listen 80;
    server_name mydomain.com;
    proxy_set_header X-Forwarded-For $remote_addr;

    location / {
         proxy_pass         http://127.0.0.1:8000;
         proxy_set_header   Host $host;
         proxy_set_header   X-Real-IP $remote_addr;
         proxy_set_header   X-Forwarded-For $proxy_add_x_forwarded_for;
         proxy_set_header   X-Forwarded-Host $server_name;
         proxy_read_timeout  1200s;

         # used for view/edit office file via Office Online Server
         client_max_body_size 0;

         access_log      /var/log/nginx/seahub.access.log;
         error_log       /var/log/nginx/seahub.error.log;
    }

# If you are using [FastCGI](http://en.wikipedia.org/wiki/FastCGI),
# which is not recommended, you should use the following config for location `/`.
#
#    location / {
#         fastcgi_pass    127.0.0.1:8000;
#         fastcgi_param   SCRIPT_FILENAME     $document_root$fastcgi_script_name;
#         fastcgi_param   PATH_INFO           $fastcgi_script_name;
#
#         fastcgi_param     SERVER_PROTOCOL     $server_protocol;
#         fastcgi_param   QUERY_STRING        $query_string;
#         fastcgi_param   REQUEST_METHOD      $request_method;
#         fastcgi_param   CONTENT_TYPE        $content_type;
#         fastcgi_param   CONTENT_LENGTH      $content_length;
#         fastcgi_param     SERVER_ADDR         $server_addr;
#         fastcgi_param     SERVER_PORT         $server_port;
#         fastcgi_param     SERVER_NAME         $server_name;
#         fastcgi_param   REMOTE_ADDR         $remote_addr;
#         fastcgi_read_timeout 36000;
#
#         client_max_body_size 0;
#
#         access_log      /var/log/nginx/seahub.access.log;
#         error_log       /var/log/nginx/seahub.error.log;
#    }

    location /seafhttp {
        rewrite ^/seafhttp(.*)$ $1 break;
        proxy_pass http://127.0.0.1:8082;
        client_max_body_size 0;
        proxy_set_header   X-Forwarded-For $proxy_add_x_forwarded_for;

        proxy_connect_timeout  36000s;
        proxy_read_timeout  36000s;
        proxy_send_timeout  36000s;
        send_timeout  36000s;
    }

    location /media {
        root /opt/seafile/seafile-server-latest/seahub;
    }

}
然后cd到 ../sites-enabled/ 目录,删除原有的default,再创建软链接,链接到刚刚那个文件上
root@VM-8-3-ubuntu:/etc/nginx/sites-enabled# ls
default
root@VM-8-3-ubuntu:/etc/nginx/sites-enabled# rm default
root@VM-8-3-ubuntu:/etc/nginx/sites-enabled# ln -s ../sites-available/seafile.conf seafile.conf
root@VM-8-3-ubuntu:/etc/nginx/sites-enabled# ls
seafile.conf
这里要注意一下,上面的nginx配置了监听80端口,这个端口一般防火墙都会默认通过的。如果监听了别的端口,
然后,重启nginx以使得更新生效
systemctl restart nginx
此时,本地浏览器输入 mydomain.com,就能看到登陆界面了。
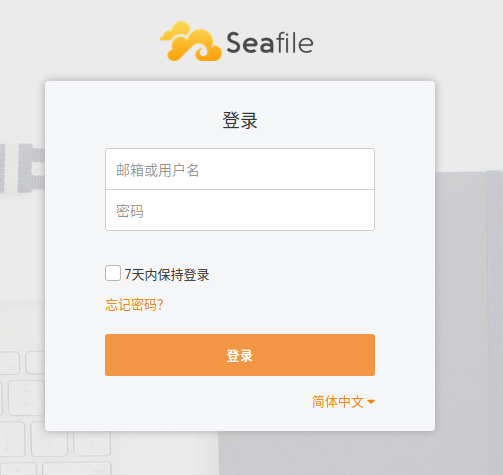
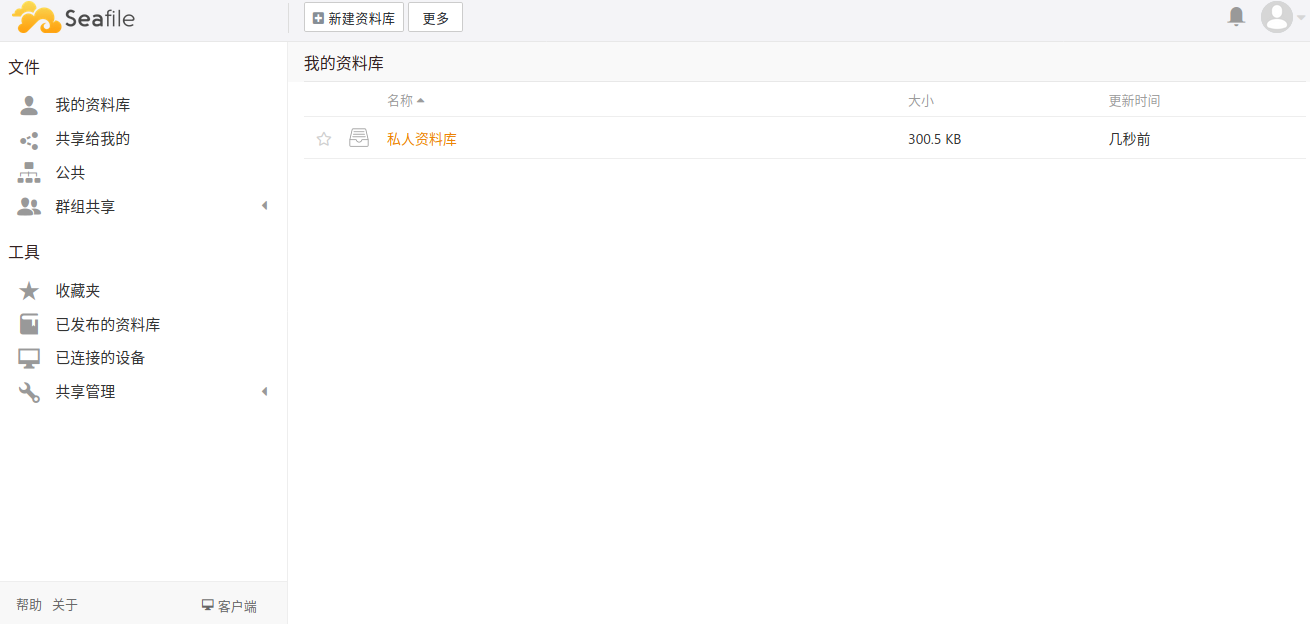
输入刚刚配置的seahub管理员帐号密码,即可登陆,看到主页。
设置上传下载文件的URL
点右上角头像,点“系统管理”,左边一栏去到“设置”。把SERVICE_URL改为http://mydomain.com/,FILE_SERVER_ROOT改为http://mydomain.com/seafhttp。如果你的nginx不监听80端口就把端口号也加上。
修改完之后,点右上角头像,“退出系统管理”,即可回到主页。
至此,一个网盘已经搭建好。面向用户的客户端网盘用法应该参阅官方客户端手册(其实不用参阅也行,界面还是很清晰的,稍微点一点琢磨一下就知道用法了)。
启用HTTPS(可选)
事实上到刚刚那一步已经可以用网盘了,但是安全性不够,有被中间人监听的风险。因此想折腾启用HTTPS的话可以进行这一步。
申请SSL证书的过程就不写了,当然也可以用自颁发证书,不过这样子的话,就算自己电脑添加了信任,在别的电脑上打开网站就会被浏览器提示证书有问题。
这里假定服务器上已经有证书文件了(如果证书文件在本地,可以scp上去),我的证书保存在 /etc/ssl/1_mydomain.com_bundle.crt,私钥存在 /etc/ssl/2_mydomain.com.key。
修改nginx的配置文件 /etc/nginx/sites-available/seafile.conf,改为如下,注意这里监听的是8888端口,而不是443端口,因为很久以前我监听了443,然后过了几天一打开网站就被提醒说没有备案。之后换了一个非标准端口,就没问题了。记得配置防火墙允许8888端口流量进入。
server {
    listen 80;
    server_name mydomain.com;
    rewrite ^ https://$http_host:8888$request_uri? permanent;    # force redirect http to https
}

server {
    listen 8888 ssl;
    server_name mydomain.com;
    ssl_certificate /etc/ssl/1_mydomain.com_bundle.crt;
    ssl_certificate_key /etc/ssl/2_mydomain.com.key;
    ssl_session_timeout 5m;
    ssl_session_cache shared:SSL:5m;
    ssl_protocols TLSv1 TLSv1.1 TLSv1.2;
    ssl_ciphers 'ECDHE-ECDSA-AES256-GCM-SHA384:ECDHE-ECDSA-AES128-GCM-SHA256:ECDHE-RSA-AES256-GCM-SHA384:ECDHE-RSA-AES128-GCM-SHA256:ECDHE-ECDSA-AES256-SHA384:ECDHE-ECDSA-AES128-SHA256:ECDHE-RSA-AES256-SHA384:ECDHE-RSA-AES128-SHA256:ECDHE-RSA-AES256-SHA:ECDHE-ECDSA-AES256-SHA:ECDHE-RSA-AES128-SHA:ECDHE-ECDSA-AES128-SHA:DHE-RSA-AES256-GCM-SHA384:DHE-RSA-AES256-SHA256:DHE-RSA-AES256-SHA:DHE-RSA-CAMELLIA256-SHA:DHE-RSA-AES128-GCM-SHA256:DHE-RSA-AES128-SHA256:DHE-RSA-AES128-SHA:DHE-RSA-SEED-SHA:DHE-RSA-CAMELLIA128-SHA:HIGH:!aNULL:!eNULL:!LOW:!3DES:!MD5:!EXP:!PSK:!SRP:!DSS';
    ssl_prefer_server_ciphers on;

    proxy_set_header X-Forwarded-For $remote_addr;

    add_header Strict-Transport-Security "max-age=31536000; includeSubDomains";

    location / {
         proxy_pass         http://127.0.0.1:8000;
         proxy_set_header   Host $host:8888;
         proxy_set_header   X-Real-IP $remote_addr;
         proxy_set_header   X-Forwarded-For $proxy_add_x_forwarded_for;
         proxy_set_header   X-Forwarded-Host $server_name;
	 proxy_set_header   X-Forwarded-Proto https;
         proxy_read_timeout  1200s;

         # used for view/edit office file via Office Online Server
         client_max_body_size 0;

         access_log      /var/log/nginx/seahub.access.log;
         error_log       /var/log/nginx/seahub.error.log;
    }

# If you are using [FastCGI](http://en.wikipedia.org/wiki/FastCGI),
# which is not recommended, you should use the following config for location `/`.
#
#    location / {
#         fastcgi_pass    127.0.0.1:8000;
#         fastcgi_param   SCRIPT_FILENAME     $document_root$fastcgi_script_name;
#         fastcgi_param   PATH_INFO           $fastcgi_script_name;
#
#         fastcgi_param     SERVER_PROTOCOL     $server_protocol;
#         fastcgi_param   QUERY_STRING        $query_string;
#         fastcgi_param   REQUEST_METHOD      $request_method;
#         fastcgi_param   CONTENT_TYPE        $content_type;
#         fastcgi_param   CONTENT_LENGTH      $content_length;
#         fastcgi_param     SERVER_ADDR         $server_addr;
#         fastcgi_param     SERVER_PORT         $server_port;
#         fastcgi_param     SERVER_NAME         $server_name;
#         fastcgi_param   REMOTE_ADDR         $remote_addr;
#         fastcgi_read_timeout 36000;
#
#         client_max_body_size 0;
#
#         access_log      /var/log/nginx/seahub.access.log;
#         error_log       /var/log/nginx/seahub.error.log;
#    }

    location /seafhttp {
        rewrite ^/seafhttp(.*)$ $1 break;
        proxy_pass http://127.0.0.1:8082;
        client_max_body_size 0;
        proxy_set_header   X-Forwarded-For $proxy_add_x_forwarded_for;

        proxy_connect_timeout  36000s;
        proxy_read_timeout  36000s;
        proxy_send_timeout  36000s;
        send_timeout  36000s;
    }

    location /media {
        root /opt/seafile/seafile-server-latest/seahub;
    }

}
然后重启nginx即可
systemctl restart nginx
由于配置了重定向,浏览器输入 mydomain.com 或 https://mydomain.com:8888 都可以正常使用。
最后,记得按照之前说的步骤,去系统管理里 ,改一下SERVICE_URL和FILE_SERVER_ROOT。
至此,网盘搭建完毕。后续还有一些可选操作(比如配置开机自启动),以后再补充吧。

 浙公网安备 33010602011771号