Nexus3 私服仓库搭建
本文使用的的是 docker-compose 方式进行安装部署
参考: https://gitee.com/chxlay/iserver-docker/tree/master/cicd
安装
1、配置环境变量 .env 文件
######################### 时区 #####################
TZ=Asia/Shanghai

# 数据挂在根路径
DATA_PATH=/home/appdata

########### nexus3 版本信息 #############
NEXUS_VERDION=latest

NEXUS_PATH=${DATA_PATH}/nexus
2、编写 docker-compose.yml 文件 编排服务
version: '3.8'
services:

  # 私服 nexus 搭建
  iserver-nexus:
    image: sonatype/nexus3:${NEXUS_VERDION}
    container_name: iserver-nexus
    restart: always
    privileged: true
    # 避免挂在数据卷路径时出现权限不足的问题OpenJDK 64-Bit Server VM warning: Cannot open file ../sonatype-work/nexus3/log/jvm.log due to Permission denied(安全的角度不建议这么做)
    user: root
    volumes:
      # 数据存储配置
      - '${NEXUS_PATH}/data:/nexus-data'
      # 日志配置文件
      - '${NEXUS_PATH}/log:/nexus-data/log'
      # Nexus JVM 内存相关配置,存储空间相关配置等
      #- '${NEXUS_PATH}/config/nexus.vmoptions:/opt/sonatype/nexus/bin/nexus.vmoptions'
      # Nexus 相关的常规配置(IP、端口号 等配置)
      #- '${NEXUS_PATH}/config/nexus.vmoptions:/opt/sonatype/nexus/etc/nexus-default.properties'
    ports:
      - '8081:8081'
    network_mode: 'host'
3、 启动服务
docker-compose up iserver-nexus
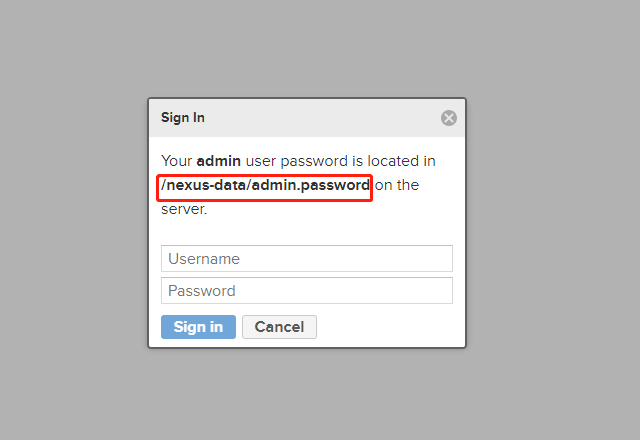
首次启动密码文件位置
连接使用(Maven 为例)
1、设置 setting.xml 文件(注意 标记颜色的地方,是服务 ID ,id 可以自定义,只要不重复就行 ,要求与 pom.xml 文件中对应,)
<server>
    <id>iserver-releases</id>
    <username>admin</username>
    <password>xxxxxx</password>
</server>
<server>
    <id>iserver-snapshots</id>
    <username>admin</username>
    <password>xxxxxx</password>
</server>
settings.xml 中配置私服下载依赖的地址
<mirror>
    <id>mirror</id>
    <mirrorOf>central,jcenter,!iserver-releases,!iserver-snapshots</mirrorOf>
    <name>mirror(仓库名称)</name>
    <url>https://maven.xxxxxx.com/repository/iserver-group/</url>
</mirror>
扩展:(阿里云 仓库制品管理的私服配置:https://packages.aliyun.com/maven )
阿里云 私服 settings.xml 配置方式 (central,jcenter,!rdc-releases,!rdc-snapshots 所有环境的依赖下载 统一使用 )Id 自定义要求和上面描述的一样
<server>
    <id>rdc-releases</id>
    <username>sdfsdfsdfsdfsdfsdfsdfsde</username>
    <password>uUWeDsPh1O30</password>
</server>
<server>
    <id>rdc-snapshots</id>
    <username>xxxxxdfsfsdfsdfsddf</username>
    <password>uUWeDsPh1O30</password>
</server>
mirror:(这再阿里云 仓库制品管理界面可以复制到 ,由阿里云生成)
<mirror>
    <id>aliyun-nexus</id>
    <mirrorOf>central,jcenter,!rdc-releases,!rdc-snapshots</mirrorOf>
    <name>阿里云私服</name>
    <url>https://maven.aliyun.com/nexus/content/groups/public</url>
</mirror>
profile: 同样是 在 阿里云 仓库制品管理页面可以复制
<profile>
    <id>rdc</id>
    <properties>
        <altReleaseDeploymentRepository>
            rdc-releases::default::https://packages.aliyun.com/maven/repository/123456-release-Btjhsk/
        </altReleaseDeploymentRepository>
        <altSnapshotDeploymentRepository>
            rdc-snapshots::default::https://packages.aliyun.com/maven/repository/123456-snapshot-YTQtrM/
        </altSnapshotDeploymentRepository>
    </properties>
</profile>

<activeProfiles>
    <activeProfile>rdc</activeProfile>
</activeProfiles>
2、 pom.xml 文件中配置 发布代码
<!-- 发布代码 -->
<distributionManagement>
    <!-- 发布环境仓库地址 -->
    <repository>
        <id>iserver-releases</id>
        <name>iserver-release</name>
        <url>https://maven.kmxt99.com/repository/xinteng-release/</url>
    </repository>
    <!-- 快照版本仓库地址 -->
    <snapshotRepository>
        <id>iserver-snapshots</id>
        <name>iserver-snapshots</name>
        <url>https://maven.kmxt99.com/repository/xinteng-snapshoot/</url>
    </snapshotRepository>
</distributionManagement>
如果使用阿里云仓库代码管理则:
<!-- 发布代码 -->
<distributionManagement>
    <!-- 发布环境仓库地址 -->
    <repository>
        <id>rdc-releases</id>
        <name>rdc-release</name>
        <url>https://packages.aliyun.com/maven/repository/2058464-release-Btjhsk/</url>
    </repository>
    <!-- 快照版本仓库地址 -->
    <snapshotRepository>
        <id>rdc-snapshots</id>
        <name>rdc-snapshots</name>
        <url>https://packages.aliyun.com/maven/repository/2058464-snapshot-YTQtrM/</url>
    </snapshotRepository>
</distributionManagement>
3、pom.xml 文件中配置打包发布代码的插件(以下是管理的)
插件定义管理(统一管理版本):
<build>
    <pluginManagement>
        <plugins>
            <!-- 发布 jar (class 文件)到中央仓库 -->
            <plugin>
                <groupId>org.apache.maven.plugins</groupId>
                <artifactId>maven-compiler-plugin</artifactId>
                <version>${maven-compiler-plugin.version}</version>
                <configuration>
                    <source>${jdk.version}</source>
                    <target>${jdk.version}</target>
                </configuration>
            </plugin>
            <!-- 发布 源码(.java)到中央仓库 -->
            <plugin>
                <groupId>org.apache.maven.plugins</groupId>
                <artifactId>maven-source-plugin</artifactId>
                <version>${maven-source-plugin.version}</version>
                <executions>
                    <execution>
                        <phase>compile</phase>
                        <goals>
                            <goal>jar-no-fork</goal>
                        </goals>
                    </execution>
                </executions>
            </plugin>
            <!-- 版本号动态管理 https://maven.apache.org/maven-ci-friendly.html -->
            <plugin>
                <groupId>org.codehaus.mojo</groupId>
                <artifactId>flatten-maven-plugin</artifactId>
                <version>${flatten-maven-plugin.version}</version>
                <configuration>
                    <updatePomFile>true</updatePomFile>
                    <flattenMode>resolveCiFriendliesOnly</flattenMode>
                </configuration>
                <executions>
                    <execution>
                        <id>flatten</id>
                        <phase>process-resources</phase>
                        <goals>
                            <goal>flatten</goal>
                        </goals>
                    </execution>
                    <execution>
                        <id>flatten.clean</id>
                        <phase>clean</phase>
                        <goals>
                            <goal>clean</goal>
                        </goals>
                    </execution>
                </executions>

            </plugin>
        </plugins>
    </pluginManagement>
</build>
插件使用(同样可将插件依赖加到通用的父级 pom.xml 中,所有子类都可以使用):
<build>
    <plugins>
        <!-- 发布 jar (class 文件)到中央仓库 -->
        <plugin>
            <groupId>org.apache.maven.plugins</groupId>
            <artifactId>maven-compiler-plugin</artifactId>
        </plugin>
        <!-- 发布 源码(.java)到中央仓库 -->
        <plugin>
            <groupId>org.apache.maven.plugins</groupId>
            <artifactId>maven-source-plugin</artifactId>
        </plugin>
        <!-- 版本号动态管理 -->
        <plugin>
            <groupId>org.codehaus.mojo</groupId>
            <artifactId>flatten-maven-plugin</artifactId>
        </plugin>
    </plugins>
</build>
...
也可以将 nexus 与 阿里云的 仓库制品 结合使用,将 nexus 的仓库地址配置为 阿里云 仓库制品的 代理地址
本文来自博客园,作者:Vermeer,转载请注明原文链接:https://www.cnblogs.com/chxlay/p/16659884.html

 浙公网安备 33010602011771号