Kindeditor在ThinkPHP框架下的使用
1、简单调用Kindeditor的图片上传功能:
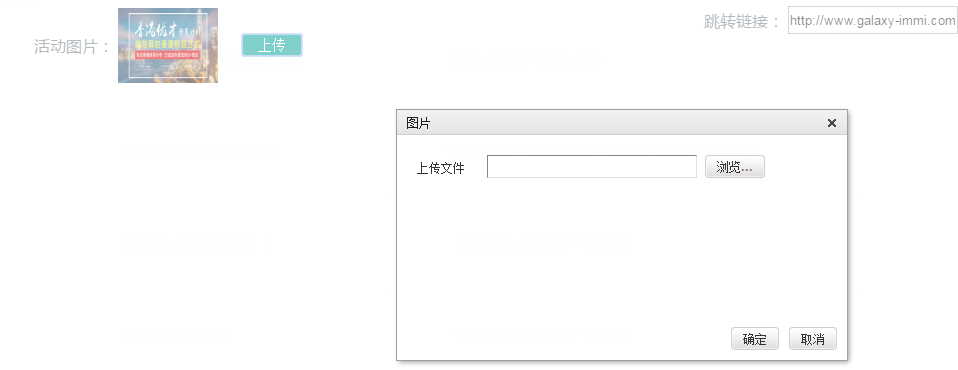
a、Html部署图片预览,记录图片上传成功之后的路径,以及上传图片点击按钮
<tr>
            <td>活动图片:</td>
            <td>
                <img id="picurl_img" :src="'../../'+data.picurl" alt="" class="flag-img">
            </td>
            <td>
                <input id="picurl" value="上传" type="button" class="upload">
                <input name="picurl" value="{{data.picurl}}" type="text" style="display: none">
            </td>
        </tr>
b、设置上传图片接口api,这里不用demo里面的,结合ThinkPHP 3.2如下:
    public function uploadFile()
    {
        if (IS_POST) {
            $config = C('ImgConfig');
            $upload = new \Think\Upload($config);// 实例化上传类
            $path = '/uploads/image/';
            $file = $upload->upload();
            if ($file) {
                $file_url = __ROOT__.$path . $file['imgFile']['savepath'] . $file['imgFile']['savename'];
//                //成功时KindEditor要求返回的格式
//                {
//                    "error" : 0,
//                    "url" : "http://www.example.com/path/to/file.ext"
//                }
//                //失败时
//                {
//                    "error" : 1,
//                    "message" : "错误信息"
//                }
                echo json_encode(array('error' => 0, 'url' => $file_url));//返回的信息必须是json格式的
            } else {
                $this->error($upload->getError());//获取失败信息
            }
        }
    }
'ImgConfig' => array(
        'maxSize'    =>    3145728,
        'rootPath'   =>    './uploads/image/',
        'savePath'   =>    '',
        'saveName'   =>    array('uniqid',''),
        'exts'       =>    array('jpg', 'gif', 'png', 'jpeg'),
        'autoSub'    =>    true,
        'subName'    =>    array('date','Ymd'),
    )
c、设置按钮点击响应事件,以及上传图片完成之后的回调执行,记录图片url:
//uploadFile,上传图片
    if(Api.prototype.uploadFile == undefined){
        Api.prototype.uploadFile = function (obj) {
            $('#'+obj).click(function() {
                var editor = KindEditor.editor({
                    uploadJson : MyUrl+'index.php/Interface/uploadFile',
                    allowFileManager : true
                });
                editor.loadPlugin('image', function() {
                    editor.plugin.imageDialog({
                        showRemote : false,
                        imageUrl : $(".cpicurl").val(),
                        //上传文件后执行的回调函数,获取上传图片的路径
                        clickFn : function(url, title, width, height, border, align) {
                            console.log(url);
                            $("input[name='"+obj+"']").val(url);
                            //刷新当前图片
                            $("#"+obj+"_img").attr("src","../../"+url);
                            editor.hideDialog();
                        }
                    });
                });
            });
        }
    }
    var api = new Api();
    api.uploadFile('picurl');
2、编辑框功能,这里使用Kindeditor的默认模式:
a、一般在form表单里面,嵌套textarea标签,再通过js绑定该textarea,实例化创建Kindeditor
<form id="form">
    <table>
        <tbody>
        <tr>
            <td>编辑正文:</td>
        </tr>
        <tr>
            <td>
                <textarea name="content">{{data.content}}</textarea>
            </td>
        </tr>
        </tbody>
    </table>
</form>
//获取form表单的宽高:
    editor = KindEditor.create('textarea[name="content"]', {
        width : $("#form").width()-50,
        height: 500,
        uploadJson : MyUrl+'index.php/Interface/uploadFile',
        allowFileManager : true,
        afterBlur: function () {
            this.sync();
        }
    });
到这里,上传单个图片是没有问题的,但是批量上传图片就不行了,原因其实这样的:
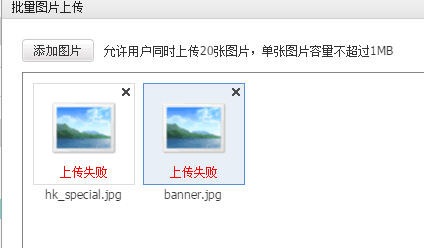
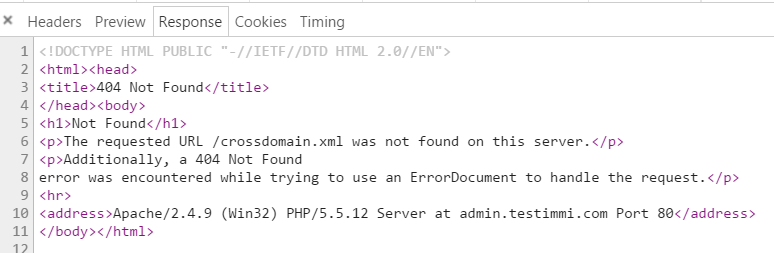
意思上传文件需要一个配置文件crossdomain.xml,这主要是adobe要求flash跨域的时候,需要配置一个允许的域,具体参考这里:http://blog.csdn.net/jimmy2248/article/details/7265549,
因此,在应用根目录加上一个配置文件就行:
<?xml version="1.0"?>
<!DOCTYPE cross-domain-policy SYSTEM "http://www.macromedia.com/xml/dtds/cross-domain-policy.dtd">
<cross-domain-policy>
    <allow-access-from domain="*.testimmi.com" />
</cross-domain-policy>
<allow-access-from domain="*.testimmi.com" />这里可以替换成自己的网站的域名;
3、关于Kindeditor生成的html内容,上传到mysql,一些html标签如:
& (和号) 成为 &
" (双引号) 成为 "
' (单引号) 成为 <
< (小于) 成为 <
> (大于) 成为 >
这里是因为,ThinkPHP默认配置I方法,如I('post.'),I('get.')会对这些字符进行了过滤转义,默认配置有:'DEFAULT_FILTER' => 'htmlspecialchars',
可以设置=>''即关闭转义,或者在post得到的参数,进行还原(推荐):$data['content'] = htmlspecialchars_decode($data['content']);

 浙公网安备 33010602011771号