四层负载均衡做端口转发
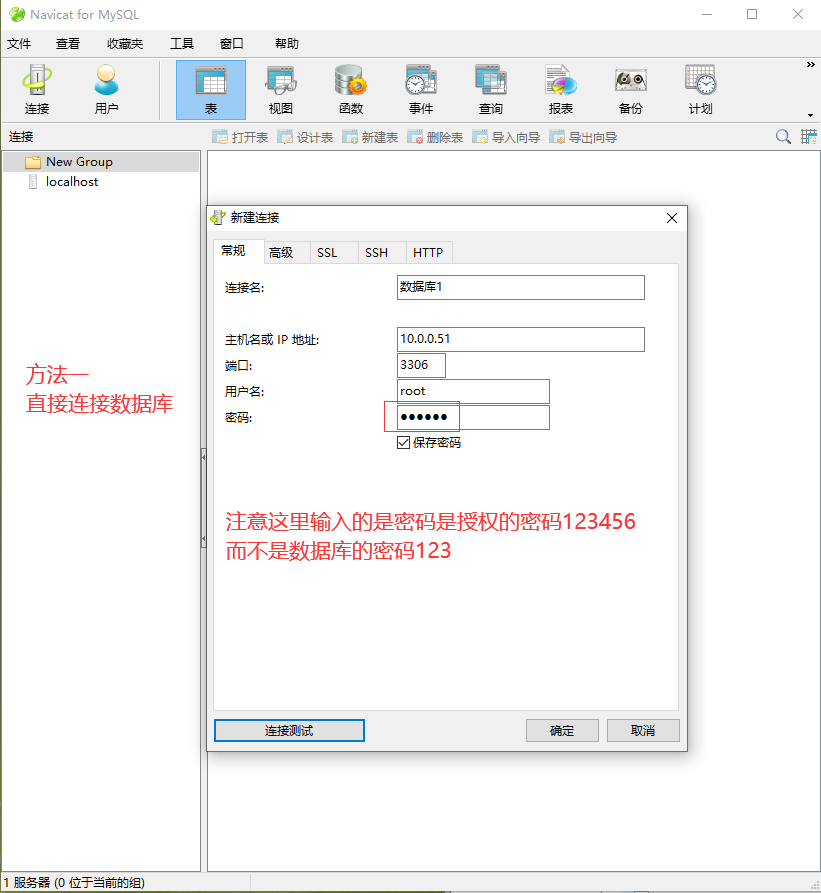
数据库连接
↓↓↓↓↓↓↓↓↓↓↓↓
链接:https://pan.baidu.com/s/1iQ1k9q9gMsrVMnXNC4GCPQ
提取码:6666
环境准备
| 主机 | 内网IP | 外网IP | 身份 |
| lb03 | 172.16.1.6 | 10.0.0.6 | 负载均衡 |
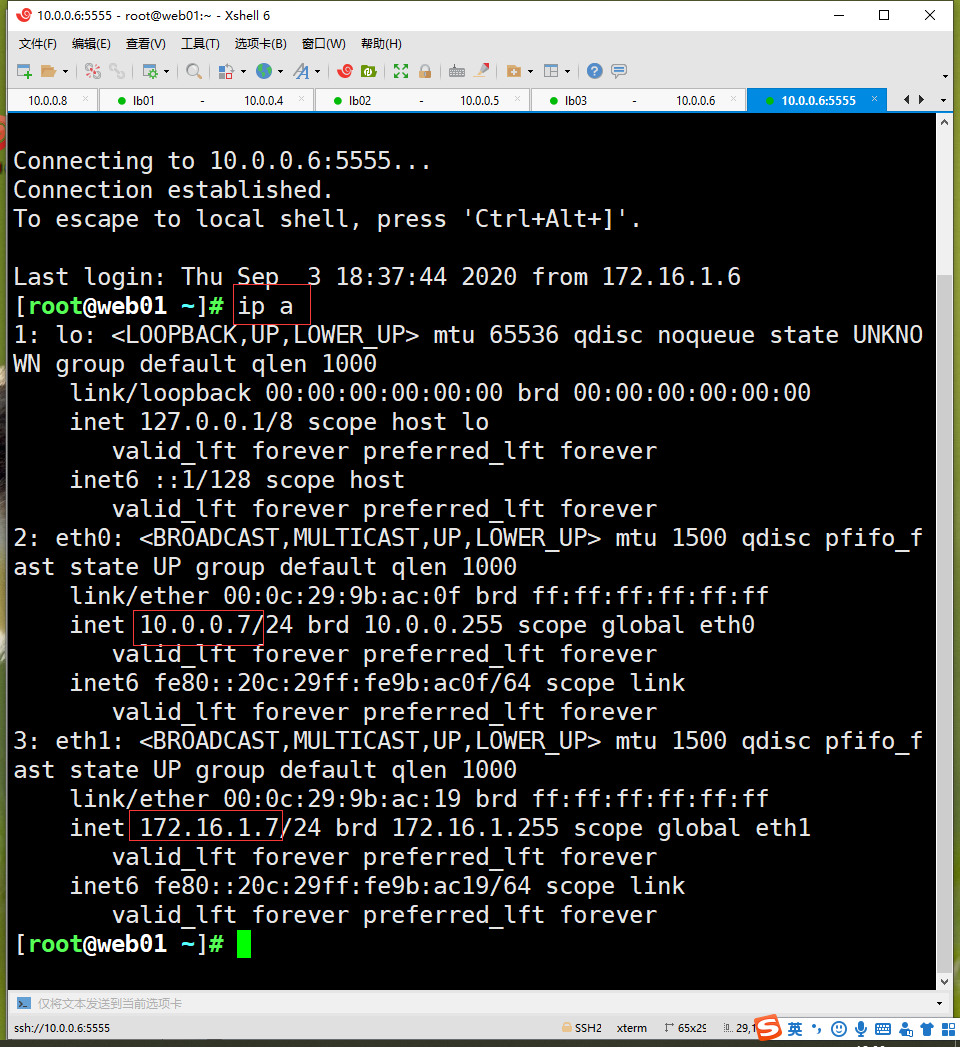
| web01 | 172.16.1.7 | 10.0.0.7 | 客户端 |
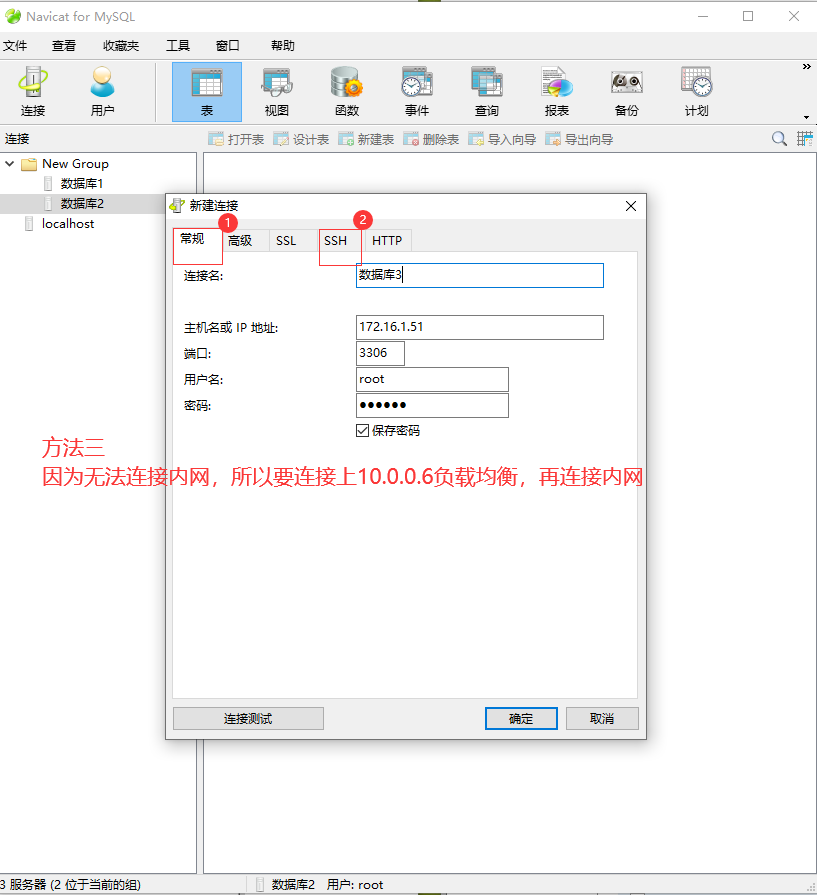
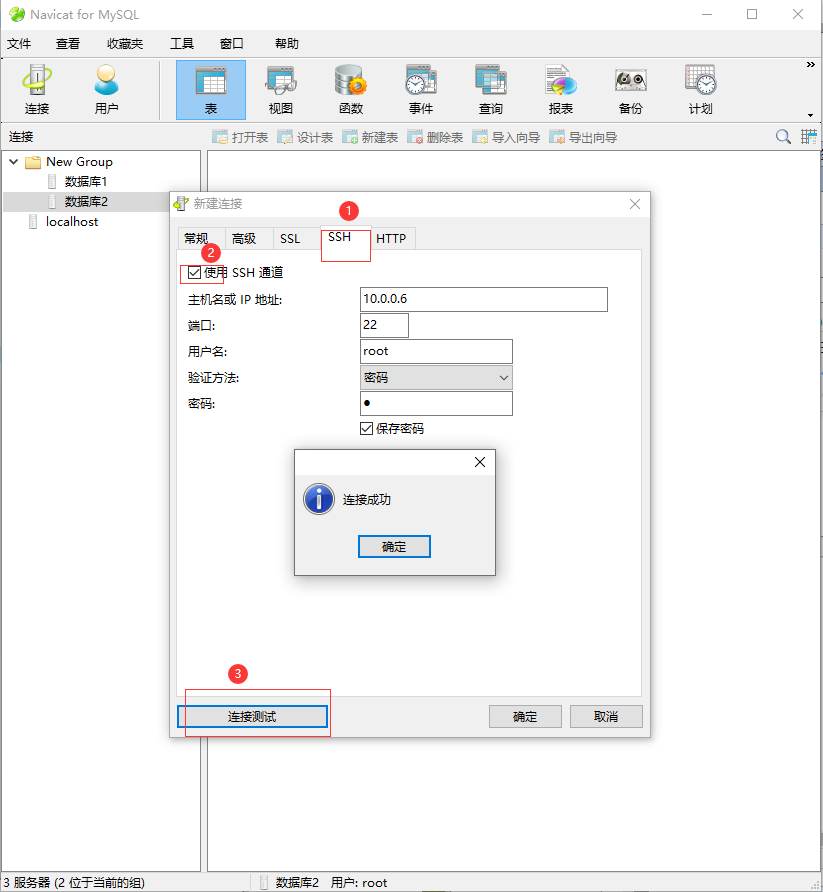
| db01 | 172.16.1.51 | 10.0.0.51 | 数据库 |
[root@lb03 ~]# vim /etc/yum.repos.d/nginx.repo
[nginx-stable]
name=nginx stable repo
baseurl=http://nginx.org/packages/centos/7/$basearch/
gpgcheck=1
enabled=1
gpgkey=https://nginx.org/keys/nginx_signing.key
module_hotfixes=true
[root@lb03 ~]# yum install -y nginx
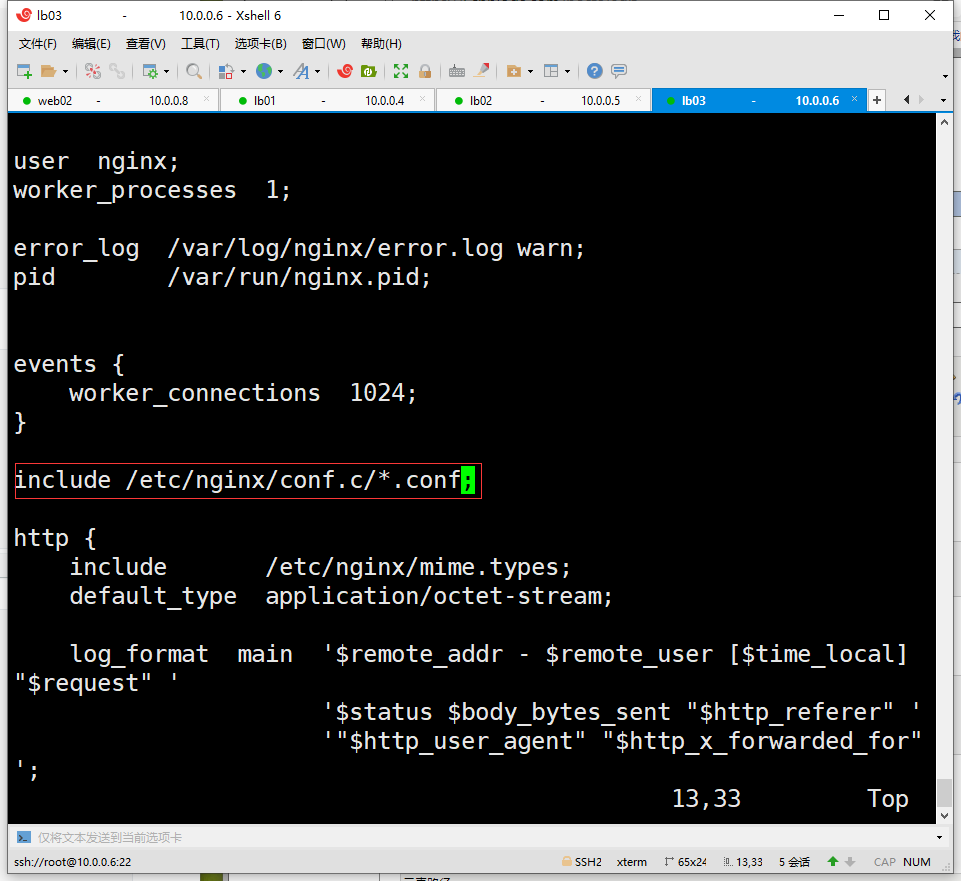
[root@lb03 ~]# vim /etc/nginx/nginx.conf
include /etc/nginx/conf.c/*.conf;
[root@lb03 ~]# mkdir /etc/nginx/conf.c
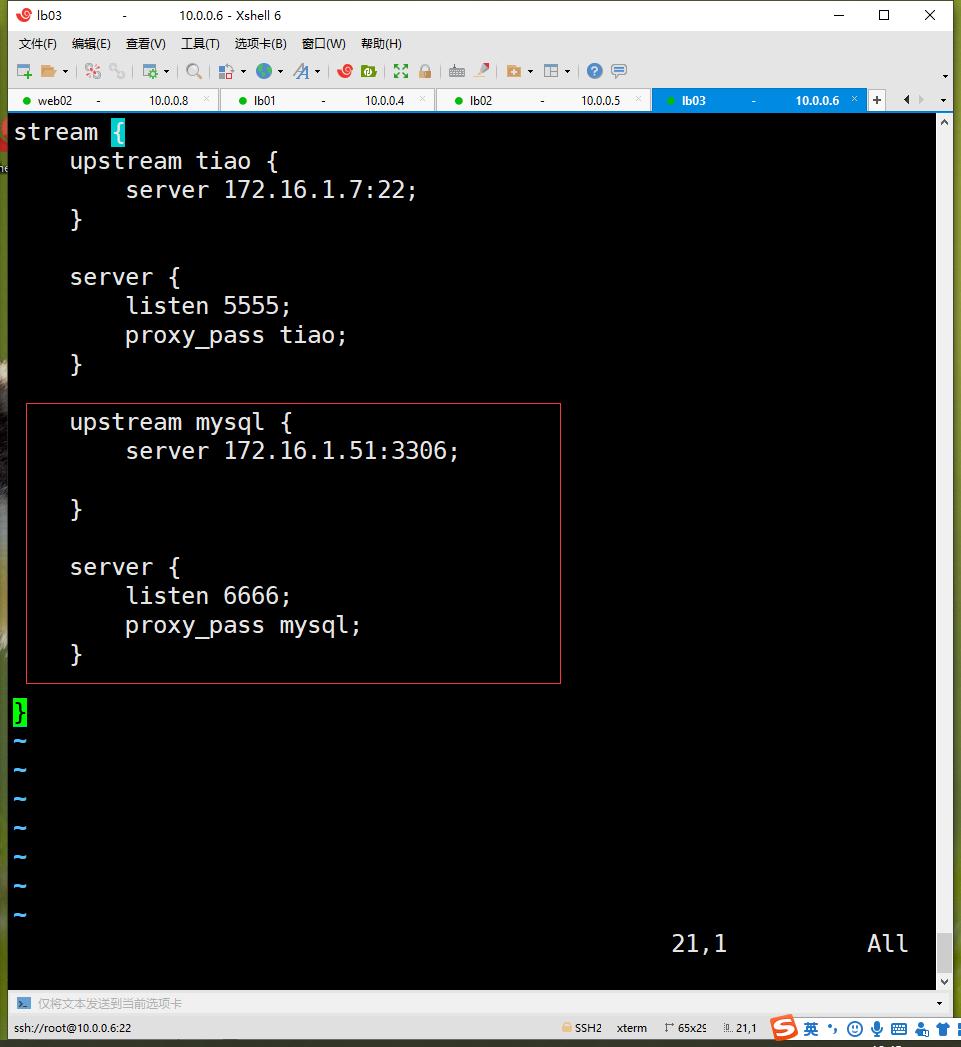
[root@lb03 ~]# vim /etc/nginx/conf.c/4lb.conf
stream {
upstream tiao {
server 172.16.1.7:22;
}
server {
listen 5555;
proxy_pass tiao;
}
}
[root@lb03 ~]# nginx -t
[root@lb03 ~]# systemctl start nginx

[root@lb03 ~]# vim /etc/nginx/conf.c/4lb.conf
upstream mysql {
server 172.16.1.51:3306;
}
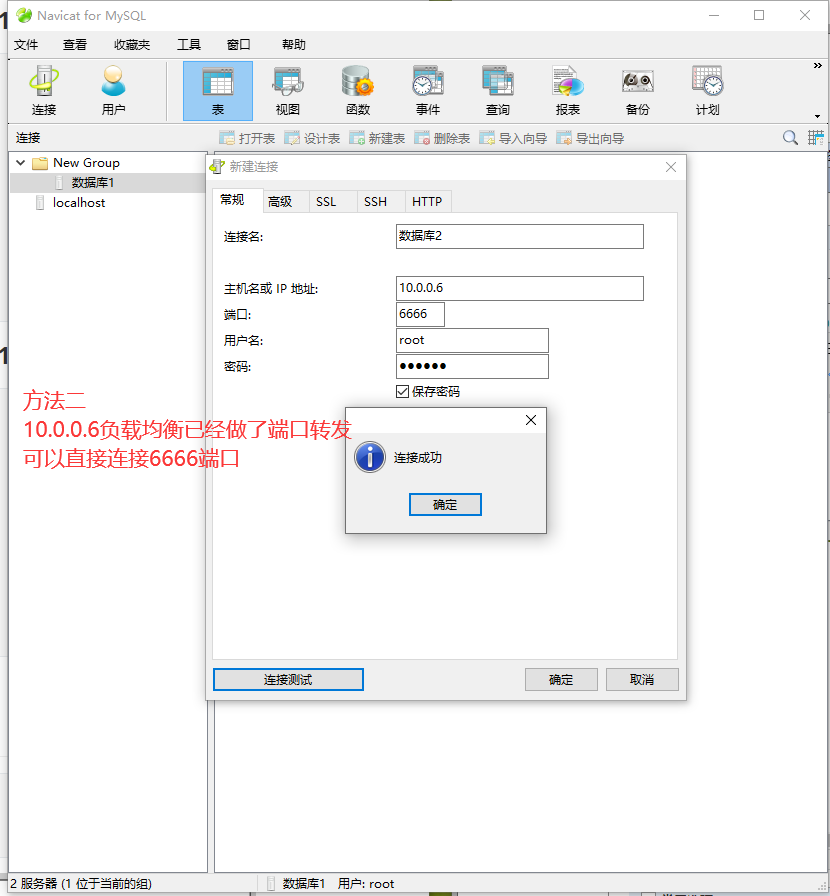
server {
listen 6666;
proxy_pass mysql;
}
[root@lb03 ~]# nginx -t
[root@lb03 ~]# systemctl reload nginx
[root@db01 ~]# yum install -y mariadb-server
[root@db01 ~]# systemctl start mariadb
[root@db01 ~]# mysqladmin -uroot password 123
[root@db01 ~]# mysql -uroot -p123
MariaDB [(none)]> grant all on *.* to root@'10.0.0.%' identified by '123456';

MariaDB [(none)]> grant all on *.* to root@'172.16.1.%' identified by '123456';
本文来自博客园,作者:六月OvO,转载请注明原文链接:https://www.cnblogs.com/chenlifan/p/13610520.html

 浙公网安备 33010602011771号