
Wordpress用戶註冊電郵,以Ultimate Member + FluentSMTP + AWS SES + JWT Authentication for WP-API為例
1.0 安網插件
1.1 Ultimate Member
https://wordpress.org/plugins/ultimate-member/
1.2 FluentSMTP
https://wordpress.org/plugins/fluent-smtp/
1.3 JWT Authentication for WP REST API
https://wordpress.org/plugins/jwt-authentication-for-wp-rest-api/
2.0 Amazon Simple Email Service
2.1 IAM
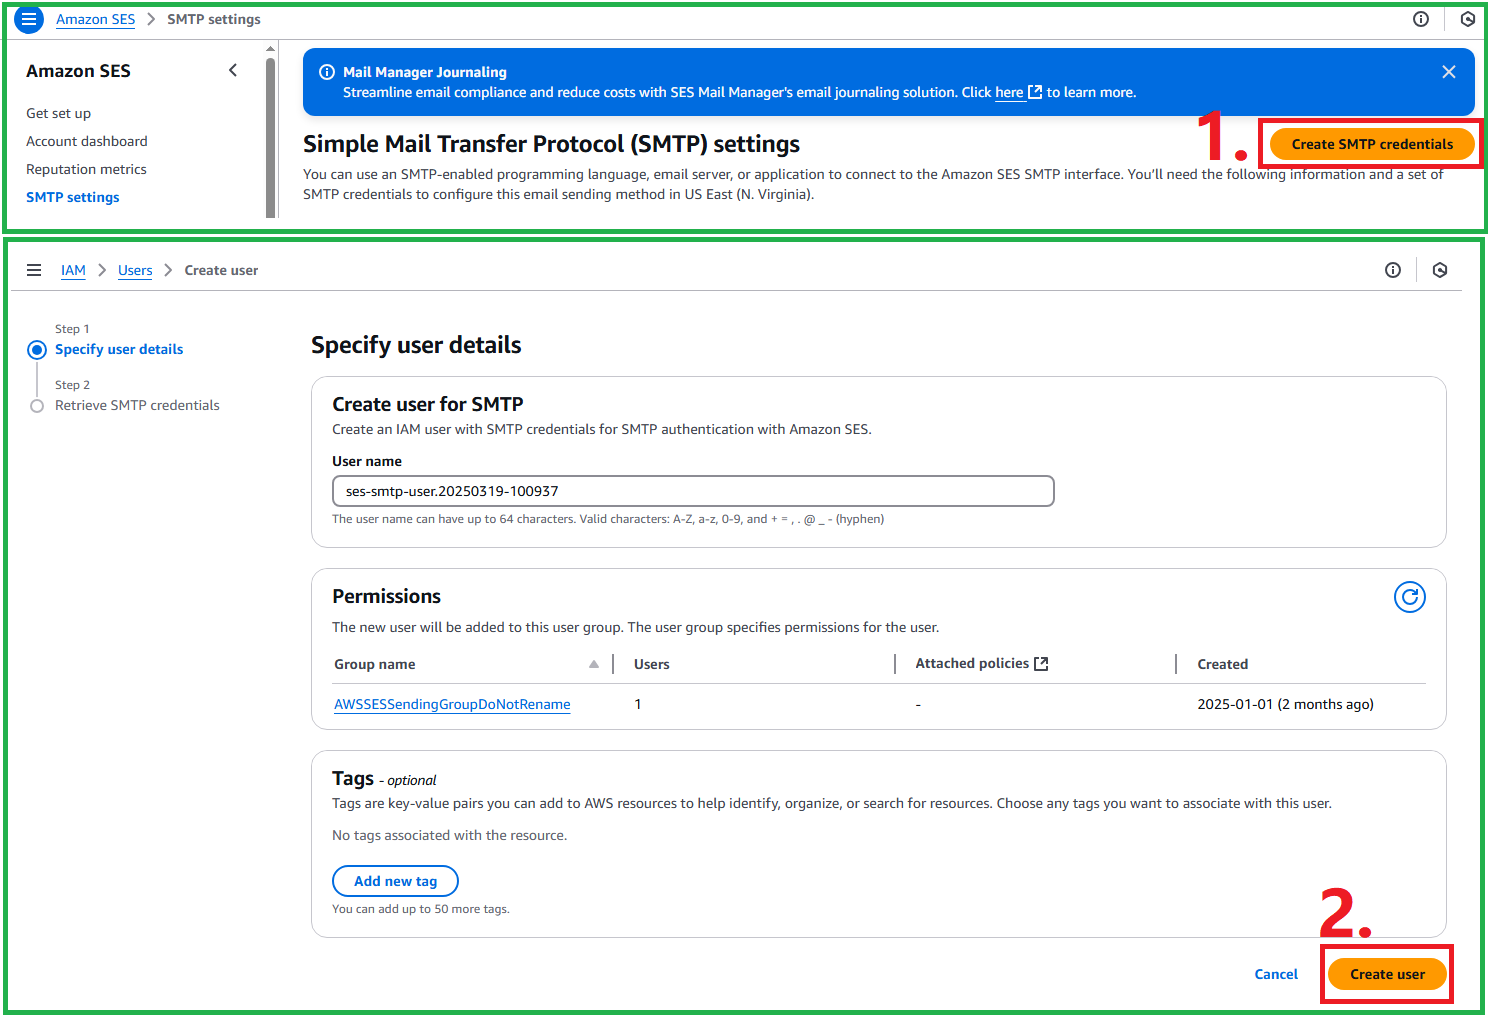
- 進入Amazon SES
- 按"Create SMTP credentials"
- 按"Create User"
2.2 SES
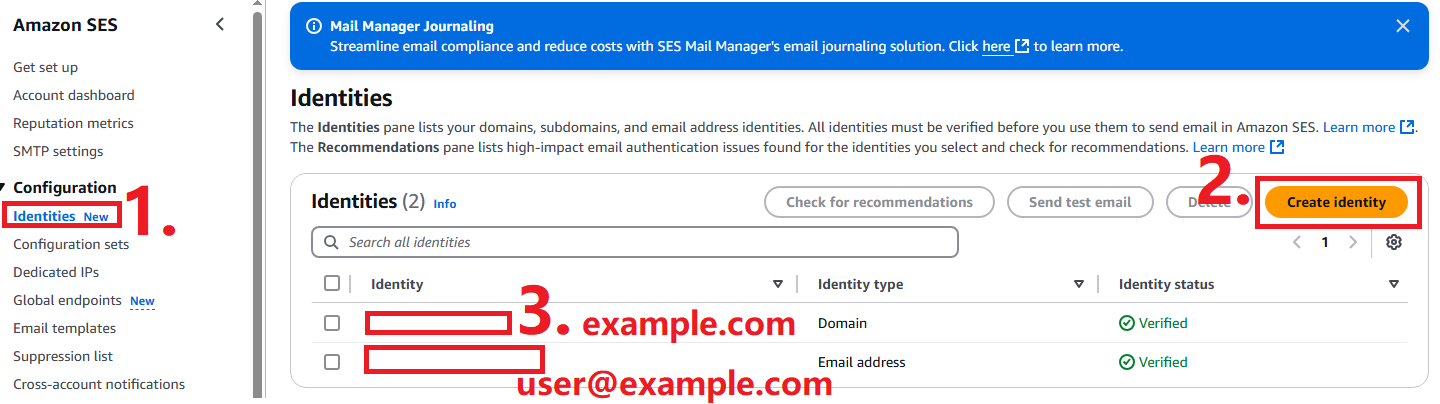
- 按"Identities"
- 按"Create identity"
- 把"example.com" + "user@example.com"加進白名單
3.0 FluentSMTP
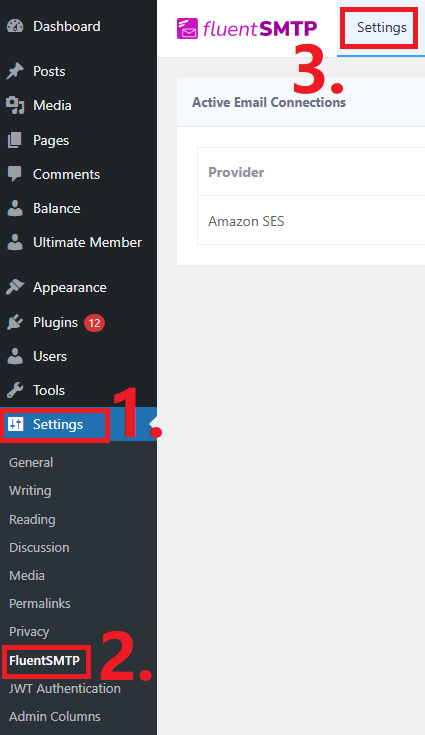
Setting -> FluentSMTP -> Settings
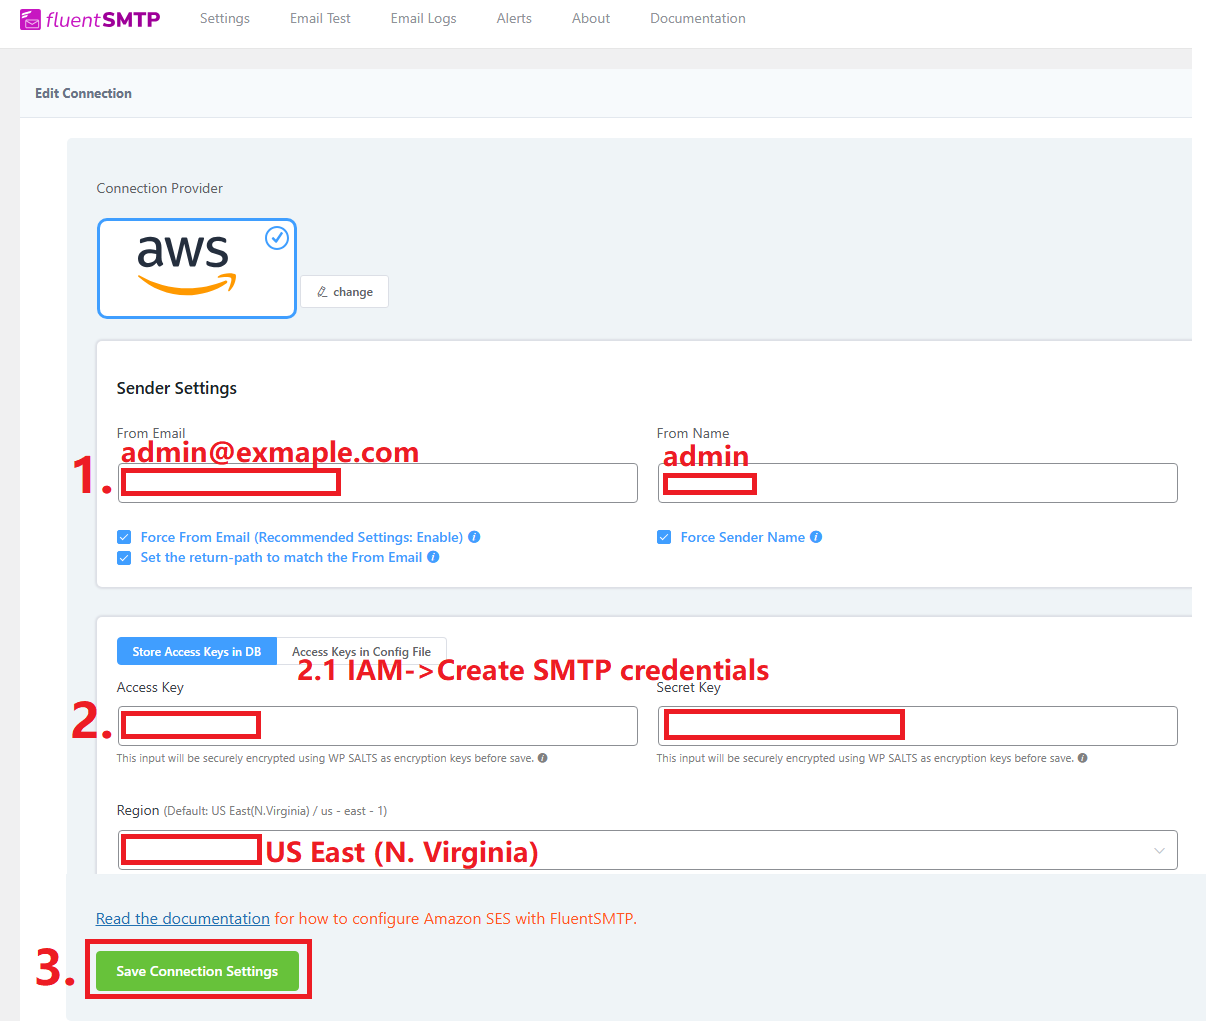
- 填寫"發件人電郵+名字"。
- 填寫"Access Key+Secret Key",在IAM時會顯示。
- 按"Save Connection Settings"
3.1 測試
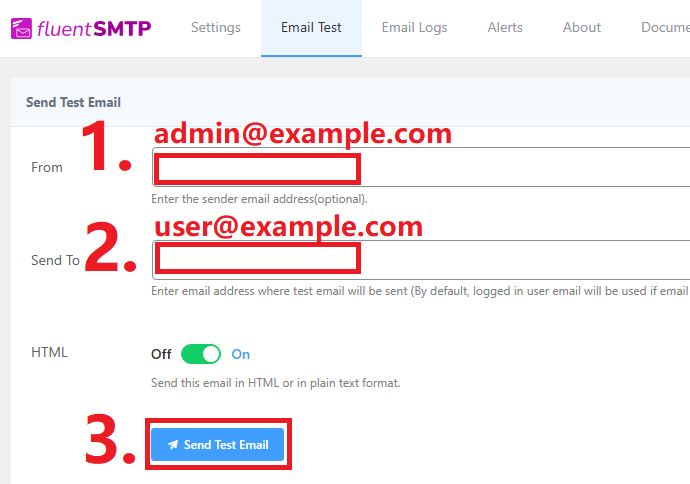
- 進入"Email Test"
- 填寫"From + Send To"
- 按"Send Test Email"
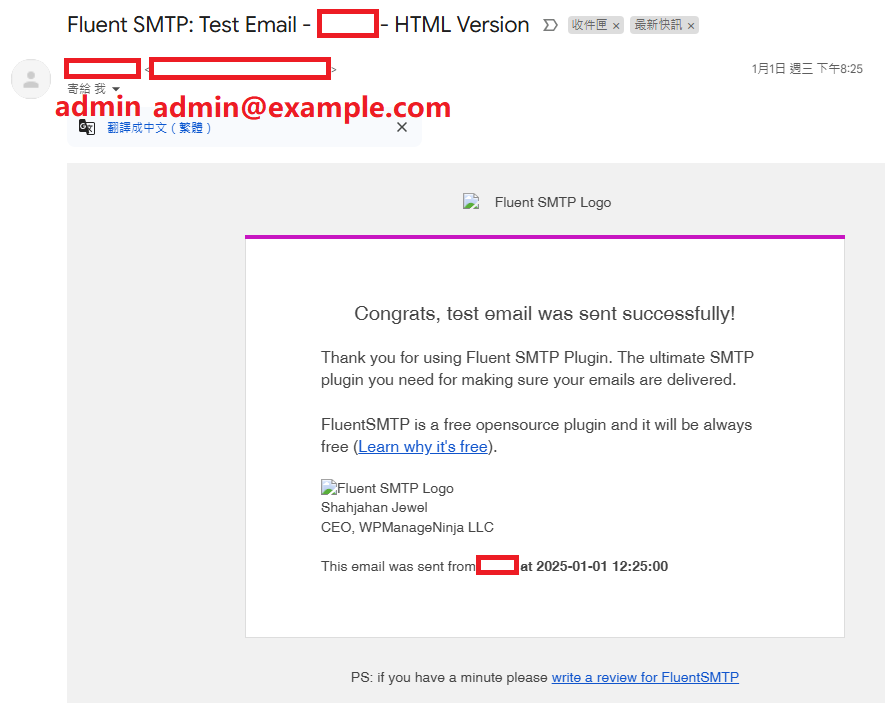
成功收到電郵。
4.0 修改Wordpress用戶登記邏輯
.\wp-includes\user.php line: 2502~2508
foreach ( wp_get_user_contact_methods( $user ) as $key => $value ) {
  if ( isset( $userdata[ $key ] ) ) {
    update_user_meta( $user_id, $key, $userdata[ $key ] );
  }
}

// 修改Wordpress用戶登記邏輯
global $counter;
if ($counter <= 0 && !metadata_exists('user', $user_id, 'password_temp')) {
  update_user_meta($user_id, 'password_temp', $userdata['user_pass']);
  update_user_meta($user_id, 'password_temp_stime', wp_date('Y-m-d h:i:s'));
  update_user_meta($user_id, 'account_is_activated', '0');
}
$counter++;
在用戶登記時,加上三個值:password_temp,password_temp_stime,account_is_activated。
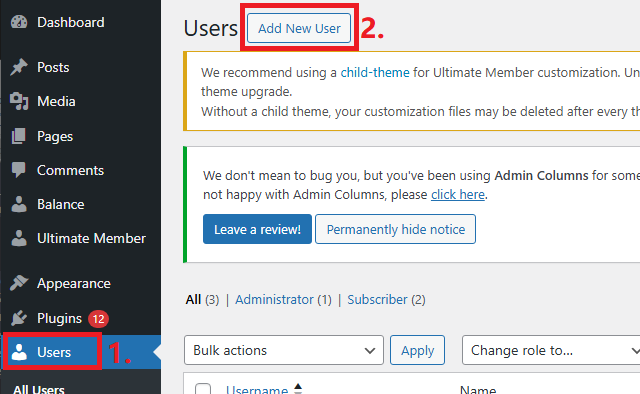
之後按正常地"Add New User",就看見user metadata多了password_temp,password_temp_stime,account_is_activated。
5.0 Restful API用戶註冊
如用Restful API用戶註冊,可參考我的另2篇文章:
1. Wordpress Restful API Overview [Updated: 2023-11-29]
https://www.cnblogs.com/chenkuang/p/17833957.html
https://www.cnblogs.com/chenkuang/p/17787626.html
或官方文檔
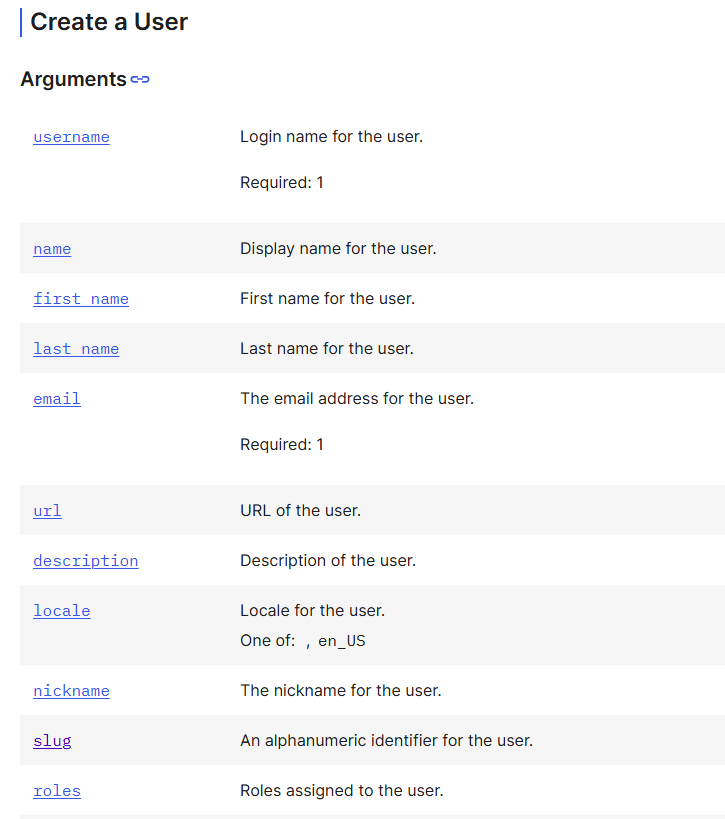
Wordpress Restful API - Create a User
https://developer.wordpress.org/rest-api/reference/users/#create-a-user

 浙公网安备 33010602011771号