如何通过SpringBoot官方手册集成RabbitMQ
众所周知,SpringBoot是对Spring的一层封装,用来简化操作。
随着SpringBoot的越发成熟,很多的流行技术都提供了SpringBoot的版本。
可以点击下方的连接查看spring-boot的家族都有哪些成员。
可以发现RabbitMQ是被spring-boot-starter-amqp所实现的。
下面我们打开springboot的官方指南(根据自己的版本)
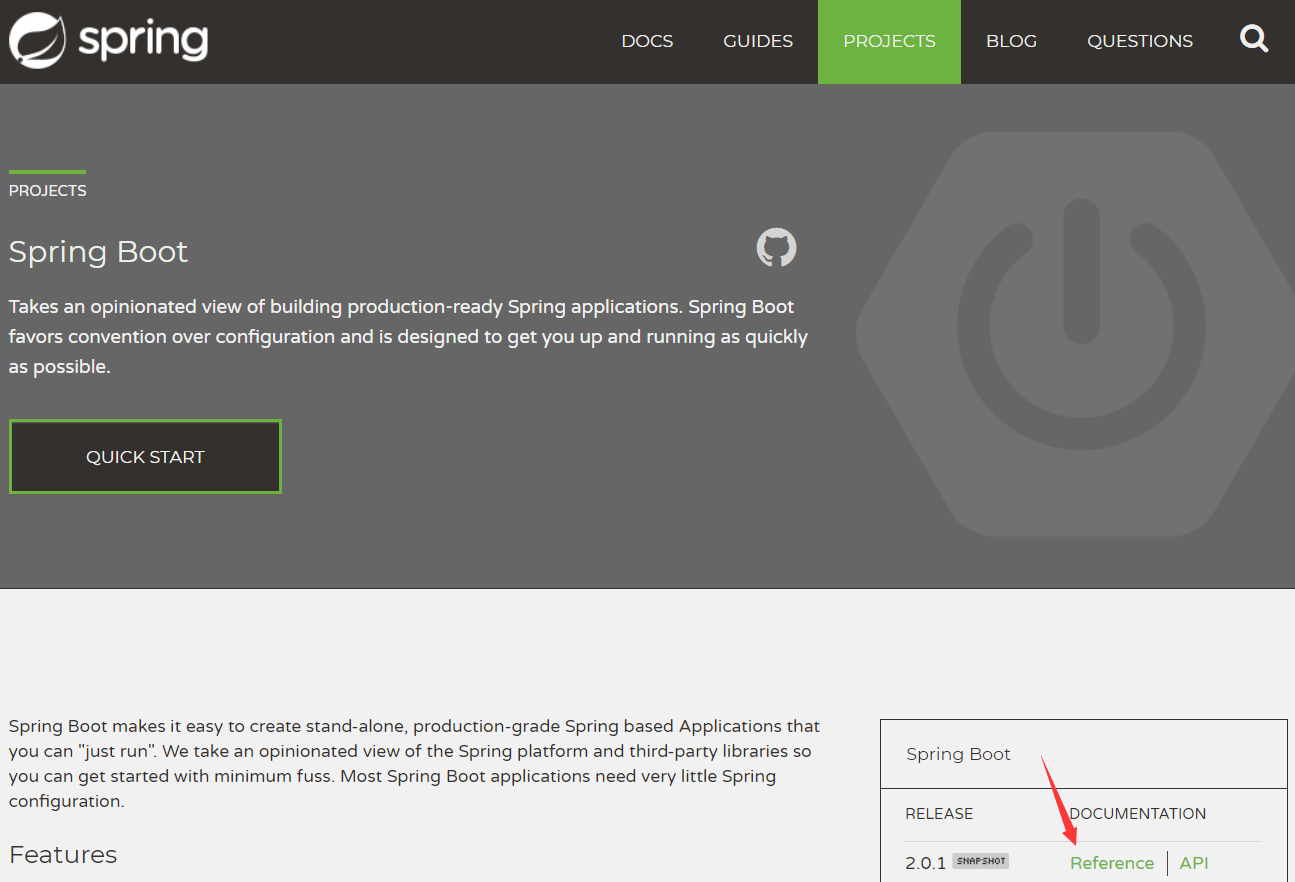
可以发现官方的指南东西太多了。如何快速找到amqp相关的指南呢?
ctrl+F 输入:amqp

从目录定位:

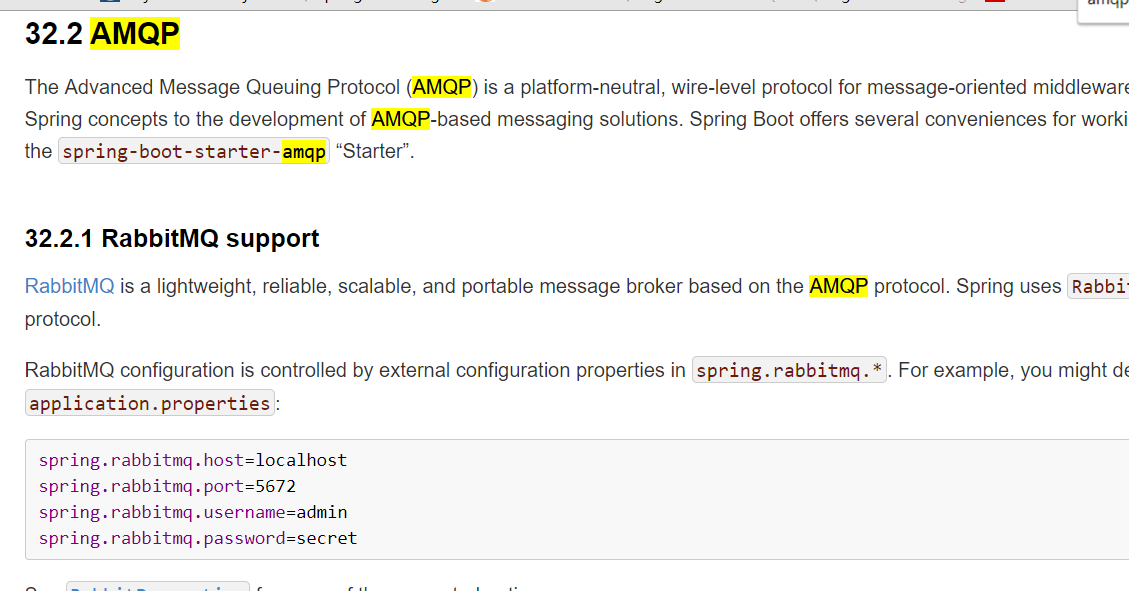
这里面就提供了RabbitMQ的基本使用,可以发现就很简单的三步:
1.把必备属性写到application.properties或者application.yml里
spring:
  rabbitmq:
    host: localhost
    port: 5672
2.在发送端,注入一个AmqpTemplate和AmqpAdmin,用来向Rabbit服务器发送数据
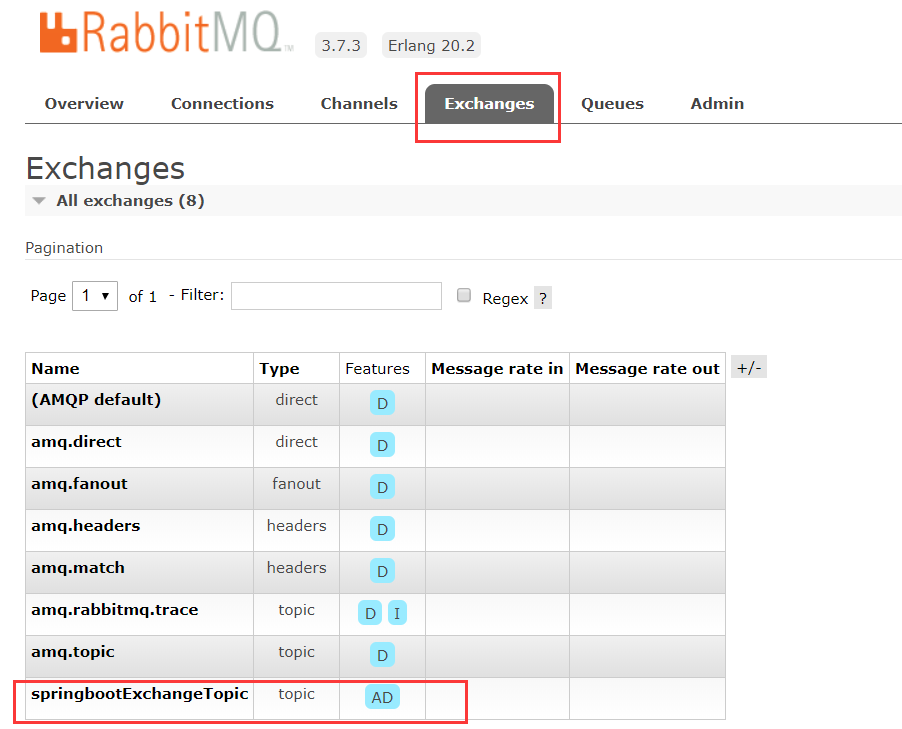
import org.springframework.amqp.core.AmqpAdmin;
import org.springframework.amqp.core.AmqpTemplate;
import org.springframework.amqp.core.TopicExchange;
import org.springframework.beans.factory.annotation.Autowired;
import org.springframework.stereotype.Component;

import com.xiaokong.bean.People;

@Component
public class AmqpSender {
    private AmqpTemplate template;
    private AmqpAdmin admin;
    @Autowired
    public void setTemplate(AmqpAdmin admin,AmqpTemplate template) {
        this.template=template;
        this.admin=admin;
    }

    public void sendMessage(People people) {
        String exchangeName="springbootExchangeTopic";
        //声明一个topic类型的交换器
        admin.declareExchange(new TopicExchange(exchangeName, false, true));
        String routingKey="com.xiaokong.test";
        template.convertAndSend(exchangeName, routingKey, people);
    }
}
这里需要注意的是:在Exchange构造函数里的(String name, boolean durable, boolean autoDelete)需要和接受端里的一致,否则会报错 inequivalent arg 'xxxx' for exchange '
3.在接受端,通过注解方式设置队列交换器的绑定规则
import org.springframework.amqp.rabbit.annotation.Exchange;
import org.springframework.amqp.rabbit.annotation.Queue;
import org.springframework.amqp.rabbit.annotation.QueueBinding;
import org.springframework.amqp.rabbit.annotation.RabbitListener;
import org.springframework.stereotype.Component;

import com.xiaokong.bean.People;

@Component
public class AmqpReceiver {
    @RabbitListener(
        bindings= {
                @QueueBinding(
                    value=@Queue,
                    exchange=@Exchange(value="springbootExchangeTopic",type="topic",durable="false",autoDelete="true"),
                    key="#"
                )})
    public void receiveMessage(People people) {
        System.out.println("-------->接收到消息:"+people);
    }
}
一定要注意,注解@Exchange中的参数一定要和发送端的一致,因为这个框架里,发送端和接受端的默认值是不一致的(坑了我好久),如果使用默认值可能就会出错!!
最后,写一下过程中出现的问题:
中间有报过一次异常,com.rabbitmq.client.ShutdownSignalException: channel error; protocol methodxxxx
大致意思是队列不存在,我一直以为是真的队列无法创建。
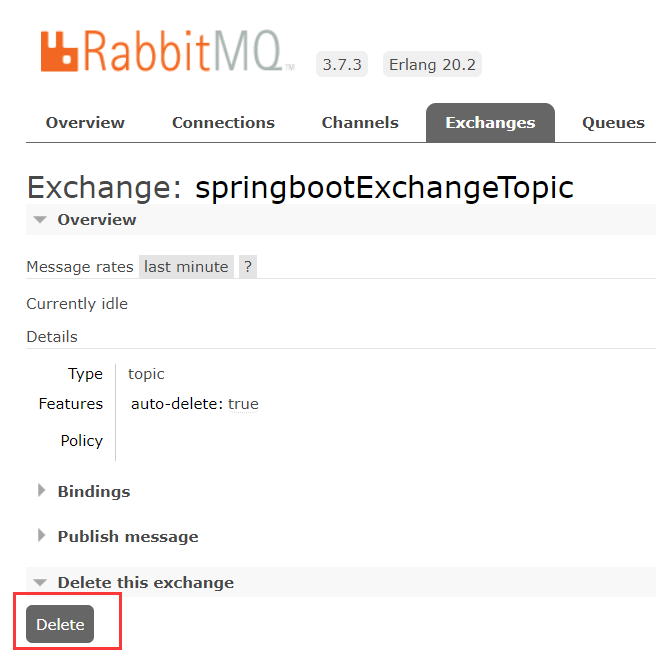
最后发现因为后面我改了交换器的配置,但是因为rabbit服务器交换器还存在,所以不会重新创建,配置也还是原来的配置。
解决方案就是打开Rabbit管理页面把Exchange删除就好了。

 浙公网安备 33010602011771号