【C++】VS Code配置
0.前言
本文已配置C++环境为例,本文主要是面向刚开始接触VS Code的朋友,采用生成默认配置任务的方法,在编写本文过程中大量参考了官方文档,感兴趣的朋友可直接前往传送门。
环境: win10 + VS Code 1.43.1
官方下载地址:https://code.visualstudio.com/
官方文档传送门:https://code.visualstudio.com/docs
1. 从官方下载地址下载VS Code并安装,安装过程应尽量避免中文路径。
2. 打开软件,在VSCode最左侧有五个选项,从上到下依次为资源管理器、搜索、源代码管理器、运行和extension。截图中含有task.json等文件,先不用管它们,刚开始配置是没有这些文件的。
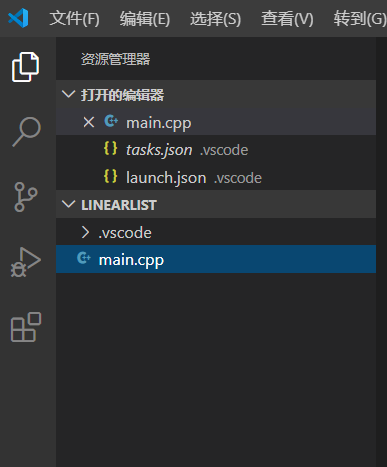
图1
3. 安装extension
根据个人喜好可以安装不同的扩展(extension),点击最后一个选项搜索即可,上述是安装了中文插件后截图,直接键入Chinese,第一个即为中文扩展。同样地,键入C++,然后安装扩展。
4.下载C++编译器
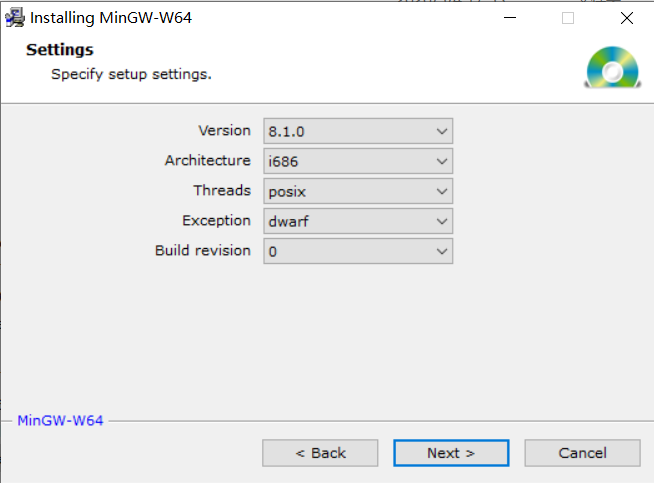
这里下载mingW-W64,下载传送门:http://mingw-w64.org/doku.php/download。下载中间这个,并安装,安装过程中的setting一般保持默认设置,其他的根据需要修改。安装完成后,需要将安装路径添加到系统环境变量中,即“路径\mingw64\bin”,安装完成后需要重启。

5.配置环境
在配置环境过程中,会产生一个.vscode 文件夹,里面包含三个配置文件:
tasks.json:编译指令  (build instructions)
launch.json:调试设置 (debugger settings)
c_cpp_properties.json:编译器路径和IntelliSense设置 (compiler path and IntelliSense settings)
(1)配置task.json
首先,在目标目录下新建文件夹vscode(当然名称随你喜好),然后如图2,依次打开:文件-->打开文件夹-->选择vscode,结果如图3。点击图3方框中“新建文件”新建main.cpp,并粘贴以下代码,结果如图4.
#include <iostream>
#include <vector>
#include <string>

using namespace std;

int main()
{
    vector<string> msg {"Hello", "C++", "World", "from", "VS Code", "and the C++ extension!"};

    for (const string& word : msg)
    {
        cout << word << " ";
    }
    cout << endl;
}
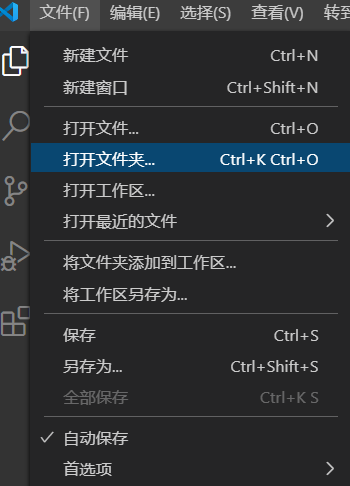
图2
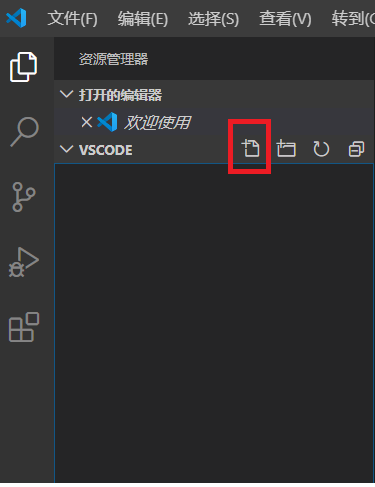
图3
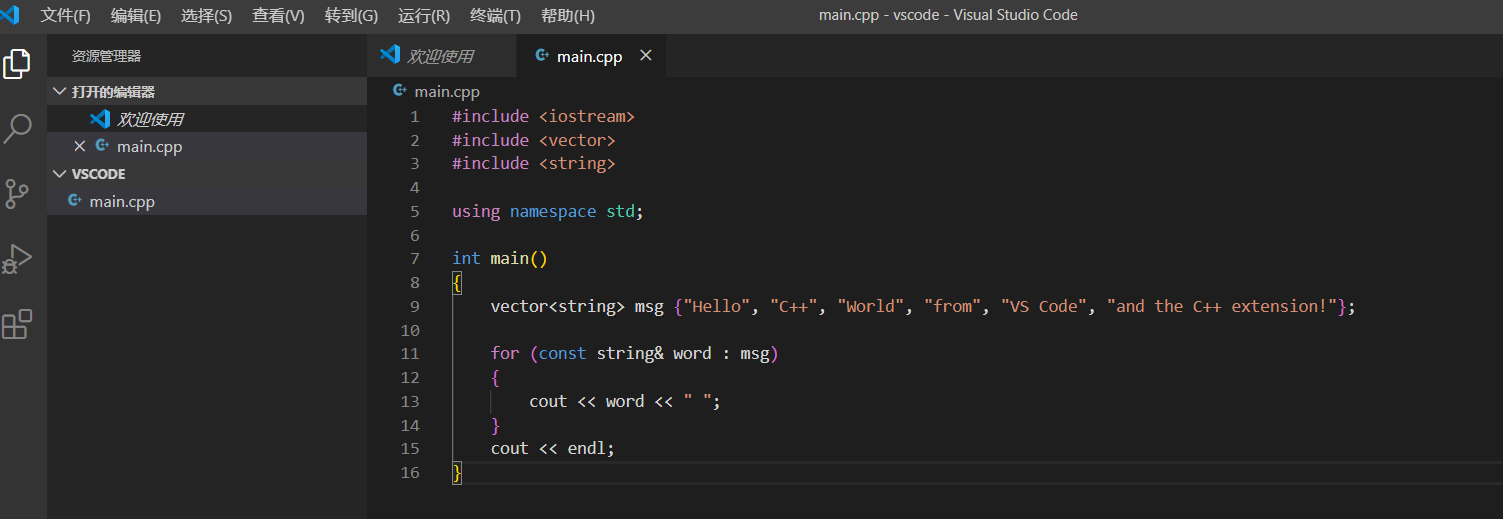
图4
然后依次点击最上方工具栏中 终端-->配置默认生成任务,然后选择C/C++:g++.exe build active file ,结果如图7,如果这里弹出的候选方式中没有“C/C++:g++.exe build active file”,可参考附录解决方法。

图5

图6

图7
为了更方便注释与说明,将tasks.json写在下面,需要注意的是在VS Code中路径中是”\\“而不是单个"\",与visual studio2015一致。
{
// 有关 tasks.json 格式的文档,请参见
    // https://go.microsoft.com/fwlink/?LinkId=733558
    "version": "2.0.0",
    "tasks": [
        {
            "type": "shell",
            "label": "g++.exe build active file",                // label:左侧”运行“选项中编译器的名称,可以任意指定。
            "command": "D:\\4.Software\\mingw-W64\\mingw64\\bin\\g++.exe",  // command:指定了本程序运行编译器的路径,这里是g++.exe。
            "args": [                                 // args: args数组指定了传递给编译器的命令(commamd-line)参数,通过这个参数数组会告诉编译器
                "-g",                                 // 处理的是”${file}“文件,并且在${fileDirname}目录下生成${fileBasenameNoExtension}.exe
                "${file}",
                "-o",
                "${fileDirname}\\${fileBasenameNoExtension}.exe"
            ],
            "options": {
                "cwd": "D:\\4.Software\\mingw-W64\\mingw64\\bin"
            },
            "problemMatcher": [                           // problemMathcher: The problemMatcher value selects the output parser to use for finding errors and warnings in the compiler output.
                "$gcc"
            ],
            "group": {
                "kind": "build",                                            // group中的”isDefault“参数仅仅是为了方便,当其为True时,可通过快捷键ctrl+shift+B运行生成任务,如果为False,无法通过快捷键生成,但可以通过 终端-->运行生成任务。
                "isDefault": true
            }
        }
    ]
}
回到main.cpp,点击 终端 -->运行生成任务,在底部终端会显示"终端被任务重用,按任意键继续" 。 同时也可以看到有两个参数,其对应于tasks.json中的args数组,-g参数表示当前编译的是main.cpp,-o参数表示当前生成的可执行exe文件的名称和路径。
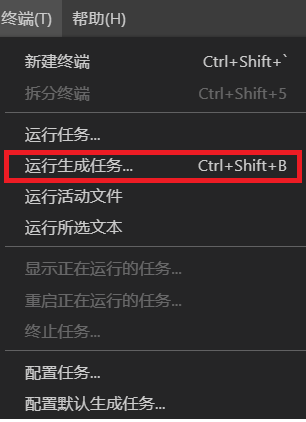
图8

图9
(2) 配置调试器 debugger
依次点击 运行-->启动调试,出现图11所示,然后选择”C++(GDB/LLB)“,出现图12,选择第一个g++.exe,然后自动生成launch.json。
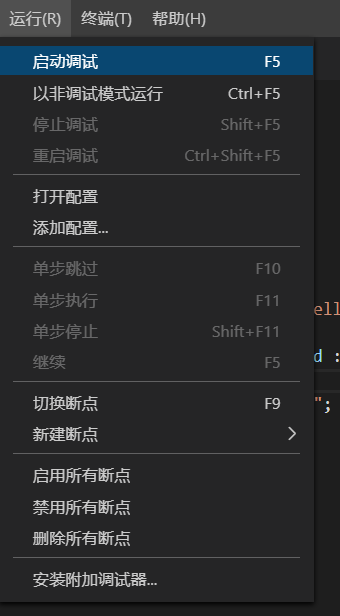
图10
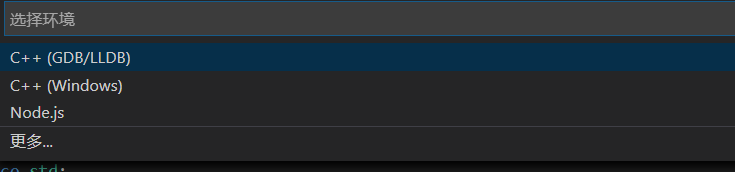
图11
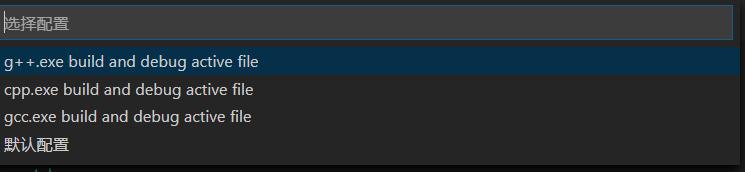
图12
launch.json如下:
{
    // 使用 IntelliSense 了解相关属性。
    // 悬停以查看现有属性的描述。
    // 欲了解更多信息,请访问: https://go.microsoft.com/fwlink/?linkid=830387
    "version": "0.2.0",
    "configurations": [
        {
            "name": "g++.exe build and debug active file",
            "type": "cppdbg",
            "request": "launch",
            "program": "${fileDirname}\\${fileBasenameNoExtension}.exe",  //正调试的可执行文件路径
            "args": [],
            "stopAtEntry": false,
            "cwd": "${workspaceFolder}",
            "environment": [],
            "externalConsole": false,
            "MIMode": "gdb",
            "miDebuggerPath": "D:\\4.Software\\mingw-W64\\mingw64\\bin\\gdb.exe",
            "setupCommands": [
                {
                    "description": "为 gdb 启用整齐打印",
                    "text": "-enable-pretty-printing",
                    "ignoreFailures": true
                }
            ],
            "preLaunchTask": "g++.exe build active file"
        }
    ]
}
(3) 配置 c_cpp_properties.json
ctrl+shift+p然后键入C/C++,选择"C/C++编辑配置(UI)"然后自动生成c_cpp_properties.json。
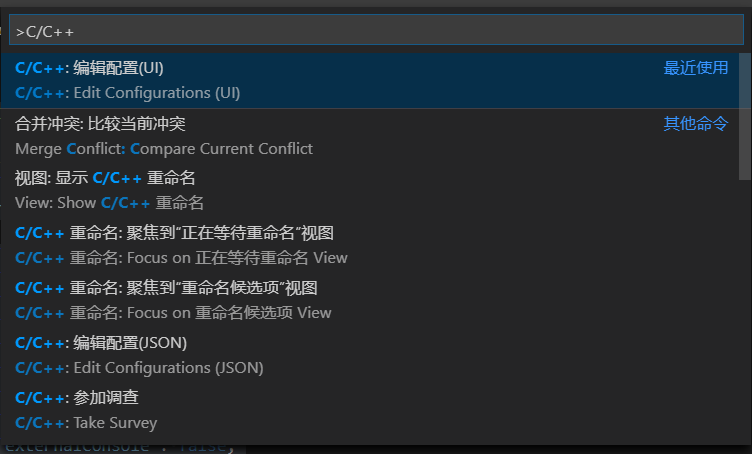
图13
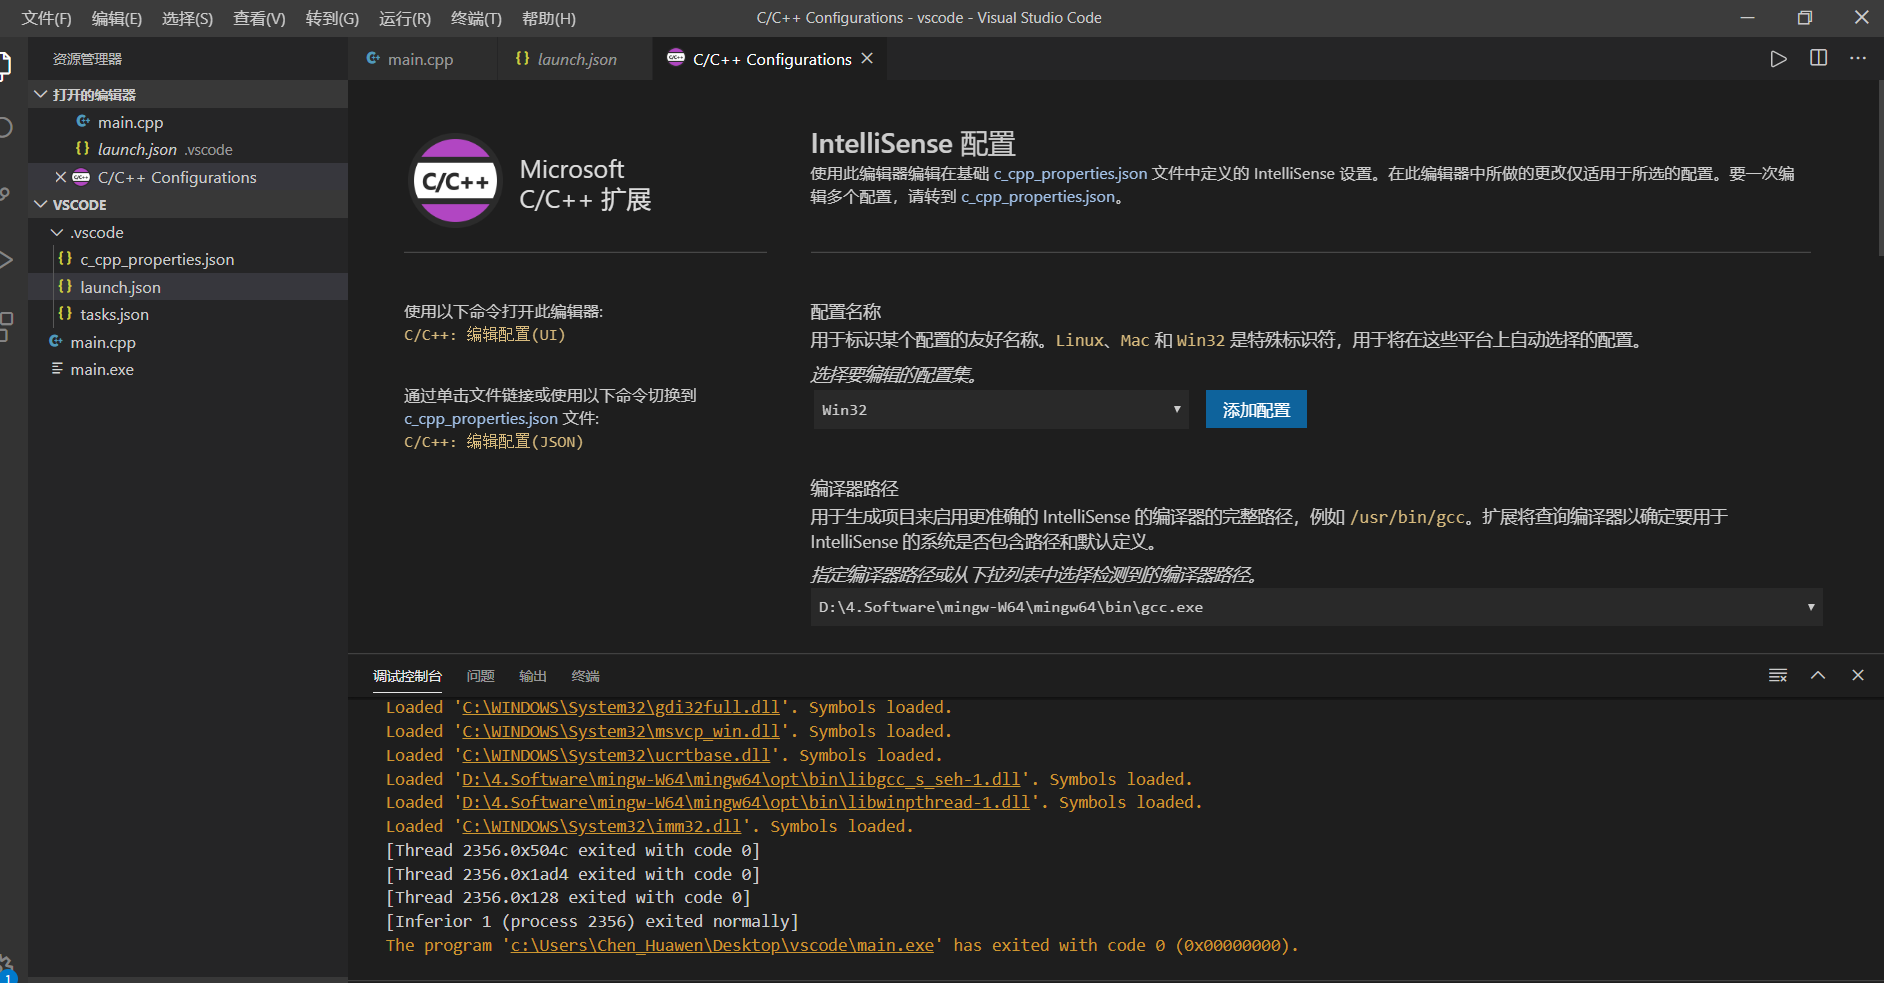
图14
c_cpp_properties.json:
{
    "configurations": [
        {
            "name": "Win32",
            "includePath": [
                "${workspaceFolder}/**"
            ],
            "defines": [
                "_DEBUG",
                "UNICODE",
                "_UNICODE"
            ],
            "compilerPath": "D:\\4.Software\\mingw-W64\\mingw64\\bin\\gcc.exe",
            "cStandard": "c11",
            "cppStandard": "c++17",
            "intelliSenseMode": "clang-x64"
        }
    ],
    "version": 4
}
结语
本文主要记录初次使用VS Code配置过程,在这三个json文件中一些参数的具体含义现在还没弄懂,后续会继续更新VS Code使用相关文章,欢迎继续关注。(Date on 25, Mar, 2020)
其他博客配置方法:
[1] https://zhuanlan.zhihu.com/p/110027894?from_voters_page=true
附录
在配置默认生成任务时,可能会出现无“C/C++:g++.exe build active file”的情况,那么就需要手动改改。
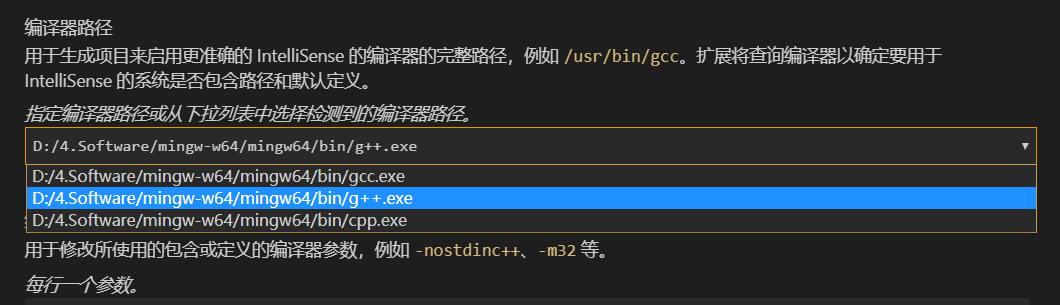
ctrl+shift+p然后键入C/C++,选择"C/C++编辑配置(UI)"然后自动生成c_cpp_properties.json。就像上边的(3) 配置 c_cpp_properties.json一样,找到“编译器路径”,然后再下拉框中选择g++,值得注意的是,如果先前存在tasks.json,最好先删掉,然后选择g++,再手动生成默认配置任务。

 浙公网安备 33010602011771号