
界面客户端
使用手册
https://www.jetbrains.com/help/idea/testing-restful-web-services.html
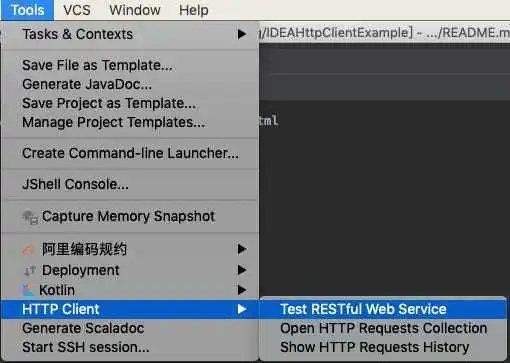
打开方式
Tools -> HTTP Client -> Test RESTful Web Service
文本客户端
使用手册 https://www.jetbrains.com/help/idea/http-client-in-product-code-editor.html
特点
- 纯文本编写
- 支持统一配置
- 支持 scripts 脚本
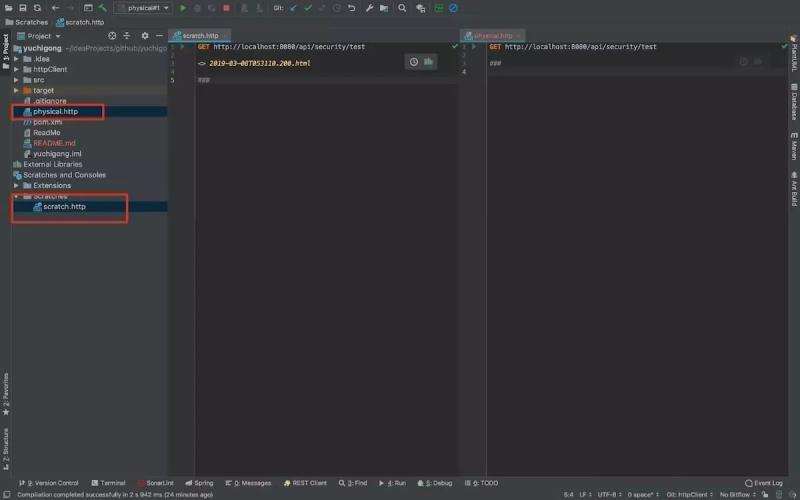
创建新的请求文件
- Scratch files (全局文件)
- physical files(项目文件)
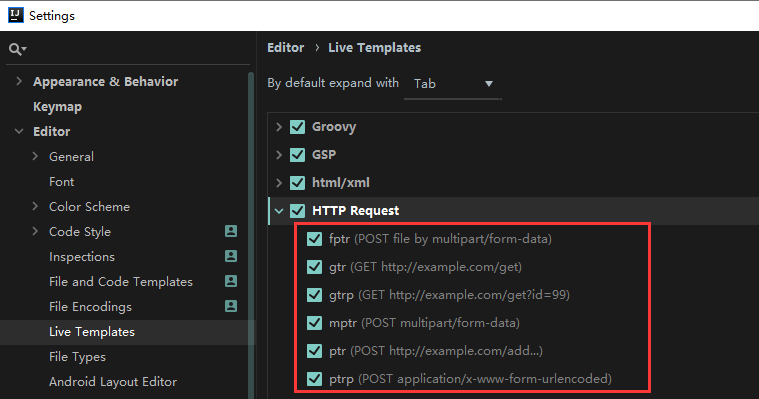
live templates
支持 HTTP 1.1 所有方法
POST、GET、PUT、DELETE、HEAD、OPTIONS、TRACE、CONNECT
### GET ``` ### Get request with a header GET https://httpbin.org/ip Accept: application/json
Get request with parameter
GET https://httpbin.org/get?show_env=1
Accept: application/json
Get request with environment variables
GET {{host}}/get?show_env={{show_env}}
Accept: application/json
Get request with disabled redirects
@no-redirect
GET http://httpbin.org/status/301
<br/><br/>
### POST
Send POST request with json body
POST https://httpbin.org/post
Content-Type: application/json
{
"id": 999,
"value": "content"
}
Send POST request with body as parameters
POST https://httpbin.org/post
Content-Type: application/x-www-form-urlencoded
id=999&value=content
Send a form with the text and file fields
POST https://httpbin.org/post
Content-Type: multipart/form-data; boundary=WebAppBoundary
--WebAppBoundary
Content-Disposition: form-data; name="element-name"
Content-Type: text/plain
Name
--WebAppBoundary
Content-Disposition: form-data; name="data"; filename="data.json"
Content-Type: application/json
< ./request-form-data.json
--WebAppBoundary--
<br/><br/>
### Post请求的两种编码格式
<br/>
* application/x-www-form-urlencoded
post的默认格式,使用js中URLencode转码方法。
包括将name、value中的空格替换为加号;将非ascii字符做百分号编码;将input的name、value用‘=’连接,不同的input之间用‘&’连接。
跟get的区别在于,get把转换、拼接完的字符串用‘?’直接与表单的action连接作为URL使用,所以请求体里没有数据
* multipart/form-data
将表单中的每个input转为了一个由boundary分割的小格式,没有转码,直接将utf8字节拼接到请求体中,在本地有多少字节实际就发送多少字节,极大提高了效率,适合传输长字节
<br/><br/><br/>
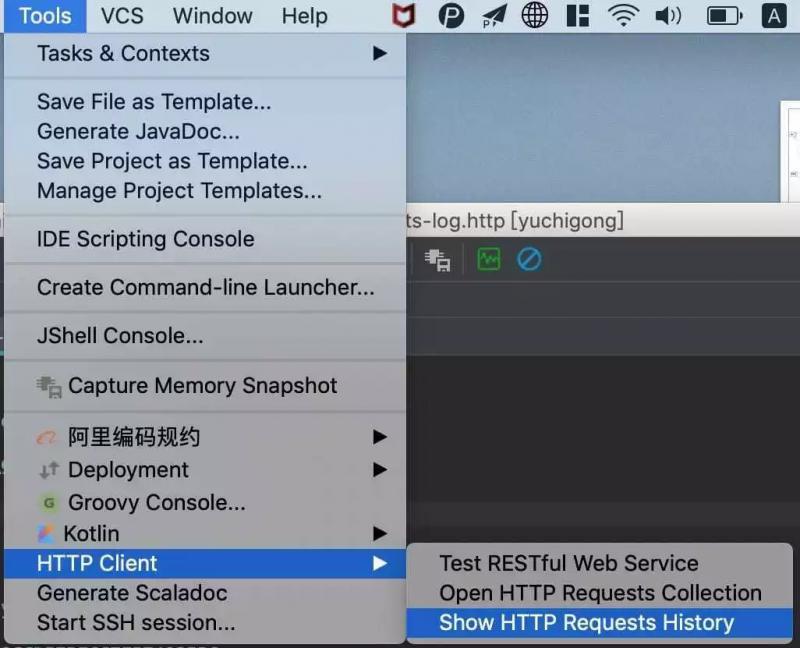
## 查看请求历史
点击右上角的按钮
Show HTTP Requests History
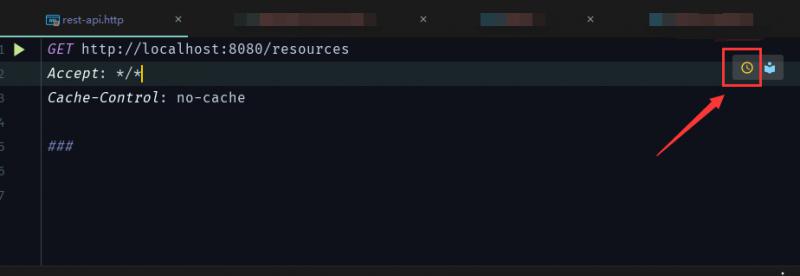
或者在工具栏内打开Tools | HTTP Client | Show HTTP Requests History
<br/><br/><br/><br/>
## 演示接口重构 - 统一配置
<br/><br/>
### 定义环境变量
环境变量需要定义在环境文件中,环境文件有两种:
1. 创建名为 rest-client.env.json 或者 http-client.env.json 的环境文件(其实里面就是保存 JSON 数据),该文件里可以定义用在整个项目上的所有常规变量
2. 创建名为rest-client.private.env.json 或者 http-client.private.env.json, 看文件名你应该也猜到这是保存敏感数据的,比如密码,token等,该文件默认是被加入到 VCS 的 ignore文件中的,同时优先级高于其他环境文件, 也就是说,该文件的变量会覆盖其他环境文件中的变量值
{
"dev": {
"host": "localhost",
"port": 8081,
"identifier": "tanrgyb",
"password": "iloveu"
},
"prod": {
"host": "dayarch.top",
"port": 8080,
"identifier": "admin",
"password": "admin"
}
}
<br/><br/>
### 通用配置,域名/端口
rest-client.env.json 或 http-client.env.json
{
"default": {
},
"local": {
"host": "http://localhost:8080"
}
}
<br/><br/>
### 个人安全配置,用户名/密码
rest-client.private.env.json 或 http-client.private.env.json
{
"default": {
},
"local": {
"account": "admin",
"password": "123456"
}
}
<br/><br/>
### 重构后的请求文件
登陆
POST {{host}}/api/login
Content-Type: application/x-www-form-urlencoded
account=lee&password=123456
测试接口
GET {{host}}/api/security/test
Accept: application/json
Cookie: JSESSIONID=1C1DD3EB60DEE60664FB0BFE0F1C9942
<br/><br/>
运行请求,点击运行按钮,可以选择对应的环境


## 使用 response handler scripts
<br/><br/>
### 引用方式
<br/>
* 直接引用
GET host/api/test
{%
// Response Handler Script
...
%}
<br/><br/>

* 文件引用
GET host/api/test
scripts/my-script.js
<br/><br/><br/>

### 主要方法
<br/><br/>
HTTP Response handling API reference

**client**

* client.global
set(varName, varValue) // 设置全局变量
get(varName) // 获取全局变量
isEmpty // 检查 global 是否为空
clear(varName) // 删除变量
clearAll // 删除所有变量
* client.test(testName, func) // 创建一个名称为 testName 的测试
* client.assert(condition, message) // 校验条件 condition 是否成立,否则抛出异常 message
* client.log(text) // 打印日志
<br/><br/>

**response**

* response.body // 字符串 或 JSON (如果content-type 为 application/json.)
* response.headers
valueOf(headerName) // 返回第一个匹配 headerName 的值,如果没有匹配的返回 null
valuesOf(headerName) // 返回所有匹配 headerName 的值的数组,如果没有匹配的返回空数组
* response.status // Http 状态码,如: 200 / 400
* response.contentType
mimeType // 返回 MIME 类型,如:text/plain, text/xml, application/json.
charset // 返回编码 UTF-8 等
<br/><br/><br/>

### 方法调用示例
GET https://httpbin.org/status/200
{%
client.test("Request executed successfully", function() {
client.assert(response.status === 200, "Response status is not 200");
});
%}
<br/><br/>

### 演示接口重构 - 动态更新 Cookie
登陆
POST {{host}}/api/login
Content-Type: application/x-www-form-urlencoded
account={{account}}&password={{password}}
测试接口
GET {{host}}/api/security/test
Accept: application/json
Cookie: {{Set-Cookie}}
<br/><br/>
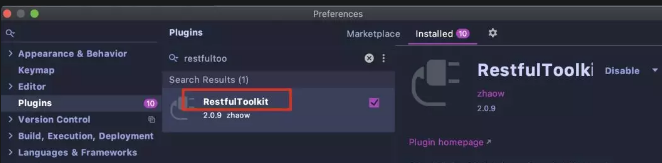
# RestfulToolkit
RestfulToolkit 同样是个插件,在插件市场搜索安装即可
安装了这个插件后,打开侧边栏,项目的所有接口信息都会展现在此处:
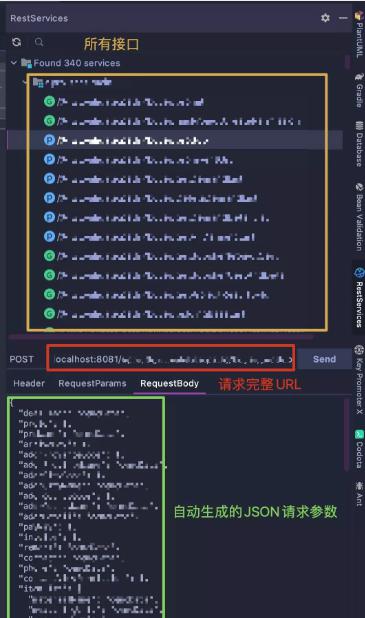
我常用的功能就是把指定接口生成的JSON数据拷贝到 HTTP request 文件中,免去手写的麻烦了,你说方便不?
除此之外,使用快捷键 cmd+\, 可以根据关键字快速找到接口,回车迅速到达代码接口位置,这也是带来了极大的便利

<br/><br/><br/>
参考:<br/>
https://www.jetbrains.com/help/idea/testing-restful-web-services.html
https://github.com/corningsun/yuchigong/blob/httpClient/httpClient/README.md
https://mp.weixin.qq.com/s/bTej94CNhzzbeN0Cynt4MA
 浙公网安备 33010602011771号