手撸vue-router 更好的理解vue-router的原理
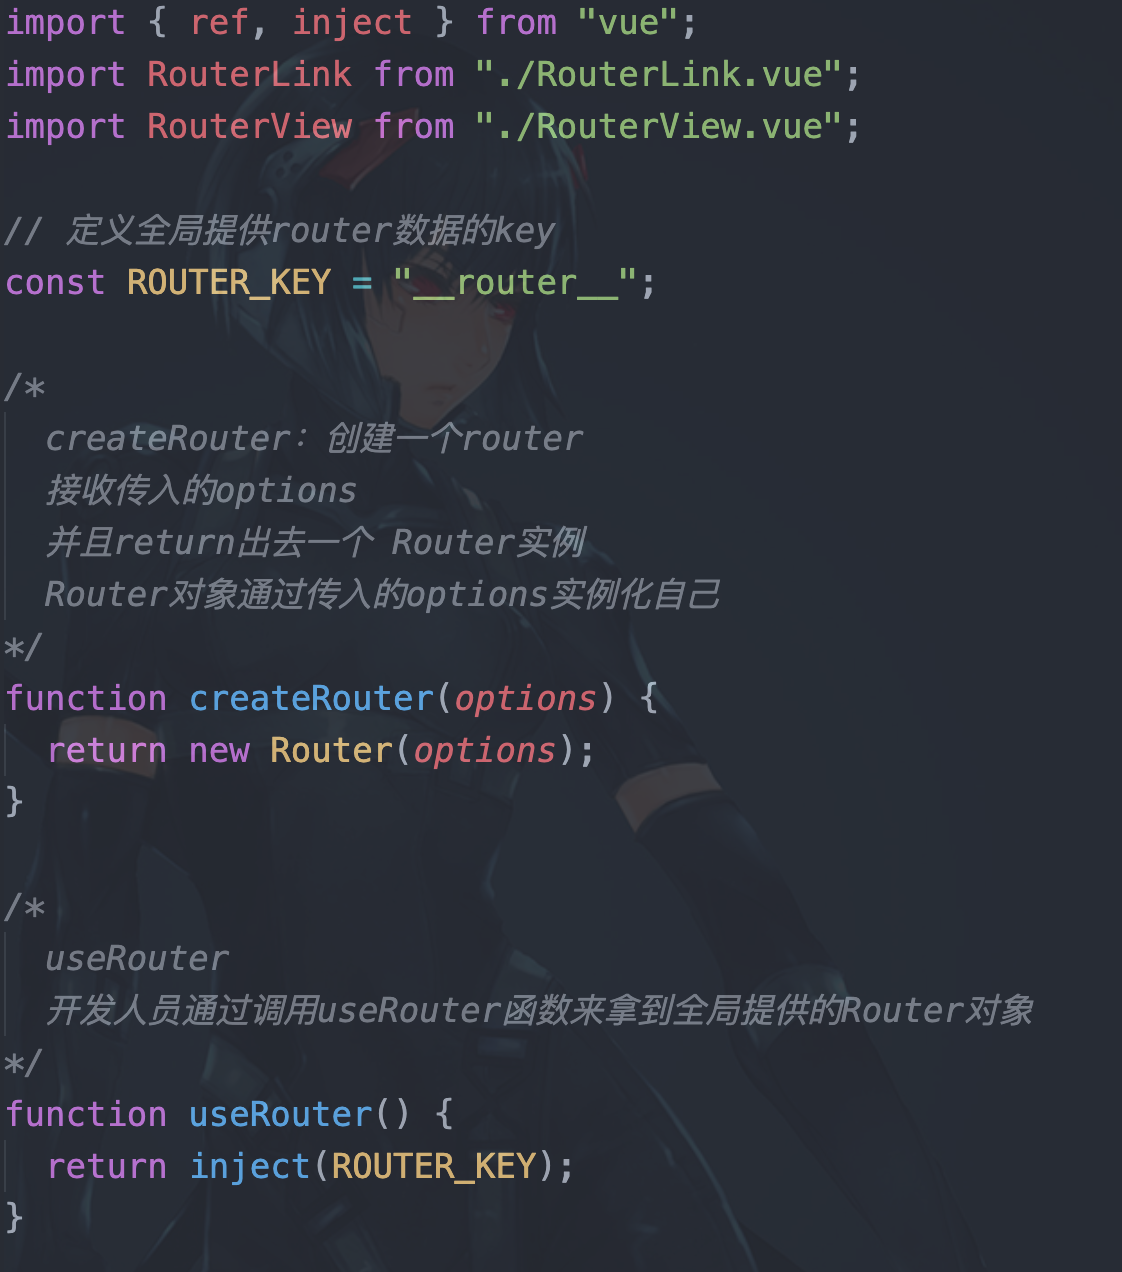
从vue中引入需要使用的api
import { ref, inject } from "vue";
1. 定义全局提供router数据的key
const ROUTER_KEY = "__router__";
2. createRouter:创建一个router, 接收传入的options,并且return出去一个 Router实例,Router对象通过传入的options实例化自己
function createRouter(options) {
  return new Router(options);
}
3. useRouter 开发人员通过调用useRouter函数来拿到全局提供的Router对象
function useRouter() {
  return inject(ROUTER_KEY);
}
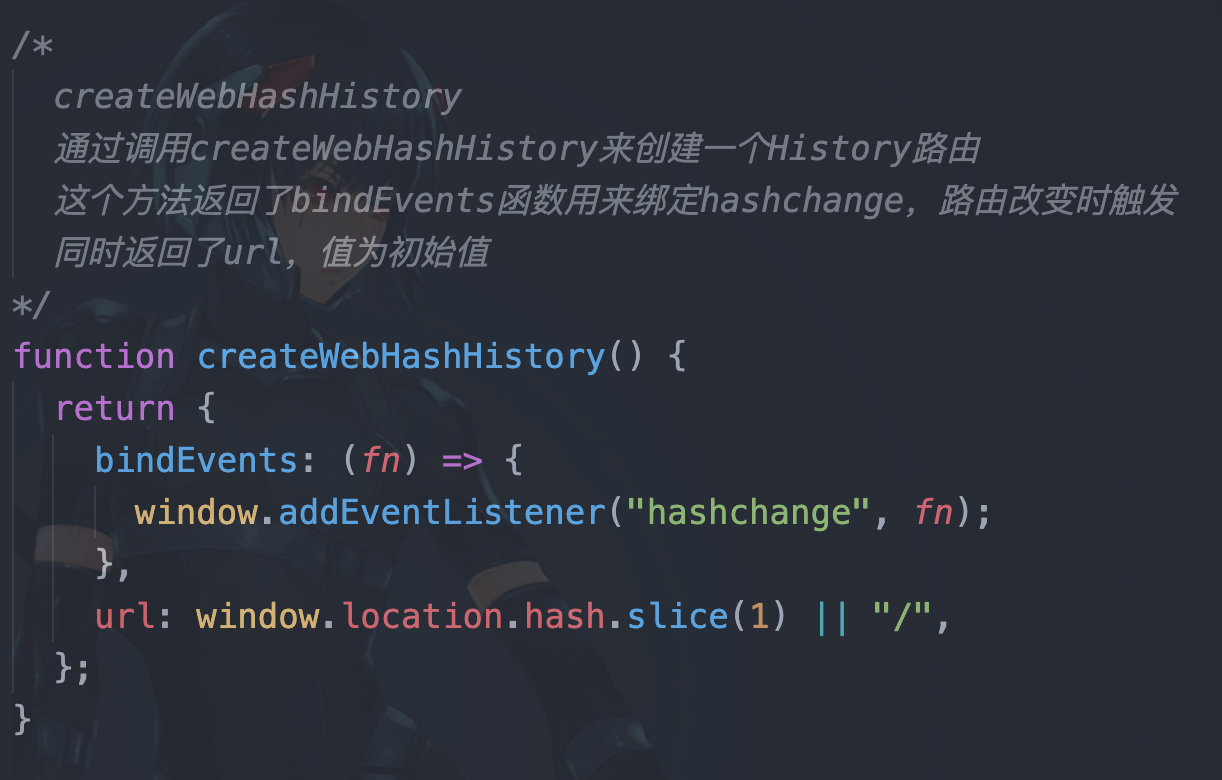
4. createWebHashHistory
通过调用createWebHashHistory来创建一个History路由
这个方法返回了bindEvents函数用来绑定hashchange,路由改变时触发
同时返回了url,值为初始值
function createWebHashHistory() {
  return {
    bindEvents: (fn) => {
      window.addEventListener("hashchange", fn);
    },
    url: window.location.hash.slice(1) || "/",
  };
}
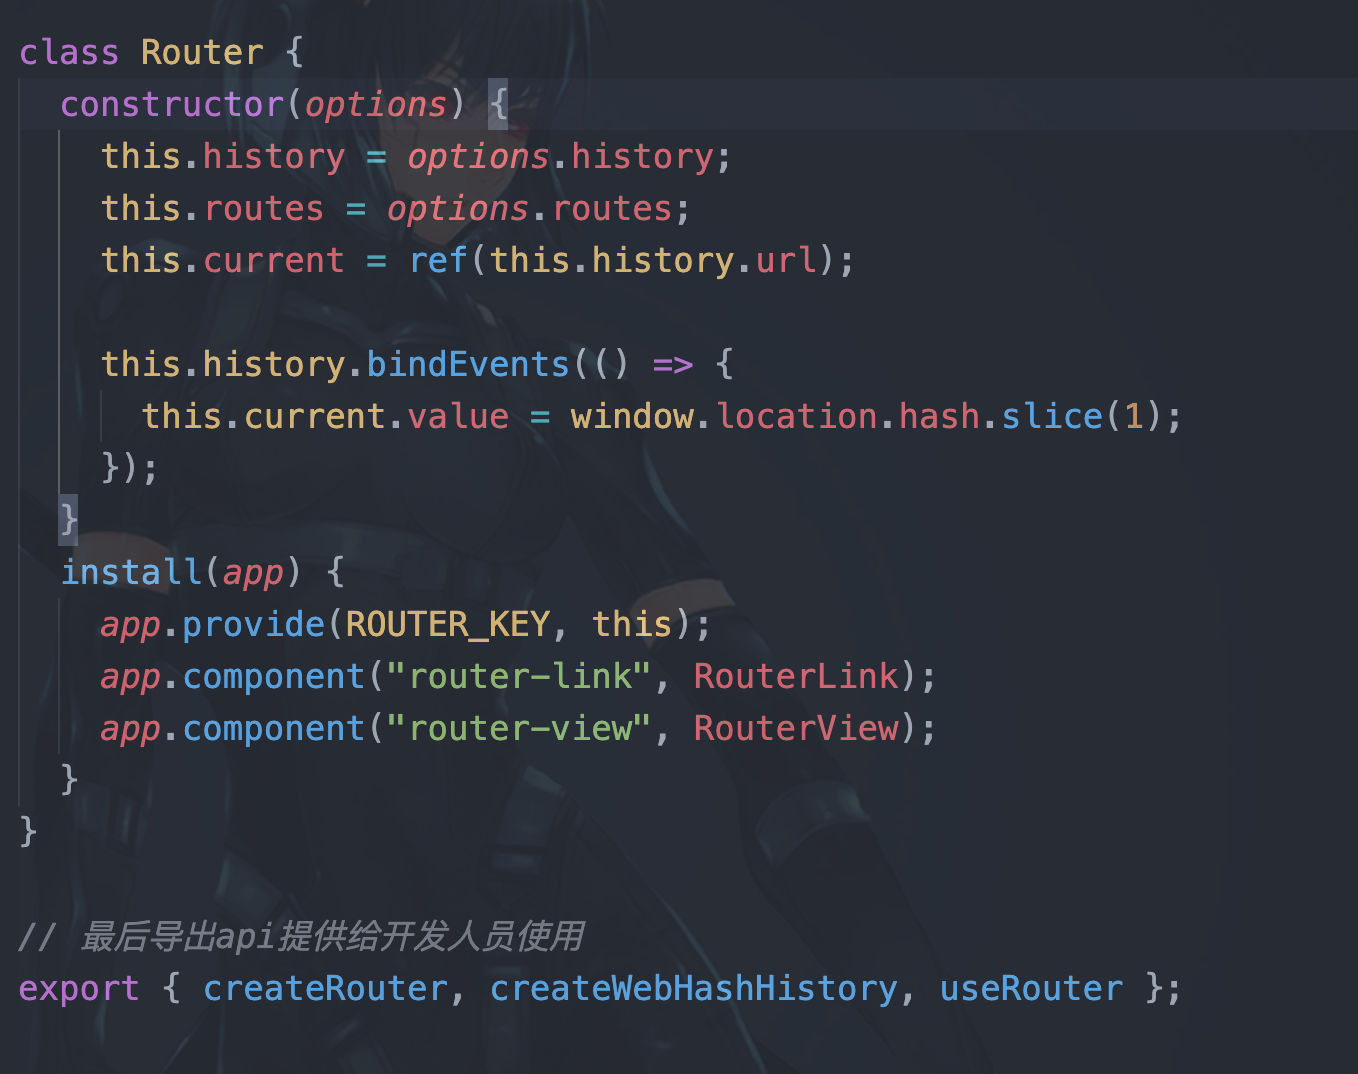
5. Router对象
options对象上包含开发人员传入的参数:
{
history:createWebHashHistory()
routes
}
可以看到history的值是调用了createWebHashHistory函数,拿到了返回值并传给createRouter
routes则是路由列表
再看Routes函数内部,通过内部变量保存了history, routes, currrent
而current通过vue提供的ref api把history.url值拿过来保存起来
current为响应式数据
这里history.url有点绕,建议多看几遍代码
最后调用history上面的bindEvents方法,注册一个函数,在路由改变触发hashchange事件时,更新current
最后install方法
在vue.use时会调用install方法进行组件注册,这时使用最顶层组件app.provide提供数据给任意子组件使用
子组件通过useRouter方法获取
通过在install方法中全局注册router-link组件和router-view组件
class Router {
  constructor(options) {
    this.history = options.history;
    this.routes = options.routes;
    this.current = ref(this.history.url);

    this.history.bindEvents(() => {
      this.current.value = window.location.hash.slice(1);
    });
  }
  install(app) {
    app.provide(ROUTER_KEY, this);
    app.component("router-link", RouterLink);
    app.component("router-view", RouterView);
  }
}
6. 最后导出api提供给开发人员使用
export { createRouter, createWebHashHistory, useRouter }
完整代码

下两篇文章:RouterLink,RouterView

 浙公网安备 33010602011771号