HSF服务的开发与使用
转载:http://www.cnblogs.com/cloudml/p/4675705.html#undefined
1.HSF服务的开发
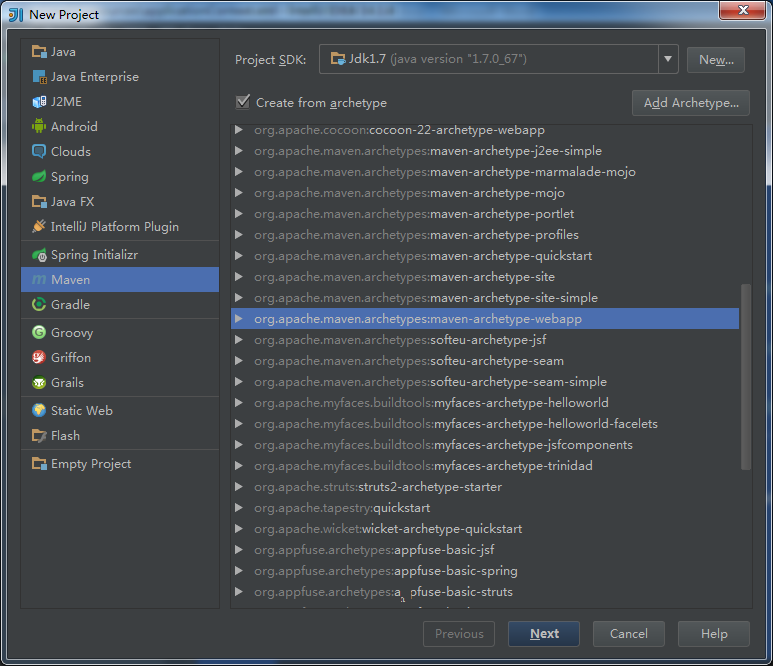
1) 基于Maven创建一个web工程HSFService,如下图,其他的可以自定义。
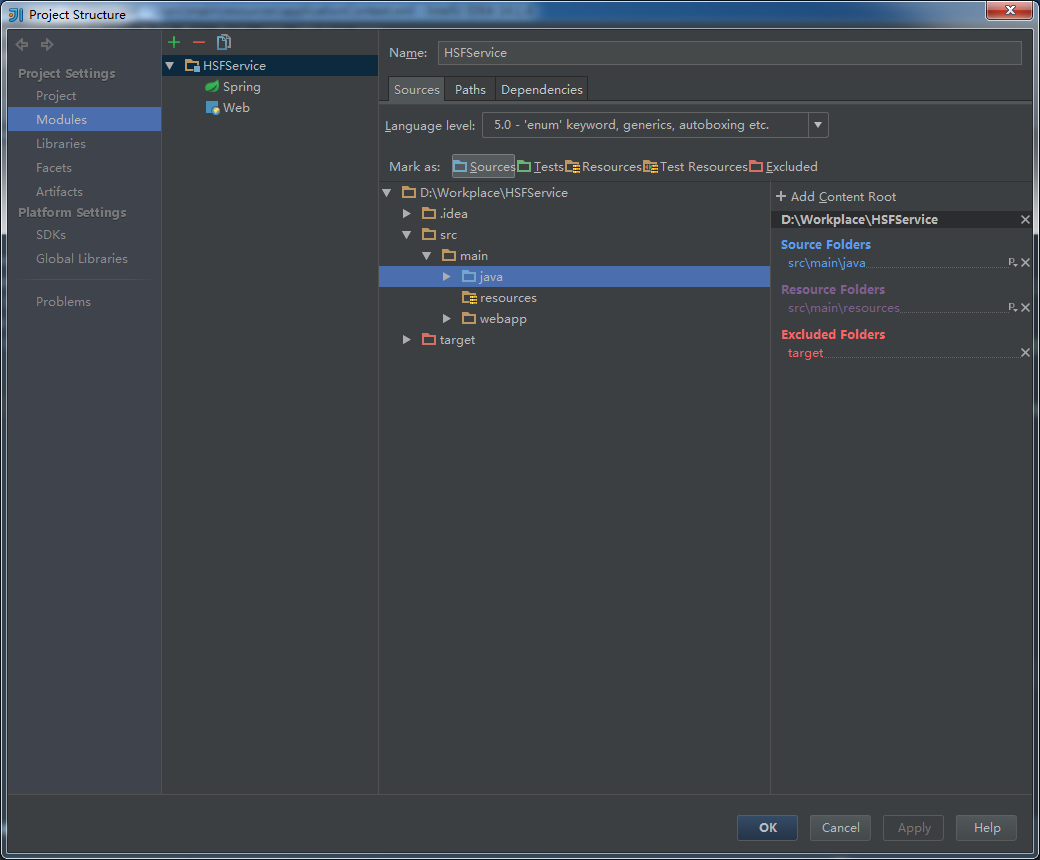
2)创建好好在src/main目录下创建一个java目录,并将其设置为sources folder,如下图所示:
3) 配置项目的pom.xml,如下

 1 <project xmlns="http://maven.apache.org/POM/4.0.0" xmlns:xsi="http://www.w3.org/2001/XMLSchema-instance"
 2   xsi:schemaLocation="http://maven.apache.org/POM/4.0.0 http://maven.apache.org/maven-v4_0_0.xsd">
 3   <modelVersion>4.0.0</modelVersion>
 4   <groupId>com.hsf</groupId>
 5   <artifactId>HSFService</artifactId>
 6   <packaging>war</packaging>
 7   <version>1.0-SNAPSHOT</version>
 8   <name>HSFService Maven Webapp</name>
 9   <url>http://maven.apache.org</url>
10   <properties>
11     <java-version>1.7.0_67</java-version>
12   </properties>
13   <dependencies>
14     <!-- Junit依赖包-->
15     <dependency>
16       <groupId>junit</groupId>
17       <artifactId>junit</artifactId>
18       <version>3.8.1</version>
19       <scope>test</scope>
20     </dependency>
21     <!--spring和servlet的依赖包-->
22     <dependency>
23       <groupId>javax.servlet</groupId>
24       <artifactId>servlet-api</artifactId>
25       <version>2.5</version>
26     </dependency>
27     <dependency>
28       <groupId>org.springframework</groupId>
29       <artifactId>spring</artifactId>
30       <version>2.5.6</version>
31       <type>jar</type>
32       <scope>compile</scope>
33     </dependency>
34     <!-- mysql依赖包-->
35     <dependency>
36       <groupId>mysql</groupId>
37       <artifactId>mysql-connector-java</artifactId>
38       <version>5.1.6</version>
39     </dependency>
40     <dependency>
41       <groupId>commons-dbcp</groupId>
42       <artifactId>commons-dbcp</artifactId>
43       <version>1.2.2</version>
44     </dependency>
45     <!-- Ibatits依赖包-->
46     <dependency>
47       <groupId>org.apache.servicemix.bundles</groupId>
48       <artifactId>org.apache.servicemix.bundles.ibatis-sqlmap</artifactId>
49       <version>2.3.4.726_4</version>
50     </dependency>
51     <!-- 淘宝HSF服务的依赖包-->
52     <dependency>
53       <groupId>com.taobao.hsf</groupId>
54       <artifactId>hsf.app.spring</artifactId>
55       <version>1.4.9.2</version>
56     </dependency>
57   </dependencies>
58   <build>
59     <finalName>HSFService</finalName>
60     <plugins>
61       <plugin>
62         <artifactId>maven-compiler-plugin</artifactId>
63         <configuration>
64           <source>${java-version}</source>
65           <target>${java-version}</target>
66         </configuration>
67       </plugin>
68     </plugins>
69   </build>
70 </project>
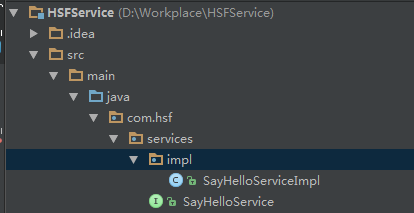
4) 编写服务接口和服务的实现
代码如下:
 1 package com.hsf.services;
 2 import java.lang.String;
 3 public interface SayHelloService{
 4     public String sayHello(String user);
 5 }
 6 package com.hsf.services.impl;
 7 import com.hsf.services.SayHelloService;
 8 public class SayHelloServiceImpl implements SayHelloService {
 9       public String sayHello(String user) {
10         return "Hello "+user+" ,Time is "+System.currentTimeMillis()+"(ms)";
11       }
12     }
5) 在Spring的配置文件中配置HSFSpringProviderBean
 1 <?xml version="1.0" encoding="UTF-8"?>
 2 <beans xmlns:xsi="http://www.w3.org/2001/XMLSchema-instance"       xmlns="http://www.springframework.org/schema/beans"       xsi:schemaLocation="            http://www.springframework.org/schema/beans   http://www.springframework.org/schema/beans/spring-beans-3.1.xsd                ">
 3     <!-- HSF服务配置-->
 4     <!--配置SayHelloService服务的实现 -->
 5     <bean id="SayHelloServiceImpl" class="com.hsf.services.impl.SayHelloServiceImpl"/>
 6     <!--配置SayHelloService服务提供者-->
 7     <bean id="SayHelloService" class="com.taobao.hsf.app.spring.util.HSFSpringProviderBean" init-method="init">
 8         <!--配置服务提供者对外提供的接口SayHelloService-->
 9         <property name="serviceInterface">
10             <value>com.hsf.services.SayHelloService</value>
11         </property>
12         <!--服务的实现者-->
13         <property name="target">
14             <ref bean="SayHelloServiceImpl"/>
15         </property>
16         <property name="serviceVersion">
17             <value>1.0.0.0.dev</value>
18         </property>
19         <!-- 组别一致的服务才能互相调用-->
20         <property name="serviceGroup">
21             <value>HSF</value>
22         </property>
23         <property name="serviceName">
24             <value>SayHello</value>
25         </property>
26     </bean>
27     <!--配置SayHelloService服务的消费者-->
28     <bean id="SayHelloServiceConsumer" class="com.taobao.hsf.app.spring.util.HSFSpringConsumerBean" init-method="init">
29      <!--服务的接口名和版本号须与服务提供者定义的一致-->
30         <property name="interfaceName">
31             <value>com.hsf.services.SayHelloService</value>
32         </property>
33         <property name="version">
34             <value>1.0.0.0.dev</value>
35         </property>
36     </bean>
37 </beans>
6) 在Web.xml中配置spring的上下文环境
 1 <!DOCTYPE web-app PUBLIC "-//Sun Microsystems, Inc.//DTD Web Application 2.3//EN" "http://java.sun.com/dtd/web-app_2_3.dtd" >
 2 <web-app xmlns:xsi="http://www.w3.org/2001/XMLSchema-instance"         xmlns="http://java.sun.com/xml/ns/javaee"         xsi:schemaLocation="http://java.sun.com/xml/ns/javaee http://java.sun.com/xml/ns/javaee/web-app_3_0.xsd"         id="WebApp_ID" version="3.0">
 3   <display-name>HSFService</display-name>
 4  <!-- 默认显示界面 -->
 5   <welcome-file-list>
 6       <welcome-file>index.jsp</welcome-file>
 7       <welcome-file>index.html</welcome-file>
 8   </welcome-file-list>
 9    <!-- 配置spring上下文环境applicationContext -->
10    <context-param>
11        <param-name>contextConfigLocation</param-name>
12        <!-- 应用上下文配置文件 -->
13        <param-value>classpath*:applicationContext.xml</param-value>
14    </context-param>
15     <!--配置spring启动listener入口 -->
16     <listener>        <listener-class>org.springframework.web.context.ContextLoaderListener</listener-class>
17     </listener>
18 </web-app>
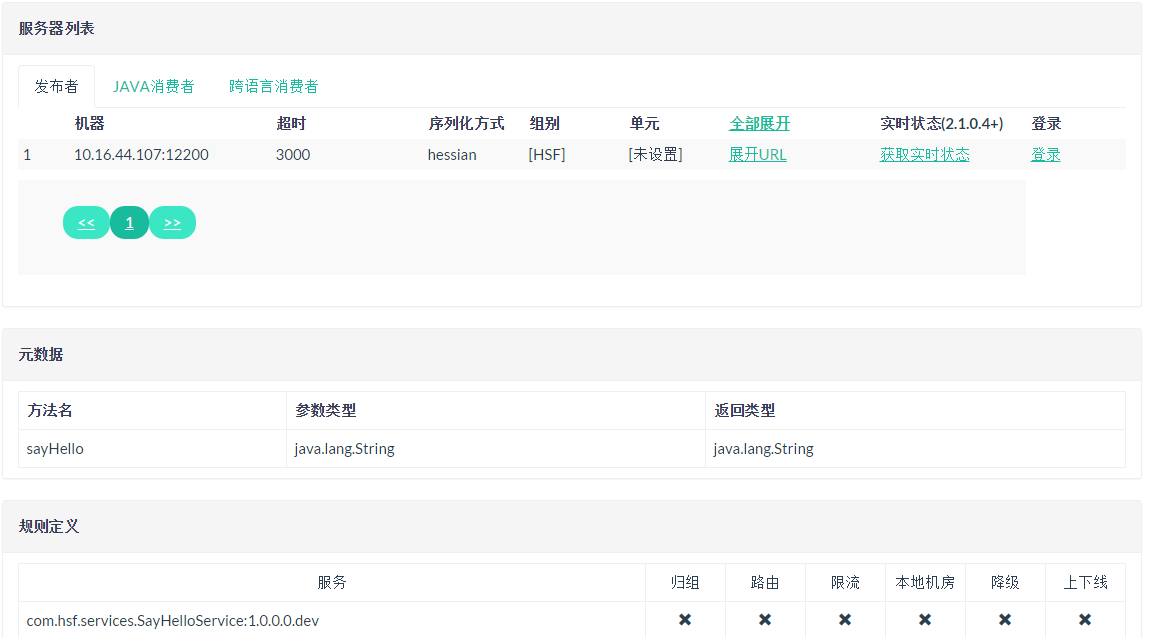
7) 将HSFService部署,启动tomcat,即可在HSF服务治理中心http://ops.jm.taobao.net/hsfops中根据自己主机的IP查找自己发布的服务
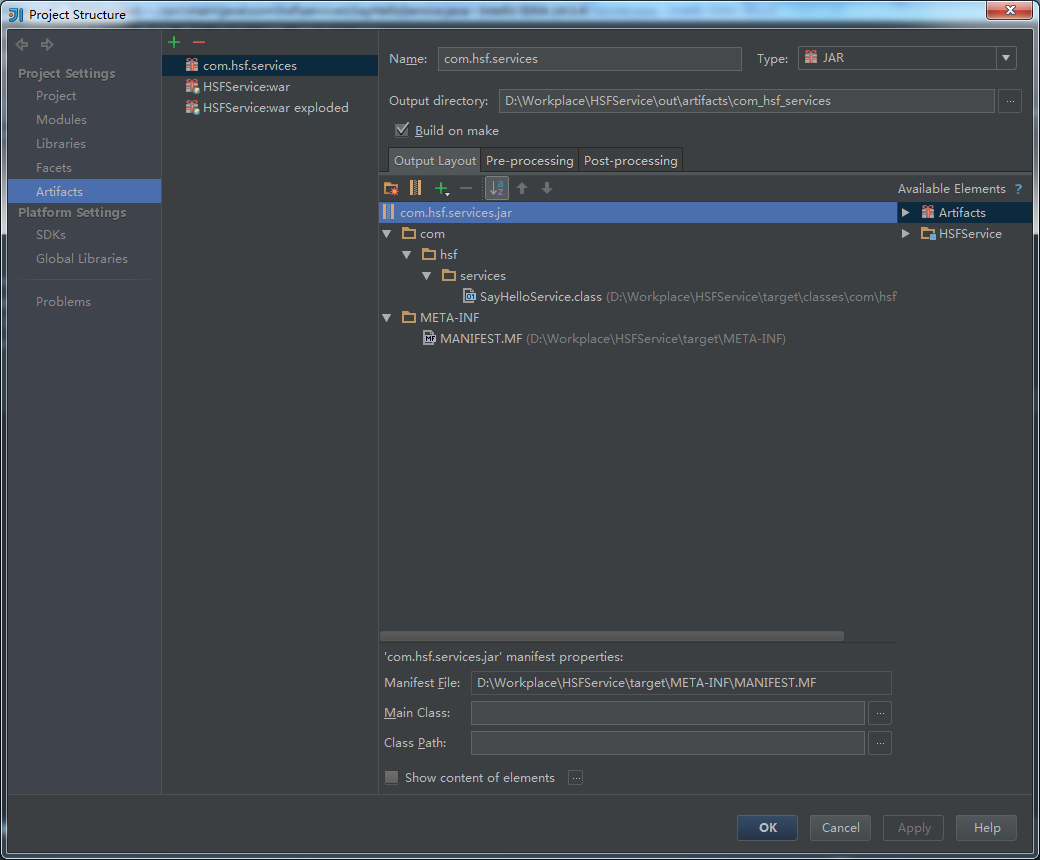
8) 将服务接口SayHelloService打成Jar包(二方包)以供客户端使用
2.HSF服务的使用
1) 在客户端的pom.xml文件中添加对HSF的依赖
1 <dependency>
2   <groupId>com.taobao.hsf</groupId>
3   <artifactId>hsf.app.spring</artifactId>
4   <version>1.4.9.2</version>
5 </dependency>
2) 在客户端的Spring配置文件中配置HSFSpringConsumerBean
 1 <!--配置SayHelloService服务的消费者-->
 2 <bean id="SayHelloServiceConsumer" class="com.taobao.hsf.app.spring.util.HSFSpringConsumerBean" init-method="init">
 3     <!--服务的接口名和版本号须与服务提供者定义的一致-->
 4     <property name="interfaceName">
 5         <value>com.hsf.services.SayHelloService</value>
 6     </property>
 7     <property name="version">
 8         <value>1.0.0.0.dev</value>
 9     </property>
10 </bean>
3)引入服务端打好的二方Jar包com.hsf.services.jar,创建SayHelloServlet使用服务
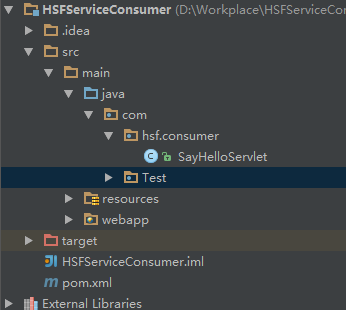
SayHelloServlet的代码如下:
 1 package com.hsf.consumer;
 2 import com.hsf.services.SayHelloService;
 3 import org.springframework.web.context.WebApplicationContext;
 4 import org.springframework.web.context.support.WebApplicationContextUtils;
 5 import javax.servlet.ServletException;
 6 import javax.servlet.http.HttpServlet;
 7 import javax.servlet.http.HttpServletRequest;
 8 import javax.servlet.http.HttpServletResponse;
 9 import java.io.IOException;
10 import java.io.PrintWriter;
11
12 public class SayHelloServlet extends HttpServlet {
13     protected void doPost(HttpServletRequest request, HttpServletResponse response) throws ServletException, IOException {
14         //通过ServletContext获取Spring的上下文
15         WebApplicationContext context= WebApplicationContextUtils.getWebApplicationContext(getServletContext());
16         //通过BeanFactory获取服务的消费者SayHelloServiceConsumer
17         SayHelloService sayHelloService= (SayHelloService) context.getBean("SayHelloServiceConsumer");
18
19         PrintWriter out=response.getWriter();
20         //调用服务
21         out.println(sayHelloService.sayHello("xiwu.xxw"));
22         out.close();
23         return;
24     }
25     protected void doGet(HttpServletRequest request, HttpServletResponse response) throws ServletException, IOException {
26         doPost(request,response);
27     }
28 }
5)部署该web工程到tomcat,启动tomcat后访问http://localhost:8079/ SayHello?name=zhangsna 即可看到打印出“Hello zhangsan,Time is xxxxx (ms)”

 浙公网安备 33010602011771号