zephyr学习:zephyr 按键+串口通信
参考:应用程序开发 — Zephyr Project Documentation --- Application Development — Zephyr Project Documentation
硬件: 立创实战派开发板(esp32-s3)
注:代码已上传github cc1234github/lichuang_shizhanpai_zephyr: use lichuang shizhan board study zephyr
1. 创建App工作空间
1.1 官方app_demo
官方给出了一个app文件的例子,我们可以使用这个文件来创建自己的zephyr App 工作空间,git地址如下:
cd <home>/zephyrproject
git clone https://github.com/zephyrproject-rtos/example-application my-app
1.2 app 文件结构
app中应该包含下面这些文件内容:
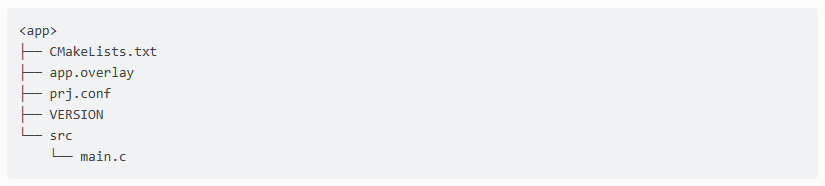
- CMakeLists.txt:此文件告诉构建系统在哪里可以找到其他应用程序文件,并将应用程序目录与 Zephyr 的 CMake 构建系统链接。
- app.overlay: 设备树覆盖文件,可以覆盖调用的那个板子上的硬件信息。
- prj.conf: 工程配置项,一般配置软件功能
- VERSION:版本
- SRC: c文件
然后工程文件也是可以创建到三个地方的:
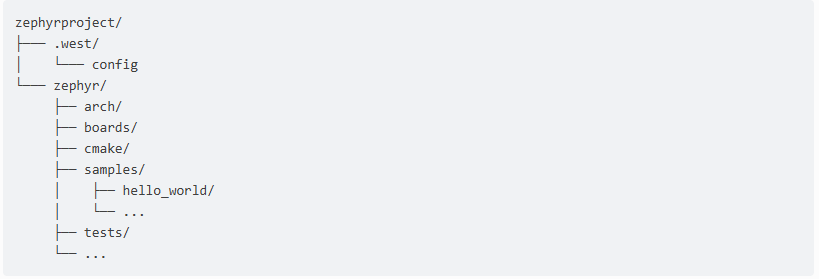
- 1. 放到west工作区zephyr源码下面,但是这样会污染zephyr工程,下次更新zephyr时比较麻烦。❌
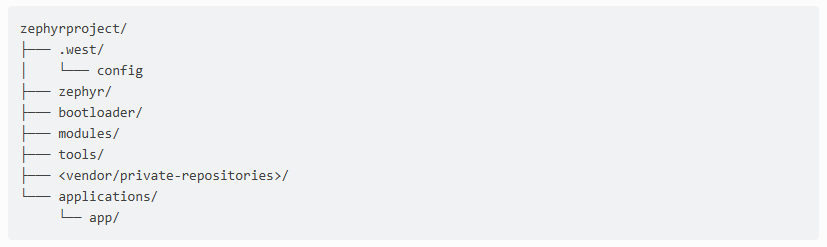
- 2. 放到west工作区,但是单独放文件,编译方便,✔️
- 3. 不放在west工作区,放到任意地方,需要配置环境变量✔️
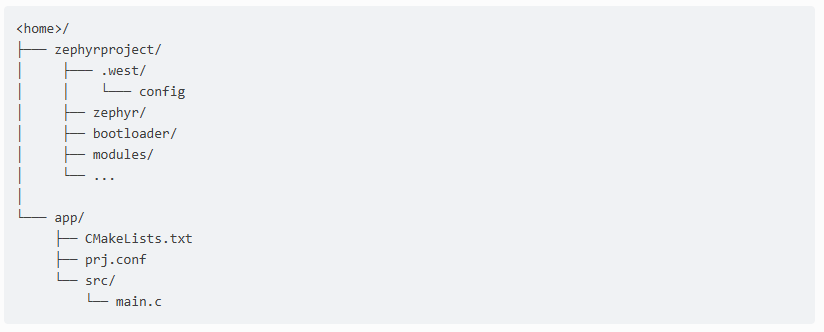
我选择了第三种方式:
注意:在zephyr源文件之外的地方编译工程需要添加几个环境变量

- ZEPHYR_BASE:zephyr主文件夹的地方
- ZEPHYR_SDK_INSTALL_DIR :指定编译工具的位置
- ZEPHYR_TOOLCHAIN_VARIANT : 指定编译工具链
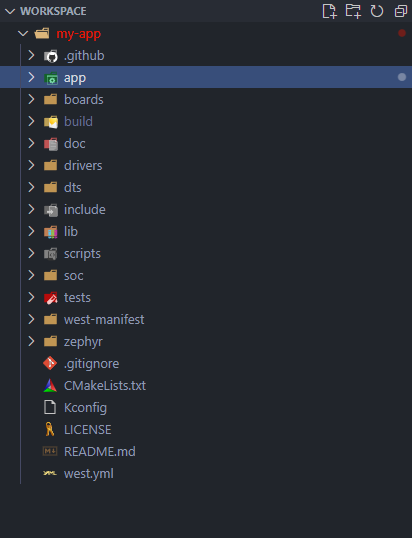
下载了app-demo工程文件后,结构如下:包含了很多东西,大部分都暂时用不上
2. 自定义板子
由于zephyr中没有立创实战派这个板子,我打算自定义一个。
-
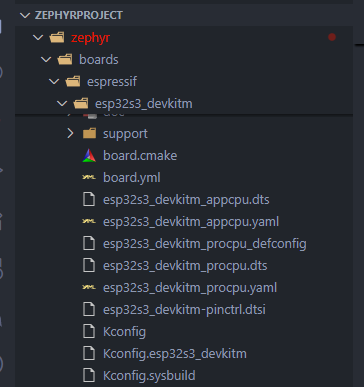
先去zephyr源码中找到资源类似的板子(直接搜esp32-s3)
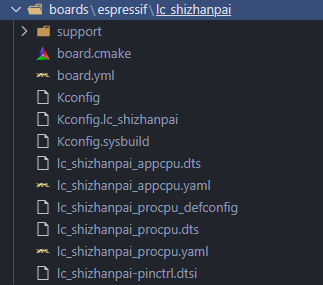
2. 复制到工程后,放置目录如下( boards\espressif\lc_shizhanpai ),修改文件名字。
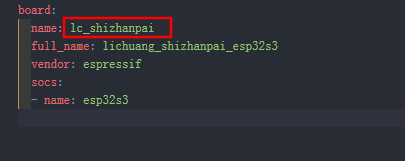
3. 修改board.yml,把名字改成和文件一样的
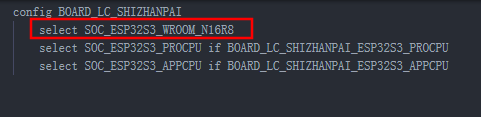
4. 修改Kconfig.lc_shizhanpai 的SOC,开发板用的 N16R8
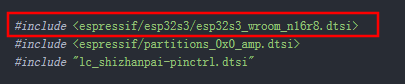
5. 因为改了芯片,所以头文件也要改
6. 引脚复用也改成开发板的 lc_shizhanpai-pinctrl.dtsi
/*
 * Copyright (c) 2022 Espressif Systems (Shanghai) Co., Ltd.
 *
 * SPDX-License-Identifier: Apache-2.0
 */

#include <zephyr/dt-bindings/pinctrl/esp-pinctrl-common.h>
#include <dt-bindings/pinctrl/esp32s3-pinctrl.h>
#include <zephyr/dt-bindings/pinctrl/esp32s3-gpio-sigmap.h>

&pinctrl {
    uart0_default: uart0_default {
        group1 {
            pinmux = <UART0_TX_GPIO43>;
            output-high;
        };
        group2 {
            pinmux = <UART0_RX_GPIO44>;
            bias-pull-up;
        };
    };

    uart1_default: uart1_default {
        group1 {
            pinmux = <UART1_TX_GPIO17>;
            output-high;
        };
        group2 {
            pinmux = <UART1_RX_GPIO18>;
            bias-pull-up;
        };
    };
};
7. 修改procpu的device tree,只用procpu这一个内核
/ {
    model = "lc_shizhanpai PROCPU";
    compatible = "espressif,esp32s3";

    aliases {
        sw2 = &button0;
    };

    chosen {
        zephyr,sram = &sram1;
        zephyr,console = &uart0;
        zephyr,shell-uart = &uart0;
        zephyr,flash = &flash0;
        zephyr,code-partition = &slot0_partition;
    };

    buttons {
        compatible = "gpio-keys";
        button0: button_0 {
            gpios = <&gpio0 0 (GPIO_PULL_UP | GPIO_ACTIVE_LOW)>;
            label = "BOOT Button";
            zephyr,code = <INPUT_KEY_0>;
        };
    };
};

&uart0 {
    status = "okay";
    current-speed = <115200>;
    pinctrl-0 = <&uart0_default>;
    pinctrl-names = "default";
};
&gpio0 {
    status = "okay";
};

&gpio1 {
    status = "okay";
};
&timer0 {
    status = "disabled";
};

&timer1 {
    status = "disabled";
};

&timer2 {
    status = "disabled";
};

&timer3 {
    status = "disabled";
};
&usb_serial {
    status = "disabled";
};
3. app程序
main.c
主要就是获取sw2这个节点,然后调用一个中断,每次中断按下就会打印当前的主程序运行周期
#include <zephyr/kernel.h>
#include <zephyr/device.h>
#include <zephyr/drivers/gpio.h>
#include <zephyr/devicetree.h>
#include <zephyr/sys/printk.h>
#include <zephyr/logging/log.h>

// 注册一个日志模块
LOG_MODULE_REGISTER(Button, LOG_LEVEL_INF);

/*
 * Get button configuration from the devicetree sw0 alias. This is mandatory.
 */
#define SW0_NODE    DT_ALIAS(sw2)
#if !DT_NODE_HAS_STATUS_OKAY(SW0_NODE)
#error "Unsupported board: sw0 devicetree alias is not defined"
#endif
static const struct gpio_dt_spec button = GPIO_DT_SPEC_GET_OR(SW0_NODE, gpios,
                                  {0});
static struct gpio_callback button_cb_data;


void button_pressed(const struct device *dev, struct gpio_callback *cb,
            uint32_t pins)
{
    LOG_INF("Button pressed at %" PRIu32 "\n", k_cycle_get_32());
}

int main(void)
{
    int ret;

    if (!gpio_is_ready_dt(&button)) {
        LOG_INF("Error: button device %s is not ready\n",
               button.port->name);
        return 0;
    }

    ret = gpio_pin_interrupt_configure_dt(&button,
                          GPIO_INT_EDGE_TO_ACTIVE);
    if (ret != 0) {
        LOG_INF("Error %d: failed to configure interrupt on %s pin %d\n",
            ret, button.port->name, button.pin);
        return 0;
    }

    gpio_init_callback(&button_cb_data, button_pressed, BIT(button.pin));
    gpio_add_callback(button.port, &button_cb_data);
    LOG_INF("Set up button at %s pin %d\n", button.port->name, button.pin);

    while (1) {
        k_msleep(1);
    }
}
app.overlay
app.overlay 文件 我这里暂时没用,因为上面我自定义了板子,我直接在DTS里面去改了
CMakeLists.txt
添加了指定板子 和 设置BOARD_ROOT
- set (BOARD xxx) 方便编译烧录
- BOARD_ROOT zephyr会在这个下面去找我自己定义的板子,不设置会找不到板子
#-------------------------------------------------------------------------------
# Zephyr Example Application
#
# Copyright (c) 2021 Nordic Semiconductor ASA
# SPDX-License-Identifier: Apache-2.0

cmake_minimum_required(VERSION 3.13.1)

# 指定板子,build/flash 时直接使用west build,不用指定板子了
set(BOARD lc_shizhanpai)
# 设定 BOARD_ROOT 指向工作空间的目录(不然会找不到自己定义的板子)
get_filename_component(PARENT_DIR ${CMAKE_CURRENT_SOURCE_DIR} DIRECTORY)
list(APPEND BOARD_ROOT ${PARENT_DIR})


find_package(Zephyr REQUIRED HINTS $ENV{ZEPHYR_BASE})   # 查找 Zephyr 包
project(my_led LANGUAGES C)                             # 定义工程
target_sources(app PRIVATE src/main.c)
prj.conf
CONFIG_MAIN_STACK_SIZE=4096
CONFIG_LOG=y
CONFIG_LOG_DEFAULT_LEVEL=3
CONFIG_GPIO=y
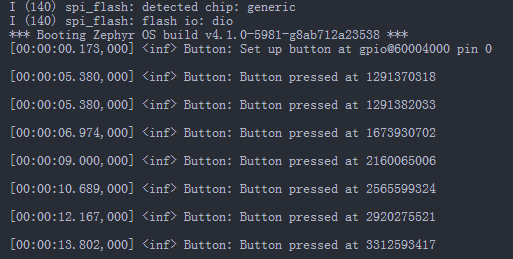
4. 编译烧录
每按一次按键,就打印一次

 浙公网安备 33010602011771号