【计算机视觉】OpenCV篇(1) - 环境配置及使用(C++/Python)
Windows+Pycharm下python虚拟环境配置
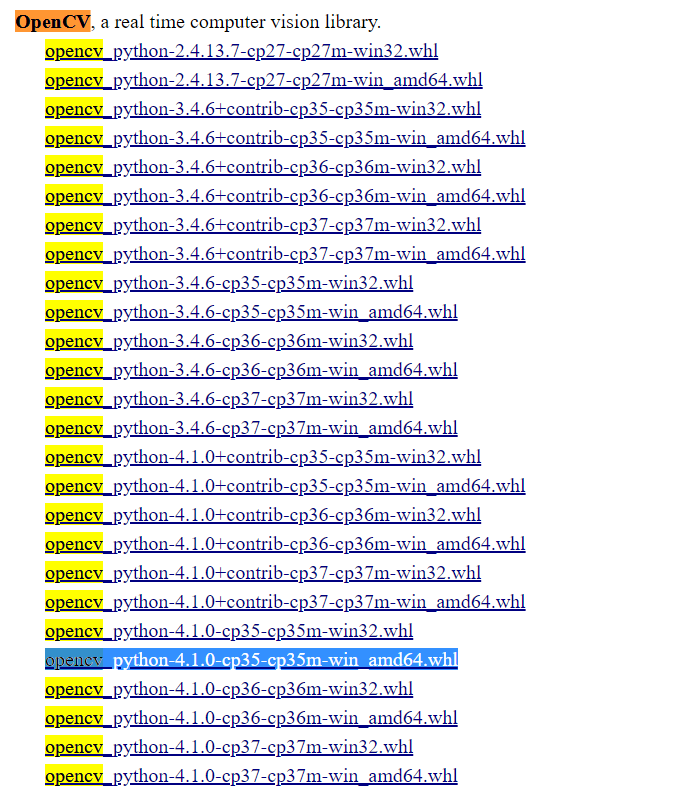
1.下载whl文件
下载地址:python extension packages
搜索opencv,根据自己的版本下载,我用的python版本是3.5.2,64位:
2.安装
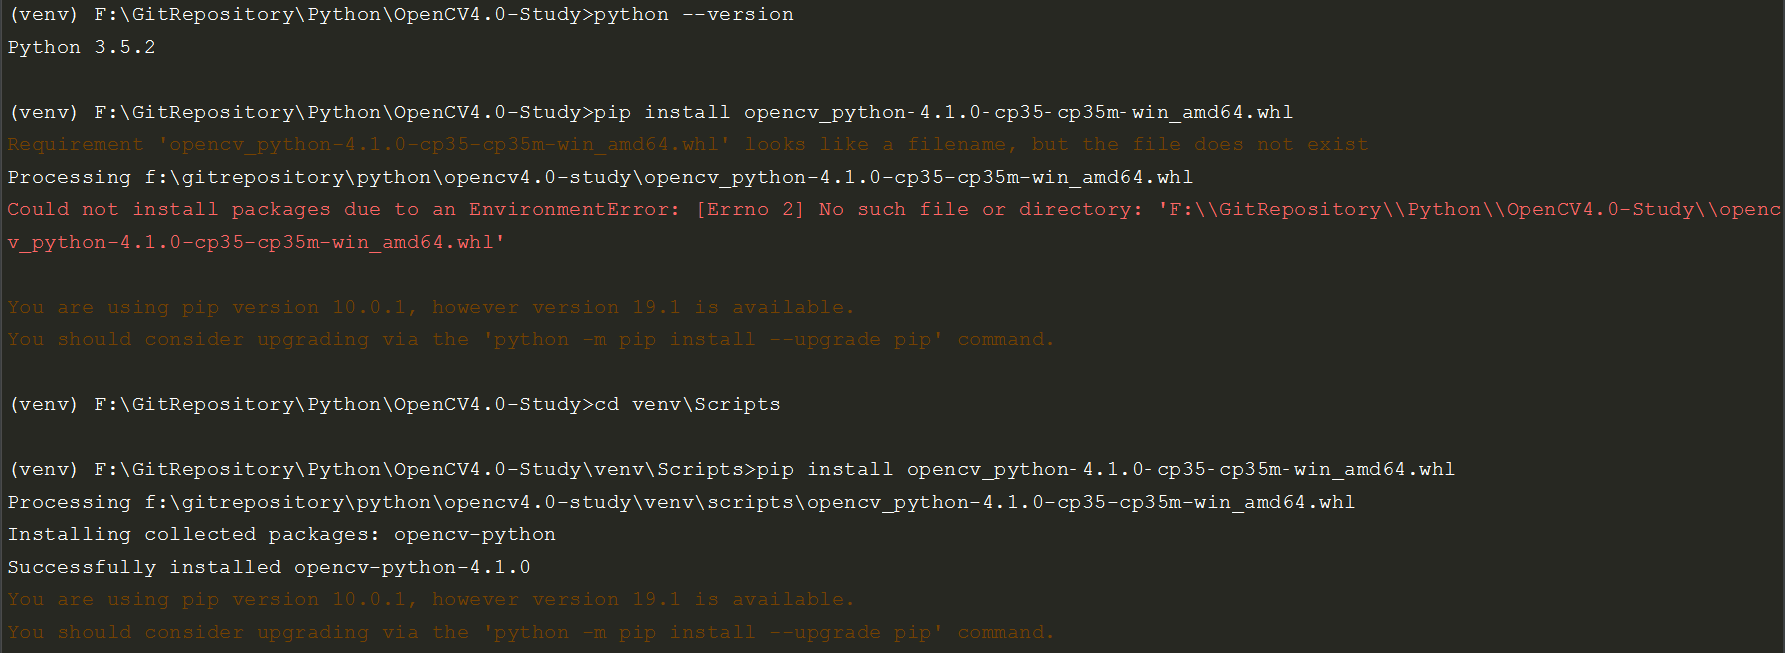
找到虚拟环境的位置,pycharm进入解释器设置查看路径并进入虚拟环境【注:需要将whl文件拷贝到Scripts目录下再进行pip install XXX.whl安装,否则会出现下图第二步的问题】:
3.测试
import cv2
import numpy

cap = cv2.VideoCapture(1) # 调整参数实现读取视频或调用摄像头: 0-调用笔记本内置摄像头,1-调用usb摄像头
while 1:
    ret, frame = cap.read()
    cv2.imshow("cap", frame)
    if cv2.waitKey(100) & 0xff == ord('q'):
        break
cap.release()
cv2.destroyAllWindows()
运行结果:

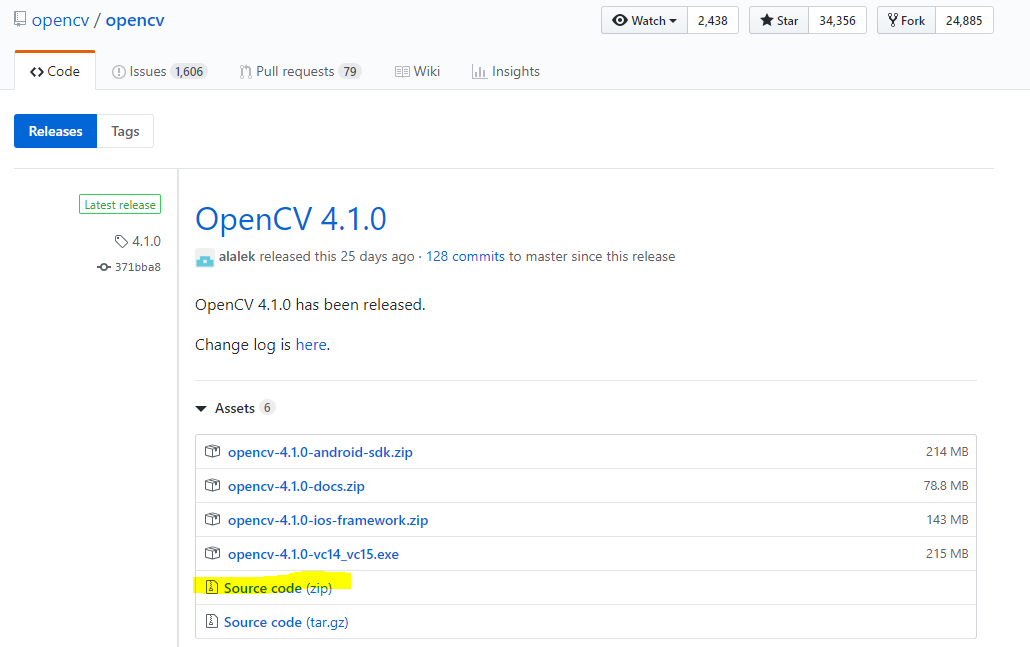
Windows+VS2017+CMake+OpenCV4.1.0 配置C++开发环境
1.下载与安装
(1) VS2017
很简单,此处省略...
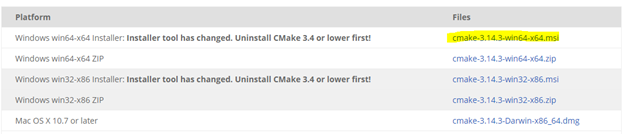
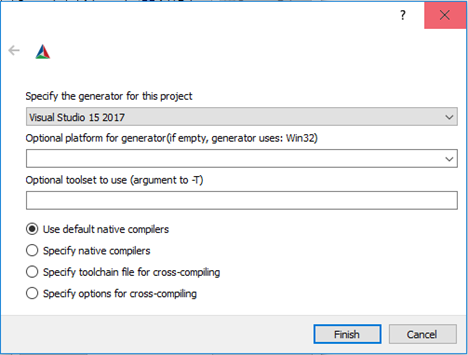
(2) cmake
直接去官网下载最新版本,我这里的版本是3.14.3,下载链接是https://cmake.org/download/
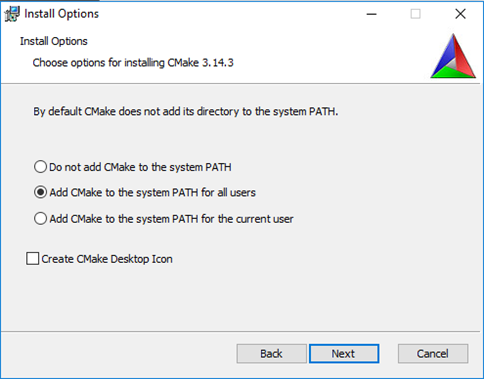
During installation, if not click “Add CMake to the system PATH for all users”, then you need to configure it. Here I use the default installation path: C:\Program Files\CMake.
Test:

(3) OpenCV4.1.0
Download the source code from the link: https://github.com/opencv/opencv/releases
2.编译
Decompress the source code to the specified path, here I use C:\opencv\opencv-4.1.0. 在C:\opencv\下创建build目录,打开cmake程序,选择源码路径和编译路径,然后单击configure,成功会显示Configuring done在最后。

接下来就是下面的截图,选择BUILD_EXAMPLES和BUILD_opencv_world,然后单击Configure和Generate
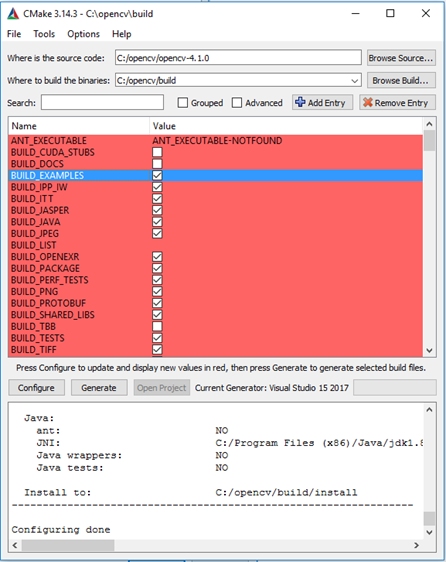
Ok,成功:

成功后,单击open Project,打开vs项目,右键解决方案,批生成。勾选如下图,其他不用勾:

The build process will take long time, below is the screenshot for successful completion:

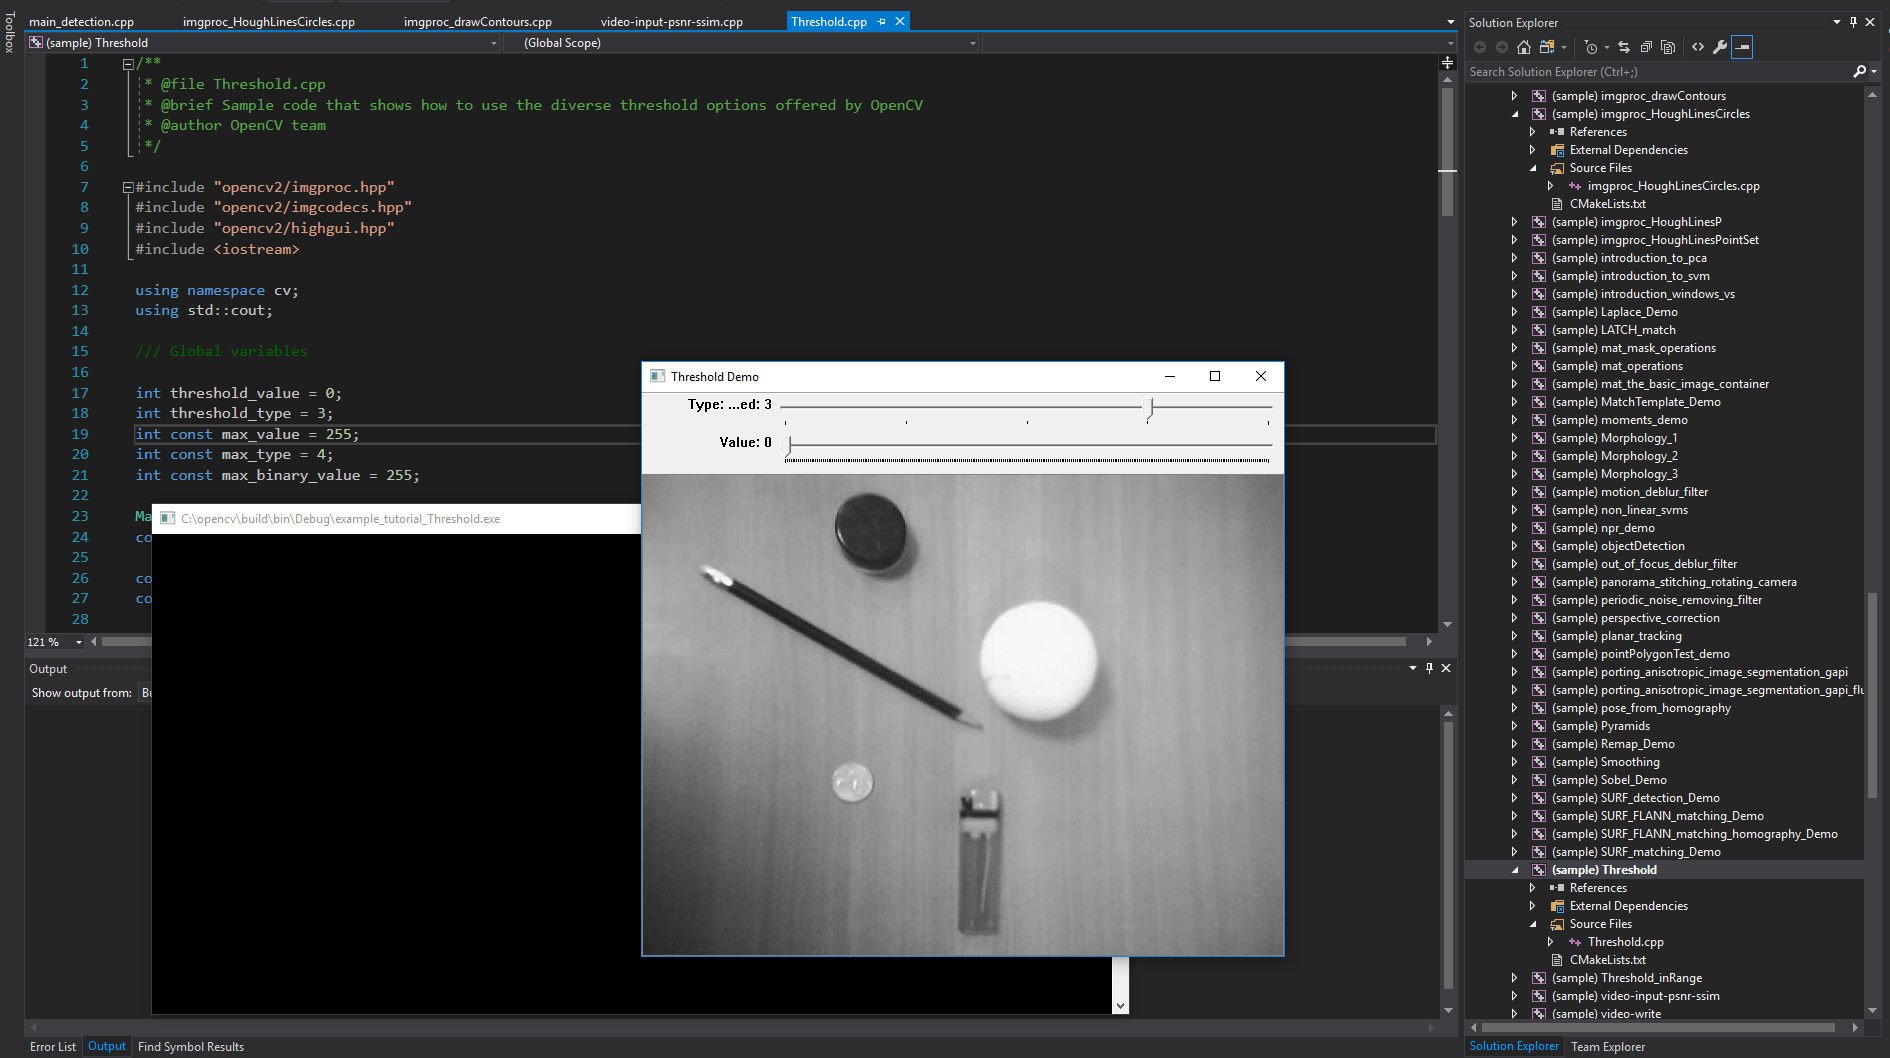
3.测试
拿一个简单的sample做测试,ok,没问题(注意:你可能需要将源码目录下的数据拷贝过来,因为build目录下没有这些数据):

 浙公网安备 33010602011771号