spring-aop + memcached 的简单实现
一般情况下,java程序取一条数据是直接从数据库中去取,当数据库达到一定的连接数时,就会处于排队等待状态,某些在一定时间内不会发生变化的数据,完全没必要每次都从数据库中去取,使用spring-aop + memcached 技术,取数据时,先从缓存中去取,缓存中如果存在,直接返回结果,无需访问数据库;如果缓存中不存在,再访问数据库,并把这条数据保存到缓存中,当程序下次再访问时,就可以取到缓存中的值了。这样不但可以大大减少访问数据库的次数(减轻数据的负担),而且可以提高程序的运行效率,因为memecached 是采用key - value 方法存取数据的。但是缓存如果使用不当,不但容易造成数据混乱,而且容易导致意想不到的bug。当然除了使用spring-aop 实现缓存技术之外,也可以使用aspectj 实现。
使用memcached时特别需要注意的是:
1.当某条数据发生变化时,一定要更新cache中的这条记录;
2.设置key时一定要唯一,一般是通过prefix + uuid 保证唯一,prefix一般使用数据库的表名;
3.合理设置缓存的时间,即有效期。
下面来介绍一下spring-aop + memcached 技术的简单实现:
![]()
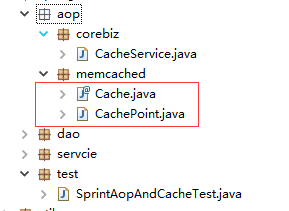
1.定义注解类 @Cache
@Target(ElementType.METHOD)
@Retention(RetentionPolicy.RUNTIME)
public @interface Cache {

    /**
     * key的前缀
     * @return
     */
    String prefix();

    /**
     * 指定哪个参数值做Key,与cacheKey两者选一,如果都有输入,默认使用indexKey
     * @return
     */
    int indexKey() default 0;
    /**
     * 缓存有效期 1000*60*60*2=2小时,下面代码暂时没有实现此功能
     * @return
     */
    long expiration() default 1000 * 60 * 60 * 2;
}
2.定义切入点类 CachePoint,这个类一定要与上面的注解类在同一包目录下
@Component
@Aspect
public class CachePoint {

    @Autowired
    private CacheService cacheService;

    /**
     * @Pointcut("@annotation(Cache)") 表示定义切入点所有带有@Cache注解的方法
     */
    @Pointcut("@annotation(Cache)")
    public void queryCache(){
        System.out.println("此输出将不会执行...");
    }

    @Around("queryCache()")
    public Object getByCache(ProceedingJoinPoint pjp) throws Throwable {
        // 1.查询缓存的值
        Object obj  = cacheService.getKey("test_1000123456");
        // 2.如果缓存中不存在,则查询mysql数据库
        if (null==obj) {
            obj = pjp.proceed();
            // 3.将obj的值写入缓存
            cacheService.setKey("test_1000123456", obj);
        }
        return obj;
    }

}
3.编写memcached 的业务类
@Component("cacheService")
public class CacheService {
    /**
     * 读取缓存的方法
     * @param key
     * @return
     */
    public Object getKey(String key) {
        System.out.println("query from memcached");
        return null;
    }
    /**
     * 写入缓存的方法
     * @param key
     * @param obj
     */
    public void setKey(String key, Object obj) {

    }
    /**
     * 删除缓存的方法
     * @param key
     */
    public void delete(String key) {

    }

}
4.Dao 的实现层添加注解
@Component("testDao")
public class TestDaoImpl implements TestDao {

    /**
     * 此处将使用 prefix + indexKey 作为缓存的key,即 test_ + uuid
     */
    @Cache(indexKey=1, prefix="test_")
    @Override
    public String query(String uuid) {
        System.out.println("query from mysql");
        return "caoxiaobo";
    }
}
配置文件spring-aop.xml:
<?xml version="1.0" encoding="UTF-8"?>
<beans xmlns="http://www.springframework.org/schema/beans"
    xmlns:aop="http://www.springframework.org/schema/aop"
    xmlns:xsi="http://www.w3.org/2001/XMLSchema-instance" xmlns:p="http://www.springframework.org/schema/p"
    xmlns:context="http://www.springframework.org/schema/context"
    xmlns:mvc="http://www.springframework.org/schema/mvc"
    xsi:schemaLocation="http://www.springframework.org/schema/beans
                        http://www.springframework.org/schema/beans/spring-beans-3.1.xsd
                        http://www.springframework.org/schema/aop
                        http://www.springframework.org/schema/aop/spring-aop-4.3.xsd
                        http://www.springframework.org/schema/context
                        http://www.springframework.org/schema/context/spring-context-3.1.xsd
                        http://www.springframework.org/schema/mvc
                        http://www.springframework.org/schema/mvc/spring-mvc-4.0.xsd">
    <!-- 自动扫描 -->
    <context:component-scan base-package="com.spring.*" />
    <!-- 开启注入注解扫描  -->
    <context:annotation-config/>
    <aop:aspectj-autoproxy/>
</beans>
测试:
@RunWith(SpringJUnit4ClassRunner.class)
@ContextConfiguration(locations = { "classpath:spring-aop.xml" })
public class SprintAopAndCacheTest {

    @Autowired
    TestService testService;

    @Test
    public void test() {
        String name = testService.query("1000123456");
        System.out.println(name);
    }
}
在执行测试代码的时候,除了第一次执行会输出 “query from mysql” 之外,后面都不会执行这条输出语句。
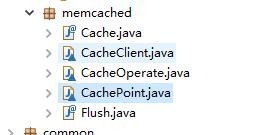
上述代码仅仅只是一个很简单的spring-aop的示例,下面继续修改CachePoint类,来实现 spring-aop + memcached
@Component("cachePoint")
@Aspect
class CachePoint {

    /**
     * @Pointcut("@annotation(Cache)") 表示定义切入点所有带有@Cache注解的方法
     */
    @Pointcut("@annotation(com.rose.aop.memcached.Cache)")
    public void cachePointcut(){
        System.out.println("此输出将不会执行...");
    }

    @Around(value="cachePointcut()")
    public Object cacheAround(ProceedingJoinPoint pjp) {
        return invoke(pjp);
    }

    /**
     * 1.查询
     * 2.
     * 3.
     * 4.删除
     * 5.删除并返回
     * @return
     * @throws Throwable
     */
    private Object invoke (ProceedingJoinPoint pjp) {
        Object object = null;
        Cache cache = this.getCache(pjp);
        int operation = cache.operation();
        switch (operation) {
        case 1:
            object = query(pjp, cache);
            break;
     // 待实现
        case 2:
            break;
     // 待实现
        case 3:
            break;
        case 4:
            delete1(pjp, cache);
            break;
        case 5:
            object = delete(pjp, cache);
            break;
        default:
            break;
        }
        return object;
    }
    /**
     * 通过反射获取cache的对象,包含很多参数
     * @param pjp
     *         Object[] getArgs:返回目标方法的参数
     *         Signature getSignature:返回目标方法的签名
     *         Object getTarget:返回被织入增强处理的目标对象
     *         Object getThis:返回AOP框架为目标对象生成的代理对象
     * @return
     */
    private Cache getCache(ProceedingJoinPoint pjp) {
        Cache cache = null;
        try {
            Signature signature = pjp.getSignature();
            Class<?> clazz = Class.forName(pjp.getTarget().getClass().getName());
            Class<?>[] paramTypes = ((MethodSignature) pjp.getSignature()).getMethod().getParameterTypes();
            Method method = clazz.getMethod(signature.getName(), paramTypes);
            Annotation annotation = method.getAnnotation(Cache.class);
            cache = (Cache) annotation;
        } catch (ClassNotFoundException e) {
            // TODO Auto-generated catch block
            e.printStackTrace();
        } catch (NoSuchMethodException e) {
            // TODO Auto-generated catch block
            e.printStackTrace();
        } catch (SecurityException e) {
            // TODO Auto-generated catch block
            e.printStackTrace();
        }
        return cache;
    }


    private Object query(ProceedingJoinPoint pjp, Cache cache) {
        // 方法传入的参数
        Object[] objs = pjp.getArgs();
        int indexKey = cache.indexKey();
        String prefix = cache.prefix();
        String key = prefix + objs[indexKey-1];
        System.out.println("key : " + key);
        // 1.查询缓存的值
        Object obj  = CacheOperate.getKey(key);

        // 2.如果缓存中不存在,则查询mysql数据库
        if (null==obj) {
            try {
                obj = pjp.proceed();
                // 3.将obj的值写入缓存
                CacheOperate.setKey(key, obj);
            } catch (Throwable e) {
                // TODO Auto-generated catch block
                e.printStackTrace();
            }
        }
        return obj;
    }

    private Object delete(ProceedingJoinPoint pjp, Cache cache) {
        System.out.println("删除缓存操作");
        Object[] objs = pjp.getArgs();
        int indexKey = cache.indexKey();
        String prefix = cache.prefix();
        String key = prefix + objs[indexKey-1];
        CacheOperate.delete(key);
        try {
            return pjp.proceed();
        } catch (Throwable e) {
            // TODO Auto-generated catch block
            e.printStackTrace();
        }
        return null;
    }

    private void delete1(ProceedingJoinPoint pjp, Cache cache) {
        delete(pjp, cache);
    }
}
class CacheOperate {

    private static CacheClient cacheClient = CacheClient.getInstance();
    /**
     * 读取缓存的方法
     * @param key
     * @return
     */
    public static Object getKey(String key) {
        System.out.println("查询缓存");
        return cacheClient.get(key);
    }
    /**
     * 写入缓存的方法
     * @param key
     * @param obj
     */
    public static void setKey(String key, Object value) {
        cacheClient.set(key, value);
    }
    /**
     * 删除缓存的方法
     * @param key
     */
    public static void delete(String key) {
        cacheClient.delete(key);
    }

}
memcached的连接及初始化 及增、删、改、查
class CacheClient {

    private CacheClient() {}

    private static CacheClient cacheClient = null;

    private static MemCachedClient client = new MemCachedClient();

    // 服务器列表和其权重
    private static String[] servers = { "127.0.0.1:11211" };
   /**
      * 项目启动时(类加载的过程中)连接及初始化
      */
    static {
        // 获取soket 连接池的实例对象
        SockIOPool pool = SockIOPool.getInstance();
        // 设置服务器信息
        pool.setServers(servers);
        pool.setFailover(true);
        //设置初始连接数、最小和最大连接数以及最大处理时间
        pool.setInitConn(10);
        pool.setMinConn(5);
        pool.setMaxConn(250);
        // 设置主线程的睡眠时间
        pool.setMaintSleep(30);
        // 设置TCP的参数和连接超时
        pool.setNagle(false);
        pool.setSocketTO(3000);
        pool.setAliveCheck(true);
        // 初始化连接池
        pool.initialize();

    }

    public static CacheClient getInstance() {
        if (null==cacheClient) {
            cacheClient = new CacheClient();
        }
        return cacheClient;
    }

    public Object get(String key) {
        return client.get(key);
    }

    public boolean set(String key, Object value) {
        return client.set(key, value);
    }

    public boolean set(String key, Object value, int expiry) {
        Calendar nowTime = Calendar.getInstance();
        nowTime.add(Calendar.SECOND, expiry);
        return client.set(key, value, nowTime.getTime());
    }

    public boolean add(String key, Object value) {
        return client.add(key, value);
    }

    public boolean add(String key, Object value, int expiry) {
        Calendar nowTime = Calendar.getInstance();
        nowTime.add(Calendar.SECOND, expiry);
        return client.add(key, value, expiry);
    }

    public boolean replace(String key, Object value) {
        return client.replace(key, value);
    }

    public boolean replace(String key, Object value, int expiry) {
        Calendar nowTime = Calendar.getInstance();
        nowTime.add(Calendar.SECOND, expiry);
        return client.replace(key, value, expiry);
    }

    public boolean delete(String key) {
        return client.delete(key);
    }

    public boolean flushAll() {
        return client.flushAll();
    }

}

 浙公网安备 33010602011771号