webpack 代码分割一点事
webpack 俨然已经成为前端最主流的构建工具,其功能多种多样,我们今天就来分析下关于代码分割这部分的一点事,并在最后讲述如何实现在webpack编译出的代码里手动添加一个异步chunk。
什么是chunkId与moduleId?
每个chunkId对应的是一个js文件,每个moduleId对应的是一个个js文件的内容的模块(一个js文件里面可以require多个资源,每个资源分配一个moduleId),所以它两的关系就是一个chunkId可能由很多个moduleId组成。
在webpack 编译出来的代码有定义了一个名称为__webpack_require__的函数,这个函数就是用来加载模块的,所以它的参数自然就是moduleId,如下:
/******/ 	function __webpack_require__(moduleId) {
/******/
/******/ 		// Check if module is in cache
/******/ 		if(installedModules[moduleId]) {
/******/ 			return installedModules[moduleId].exports;
/******/ 		}
/******/ 		// Create a new module (and put it into the cache)
/******/ 		var module = installedModules[moduleId] = {
/******/ 			i: moduleId,
/******/ 			l: false,
/******/ 			exports: {}
/******/ 		};
/******/
/******/ 		// Execute the module function
/******/ 		modules[moduleId].call(module.exports, module, module.exports, __webpack_require__);
/******/
/******/ 		// Flag the module as loaded
/******/ 		module.l = true;
/******/
/******/ 		// Return the exports of the module
/******/ 		return module.exports;
/******/ 	}
这里我们要讲代码分割,那自然也要看看webpack编译出来的代码是通过什么方法进行异步加载js文件的,从代码中我们可以找到一个名为requireEnsure的函数,这个函数便是来做这个事情的,那自然而然它的参数就是chunkId了,如下:
/******/ 	__webpack_require__.e = function requireEnsure(chunkId) {
/******/ 		var installedChunkData = installedChunks[chunkId];
/******/ 		if(installedChunkData === 0) {
/******/ 			return new Promise(function(resolve) { resolve(); });
/******/ 		}
/******/
/******/ 		// a Promise means "currently loading".
/******/ 		if(installedChunkData) {
/******/ 			return installedChunkData[2];
/******/ 		}
/******/
/******/ 		// setup Promise in chunk cache
/******/ 		var promise = new Promise(function(resolve, reject) {
/******/ 			installedChunkData = installedChunks[chunkId] = [resolve, reject];
/******/ 		});
/******/ 		installedChunkData[2] = promise;
/******/
/******/ 		// start chunk loading
/******/ 		var head = document.getElementsByTagName('head')[0];
/******/ 		var script = document.createElement('script');
/******/ 		script.type = 'text/javascript';
/******/ 		script.charset = 'utf-8';
/******/ 		script.async = true;
/******/ 		script.timeout = 120000;
/******/
/******/ 		if (__webpack_require__.nc) {
/******/ 			script.setAttribute("nonce", __webpack_require__.nc);
/******/ 		}
/******/ 		script.src = __webpack_require__.p + "" + ({"0":"home-chunk","1":"users-chunk","2":"about-chunk"}[chunkId]||chunkId) + ".js";
/******/ 		var timeout = setTimeout(onScriptComplete, 120000);
/******/ 		script.onerror = script.onload = onScriptComplete;
/******/ 		function onScriptComplete() {
/******/ 			// avoid mem leaks in IE.
/******/ 			script.onerror = script.onload = null;
/******/ 			clearTimeout(timeout);
/******/ 			var chunk = installedChunks[chunkId];
/******/ 			if(chunk !== 0) {
/******/ 				if(chunk) {
/******/ 					chunk[1](new Error('Loading chunk ' + chunkId + ' failed.'));
/******/ 				}
/******/ 				installedChunks[chunkId] = undefined;
/******/ 			}
/******/ 		};
/******/ 		head.appendChild(script);
/******/
/******/ 		return promise;
/******/ 	};
从上面代码我们可以看出requireEnsure其实就是通过动态创建script标签来加载js文件的,但是这里不是每次访问这个js文件,都进行创建script请求的,在创建script前,requireEnsure会先通过installedChunks读取下是否已经有缓存了,如果有缓存直接使用便可。
一个Demo
干说原理,都抽象啊,还是从一个demo来分析,你轻松我也轻松😉,废话少说,先亮出demo地址:https://github.com/canfoo/webpack-code-split。
这个demo是一个react项目,既然要讲代码分割,那么肯定要实现动态路由加载了,如下:
export default {
  path: '/',
  component: Core,
  indexRoute: {
    getComponent(location, cb) {
      System.import(/* webpackChunkName: "home-chunk" */ './components/Home')
        .then(loadRoute(cb))
        .catch(errorLoading);
    },
  },
  childRoutes: [
    {
      path: 'about',
      getComponent(location, cb) {
        System.import(/* webpackChunkName: "about-chunk" */ './components/About')
          .then(loadRoute(cb))
          .catch(errorLoading);
      },
    },
    {
      path: 'users',
      getComponent(location, cb) {
        System.import(/* webpackChunkName: "users-chunk" */ './components/Users')
          .then(loadRoute(cb))
          .catch(errorLoading);
      },
    },
    {
      path: '*',
      getComponent(location, cb) {
        System.import(/* webpackChunkName: "home-chunk" */ './components/Home')
          .then(loadRoute(cb))
          .catch(errorLoading);
      },
    },
  ],
};
如上,demo总共实现三个页面,三个页面都是通过分割的形式进行加载,名称分别为:home-chunk、about-chunk、users-chunk,build下,启动服务(anywhere),打开浏览器,从控制台我们也看到我们想要的结果:
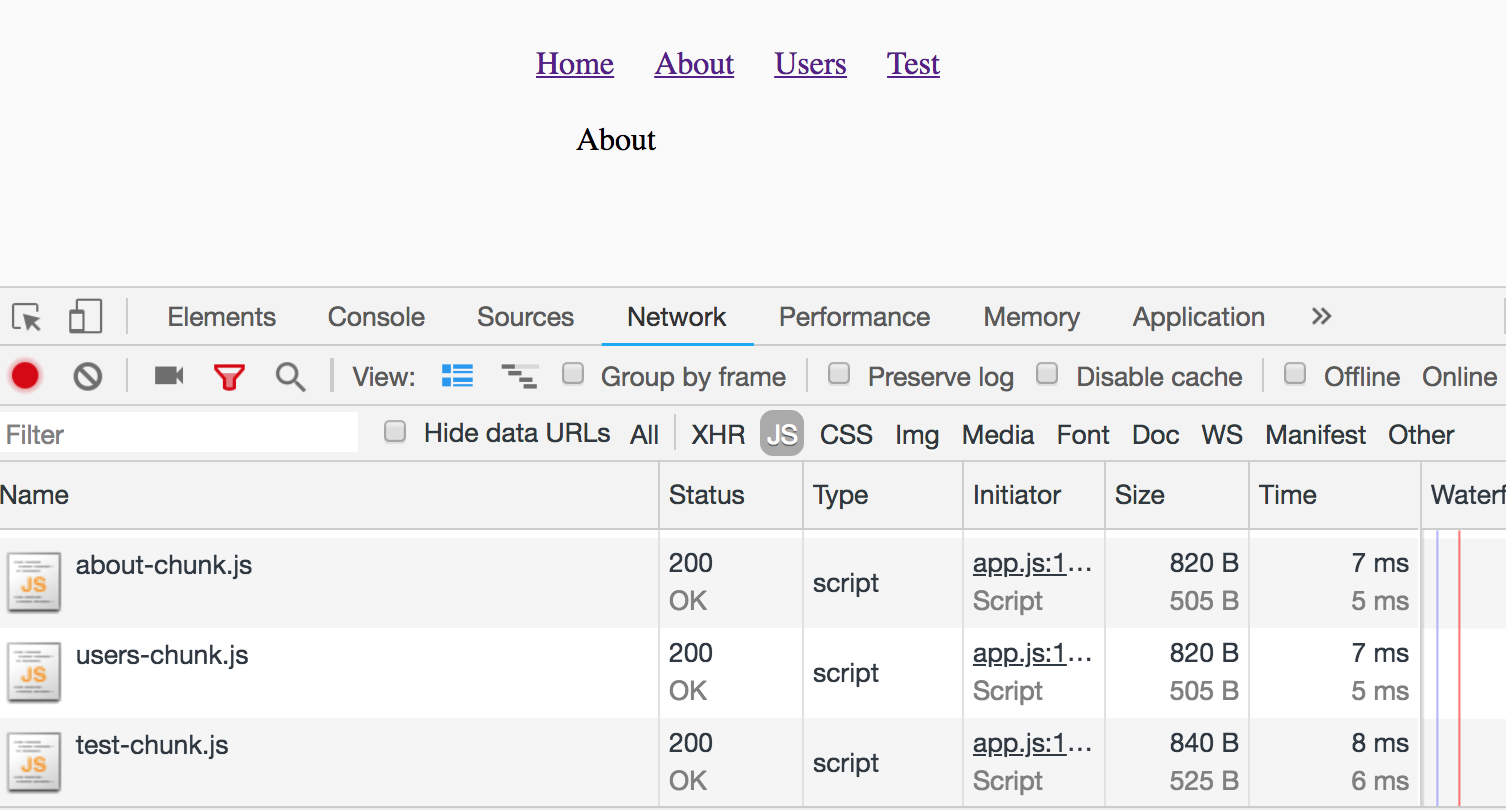
这时候我们打开编辑器看看webpack编译的代码app.js,直接搜索“about-chunk”,我们就定位到上文所说的requireEnsure的函数里有一段这样的代码:
/******/ script.src = __webpack_require__.p + "" + ({"0":"home-chunk","1":"users-chunk","2":"about-chunk"}[chunkId]||chunkId) + ".js";
从这段代码,可以看到每个chunk对应key都是一个数字,这个数字正是chunkId,所以这也是为什么上文说requireEnsure函数的参数是chunkId的原因,因为这个函数正是通过chunkId来异步加载对应的js文件的。
接下来我们来看看代码是在何时调用了这个方法的,全局搜索__webpack_require__.e,我们便知道了:
exports.default = {
  path: '/',
  component: _Core2.default,
  indexRoute: {
    getComponent: function getComponent(location, cb) {
      __webpack_require__.e/* import() */(0).then(__webpack_require__.bind(null, 227)).then(loadRoute(cb)).catch(errorLoading);
    }
  },
  childRoutes: [{
    path: 'about',
    getComponent: function getComponent(location, cb) {
      __webpack_require__.e/* import() */(2).then(__webpack_require__.bind(null, 268)).then(loadRoute(cb)).catch(errorLoading);
    }
  }, {
    path: 'users',
    getComponent: function getComponent(location, cb) {
      __webpack_require__.e/* import() */(1).then(__webpack_require__.bind(null, 269)).then(loadRoute(cb)).catch(errorLoading);
    }
  },
  {
    path: '*',
    getComponent: function getComponent(location, cb) {
      __webpack_require__.e/* import() */(0).then(__webpack_require__.bind(null, 227)).then(loadRoute(cb)).catch(errorLoading);
    }
  }]
};
从上面代码就可以看到,正是路由访问适合,调取了这个函数的。我们直接分析其中一个路由就可以了,比如about路由,由上面代码可以看到,当路径访问about时候,就调取对应的getComponent函数,这个函数里面首先执行__webpack_require__.e方法,成功再通过then执行__webpack_require__方法,即先去加载chunk文件,然后再去加载当前chunk文件里的模块,因此我们可以从这里推断出,上面方法中由两个数字 1 和 268 ,这两个数字肯定就是chunkId和modleId了,很显然,1 就是chunkId,而 268 就是moduleId。到了这里,我们是不是也可以推论出 about-chunk.js 文件中是不是也会存在 1 和 268 这两个数字呢?答案是肯定的,我们打开about-chunk.js文件:
webpackJsonp([2],{

/***/ 268:
/***/ (function(module, exports, __webpack_require__) {

"use strict";


Object.defineProperty(exports, "__esModule", {
  value: true
});

var _react = __webpack_require__(13);

var _react2 = _interopRequireDefault(_react);

function _interopRequireDefault(obj) { return obj && obj.__esModule ? obj : { default: obj }; }

var About = function About() {
  return _react2.default.createElement(
    'div',
    null,
    'About'
  );
};

exports.default = About;

/***/ })

});
如上所示,这个文件里直接调用了webpackJsonp方法,而这个方法第一个参数就是chunkIds 列表,而第二个参数就是一个moduleId与模块的对象,而这里正出现我们上文出现两个数字 1 和 268,那为什么需要这两个数字呢。这时候我们还得继续看代码,看webpackJsonp是何方神圣,直接贴代码:
/******/ 	window["webpackJsonp"] = function webpackJsonpCallback(chunkIds, moreModules, executeModules) {
/******/ 		// add "moreModules" to the modules object,
/******/ 		// then flag all "chunkIds" as loaded and fire callback
/******/ 		var moduleId, chunkId, i = 0, resolves = [], result;
/******/ 		for(;i < chunkIds.length; i++) {
/******/ 			chunkId = chunkIds[i];
/******/ 			if(installedChunks[chunkId]) {
/******/ 				resolves.push(installedChunks[chunkId][0]);
/******/ 			}
/******/ 			installedChunks[chunkId] = 0;
/******/ 		}
/******/ 		for(moduleId in moreModules) {
/******/ 			if(Object.prototype.hasOwnProperty.call(moreModules, moduleId)) {
/******/ 				modules[moduleId] = moreModules[moduleId];
/******/ 			}
/******/ 		}
/******/ 		if(parentJsonpFunction) parentJsonpFunction(chunkIds, moreModules, executeModules);
/******/ 		while(resolves.length) {
/******/ 			resolves.shift()();
/******/ 		}
/******/
/******/ 	};
从上面代码可以看出,webpackJsonpCallback主要做的是就是将每个chunk存入到resolves中,并最后依次执行,另外还行chunk里模块缓存到modules变量。
仿照一个异步chunk?
至此,我们就粗略分析完了代码分割事情,那么我们是不是可以直接在编译出的代码里添加一些代码就可以生成一个新的异步chunk了?当然可以了!
假设我们要添加一个新的chunk,名称为test-chunk
第一步,首先到页面添加个路由,这个比较简单,就不贴代码了。
第二步,就在路由代码中添加一个新的路径,这里添加路径就需要手动生成chunkId和moduleId,我们就取以最大的chunkId和moduleId分别加1,即令chunkId=3,moduleId=270:
{
    path: 'test',
    getComponent: function getComponent(location, cb) {
      // 3 为 chunkId ,270 为moduleId
      __webpack_require__.e/* import() */(3).then(__webpack_require__.bind(null, 270)).then(loadRoute(cb)).catch(errorLoading);
    }
  }
第三步,手动生成一个新的test-chunk.js(copy about-chunk.js文件内容改改部门内容即可),这里要注意的是需要将 chunkId=3,moduleId=270 正确的填入到参数里:
webpackJsonp([3],{  // chunkId

/***/ 270: // moduleId
/***/ (function(module, exports, __webpack_require__) {

"use strict";


Object.defineProperty(exports, "__esModule", {
  value: true
});

var _react = __webpack_require__(13);

var _react2 = _interopRequireDefault(_react);

function _interopRequireDefault(obj) { return obj && obj.__esModule ? obj : { default: obj }; }

var Test = function Test() {
  return _react2.default.createElement(
    'div',
    null,
    'Test'
  );
};

exports.default = Test;

/***/ })

});
到此就添加完毕了,这时候刷新页面,并点击"Test"链接,就可以看到浏览器正确加载出js文件了(这个效果其实在上图效果有体现了,这里就不贴出了)


 浙公网安备 33010602011771号