vue-router源码分析
上一篇我们写了前端路由,这几天比较闲,抽空研究了vue.js官方路由的vue-router的实现。
本文主要是以vue-router2.7.0(https://github.com/vuejs/vue-router)版本的源代码进行分析。
首先我们来看一下目录结构
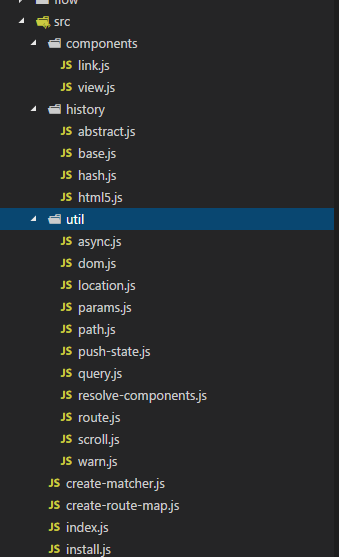
这里,先大概说明一下各个文件的作用,下面会详细讲解
components下是两个组件<router-view> and <router-link> 的实现
history是路由方式的封装
util下主要是各种功能类和功能函数
create-matcher和create-router-map的作用是生成匹配表
index是整个插件的入口
Install 提供安装的方法
看源代码之前,我们看一下vue-router的使用方法
import Vue from 'vue'
import VueRouter from 'vue-router'
//注册插件
Vue.use(VueRouter)
// 1. 定义(路由)组件。
// 可以从其他文件 import 进来
const Foo = { template: '<div>foo</div>' }
const Bar = { template: '<div>bar</div>' }


// 2. 定义路由
// 每个路由应该映射一个组件。 其中"component" 可以是
const routes = [
  { path: '/foo', component: Foo },
  { path: '/bar', component: Bar }
]

// 3. 创建 router 实例,然后传 `routes` 配置
const router = new VueRouter({
  routes
})

// 4. 创建和挂载根实例。
// 记得要通过 router 配置参数注入路由,
// 从而让整个应用都有路由功能
// 使用 router-link 组件来导航.
// 路由出口
// 路由匹配到的组件将渲染在这里
const app = new Vue({
  router,
  template: `
    <div id="app">
      <h1>Basic</h1>
      <ul>
        <li><router-link to="/">/</router-link></li>
        <li><router-link to="/foo">/foo</router-link></li>
        <li><router-link to="/bar">/bar</router-link></li>
        <router-link tag="li" to="/bar">/bar</router-link>
      </ul>
      <router-view class="view"></router-view>
    </div>
  `
}).$mount('#app')
插件安装
利用 Vue.js 提供的插件机制 .use(plugin) 来安装 VueRouter,而这个插件机制则会调用该 plugin 对象的 install 方法
这里我们先分析注册vueRouter类的两个文件 src/index.js 和src/install.js
Index文件主要暴露了一个vueRouter类
xport default class VueRouter {


  constructor (options: RouterOptions = {}) {
    .....
  }
   //初始化函数
  init (app: any /* Vue component instance */) {

    this.apps.push(app)

    // main app already initialized.

    if (this.app) {
      return
    }
    //初次初始化,即首次进入页面路由指定展示
    this.app = app

    const history = this.history

    if (history instanceof HTML5History) {
      history.transitionTo(history.getCurrentLocation())
    } else if (history instanceof HashHistory) {
      //建立hash监控
      const setupHashListener = () => {
        history.setupListeners()
      }
      history.transitionTo(
        history.getCurrentLocation(),
        setupHashListener,
        setupHashListener
      )
    }

    history.listen(route => {
      this.apps.forEach((app) => {
        app._route = route
      })
    })
  }
}

VueRouter.install = install
VueRouter.version = '__VERSION__'

//在外部直接引用vue-router,自动使用插件
if (inBrowser && window.Vue) {
  window.Vue.use(VueRouter)
}
这里是vue插件的经典写法,给插件对象增加 install 方法用来安装插件具体逻辑,同时在最后判断下如果是在浏览器环境且存在 window.Vue 的话就会自动使用插件。
接下来,我们从install看vue如何安装插件
import View from './components/view'
import Link from './components/link'

export let _Vue

export function install(Vue) {
    if (install.installed) return
    install.installed = true
    //私有化vue,方便引入
    _Vue = Vue

    const isDef = v => v !== undefined

    const registerInstance = (vm, callVal) => {
        let i = vm.$options._parentVnode
        if (isDef(i) && isDef(i = i.data) && isDef(i = i.registerRouteInstance)) {
            i(vm, callVal)
        }
    }

    Vue.mixin({
        beforeCreate() {
            //首次进入初始化路由
            if (isDef(this.$options.router)) {
                //根组件指向自己
                this._routerRoot = this
                this._router = this.$options.router
                    //初次进入对页面进行路由
                this._router.init(this)
                    //监控 router数据变化,这里为更新router-view
                Vue.util.defineReactive(this, '_route', this._router.history.current)
            } else {
                //为每个组件传递根组件,方便访问router信息
                this._routerRoot = (this.$parent && this.$parent._routerRoot) || this
            }
            registerInstance(this, this)
        },
        destroyed() {
            registerInstance(this)
        }
    })

    /**router访问的是根组件的router对象,就是传入的router**/
    Object.defineProperty(Vue.prototype, '$router', {
        get() { return this._routerRoot._router }
    })

    /**route访问的是根组件的router对象,就是传入的route**/
    Object.defineProperty(Vue.prototype, '$route', {
            get() { return this._routerRoot._route }
        })
        //注册router-view和router-link组件
    Vue.component('router-view', View)
    Vue.component('router-link', Link)

    const strats = Vue.config.optionMergeStrategies
        // use the same hook merging strategy for route hooks
    strats.beforeRouteEnter = strats.beforeRouteLeave = strats.beforeRouteUpdate = strats.created
}
install做了以下操作
1、对所有vue实例混入beforeCreate操作,设置_routerRoot向上传递指向根组件,根组件设置router对象
2、根组件首次进入的时候,初始化路由,将router对象挂载到根组件元素_router上,并且设置劫持数据_route
3、通过给 Vue.prototype 定义 $router、$route 属性把他们注入到所有组件中(主要是为了方便访问router,route)
4、注册两个组件outer-view和router-link
创建 router 实例
在使用的实例中,我们看到安装完插件后,会实例一个router对象,把路由配置的数组作为参数传入,并且将其传入vue实例的options中。接下来我们看VueRouter类的作用。VueRouter在index.js文件中
export default class VueRouter {
  static install: () => void;
  static version: string;

  app: any;
  apps: Array<any>;
  ready: boolean;
  readyCbs: Array<Function>;
  options: RouterOptions;
  mode: string;
  history: HashHistory | HTML5History | AbstractHistory;
  matcher: Matcher;
  fallback: boolean;
  beforeHooks: Array<?NavigationGuard>;
  resolveHooks: Array<?NavigationGuard>;
  afterHooks: Array<?AfterNavigationHook>;

  constructor (options: RouterOptions = {}) {
    this.app = null
    this.apps = []
    this.options = options
    this.beforeHooks = []
    this.resolveHooks = []
    this.afterHooks = []
    this.matcher = createMatcher(options.routes || [], this) //生成匹配表

    /*路由模式***/
    let mode = options.mode || 'hash'
    /**兼容低版本不支持history模式*/
    this.fallback = mode === 'history' && !supportsPushState && options.fallback !== false
    if (this.fallback) {
      mode = 'hash'
    }
    /**非浏览器***/
    if (!inBrowser) {
      mode = 'abstract'
    }
    this.mode = mode

    /**门面模式封装history***/
    switch (mode) {
      case 'history':
        this.history = new HTML5History(this, options.base)
        break
      case 'hash':
        this.history = new HashHistory(this, options.base, this.fallback)
        break
      case 'abstract':
        this.history = new AbstractHistory(this, options.base)
        break
      default:
        if (process.env.NODE_ENV !== 'production') {
          assert(false, `invalid mode: ${mode}`)
        }
    }
  }
这里可以看到构造函数中有一步操作
this.matcher = createMatcher(options.routes || [], this)
将传入的routes配置数组处理为 mather属性的值,顺藤摸瓜,我们去createMatcher创建的文件src/create-matcher.js 文件中看他到底做了什么操作。
export function createMatcher (
  routes: Array<RouteConfig>,
  router: VueRouter
): Matcher {
  const { pathList, pathMap, nameMap } = createRouteMap(routes) //生成routermap表

  function addRoutes (routes) {
    createRouteMap(routes, pathList, pathMap, nameMap)
  }

  function match (
    raw: RawLocation,
    currentRoute?: Route,
    redirectedFrom?: Location
  ): Route {
    const location = normalizeLocation(raw, currentRoute, false, router)
    const { name } = location

    if (name) {
      const record = nameMap[name]
      if (process.env.NODE_ENV !== 'production') {
        warn(record, `Route with name '${name}' does not exist`)
      }
      if (!record) return _createRoute(null, location)
      const paramNames = record.regex.keys
        .filter(key => !key.optional)
        .map(key => key.name)

      if (typeof location.params !== 'object') {
        location.params = {}
      }

      if (currentRoute && typeof currentRoute.params === 'object') {
        for (const key in currentRoute.params) {
          if (!(key in location.params) && paramNames.indexOf(key) > -1) {
            location.params[key] = currentRoute.params[key]
          }
        }
      }

      if (record) {
        location.path = fillParams(record.path, location.params, `named route "${name}"`)
        return _createRoute(record, location, redirectedFrom)
      }
    } else if (location.path) {
      location.params = {}
      for (let i = 0; i < pathList.length; i++) {
        const path = pathList[i]
        const record = pathMap[path]
        if (matchRoute(record.regex, location.path, location.params)) {
          return _createRoute(record, location, redirectedFrom)
        }
      }
    }
    // no match
    return _createRoute(null, location)
  }

  function redirect (
    record: RouteRecord,
    location: Location
  ): Route {
   //*****
  }

  function alias (
    record: RouteRecord,
    location: Location,
    matchAs: string
  ): Route {
   //*********
  }

  function _createRoute (
    record: ?RouteRecord,
    location: Location,
    redirectedFrom?: Location
  ): Route {
    //************
  }

  return {
    match,
    addRoutes
  }
}
在代码中,我们看到了createMatcher再一次将routes配置数组传给了createRouteMap进一步处理
根据代码分析createMatcher就是根据传入的routes生成路由map对应表,并且返回match函数以及一个可以增加路由配置项addRoutes函数,向上传递给VueRouter类暴露的接口addRoutes。
我们继续来看src/create-route-map.js下的createRouteMap如何生成map表的
export function createRouteMap (
  routes: Array<RouteConfig>,
  oldPathList?: Array<string>,
  oldPathMap?: Dictionary<RouteRecord>,
  oldNameMap?: Dictionary<RouteRecord>
): {
  pathList: Array<string>;
  pathMap: Dictionary<RouteRecord>;
  nameMap: Dictionary<RouteRecord>;
} {
  // the path list is used to control path matching priority
  const pathList: Array<string> = oldPathList || []  //路径列表
  const pathMap: Dictionary<RouteRecord> = oldPathMap || Object.create(null) //path路由map
  const nameMap: Dictionary<RouteRecord> = oldNameMap || Object.create(null) //名字路由map

  routes.forEach(route => {
    addRouteRecord(pathList, pathMap, nameMap, route)
  })

  //确保通配符总是在最后
  // ensure wildcard routes are always at the end
  for (let i = 0, l = pathList.length; i < l; i++) {
    if (pathList[i] === '*') {
      pathList.push(pathList.splice(i, 1)[0])
      l--
      i--
    }
  }

  return {
    pathList,
    pathMap,
    nameMap
  }
}

function addRouteRecord (
  pathList: Array<string>,
  pathMap: Dictionary<RouteRecord>,
  nameMap: Dictionary<RouteRecord>,
  route: RouteConfig,
  parent?: RouteRecord,
  matchAs?: string
) {
  const { path, name } = route
  if (process.env.NODE_ENV !== 'production') {
    assert(path != null, `"path" is required in a route configuration.`)
    assert(
      typeof route.component !== 'string',
      `route config "component" for path: ${String(path || name)} cannot be a ` +
      `string id. Use an actual component instead.`
    )
  }

  const pathToRegexpOptions: PathToRegexpOptions = route.pathToRegexpOptions || {}
  const normalizedPath = normalizePath(
    path,
    parent,
    pathToRegexpOptions.strict
  )

  if (typeof route.caseSensitive === 'boolean') {
    pathToRegexpOptions.sensitive = route.caseSensitive
  }

  //封装route记录
  const record: RouteRecord = {
    path: normalizedPath, //路径
    regex: compileRouteRegex(normalizedPath, pathToRegexpOptions), //转化为匹配数组
    components: route.components || { default: route.component }, //关联组件
    instances: {}, //实例
    name, //名字
    parent, //父级router
    matchAs,
    redirect: route.redirect, //跳转
    beforeEnter: route.beforeEnter, //进入前操作
    meta: route.meta || {}, //附加参数
    props: route.props == null  //props属性
      ? {}
      : route.components
        ? route.props
        : { default: route.props }
  }

  //子路由
  if (route.children) {

    //子路由收集
    route.children.forEach(child => {
      const childMatchAs = matchAs
        ? cleanPath(`${matchAs}/${child.path}`)
        : undefined
      addRouteRecord(pathList, pathMap, nameMap, child, record, childMatchAs)
    })
  }

  //别名
  if (route.alias !== undefined) {
    const aliases = Array.isArray(route.alias)
      ? route.alias
      : [route.alias]

    aliases.forEach(alias => {
      const aliasRoute = {
        path: alias,
        children: route.children
      }
      addRouteRecord(
        pathList,
        pathMap,
        nameMap,
        aliasRoute,
        parent,
        record.path || '/' // matchAs
      )
    })
  }

  //存储。按路径存储
  if (!pathMap[record.path]) {
    pathList.push(record.path)
    pathMap[record.path] = record
  }

  //按名字存储
  if (name) {
    if (!nameMap[name]) {
      nameMap[name] = record
    } else if (process.env.NODE_ENV !== 'production' && !matchAs) {
      warn(
        false,
        `Duplicate named routes definition: ` +
        `{ name: "${name}", path: "${record.path}" }`
      )
    }
  }
}
这里可以看到遍历routes根据path和名name将每一个路由项处理为一个routerRecord,并且分类保存到pathMap 和 nameMap,方便后续的匹配操作。
接下来,我们继续往下看vueRouter的构造函数。根据不同的模式生成history对象,那history对象到底是什么呢?我们接下去看History类。所有的History类都继承自基类base.js
export class History {
  router: Router; //router对象
  base: string;  //基准路径
  current: Route;  //当前的路由
  pending: ?Route;
  cb: (r: Route) => void;  //回调
  ready: boolean;
  readyCbs: Array<Function>;
  readyErrorCbs: Array<Function>;
  errorCbs: Array<Function>;

  // 子类实现
  +go: (n: number) => void;
  +push: (loc: RawLocation) => void;
  +replace: (loc: RawLocation) => void;
  +ensureURL: (push?: boolean) => void;
  +getCurrentLocation: () => string;

  constructor (router: Router, base: ?string) {
    this.router = router
    this.base = normalizeBase(base) //返回基准路径
    this.current = START //route 设置当前route
    this.pending = null
    this.ready = false
    this.readyCbs = []
    this.readyErrorCbs = []
    this.errorCbs = []
  }

  listen (cb: Function) {
    this.cb = cb
  }

  onReady (cb: Function, errorCb: ?Function) {
   //*****
  }

  onError (errorCb: Function) {
    //*****
  }

  //路由转化操作
  transitionTo (location: RawLocation, onComplete?: Function, onAbort?: Function) {
    const route = this.router.match(location, this.current) //找到匹配路由
    this.confirmTransition(route, () => { //确认是否转化
      this.updateRoute(route) //更新route
      onComplete && onComplete(route)
      this.ensureURL()

      // fire ready cbs once
      if (!this.ready) {
        this.ready = true
        this.readyCbs.forEach(cb => { cb(route) })
      }
    }, err => {
      if (onAbort) {
        onAbort(err)
      }
      if (err && !this.ready) {
        this.ready = true
        this.readyErrorCbs.forEach(cb => { cb(err) })
      }
    })
  }
  //确认是否转化路由
  confirmTransition (route: Route, onComplete: Function, onAbort?: Function) {
    const current = this.current
    const abort = err => {
      if (isError(err)) {
        if (this.errorCbs.length) {
          this.errorCbs.forEach(cb => { cb(err) })
        } else {
          warn(false, 'uncaught error during route navigation:')
          console.error(err)
        }
      }
      onAbort && onAbort(err)
    }
    //判断如果前后是同一个路由,不进行操作
    if (
      isSameRoute(route, current) &&
      route.matched.length === current.matched.length
    ) {
      this.ensureURL()
      return abort()
    }
    //下面是各类钩子函数的处理
    //*********************
    })
  }

  //更新路由
  updateRoute (route: Route) {
    const prev = this.current //跳转前路由
    this.current = route //装备跳转路由
    this.cb && this.cb(route) //回调函数,这一步很重要,这个回调函数在index文件中注册,会更新被劫持的数据 _router
    this.router.afterHooks.forEach(hook => {
      hook && hook(route, prev)
    })
  }
}
history/base.js实现了基本history的操作,history/hash.js,history/html5.js和history/abstract.js继承了base,只是根据不同的模式封装了一下几个函数的基本操作
  +go: (n: number) => void;
  +push: (loc: RawLocation) => void;
  +replace: (loc: RawLocation) => void;
  +ensureURL: (push?: boolean) => void;
  +getCurrentLocation: () => string;
可以看到有几个重要的操作函数,transitionTo对于路由更新的控制以及更新路由,updateRoute调用了我们在vue-router中注册的函数
 history.listen(route => {
      this.apps.forEach((app) => {
        app._route = route
      })
    })
这一步很重要,更新_route的值,还记得我们在install中做的操作
Vue.util.defineReactive(this, '_route', this._router.history.current)
劫持了_route对象,所里这里路由更新_route,导致了视图更新。
接下来,我们来看如何调用transitionTo,达到更新目的,transitionTo的调用都是在代码几个子类的实现里面。
//hash.js
//设置路由,监控路由改变
export class HashHistory extends History {
  constructor (router: Router, base: ?string, fallback: boolean) {
    super(router, base)
    // check history fallback deeplinking
    if (fallback && checkFallback(this.base)) {
      return
    }
    ensureSlash()
  }
  setupListeners () {
    window.addEventListener('hashchange', () => {
      if (!ensureSlash()) {
        return
      }
      this.transitionTo(getHash(), route => {
        replaceHash(route.fullPath)
      })
    })
  }
 //push方法
  push (location: RawLocation, onComplete?: Function, onAbort?: Function) {
    this.transitionTo(location, route => {
      pushHash(route.fullPath)
      onComplete && onComplete(route)
    }, onAbort)
  }
  //replace方法
  replace (location: RawLocation, onComplete?: Function, onAbort?: Function) {
    this.transitionTo(location, route => {
      replaceHash(route.fullPath)
      onComplete && onComplete(route)
    }, onAbort)
  }
 }

  //html5.js实现

export class HTML5History extends History {
  constructor (router: Router, base: ?string) {
    super(router, base)

    const expectScroll = router.options.scrollBehavior //指回滚方式

    if (expectScroll) {
      setupScroll()
    }
    //监控popstate事件
    window.addEventListener('popstate', e => {
      const current = this.current
      this.transitionTo(getLocation(this.base), route => {
        if (expectScroll) {
          handleScroll(router, route, current, true)
        }
      })
    })
  }

  //push
   push (location: RawLocation, onComplete?: Function, onAbort?: Function) {
    const { current: fromRoute } = this
    this.transitionTo(location, route => {
      pushState(cleanPath(this.base + route.fullPath)) //保存当前的位置信息,用于返回时候复位
      handleScroll(this.router, route, fromRoute, false)
      onComplete && onComplete(route)
    }, onAbort)
  }

  replace (location: RawLocation, onComplete?: Function, onAbort?: Function) {
    const { current: fromRoute } = this
    this.transitionTo(location, route => {
      replaceState(cleanPath(this.base + route.fullPath)) //保存当前的位置信息,用于返回时候复位
      handleScroll(this.router, route, fromRoute, false)
      onComplete && onComplete(route)
    }, onAbort)
  }
}

  //abstract.js实现,这里通过栈的数据结构来模拟路由路径
 export class AbstractHistory extends History {
  index: number;
  stack: Array<Route>;

  constructor (router: Router, base: ?string) {
    super(router, base)
    this.stack = []
    this.index = -1
  }

  push (location: RawLocation, onComplete?: Function, onAbort?: Function) {
    this.transitionTo(location, route => {
      this.stack = this.stack.slice(0, this.index + 1).concat(route)
      this.index++
      onComplete && onComplete(route)
    }, onAbort)
  }

  replace (location: RawLocation, onComplete?: Function, onAbort?: Function) {
    this.transitionTo(location, route => {
      this.stack = this.stack.slice(0, this.index).concat(route)
      onComplete && onComplete(route)
    }, onAbort)
  }
}
这里,3种方式都提供了replace和push接口来更新路由同时hash模式监控 hashchange,H5模式监控 popstate
这里H5模式多了一步保存当前的位置信息,用于返回时候复位的操作
除了在子类调用之外,在 vueRouter类中init也有调用
if (history instanceof HTML5History) {
      history.transitionTo(history.getCurrentLocation())
    } else if (history instanceof HashHistory) {
      //建立hash监控
      const setupHashListener = () => {
        history.setupListeners()
      }
      history.transitionTo(
        history.getCurrentLocation(),
        setupHashListener,
        setupHashListener
      )
    }
}
因为在这两种模式下才有可能存在进入时候的不是默认页,需要根据当前浏览器地址栏里的 path 或者 hash 来激活对应的路由,此时就是通过调用 transitionTo 来达到目的
接着继续追踪replace和push的调用,这两个方法的触发通过我们定义的router-link组件
render (h: Function) {
    const router = this.$router //路由对象
    const current = this.$route  //当前路由
    //解析 to的路径对应路由项
    const { location, route, href } = router.resolve(this.to, current, this.append)

    //设置一些默认元素class
    const classes = {}
    const globalActiveClass = router.options.linkActiveClass
    const globalExactActiveClass = router.options.linkExactActiveClass
    // Support global empty active class
    const activeClassFallback = globalActiveClass == null
            ? 'router-link-active'
            : globalActiveClass
    const exactActiveClassFallback = globalExactActiveClass == null
            ? 'router-link-exact-active'
            : globalExactActiveClass
    const activeClass = this.activeClass == null
            ? activeClassFallback
            : this.activeClass
    const exactActiveClass = this.exactActiveClass == null
            ? exactActiveClassFallback
            : this.exactActiveClass

    /**根据当前路由设置当前对象**/
    const compareTarget = location.path
      ? createRoute(null, location, null, router)
      : route
    // 如果严格模式的话 就判断是否是相同路由(path query params hash)
    // 否则就走包含逻辑(path包含,query包含 hash为空或者相同)
    classes[exactActiveClass] = isSameRoute(current, compareTarget)
    classes[activeClass] = this.exact
      ? classes[exactActiveClass]
      : isIncludedRoute(current, compareTarget)

    //事件处理函数
    const handler = e => {
      if (guardEvent(e)) {
        if (this.replace) {//路由replace触发改变router-view
          router.replace(location)
        } else {//路由push触发改变router-view
          router.push(location)
        }
      }
    }

    //事件对象
    const on = { click: guardEvent }
    if (Array.isArray(this.event)) {
      this.event.forEach(e => { on[e] = handler })
    } else {
      on[this.event] = handler
    }
   //添加元素的类
    const data: any = {
      class: classes
    }

    if (this.tag === 'a') {
      data.on = on
      data.attrs = { href }
    } else {
      // find the first <a> child and apply listener and href
      const a = findAnchor(this.$slots.default)
      if (a) {
        // in case the <a> is a static node
        a.isStatic = false
        const extend = _Vue.util.extend
        const aData = a.data = extend({}, a.data)
        aData.on = on
        const aAttrs = a.data.attrs = extend({}, a.data.attrs)
        aAttrs.href = href
      } else {
        // doesn't have <a> child, apply listener to self
        data.on = on
      }
    }

    return h(this.tag, data, this.$slots.default)
  }
}

function guardEvent (e) {
  // 忽略带有功能键的点击
  if (e.metaKey || e.altKey || e.ctrlKey || e.shiftKey) return
  // 已阻止的返回
  if (e.defaultPrevented) return
  // 右击
  if (e.button !== undefined && e.button !== 0) return
  // `target="_blank"` 忽略
  if (e.currentTarget && e.currentTarget.getAttribute) {
    const target = e.currentTarget.getAttribute('target')
    if (/\b_blank\b/i.test(target)) return
  }
   // 阻止默认行为 防止跳转
  if (e.preventDefault) {
    e.preventDefault()
  }
  return true
}

//找到第一个A标签
function findAnchor (children) {
  if (children) {
    let child
    for (let i = 0; i < children.length; i++) {
      child = children[i]
      if (child.tag === 'a') {
        return child
      }
      if (child.children && (child = findAnchor(child.children))) {
        return child
      }
    }
  }
}
可以看到router-link绑定了click 方法调用replace和push 达到更新路由目的。
最后,我们来看router-view如何是如何更新的
export default {
  name: 'router-view',
  functional: true, // 功能组件 纯粹渲染
  props: {
    name: {
      type: String,
      default: 'default'
    }
  },
  render (_, { props, children, parent, data }) {
    //标记为routerview
    data.routerView = true

    // directly use parent context's createElement() function
    //直接使用父组件上下文的createElement()函数
    // so that components rendered by router-view can resolve named slots
    const h = parent.$createElement
    const name = props.name
    const route = parent.$route
    const cache = parent._routerViewCache || (parent._routerViewCache = {}) //缓存

    // determine current view depth, also check to see if the tree
    // has been toggled inactive but kept-alive.
    let depth = 0
    let inactive = false
    //解决router-view 嵌套问题
    while (parent && parent._routerRoot !== parent) {
      if (parent.$vnode && parent.$vnode.data.routerView) {
        depth++
      }
      //是否是keep-alive
      if (parent._inactive) {
        inactive = true
      }
      parent = parent.$parent
    }
    //当前view-router的嵌套深度
    data.routerViewDepth = depth

    // render previous view if the tree is inactive and kept-alive
    if (inactive) {
      return h(cache[name], data, children)
    }
    // 得到相匹配的当前组件层级的 路由记录
    const matched = route.matched[depth]
    // render empty node if no matched route
    if (!matched) {
      cache[name] = null
      return h()
    }

    //缓存组件
    const component = cache[name] = matched.components[name]

    // attach instance registration hook
    // this will be called in the instance's injected lifecycle hooks
    data.registerRouteInstance = (vm, val) => {
      // val could be undefined for unregistration
      const current = matched.instances[name]
      if (
        (val && current !== vm) ||
        (!val && current === vm)
      ) {
        matched.instances[name] = val
      }
    }

    // also register instance in prepatch hook
    // in case the same component instance is reused across different routes
    ;(data.hook || (data.hook = {})).prepatch = (_, vnode) => {
      matched.instances[name] = vnode.componentInstance
    }

    // resolve props
    data.props = resolveProps(route, matched.props && matched.props[name])

    return h(component, data, children)
  }
}
可以看到逻辑还是比较简单的,根据route拿到匹配的组件进行渲染就可以了。里面比较复杂的是对于组件的缓存处理。
这里,整个流程就完全走完了。可能还有些懵,我们下面就在总结一下整个流程。
1、安装插件
完成了router-link和 router-view 两个组件的注册,router-link用于触发路由的变化,router-view作为功能组件,用于触发对应路由视图的变化
混入beforeCreate生命周期处理,初始化_routerRoot,_router,_route等数据
全局设置VUE静态访问$router和$route,方便后期访问
2、根据路由配置生成router实例
根据配置数组生成路由配置记录表
生成监控路由变化的hsitory对象
3、将router实例传入根VUE实例
根据beforeCreate混入,为根vue对象设置了劫持字段_route,用户触发router-view的变化
调用init()函数,完成首次路由的渲染,首次渲染的调用路径是 调用history.transitionTo方法,根据router的match函数,生成一个新的route对象,接着通过confirmTransition对比一下新生成的route和当前的route对象是否改变,改变 的话触发updateRoute,更新hsitory.current属性,触发根组件的_route的变化,从而导致组件的调用render函数,更新router-view。
另外一种更新路由的方式是主动触发,router-link绑定了click方法,触发history.push或者history.replace,从而触发history.transitionTo
同时会监控hashchange和popstate来对路由变化作对用的处理

 浙公网安备 33010602011771号