postgres高可用学习篇三:haproxy+keepalived实现postgres负载均衡
环境: CentOS Linux release 7.6.1810 (Core) 内核版本:3.10.0-957.10.1.el7.x86_64
node1:192.168.216.130
node2:192.168.216.132
node3:192.168.216.134
VIP:192.168.216.138
基础环境准备
优化内核参数cat /etc/sysctl.conf
net.netfilter.nf_conntrack_tcp_be_liberal=1
vm.swappiness=1
vm.min_free_kbytes=102400
vm.dirty_expire_centisecs=1000
vm.dirty_background_bytes=67108864
vm.dirty_bytes=536870912
vm.zone_reclaim_mode=0
kernel.numa_balancing=0
kernel.sched_migration_cost_ns=5000000
kernel.sched_autogroup_enabled=0
net.ipv4.ip_nonlocal_bind=1
net.ipv4.ip_forward=1
net.ipv4.ip_local_port_range=1024 65535
net.netfilter.nf_conntrack_max=1048576
一、安装haproxy
yum install centos-release-scl -y
yum install rh-haproxy18-haproxy rh-haproxy18-haproxy-syspaths -y
开机启动:
systemctl enable rhhaproxy18-haproxy
启动:
systemctl start rh-haproxy18-haproxy
在node1、node2、node3分别修改配置文件haproxy.cfg,并启动haproxy服务
5000读写/5001只读、5002同步模式/5003异步模式(默认异步模式)
cat /etc/haproxy/haproxy.cfg
global
    maxconn 100000
    log /dev/log    local0
    log /dev/log    local1 notice
    chroot /var/lib/haproxy
    stats socket /run/haproxy/admin.sock mode 660 level admin expose-fd listeners
    stats timeout 30s
    user haproxy
    group haproxy
    daemon

defaults
    mode               tcp
    log                global
    retries            2
    timeout queue      5s
    timeout connect    5s
    timeout client     60m
    timeout server     60m
    timeout check      15s

listen stats
    mode http
    bind 192.168.216.130:7000
    stats enable
    stats uri /

listen master
    bind 192.168.216.138:5000
    maxconn 10000
    option tcplog
    option httpchk OPTIONS /master
    http-check expect status 200
    default-server inter 3s fastinter 1s fall 3 rise 4 on-marked-down shutdown-sessions
 server pgnode01 192.168.216.130:6432 check port 8008
 server pgnode02 192.168.216.132:6432 check port 8008
 server pgnode03 192.168.216.134:6432 check port 8008


listen replicas
    bind 192.168.216.138:5001
    maxconn 10000
    option tcplog
    option httpchk OPTIONS /replica
    balance roundrobin
    http-check expect status 200
    default-server inter 3s fastinter 1s fall 3 rise 2 on-marked-down shutdown-sessions
 server pgnode01 192.168.216.130:6432 check port 8008
 server pgnode02 192.168.216.132:6432 check port 8008
 server pgnode03 192.168.216.134:6432 check port 8008


listen replicas_sync
    bind 192.168.216.138:5002
    maxconn 10000
    option tcplog
    option httpchk OPTIONS /sync
    balance roundrobin
    http-check expect status 200
    default-server inter 3s fastinter 1s fall 3 rise 2 on-marked-down shutdown-sessions
 server pgnode01 192.168.216.130:6432 check port 8008
 server pgnode02 192.168.216.132:6432 check port 8008
 server pgnode03 192.168.216.134:6432 check port 8008


listen replicas_async
    bind 192.168.216.138:5003
    maxconn 10000
    option tcplog
    option httpchk OPTIONS /async
    balance roundrobin
    http-check expect status 200
    default-server inter 3s fastinter 1s fall 3 rise 2 on-marked-down shutdown-sessions
 server pgnode01 192.168.216.130:6432 check port 8008
 server pgnode02 192.168.216.132:6432 check port 8008
 server pgnode03 192.168.216.134:6432 check port 8008
haproxy默认不开启日志记录,haproxy启用日志记录方法
参考:https://blog.csdn.net/eddie_cm/article/details/79794432
二、1、分别在node1、node2、node3节点安装keepalived
yum install -y epel-release
yum install -y keepalived
2、更改node1节点上的keepalived.conf配置文件
cat /etc/keepalived/keepalived.conf
global_defs {
   router_id ocp_vrrp
}

vrrp_script haproxy_check {
   script "/bin/kill -0 `cat /var/run/haproxy/haproxy.pid`"
   interval 2
   weight 2
}

vrrp_instance VI_1 {
   interface ens32
   virtual_router_id 133
   priority  100
   advert_int 2
   state  BACKUP
   virtual_ipaddress {
       192.168.216.138
   }
   track_script {
       haproxy_check
   }
   authentication {
      auth_type PASS
      auth_pass 1ce24b6e
   }
}
这里需要注意的是:"virtual_ipaddress"也就是所谓的vip我们设置为192.168.216.138
3、更改node2节点上的keepalived.conf配置文件
[root@pgnode02 ~]# cat /etc/keepalived/keepalived.conf
global_defs {
   router_id ocp_vrrp
}

vrrp_script haproxy_check {
   script "/bin/kill -0 `cat /var/run/haproxy/haproxy.pid`"
   interval 2
   weight 2
}

vrrp_instance VI_1 {
   interface ens32
   virtual_router_id 133
   priority  100
   advert_int 2
   state  BACKUP
   virtual_ipaddress {
       192.168.216.138
   }
   track_script {
       haproxy_check
   }
   authentication {
      auth_type PASS
      auth_pass 1ce24b6e
   }
}
这里需要注意的是:"virtual_ipaddress"也就是所谓的vip我们设置为192.168.216.138
4、更改node3节点上的keepalived.conf配置文件
[root@localhost keepalived]# cat /etc/keepalived/keepalived.conf
global_defs {
   router_id ocp_vrrp
}

vrrp_script haproxy_check {
   script "/bin/kill -0 `cat /var/run/haproxy/haproxy.pid`"
   interval 2
   weight 2
}

vrrp_instance VI_1 {
   interface ens32
   virtual_router_id 133
   priority  100
   advert_int 2
   state  BACKUP
   virtual_ipaddress {
       192.168.216.138
   }
   track_script {
       haproxy_check
   }
   authentication {
      auth_type PASS
      auth_pass 1ce24b6e
   }
}
这里需要注意的是:"virtual_ipaddress"也就是所谓的vip我们设置为192.168.216.138
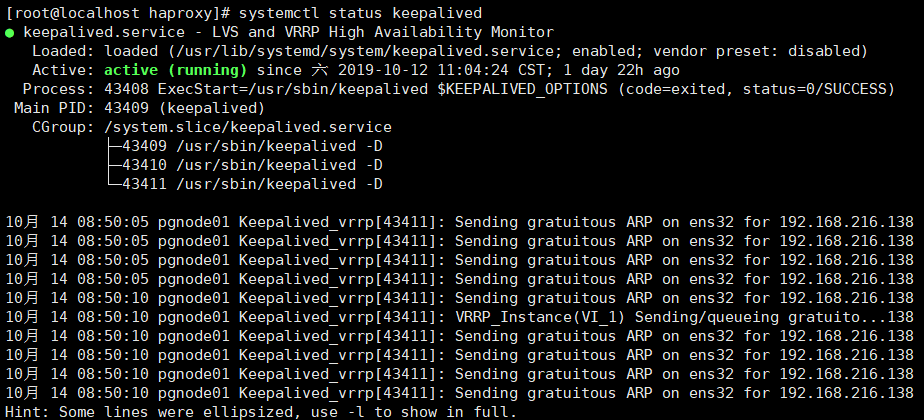
5、依次在node1、node2、node3上启动keepalived
systemctl start keepalived
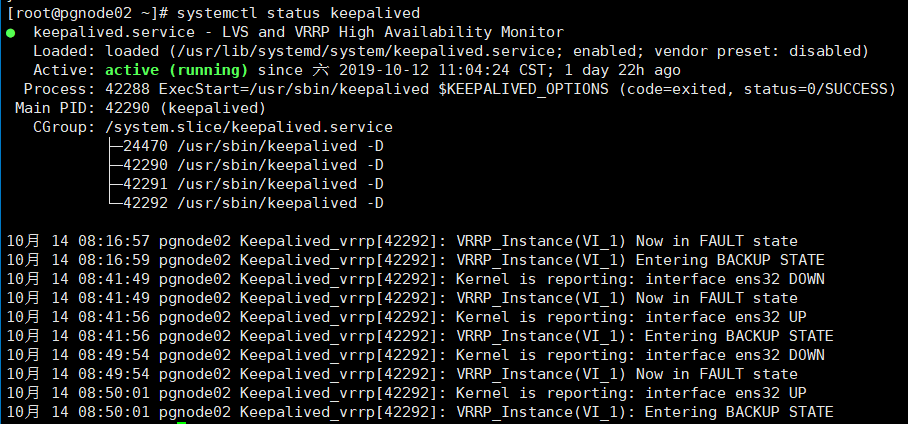
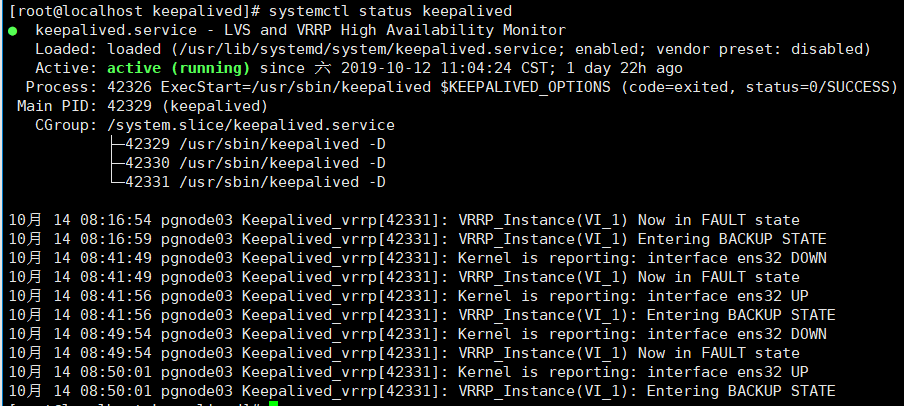
验证node1、node2、node3上keepalived启动状态,VIP跟随master进行漂移
node2 :
node3:

 浙公网安备 33010602011771号