allure测试报告美化与定制
一份简单的测试报告
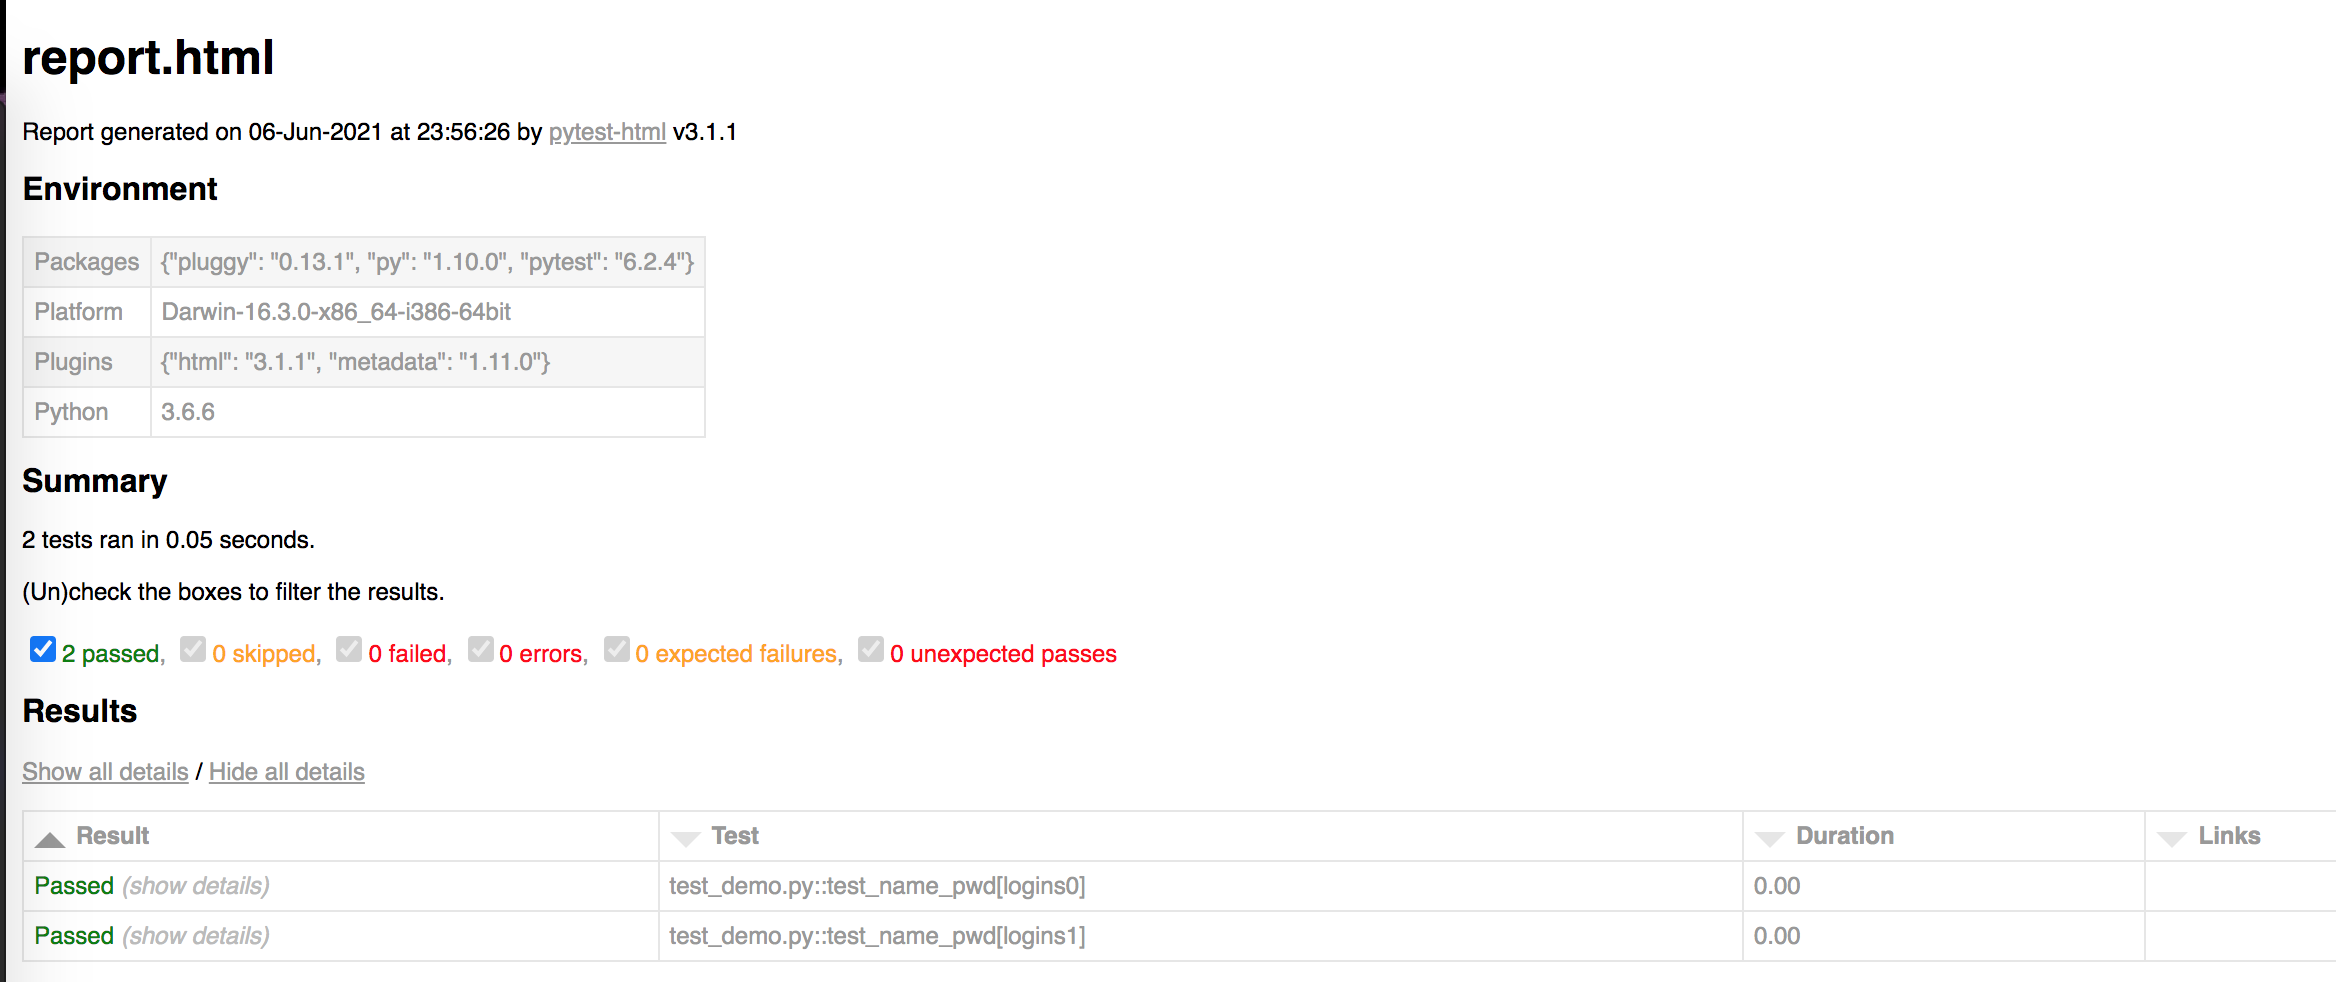
一份简单的测试报告可以使用pytest的插件html就可以生成, demo如下 先下载
pip install pytest-html
下载完之后,在当前执行过测试用例的测试目录下的终端执行
pytest --html=report.html # 即可生成一份简单的 report.html 报告, 如下图

allure介绍
allure 可以生成一个漂亮的测试报告。做kpi的时候老板看到可以加个鸡腿
allure安装
allure安装还是有点复杂的,首先是给到allure的下载路径 https://github.com/allure-framework/allure2/releases
下载完成之后,解压到本地电脑,这步没问题就要
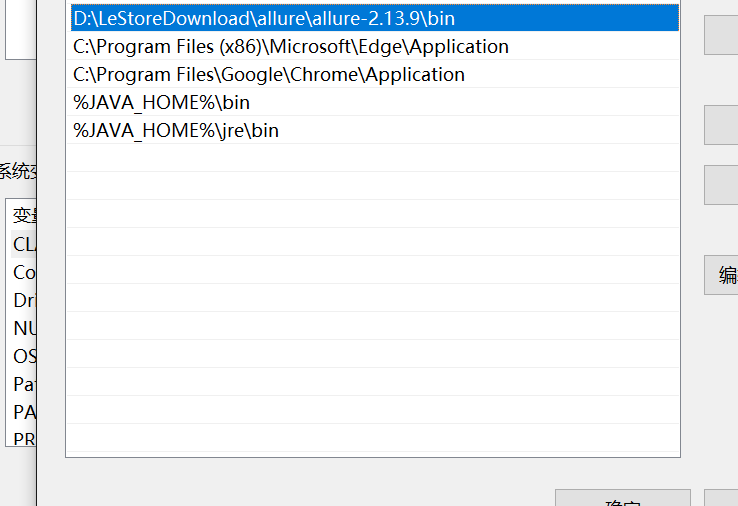
把bin目录添加到环境变量Path下
bin目录

然后我的电脑右键属性 -> 高级设置 -> 环境变量path编辑

这步完成代表基本可以,但是电脑如果没有安装jdk的情况下,allure是运行不成功的。所以我们又要去安装一个jdk
安装jdk参考 https://blog.csdn.net/weixin_44535573/article/details/110232317
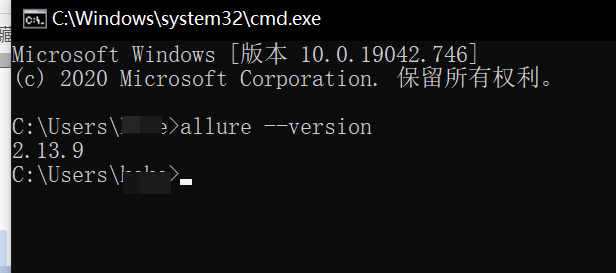
jdk安装完毕之后,就可以在终端中输入
allure --version

这样就可以使用allure服务了
pytest_allure 插件 Allure报告生成
安装完allure 如果需要在python中使用allure,则需要安装多一个库来操作allure
allure官方文档 参考:https://docs.qameta.io/allure/#_pytest
pip install allure-pytest —index-url https://pypi.douban.com/simple
参考官网的demo,生成一个简单的例子
新建一个文件
import pytest


def test_success():
    """this test succeeds"""
    assert True


def test_failure():
    """this test fails"""
    assert False


def test_skip():
    """this test is skipped"""
    pytest.skip('for a reason!')


def test_broken():
    raise Exception('oops')


if __name__ == '__main__':
    pytest.main(["-s", "test_allure01.py"])
在该文件夹下创建多一个result文件夹,然后在终端执行命令
pytest .\test_allure01.py --alluredir=result/1 # 将文件生成在result下的1文件
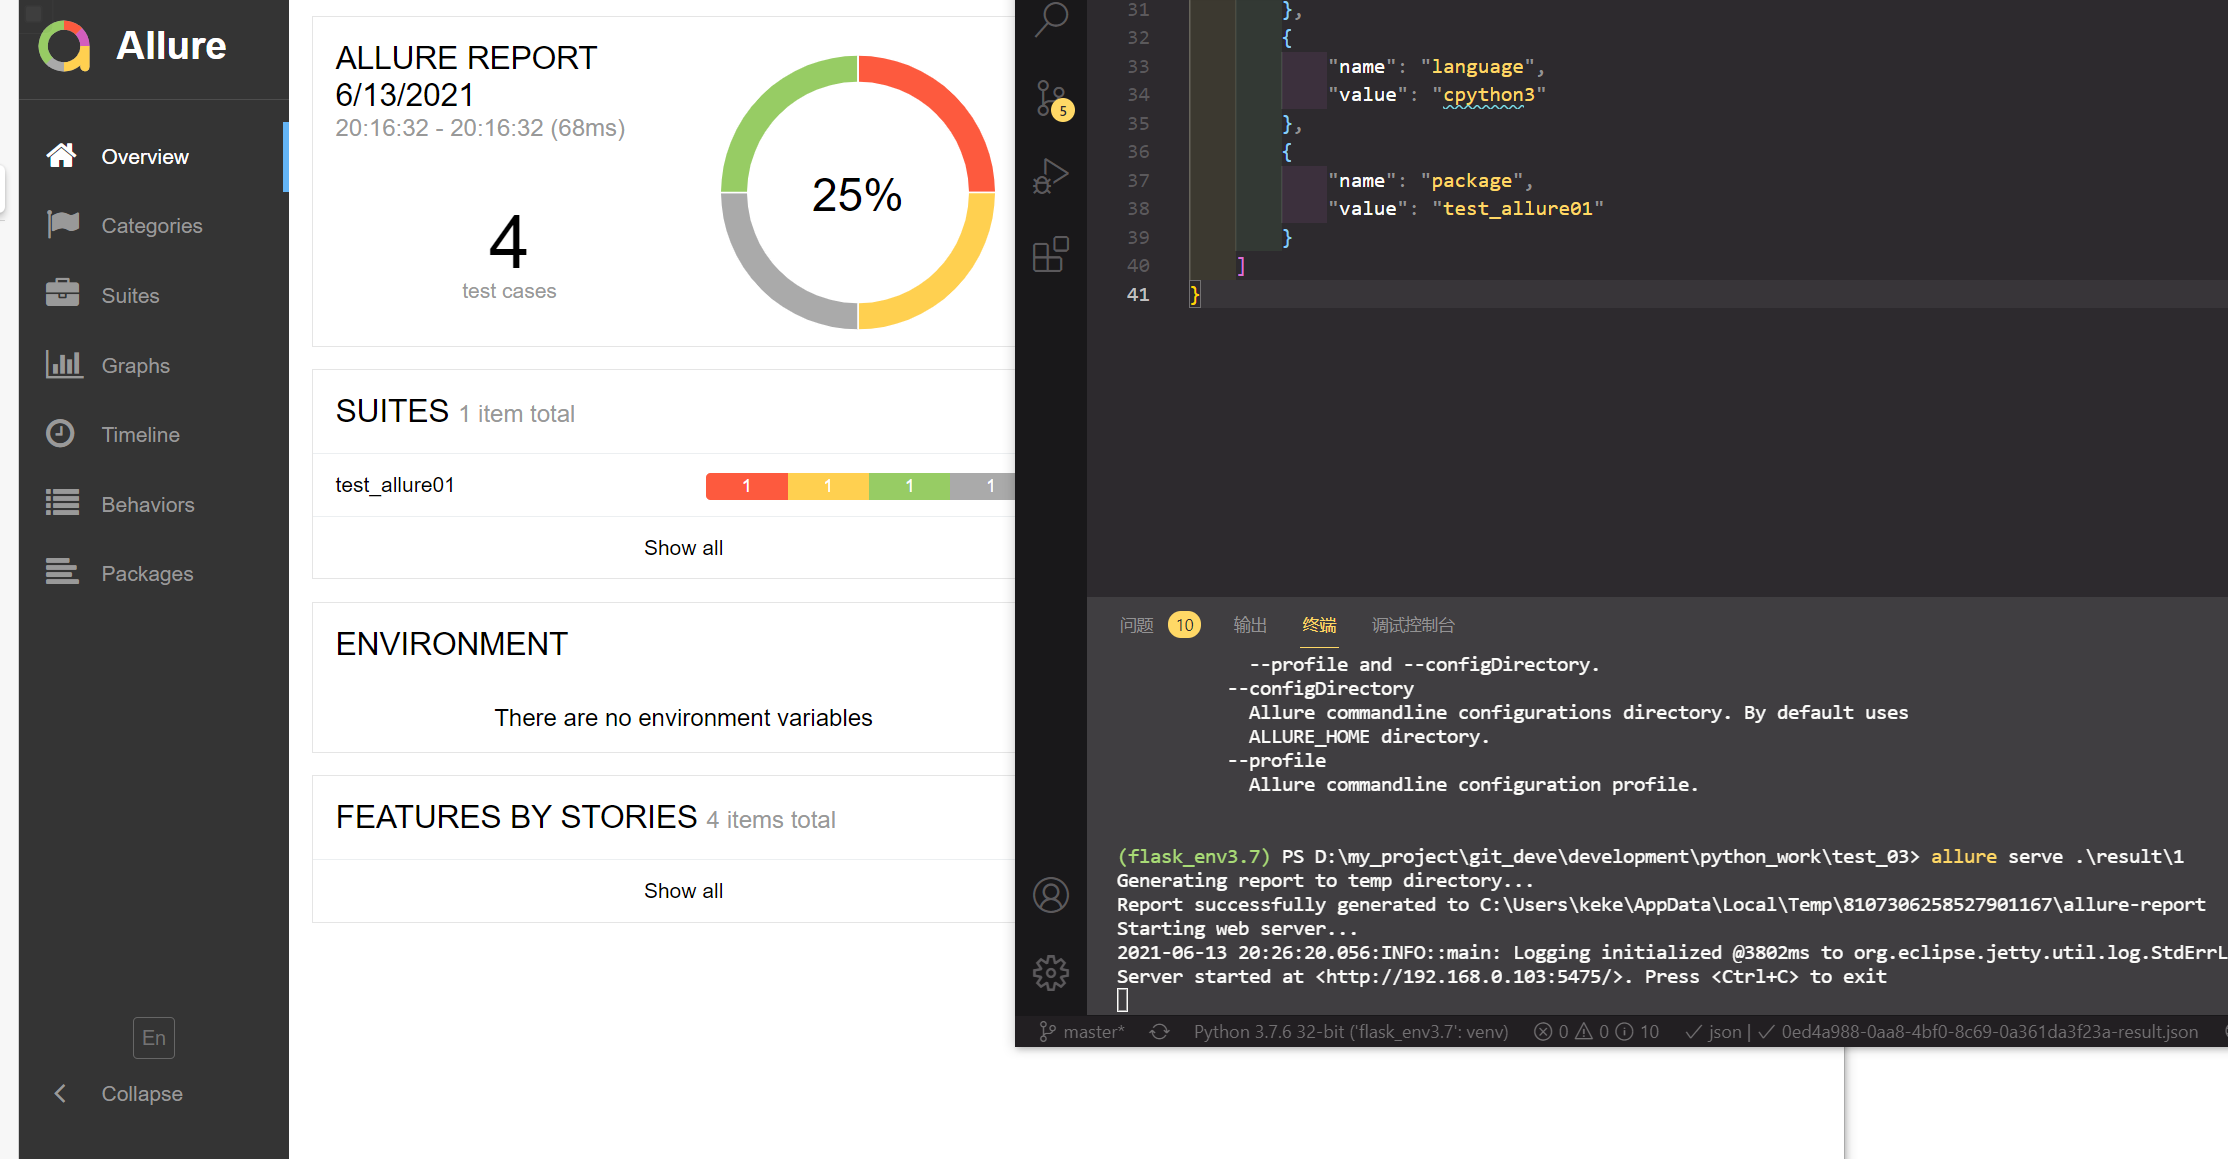
生成成功后会有一批json的数据,这时候我们就可以用allure来执行这个文件夹
allure serve .\result\1\

还有一种方法是生成在本地的,有兴趣可以自行了解
allure 特性分析
场景:
- 希望在报告中看到测试功能,子功能或者场景,测试步骤 包括测试附加信息
解决: - @Feature, @story, @step, @attach
步骤: - import allure
- 功能上加 @allure.feature("功能名称")
- 子功能上加 @allure.story("子功能名称")
- 步骤上加 @allure.step("步骤细节")
- allure.attach("具体文本信息"), 需要附加的信息,可以是数据,文本,图片,视频,网页
新建一个文件demo
import pytest
import allure


@allure.feature("登录模块")
class TestLogin():
    @allure.story("登录成功")
    def test_login_success(self):
        print("这是登录")
        pass

    @allure.story("登录失败")
    def test_login_success_a(self):
        print("这是登录")
        pass

    @allure.story("用户名缺失")
    def test_login_success_b(self):
        print("用户名缺失")
        pass

    @allure.story("密码缺失")
    def test_login_failure(self):
        with allure.step("点击用户名"):
            print("输入用户名")
        with allure.step("点击密码"):
            print("输入密码")
        with allure.step("点击登录之后登录失败"):
            assert '1' == 1
            print('登录失败')
        pass

    @allure.story("登录失败")
    def test_login_failure_a(self):
        print("这是登录")
        pass


if __name__ == '__main__':
    pytest.main()
然后用allure生成,看看生成的不同, 就知道用法的差别
如果有很多用例在,而只想运行一个模块用例的话, 那就运行
pytest .\test_allure02.py --allure-features '登录模块'
或者 只想执行某个模块下的story
pytest -v .\test_allure02.py --allure-stories '登录成功'
- feature相当于一个功能,一个大的模块,将case分类到某个feature中,story属于feature下的内容
- feature与story类似于父子关系
- @allure.step() 只能以装饰器的形式放在类或者方法上面,用于关键点
- @allure.severity(allure.severity_level.TRIVIAL) 这是allure的标记,执行时 pytest -s -v 文件名 --allure-severities normal, critical 这样就可以执行相关的优先级
- allure.attach()
allure + pytest + selenium实战
默认已经调好selenium
实战内容为通过selenium 搜索三个关键词然后截图放到allure中, 前端自动化测试 百度搜索功能实战演示
import allure
import pytest
from selenium import webdriver

import time


# chrome_options = webdriver.ChromeOptions()
@allure.testcase("##")  # 默认连接到一个测试用例管理的地址
@allure.feature('百度搜索')
@pytest.mark.parametrize('test_data1', ['allure', 'unitest', 'pytest'])
def test_step_demo(test_data1):
    with allure.step("打开百度网页"):
        driver = webdriver.Chrome(r'D:\my_project\git_deve\development\python_work\chromedriver_win32\chromedriver.exe')
        driver.get('http://www.baidu.com')
        driver.maximize_window()

    with allure.step(f"输入搜索词{test_data1}"):
        driver.find_element_by_id('kw').send_keys(test_data1)  # 找到百度的Kw, 然后输入你好世界
        time.sleep(2)
        driver.find_element_by_id('su').click()
        time.sleep(2)

    with allure.step("保存图片"):
        driver.save_screenshot('./result/1/a.png')
        allure.attach.file('./result/1/a.png', attachment_type=allure.attachment_type.PNG)
        allure.attach('<head></head><body>首页</body>', 'Attach with HTML type', allure.attachment_type.HTML)
    with allure.step("退出浏览器"):
        driver.quit()
代码写完之后。然后执行
pytest .\test_baidudemo.py --alluredir=result/1
# 然后生成报告
allure serve .\result\1
可以再改写一下,不用连续的打开chrom
import allure
import pytest
from selenium import webdriver
from selenium.webdriver.chrome.options import Options

import time

# chrome_options.add_experimental_option("debuggerAddress", "127.0.0.1:9222") # 指定配置好的 chrom
# chrome_driver = r"E:\\chromedriver.exe" # 驱动路径
# driver = webdriver.Chrome(chrome_driver, chrome_options=chrome_options) # 加入驱动设置
# chrome_options = webdriver.ChromeOptions()


@allure.testcase("##")  # 默认连接到一个测试用例管理的地址
@allure.feature('百度搜索')
@pytest.mark.parametrize('test_data1', ['allure', 'unitest', 'pytest'])
def test_step_demo(test_data1):
    with allure.step("打开百度网页"):
        chrome_options = Options()
        chrome_options.add_experimental_option("debuggerAddress", "127.0.0.1:9222")  # 指定配置好的 chrom
        chrome_driver = r"D:\my_project\git_deve\development\python_work\chromedriver_win32\chromedriver.exe"  # 驱动路径
        driver = webdriver.Chrome(chrome_driver, chrome_options=chrome_options)  # 加入驱动设置
        driver.get('http://www.baidu.com')
        driver.maximize_window()

    with allure.step(f"输入搜索词{test_data1}"):
        driver.find_element_by_id('kw').send_keys(test_data1)  # 找到百度的Kw, 然后输入你好世界
        time.sleep(2)
        driver.find_element_by_id('su').click()
        time.sleep(2)

    with allure.step("保存图片"):
        driver.save_screenshot('./result/1/a.png')
        allure.attach.file('./result/1/a.png', attachment_type=allure.attachment_type.PNG)
        allure.attach('<head></head><body>首页</body>', 'Attach with HTML type', allure.attachment_type.HTML)

    with allure.step("退出浏览器"):
        driver.quit()
完。


 浙公网安备 33010602011771号