
cdh6.3 hive2.1.1升级hive2.3.8
环境说明
操作系统:centos7
CDH版本:6.3.2
hive 版本 2.1.1 升级hive2.3.8
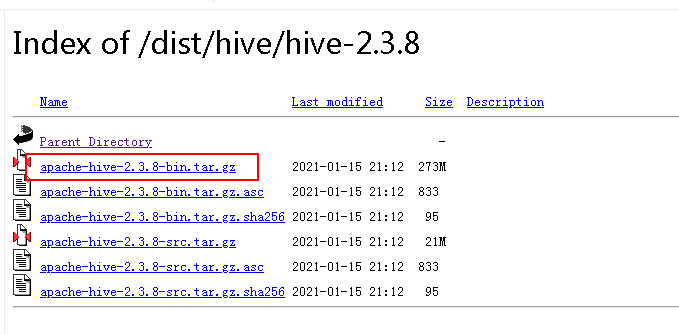
一、下载hive2.3.8版本
下载地址:http://archive.apache.org/dist/hive/
如果有重要数据的建议备份一下元数据,就是把hive的对应mysql数据库的数据进行一下备份
二、升级hive版本(这一步在所有安装了hive的节点都这样操作)
先停掉CDH的hive
上传到CDH集群所在的服务器,我这里的CDH是三节点集群。
解压
tar -zxf apache-hive-2.3.8-bin.tar.gz

1、复制hive 2.3.8 lib包到原来的hive中
在hive 的安装目录下创建lib238目录

将hive2.3.8下的lib目录下的所有内容复制到lib238目录下
cp -r /home/apache-hive-2.3.8-bin/lib/ /opt/cloudera/parcels/CDH/lib/hive/lib238/
2、修改hive的启动文件

#HIVE_LIB=${HIVE_HOME}/lib
HIVE_LIB=${HIVE_HOME}/lib238
3、替换spark中hive 包(hive on spark运行)
将spark的hive目录下的hive-exec-2.1.1-cdh6.3.2.jar包换成hive-exec-2.3.8.jar包

cp /opt/cloudera/parcels/CDH-6.3.2-1.cdh6.3.2.p0.1605554/lib/hive/lib238/hive-exec-2.3.8.jar /opt/cloudera/parcels/CDH-6.3.2-1.cdh6.3.2.p0.1605554/lib/spark/hive/
再次提醒,以上三步在所有安装了hive的节点上都进行操作。
三、升级hive的mysql数据库,这一步如果不做的话启动Hive会失败的
需要运行的脚本在下载的hive2.3.8的目录下

登录mysql
 mysql> use cdh_hivemetastore;  //我创建hive的时候对应的数据库名称,大家根据自己的实际情况来

 mysql> source /home/hive-2.3.8/scripts/metastore/upgrade/mysql/upgrade-2.1.0-to-2.2.0.mysql.sql;

 mysql> source /home/hive-2.3.8/scripts/metastore/upgrade/mysql/upgrade-2.2.0-to-2.3.0.mysql.sql;
启动hive


四、编写简单的java程序来连接升级后的hive
我这里通过创建一个maven工程连测试连接
java代码
package com.gong.hive;


import java.sql.*;
import java.sql.DriverManager;
import java.sql.ResultSet;

public class HiveJdbcTest {
    private static String driverName = "org.apache.hive.jdbc.HiveDriver";
    private static String connctUrl = "jdbc:hive2://172.16.119.26:10000/ods";
    private static String userName = "root";
    private static String password = "";

    public static void main(String[] args) throws SQLException, ClassNotFoundException {
        Class.forName(driverName);

        Connection con = DriverManager.getConnection(connctUrl);
        Statement stmt = con.createStatement();
        String tableName = "testth";

        //创建表
        stmt.execute("create table  if not exists " + tableName + " (id bigint, name string,age int)");


        //插入
        stmt.execute("insert into " +tableName + "( id ,name ,age ) values(4,'隔壁老王',100   )"  );
       stmt.execute("insert into " +tableName + "( id ,name ,age ) values(5,'董小姐',200   )"  );
        stmt.execute("insert into " +tableName + "( id ,name ,age ) values(6,'沙雕',300   )"  );


        //查询
        ResultSet res = stmt.executeQuery( "select * from " + tableName );
        while (res.next()) {
            System.out.println( res.getLong(1) +"," + res.getString(2) + "," + res.getInt(3)  );
        }


        stmt.close();
        con.close();

    }
}
pom.xml依赖
 <dependency>
      <groupId>junit</groupId>
      <artifactId>junit</artifactId>
      <version>4.11</version>
      <scope>test</scope>
    </dependency>
    <dependency>
      <groupId>org.apache.hive</groupId>
      <artifactId>hive-jdbc</artifactId>
      <version>2.3.8</version>
    </dependency>
    <dependency>
      <groupId>org.apache.hadoop</groupId>
      <artifactId>hadoop-common</artifactId>
      <version>3.0.0</version>
    </dependency>
    <dependency>
      <groupId>org.apache.hive</groupId>
      <artifactId>hive-exec</artifactId>
      <version>2.3.8</version>
    </dependency>
这个时候还不能直接运行代码来测试,要先启动hiveserver2,如果hiveserver2之前启动过了,一定要退出再重新启动,不然运行代码的时候会报错的,报的是jdbc版本不对应
hiveserver2进程如果之前是后台方式运行,网上很多退出的方法是:
通过命令 ps -aux| grep hiveserver2 查询进程号,然后kill -9 进程号,这个方法经过实际,一直不成功,因为hiveserver2的进程号一直在变化,实际证明这个办法行不通。
我们可以这样通过jps命令,查看当前的进程,RunJar的进程,全部kill 掉,然后重启CDH的hive,再到命令行终端去启动hiveserver2
启动hiveserver2命令
进入CDH的hive/bin目录下

前台启动hiveserver2
 ./hive --service  hiveserver2

后台启动
 nohup  ./hive --service hiveserver2 &
如果是前端运行hiveserer2的话,直接在shell终端就能看到运行的日志了,如果是后台运行hiveserver2,通过命令tail -f nohup.out查看日志
这个时候可以运行java代码测量连接了


 浙公网安备 33010602011771号