

centos7安装配置nfs
操作系统版本:3.10.0-123.el7.x86_64
192.168.137.11 nfs服务端
192.168.137.10 nfs客户端
一、安装nfs服务端(在192.168.137.11上操作)
1、创建nfs数据存储目录(在192.168.137.11)
mkdir -p /home/nfs_data
chmod 755 /home/nfs_data
2、安装nfs
yum install -y nfs-utils
3、编辑/etc/exports,写入以下内容
/home/nfs_data 192.168.137.0/24(insecure,rw,sync,no_root_squash,fsid=0)
- rw:read-write,可读写; 注意,仅仅这里设置成读写客户端还是不能正常写入,还要正确地设置共享目录的权限,参考问题7
- ro:read-only,只读;
- sync:文件同时写入硬盘和内存;
- async:文件暂存于内存,而不是直接写入内存;
- no_root_squash:NFS客户端连接服务端时如果使用的是root的话,那么对服务端分享的目录来说,也拥有root权限。显然开启这项是不安全的。
- root_squash:NFS客户端连接服务端时如果使用的是root的话,那么对服务端分享的目录来说,拥有匿名用户权限,通常他将使用nobody或nfsnobody身份;
- all_squash:不论NFS客户端连接服务端时使用什么用户,对服务端分享的目录来说都是拥有匿名用户权限;
4、启用nfs服务
systemctl enable rpcbind.service
systemctl enable nfs-server.service
5、启动nfs服务
systemctl start rpcbind.service
systemctl start nfs-server.service
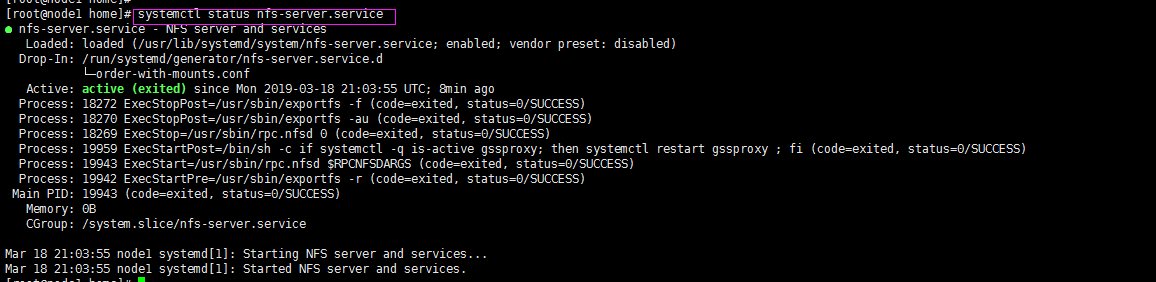

6、测试本机能否挂载
mkdir -p /opt/nfs_root
umount -t nfs 192.168.137.11:/home/nfs_data /opt/nfs_root
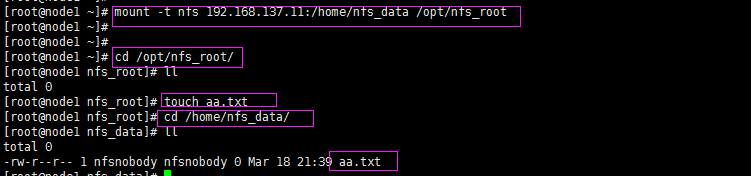
从上面可以挂载成功
二、从另一台机器挂nfs(在192.168.137.10上操作)
1、安装nfs
yum install -y nfs-utils
2、启用rpcbind
systemctl enable rpcbind.service
3、启动rpcbind
systemctl start rpcbind.service
注意:客户端不需要启动nfs服务
4、检查 NFS 服务器端是否有目录共享
[root@master ~]# showmount -e 192.168.137.11
Export list for 192.168.137.11:
/home/nfs_data 192.168.137.0/24
5、挂载
mkdir -p /opt/testnfs
mount -t nfs 192.168.137.11:/home/nfs_data /opt/testnfs

挂载成功

 浙公网安备 33010602011771号