
18.Ningx HTTPS 实践
Ningx HTTPS 实践
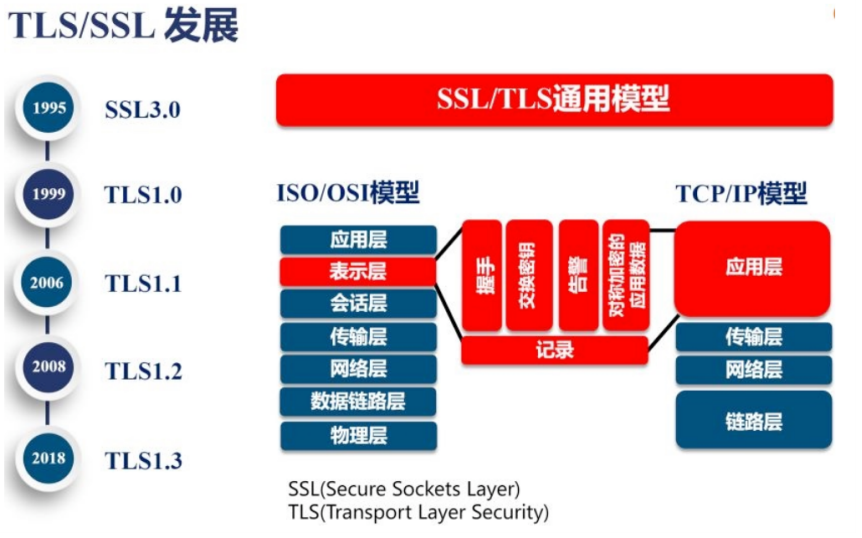
HTTPS安全证书基本概述
为什么需要使用HTTPS,因为HTTP不安全,当我们使用http网站时,会遭到劫持和篡改,如果采用https协议,那么数据在传输过程中是加密的,所以黑客无法窃取或者篡改数据报文信息,同时也避免网站传输时信息泄露。
https证书:ssl协议
那么在数据进行加密与解密过程中,如何确定双方的身份,此时就需要有一个权威机构来验证双方身份,那么这个权威机构就是CA机构,那么CA机构又是如何颁发证书
我们首先需要申请证书,先去登记机构进行身份登记然后登记机构再通过CSR发给CA,CA中心通过后会生成一堆公钥和私钥,公钥会在CA证书链中保存,公钥和私钥证书我们拿到后,会将其部署在WEB服务器上
-
1.当浏览器访问我们的https站点时,他回去请求我们的证书
-
2.Nginx这样的web服务器会将我们的公钥证书发给浏览器
-
3.浏览器会去验证我们的证书是否合法有效
-
4.CA机构会将过期的证书放置在CRL服务器,CRL服务的验证效率是非常差的,所以CA有推出了OCSP响应程序,OCSP响应程序可以查询指定的一个证书是否过去,所以浏览器可以直接查询OSCP响应程序,但OSCP响应程序性能还不是很高
-
5.Nginx会有一个OCSP的开关,当我们开启后,Nginx会主动上OCSP上查询,这样大量的客户端直接从Nginx获取证书是否有效
访问流程
-
1、浏览器发起往服务器的443端口发起请求,请求携带了浏览器支持的加密算法和哈希算法。
-
2、服务器收到请求,选择浏览器支持的加密算法和哈希算法。
-
3、服务器下将数字证书返回给浏览器,这里的数字证书可以是向某个可靠机构申请的,也可以是自制的。
-
4、浏览器进入数字证书认证环节,这一部分是浏览器内置的TLS完成的:
- 4.1 首先浏览器会从内置的证书列表中索引,找到服务器下发证书对应的机构,如果没有找到,此时就会提示用户该证书是不是由权威机构颁发,是不可信任的。如果查到了对应的机构,则取出该机构颁发的公钥。
- 4.2 用机构的证书公钥解密得到证书的内容和证书签名,内容包括网站的网址、网站的公钥、证书的有效期等。浏览器会先验证证书签名的合法性(验证过程类似上面Bob和Susan的通信)。签名通过后,浏览器验证证书记录的网址是否和当前网址是一致的,不一致会提示用户。如果网址一致会检查证书有效期,证书过期了也会提示用户。这些都通过认证时,浏览器就可以安全使用证书中的网站公钥了。
- 4.3 浏览器生成一个随机数R,并使用网站公钥对R进行加密。
-
5、浏览器将加密的R传送给服务器。
-
6、服务器用自己的私钥解密得到R。
-
7、服务器以R为密钥使用了对称加密算法加密网页内容并传输给浏览器。
-
8、浏览器以R为密钥使用之前约定好的解密算法获取网页内容。
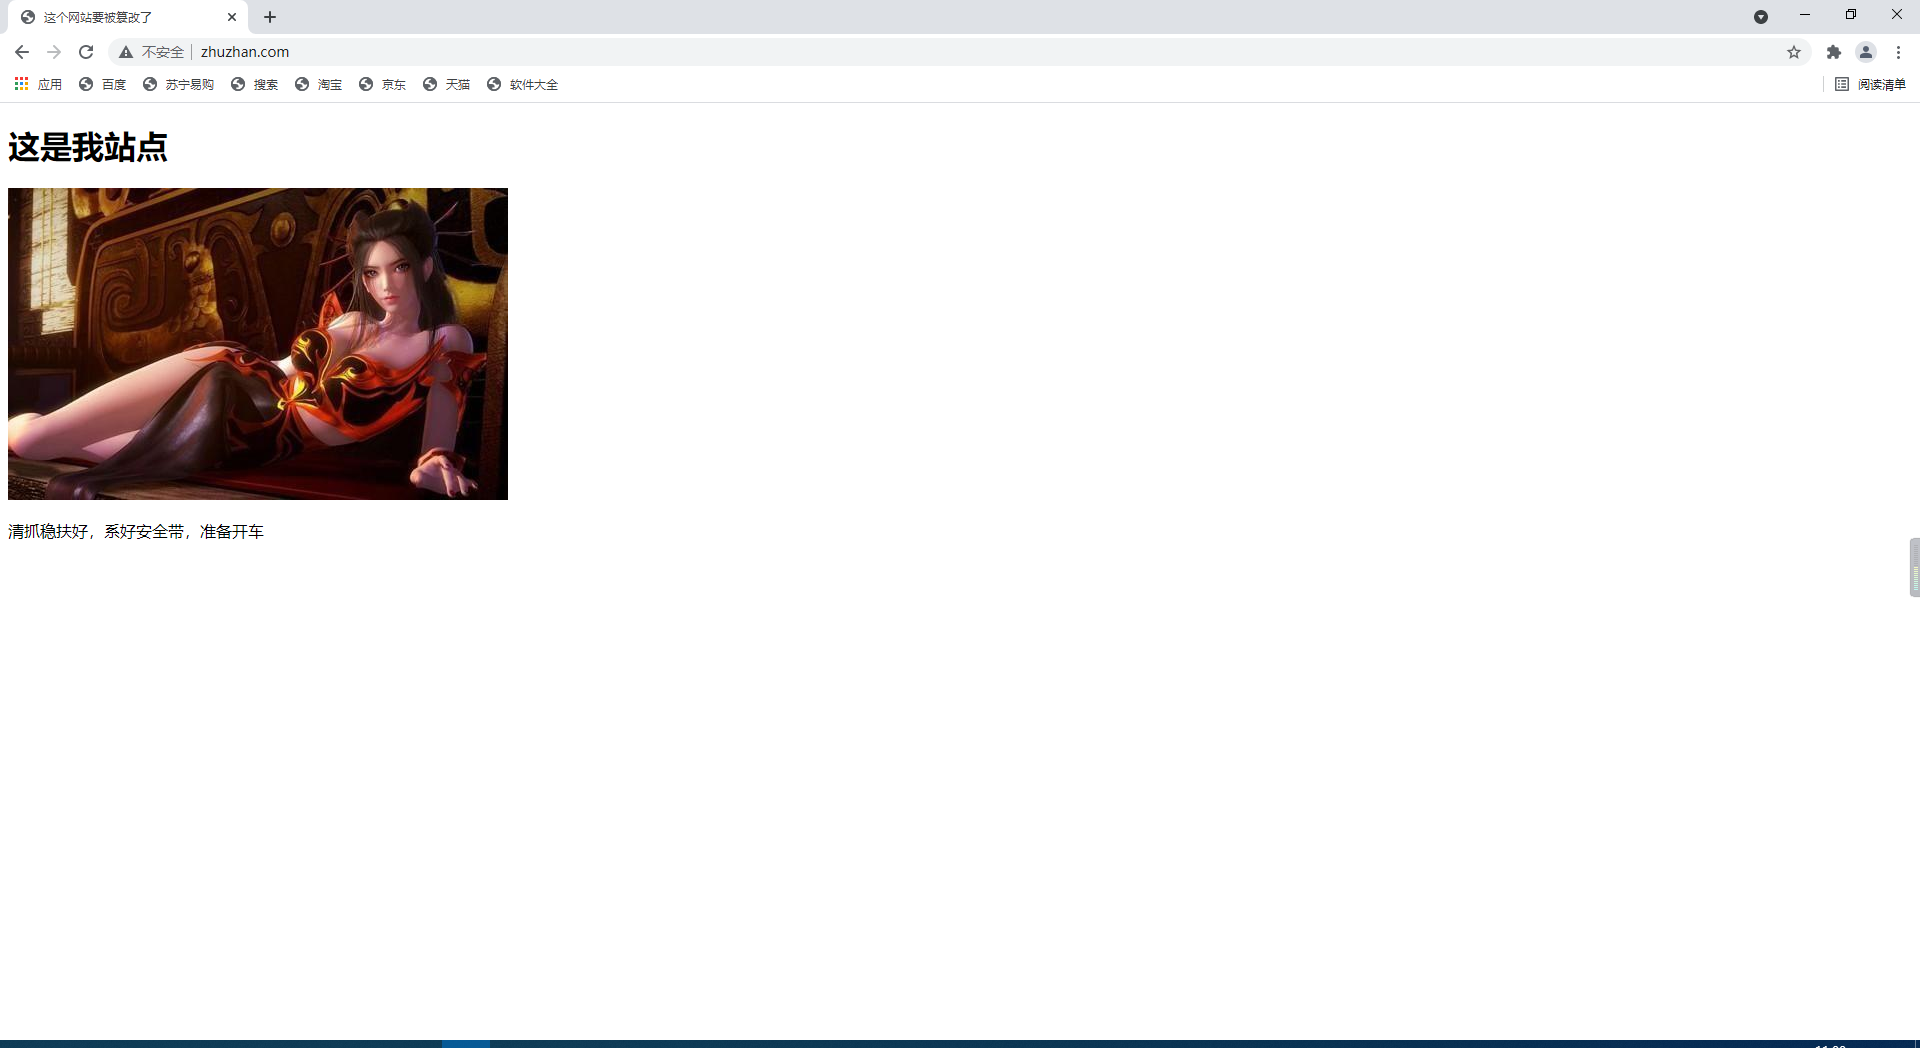
模拟网站被篡改
首先需要一个主站
1.编写nginx配置文件
[root@web01 ~]# vim /etc/nginx/conf.d/zhuzhan.conf
server {
listen 80;
server_name www.zhuzhan.com;
location / {
root /zhuzhan;
index index.html;
}
}
2.创建站点目录,编辑默认页面
[root@web01 ~]# mkdir /zhuzhan
[root@web01 ~]# vim /zhuzhan/index.html
<!DOCTYPE html>
<html lang="zh">
<head>
<meta charset="UTF-8">
<meta http-equiv="X-UA-Compatible" content="IE=edge">
<meta name="viewport" content="width=device-width, initial-scale=1.0">
<title>这个网站要被篡改了</title>
</head>
<body>
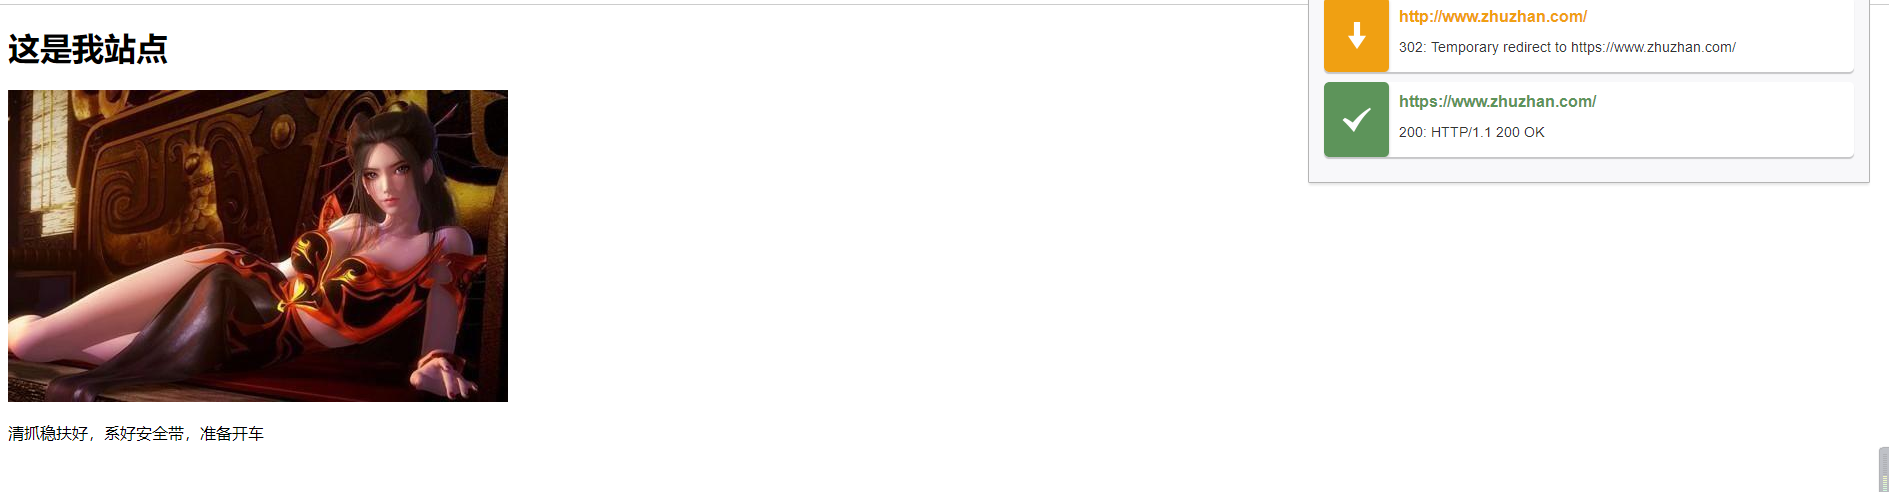
<h1>这是我站点</h1>
<a href="https://imgtu.com/i/fQak5V"><img src="https://z3.ax1x.com/2021/08/08/fQak5V.jpg" alt="fQak5V.jpg" border="0" /></a>
<p>清抓稳扶好,系好安全带,准备开车</p>
</body>
</html>
3.启动nginx服务
[root@web01 ~]# systemctl start nginx
4.访问www.zhuzhan.com
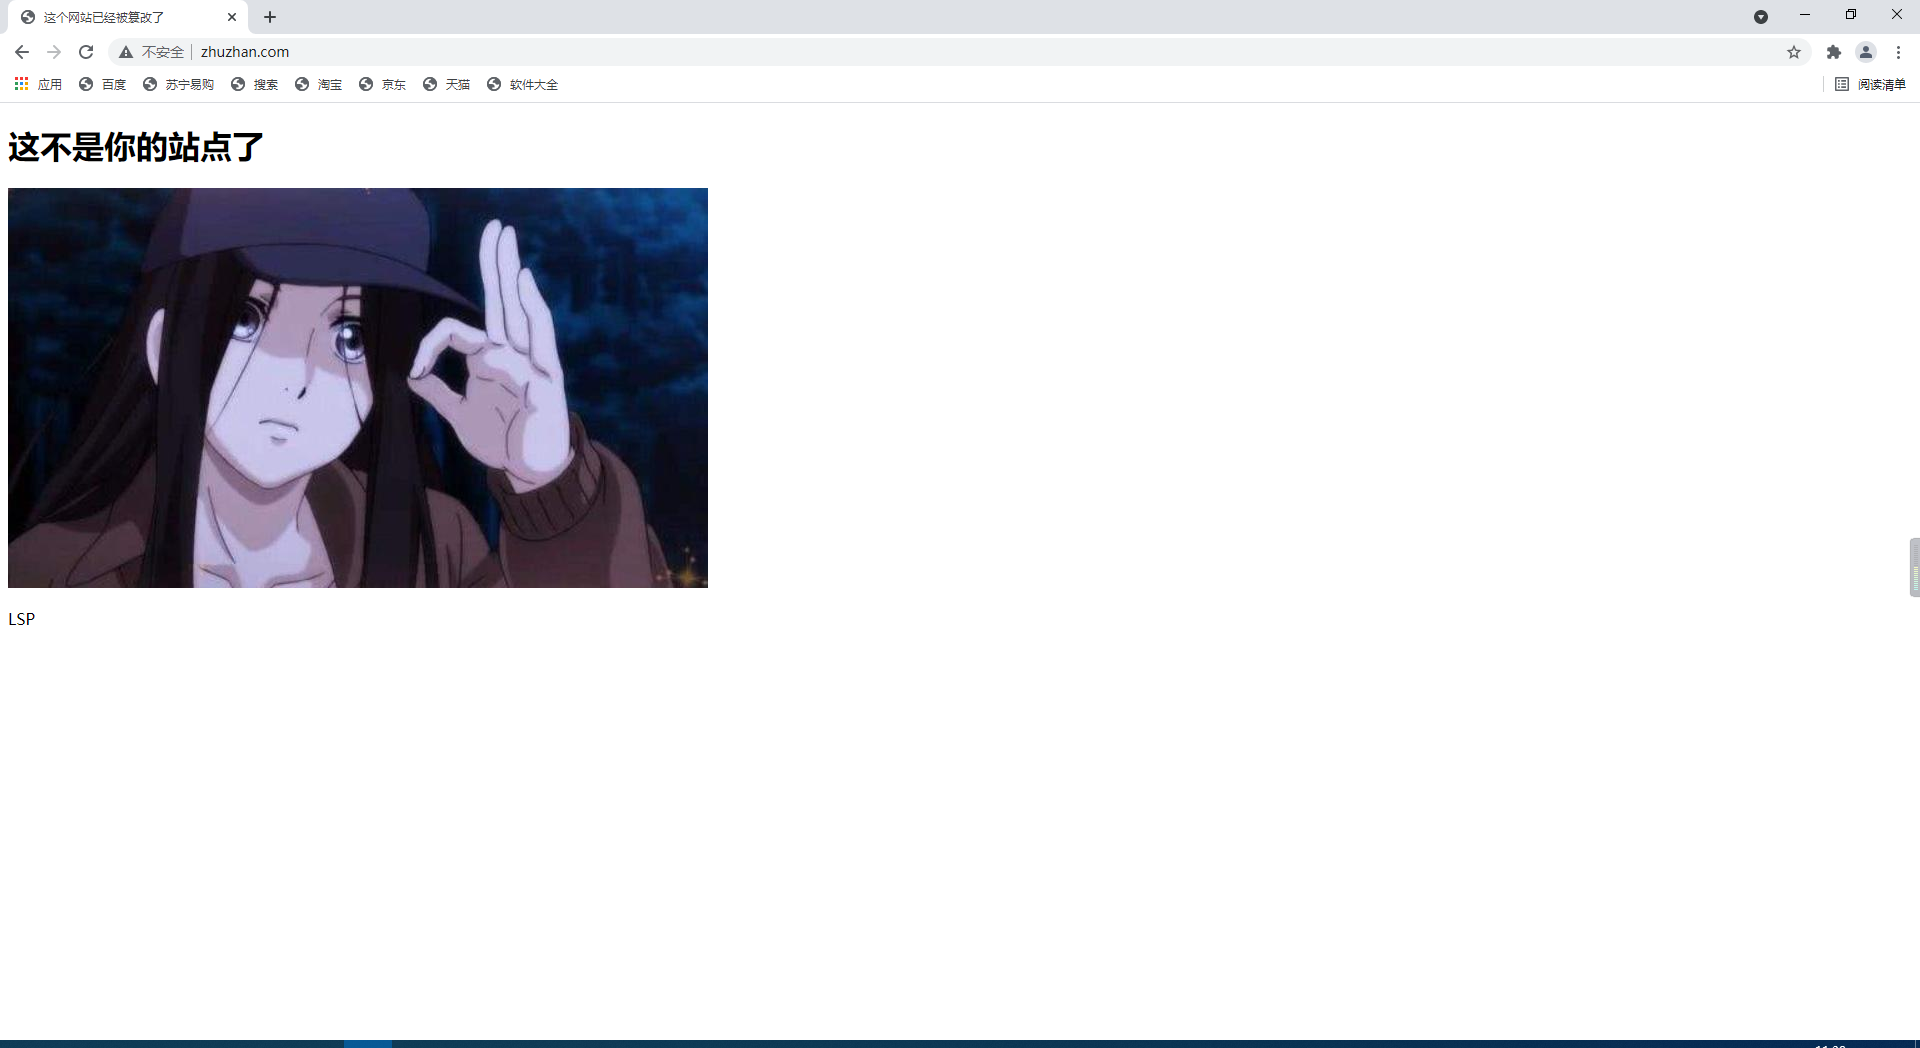
模拟网站篡改
在另一台虚拟机上编写nginx配置
[root@lb01 ~]# vim /etc/nginx/conf.d/cuangai.conf

server {
  listen 80;
  server_name www.zhuzhan.com;

  location / {
    proxy_pass http://172.16.1.7;
    include /etc/nginx/proxy_params;
    sub_filter '<title>这个网站要被篡改了</title>' '<title>这个网站已经被篡改了</title>';
    sub_filter '<h1>这是我站点</h1>' '<h1>这不是你的站点了</h1>';
    sub_filter '<a href="https://imgtu.com/i/fQak5V"><img src="https://z3.ax1x.com/2021/08/08/fQak5V.jpg" alt="fQak5V.jpg" border="0" /></a>' '<a href="https://imgtu.com/i/fQd5md"><img src="https://z3.ax1x.com/2021/08/08/fQd5md.jpg" alt="fQd5md.jpg" border="0" /></a>';
    sub_filter '<p>清抓稳扶好,系好安全带,准备开车</p>' '<p>LSP</p>';
  }
}
访问www.zhuzhan.com查看篡改结果
证书的类型
| 对比 | 域名型 DV | 企业型 OV | 增强型 EV |
|---|---|---|---|
| 绿色地址栏 | 小锁标记+https | 小锁标记+https | 小锁标记+企业名称+https |
| 一般用途 | 个人站点和应用; 简单的https加密需求 | 电子商务站点和应用; 中小型企业站点 | 大型金融平台;大型企业和政府机构站点 |
| 审核内容 | 域名所有权验证 | 全面的企业身份验证; 域名所有权验证 | 最高等级的企业身份验证; 域名所有权验证 |
| 颁发时长 | 10分钟-24小时 | 3-5个工作日 | 5-7个工作日 |
| 单次申请年限 | 1年 | 1-2年 | 1-2年 |
| 赔付保障金 | —— | 125-175万美金 | 150-175万美金 |
证书选择
保护一个域名www
保护五个域名 www images cdn test m
通配符域名 *.zhandian.com
https注意事项
https不支持续费,证书到期需要重新申请并进行替换 https不支持三级域名解析,如 test.m.zhandian.com https
显示绿色,说明整个网站的url都是https的
https显示黄色,因为网站代码中包含http的不安全链接;https显示红色,那么证书是假的或者证书过期。
单台web实现证书
1.查看nginx是否支持ssl证书
[root@web01 ~]# nginx -V
--with-http_ssl_module
2.创建证书的目录
[root@web01 ~]# mkdir /etc/nginx/ssl
3.进入证书目录
[root@web01 ~]# cd /etc/nginx/ssl
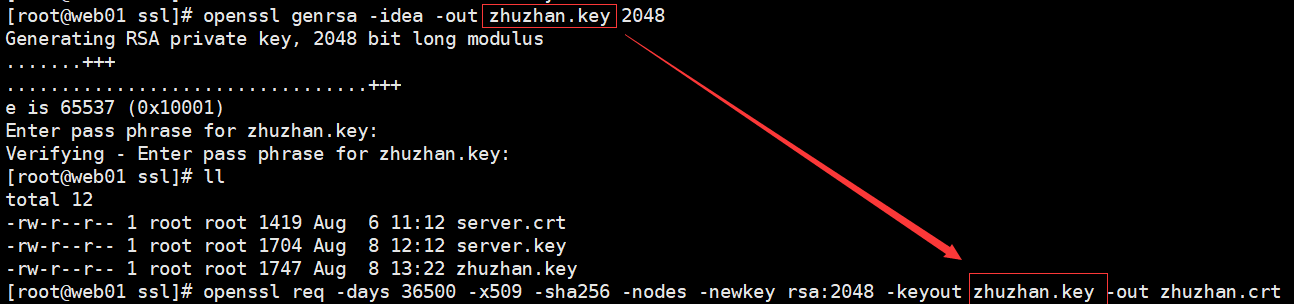
4.生成证书
[root@web01 ssl]# openssl genrsa -idea -out zhuzhan.key 2048
Generating RSA private key, 2048 bit long modulus
.....................................................................+++
..........................................................................................................................................................+++
e is 65537 (0x10001)
Enter pass phrase for zhandian.key:
Verifying - Enter pass phrase for zhandian.key:
5.自签证书
[root@web01 ssl]# openssl req -days 36500 -x509 -sha256 -nodes -newkey rsa:2048 -keyout zhuzhan.key -out zhuzhan.crt
Generating a 2048 bit RSA private key
.................................................................................................................................................+++
...........................+++
writing new private key to 'zhuzhan.key'
-----
You are about to be asked to enter information that will be incorporated
into your certificate request.
What you are about to enter is what is called a Distinguished Name or a DN.
There are quite a few fields but you can leave some blank
For some fields there will be a default value,
If you enter '.', the field will be left blank.
-----
## 国家名,最多2个字符
Country Name (2 letter code) [XX]:CN
## 省全称
State or Province Name (full name) []:Shanghai
## 城市全称
Locality Name (eg, city) [Default City]:Shanghai
## 公司名
Organization Name (eg, company) [Default Company Ltd]:tingqilaijiuniu
## 部门
Organizational Unit Name (eg, section) []:xiuer
## 证书要保护的域名
Common Name (eg, your name or your server's hostname) []:www.zhuzhan.com
## 邮件
Email Address []:123@qq.com
配置ssl证书
[root@web01 ~]# vim /etc/nginx/conf.d/zhuzhan.conf
server {
	listen 443 ssl;
	server_name www.zhuzhan.com;
	root /zhuzhan;
	ssl_certificate /etc/nginx/ssl/zhuzhan.crt;
	ssl_certificate_key /etc/nginx/ssl/zhuzhan.key;
	index index.html;
}
浏览器访问:https://www.zhuzhan.com/

80强转443
[root@web01 ~]# vim /etc/nginx/conf.d/zhuzhan.conf

server {
	listen 80;
	server_name www.zhuzhan.com;

	rewrite (.*) https://$server_name$1 redirect;
}

server {
	listen 443 ssl;
	server_name www.zhuzhan.com;
	root /zhuzhan;
	ssl_certificate /etc/nginx/ssl/zhuzhan.crt;
	ssl_certificate_key /etc/nginx/ssl/zhuzhan.key;
	index index.html;
}
nginx集群实现HTTPS实践
环境准备
| 主机名 | 外网ip | 内网ip | 角色 |
|---|---|---|---|
| lb01 | 10.0.05 | 172.16.1.5 | 负载均衡 |
| web01 | 10.0.0.7 | 172.16.1.7 | web服务器 |
| web02 | 10.0.0.8 | 172.16.1.8 | web服务器 |
部署web
1.部署web01
[root@web01 conf.d]# vim /etc/nginx/conf.d/blog.abc.com.conf
server{
        listen 80;
        server_name blog.abc.com;
        root /code/wordpress;

        location / {
                index index.php inde.html;
                if ( -f $request_filename/index.html ){
                        rewrite (.*) $1/index.html break;
                }
                if ( -f $request_filename/index.php ){
                        rewrite (.*) $1/index.php;
                }
                if ( !-f $request_filename ){
                        rewrite (.*) /index.php;
                }
                if ($http_user_agent ~* "Wget|ApacheBench|webBench|isouSpider|MJ12bot|YoudaoBot|Tomato|bingbot/2.0|compatible"){
                        set $block_user_agent 1;
                }
                if ($block_user_agent = 1){
                        return 403;
                }
        }

        location ~ \.php {
                fastcgi_pass unix:/dev/shm/php71w.sock;
                fastcgi_param SCRIPT_FILENAME $document_root$fastcgi_script_name;
                include /etc/nginx/fastcgi_params;
        }
}

2.部署web02
[root@web02 conf.d]# vim /etc/nginx/conf.d/blog.abc.com.conf
server{
        listen 80;
        server_name blog.abc.com;
        root /code/wordpress;

        location / {
                index index.php inde.html;
                if ( -f $request_filename/index.html ){
                        rewrite (.*) $1/index.html break;
                }
                if ( -f $request_filename/index.php ){
                        rewrite (.*) $1/index.php;
                }
                if ( !-f $request_filename ){
                        rewrite (.*) /index.php;
                }
                if ($http_user_agent ~* "Wget|ApacheBench|webBench|isouSpider|MJ12bot|YoudaoBot|Tomato|bingbot/2.0|compatible"){
                        set $block_user_agent 1;
                }
                if ($block_user_agent = 1){
                        return 403;
                }
        }

        location ~ \.php {
                fastcgi_pass unix:/dev/shm/php71w.sock;
                fastcgi_param SCRIPT_FILENAME $document_root$fastcgi_script_name;
                include /etc/nginx/fastcgi_params;
        }
}

3.检查配置是否错误
nginx -t

4.重新加载配置文件
systemctl reload nginx
部署负载均衡
1.编写配置文件
[root@lb01 ~]# vim /etc/nginx/conf.d/blog.conf

upstream blog_abc_com {
	server 172.16.1.7;
	server 172.16.1.8;
}

server {
	listen 80;
	server_name blog.abc.com;
	rewrite (.*) https://$server_name$request_uri redirect;
}

server {
	listen 443 ssl;
	server_name blog.abc.com;
	ssl_certificate /etc/nginx/ssl/server.crt;
	ssl_certificate_key /etc/nginx/ssl/server.key;
	location / {
		proxy_pass http://blog_abc_com;
		include /etc/nginx/proxy_params;
	}
}

2. 创建证书存放目录
[root@lb01 ~]# mkdir /etc/nginx/ssl/

3.进入证书目录
[root@lb01 ~]# cd /etc/nginx/ssl

4.生成证书
[root@lb01 ssl]# openssl genrsa -idea -out server.key 2048

5.自签证书
[root@web01 ssl]# openssl req -days 36500 -x509 -sha256 -nodes -newkey rsa:2048 -keyout server.key -out server.crt

6.访问blog.abc.com
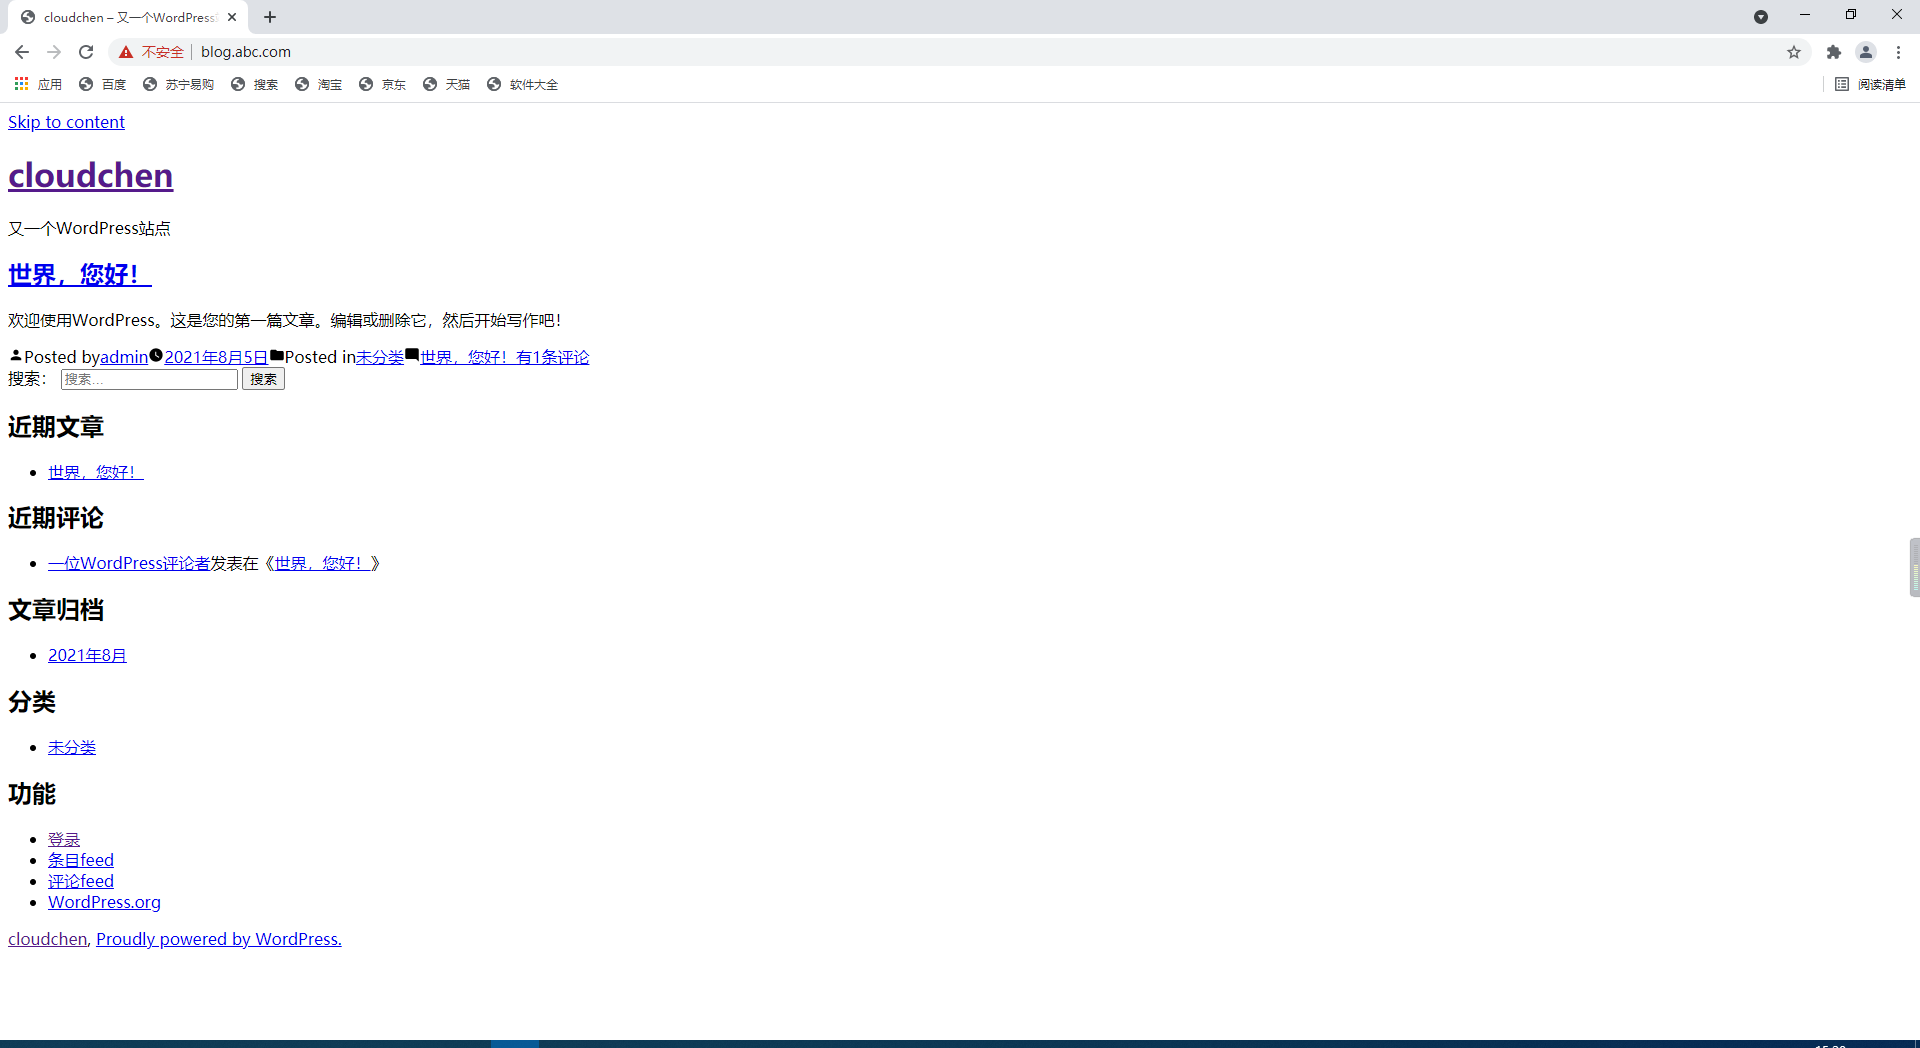
HTTPS导致wordpress破图
原因:前端使用443端口,web使用80端口,PHP程序走的80请求
解决方法:让PHP程序知道,前端使用的是443端口
[root@web01 conf.d]# vim blog.abc.com.conf

location ~ \.php {
                fastcgi_pass unix:/dev/shm/php71w.sock;
                fastcgi_param HTTPS on;
                fastcgi_param SCRIPT_FILENAME $document_root$fastcgi_script_name;
                include /etc/nginx/fastcgi_params;
}

SSL优化参数
#在建立完ssl握手后如果断开连接,在session_timeout时间内再次连接,是不需要再次获取公钥建立握手的,可以服用之前的连接
ssl_session_cache shared:SSL:10m;
#ssl连接断开后的超时时间
ssl_session_timeout 1440m;
#配置加密套接协议
ssl_ciphers ECDHE-RSA-AES128-GCM-SHA256:ECDHE:ECDH:AES:HIGH:!NULL:!aNULL:!MD5:!ADH:!RC4;
#使用TLS版本协议
ssl_protocols TLSv1 TLSv1.1 TLSv1.2;
#nginx决定使用哪些协议与浏览器通信
ssl_prefer_server_ciphers on;
blog配置优化
[root@lb01 conf.d]# cat blog.conf
upstream blog_abc_com {
        server 172.16.1.7;
        server 172.16.1.8;
}
# 防止恶意解析
server {
	listen 80;
	server_name _;
	rewrite (.*) https://blog.abc.com redirect;
}


server {
        listen 80;
        server_name blog.abc.com;

        rewrite (.*) https://$server_name$request_uri redirect;
}

server {
        listen 443 ssl;
        server_name blog.abc.com;
        ssl_certificate   /etc/nginx/ssl/server.crt;
        ssl_certificate_key  /etc/nginx/ssl/server.key;

#在建立完ssl握手后如果断开连接,在session_timeout时间内再次连接,是不需要再次获取公钥建立握手的,可以服用之前的连接
		ssl_session_cache shared:SSL:10m;
#ssl连接断开后的超时时间
		ssl_session_timeout 1440m;
#配置加密套接协议
		ssl_ciphers ECDHE-RSA-AES128-GCM-SHA256:ECDHE:ECDH:AES:HIGH:!NULL:!aNULL:!MD5:!ADH:!RC4;
#使用TLS版本协议
		ssl_protocols TLSv1 TLSv1.1 TLSv1.2;
#nginx决定使用哪些协议与浏览器通信
		ssl_prefer_server_ciphers on;

        location / {
                proxy_pass http://blog_abc_com;
                include /etc/nginx/proxy_params;
        }
}

 浙公网安备 33010602011771号