

Web Service简单demo
最近开发因需求要求需要提供Web Service接口供外部调用,由于之前没有研究过该技术,故查阅资料研究了一番,所以写下来记录一下,方便后续使用。
这个demo采用CXF框架进行开发,后续所提到的Web Service 均由WS所替代。
一、CXF所使用的maven依赖,版本为:
<cxf.version>3.1.4</cxf.version>
<dependency>
            <groupId>org.apache.cxf</groupId>
            <artifactId>cxf-core</artifactId>
            <version>${cxf.version}</version>
        </dependency>
        <dependency>
            <groupId>org.apache.cxf</groupId>
            <artifactId>cxf-rt-transports-http</artifactId>
            <version>${cxf.version}</version>
        </dependency>
        <dependency>
            <groupId>org.apache.cxf</groupId>
            <artifactId>cxf-rt-frontend-jaxws</artifactId>
            <version>${cxf.version}</version>
        </dependency>
二、创建WS接口
import javax.jws.WebMethod;
import javax.jws.WebService;

@WebService
public interface LogServiceWS {

    @WebMethod
    TSLog getLogById(String id);
}
三、实现类
@WebService
public class LogServiceWSImpl implements LogServiceWS {

    @Autowired
    private SystemService systemService;
    public LogServiceWSImpl(){
        System.out.println("LogServiceWSImpl  初始化了。。。。。。。");
    }


    @Override
    public TSLog getLogById(String id) {
        return systemService.getEntity(TSLog.class, id);
    }
}
切记,实现类和接口尽量放在同一个包中,这样可以避免后续生成的WSDL文件有import标签,导致解析麻烦,或者在实现类上配置接口具体位置来解决该问题。
四、接下来配置CXF的配置文件cxf-beans.xml
<?xml version="1.0" encoding="UTF-8"?>
<beans xmlns="http://www.springframework.org/schema/beans"
       xmlns:xsi="http://www.w3.org/2001/XMLSchema-instance"
       xmlns:jaxws="http://cxf.apache.org/jaxws"
       xsi:schemaLocation="http://www.springframework.org/schema/beans
        http://www.springframework.org/schema/beans/spring-beans-4.0.xsd
        http://cxf.apache.org/jaxws
        http://cxf.apache.org/schemas/jaxws.xsd">
<!--  Cxf WebService 服务端示例 -->
<jaxws:endpoint id="userServiceWSImpl" implementor="com.svw.hrssc.webservice.ws.LogServiceWSImpl" address="/log/getLogById"/>
</beans>
implementor:表示WS接口的实现类
address:表示该接口的访问地址
由于使用的CXF为3.0以上版本,所以不需要引入那三个配置文件
<import resource="classpath:META-INF/cxf/cxf.xml"/>
<import resource="classpath:META-INF/cxf/cxf-extension-soap.xml"/>
<import resource="classpath:META-INF/cxf/cxf-servlet.xml"/>
五、接下来配置web.xml将CXF加入到项目启动容器中,项目启动的时候发布WS接口。
首先把cxf-beans.xml文件加入context-param中,项目启动的时候加载CXF配置文件,发布WS接口。
<context-param>
		<param-name>contextConfigLocation</param-name>
		<param-value>
			classpath*:spring-mvc-aop.xml,
			classpath*:spring-mvc.xml,
			classpath*:cxf-beans.xml
		</param-value>
	</context-param>
然后配置org.apache.cxf.transport.servlet.CXFServlet 作用:过滤请求,将符合CXF的请求交给接口处理。
<!--过滤cxf请求-->
	<servlet>
		<servlet-name>cxf</servlet-name>
		<servlet-class>org.apache.cxf.transport.servlet.CXFServlet</servlet-class>
		<load-on-startup>1</load-on-startup>
	</servlet>
	<servlet-mapping>
		<servlet-name>cxf</servlet-name>
		<url-pattern>/ws/services/*</url-pattern>
	</servlet-mapping>
根据配置可知,当有 /ws/services/* 格式的请求都会被过滤,然后交给CXF来处理。
至此,CXF服务端开发完成,可以启动项目访问:http://localhost:8080/sscmanage/ws/services/ 查看接口是否发布完成。

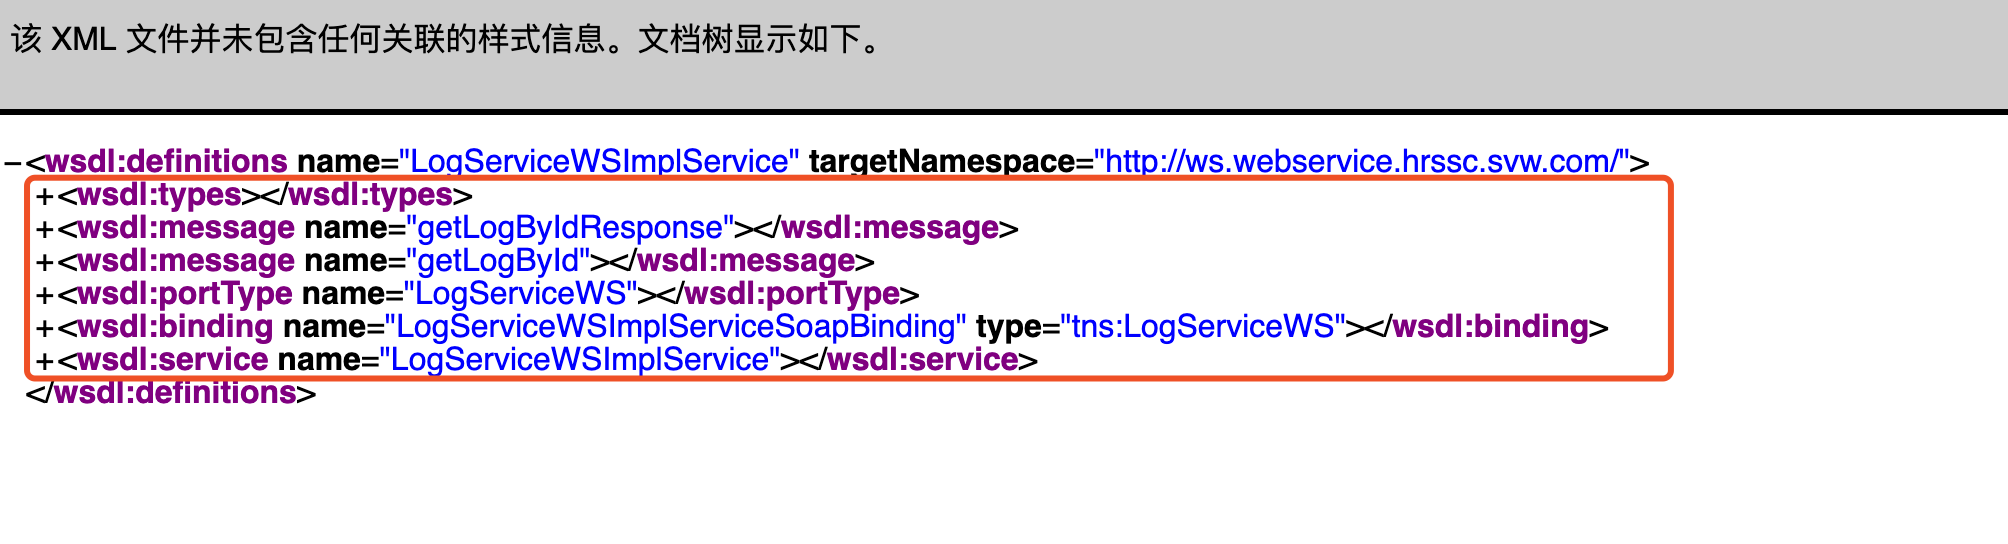
点击WSDL后面的链接,可以看到CXF产生的WSDL协议。标准的WSDL协议包含如下6部分:
六、测试客户端开发
- 根据项目中所引用的cxf版本,自己去下载cxf开发包 apache-cxf-3.1.4.zip
- 解压包至磁盘目录,建议放到开发常用目录
- 配置环境变量:在系统环境变量中创建 环境变量,变量名:CXF_HOME 变量值:D:\software\development\apache-cxf-3.1.4 然后在系统环境变量Path下添加 %CXF_HOME%\bin 即可,然后打开CMD窗口,输入 wsdl2java -v 验证是否正常

- WSDL:开发好接口后运行项目,访问http://localhost:8081/sscmanage/ws/services/log/getLogById?wsdl可以看到所产生的的WSDL文档,这是WS接口的标准规范,具体含义还请自行查资料。
- 然后通过WSDL去生成客户端代码;wsdl2java -d D:\\src -client http://localhost:8081/sscmanage/ws/services/log/getLogById?wsdl 命令解析: wsdl2java是cxf提供的一个根据WSDL文件生成客户端的一个工具 ,因为配置了环境变量,所以可以直接调用,D:\\src 表示在D盘下的src目录下生成代码,http://localhost:8081/sscmanage/ws/services/log/getLogById?wsdl 为运行项目后所产生的的WSDL文档,表示根据该文档生成对应的客户端。
- 生成代码后,将代码拷贝到创建的java项目中,大致目录如图:
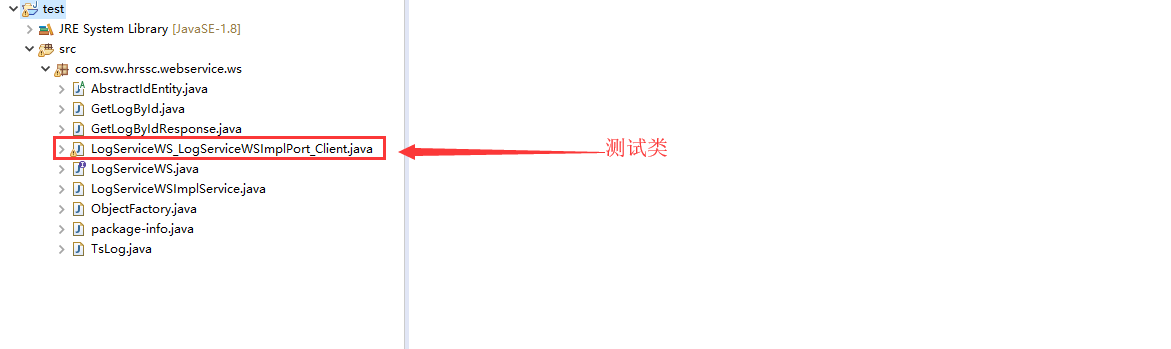
- 打开测试类可以看到

- 至此,WS开发demo完毕,项目中CXF的配置已经配置完成,只需要开发对应的接口、实现类和cxf-bean.xml文件即可,开发完成后要记得测试通过!!!!!

 浙公网安备 33010602011771号