Jenkins Pipeline
一、Jenkinsfile
该Jenkinsfile使用Blue Ocean生成的框架,然后进行了修改
pipeline {
  agent any
  stages {
    stage('Pull Code') {
      parallel {
        stage('Pull Code') {
          when {
            expression {
              env.gitlabBranch== null
            }

          }
          steps {
            git(url: "${GIT_URL}", branch: "${BRANCH}", credentialsId: 'c7b6f5cf-6dfe-4d8d-b0a6-0f22b51ad1b7')
          }
        }

        stage('Pull Code by trigger') {
          when {
            expression {
              env.gitlabBranch!= null
            }

          }
          steps {
            git(credentialsId: 'c7b6f5cf-6dfe-4d8d-b0a6-0f22b51ad1b7', branch: "env.gitlabBranch", url: "${GIT_URL}")
            script {
              BRANCH = env.gitlabBranch
            }

          }
        }

      }
    }

    stage('initConfiguration') {
      steps {
        script {
          println "init parameters"

          CommitMessage = sh(returnStdout: true, script: "git log -1 --pretty=format:'%h : %an %s'").trim()

          CommitID = sh(returnStdout: true, script: "git log -1 --pretty=format:'%h'").trim()

          def curDate = sh(returnStdout: true, script: "date '+%Y%m%d-%H%M%S'").trim()

          TAG = curDate[0..14] + "-" + CommitID + "-" + BRANCH
        }

      }
    }

    stage('Build') {
      steps {
        sh """
           echo "Starting Building"
           ${BUILD_COMMAND}
           """
      }
    }

    stage('Build Dockerimage') {
      steps {
        withCredentials(bindings: [usernamePassword(credentialsId: '6c3882b8-957c-406f-8141-02c8602ed98a', passwordVariable: 'Password', usernameVariable: 'Username')]) {
          sh """
            cd ${Item_DIR}
            docker build -t ${HARBOR_ADDRESS}/${REGISTRY_DIR}/${IMAGE_NAME}:${TAG} .
            docker login -u ${Username} -p ${Password} ${HARBOR_ADDRESS}
            docker push ${HARBOR_ADDRESS}/${REGISTRY_DIR}/${IMAGE_NAME}:${TAG}
            """
        }

      }
    }

    stage('Deploy') {
      steps {
        sh """
          echo "deploy"
          kubectl set image ${DEPLOY_TYPE} -l ${DEPLOY_LABEL} ${CONTAINER_NAME}=${HARBOR_ADDRESS}/${REGISTRY_DIR}/${IMAGE_NAME}:${TAG} -n ${NAMESPACE}
          """
      }
    }

  }
  environment {
    CommitMessage = ''
    CommitID = ''
    TAG = ''
  }
}
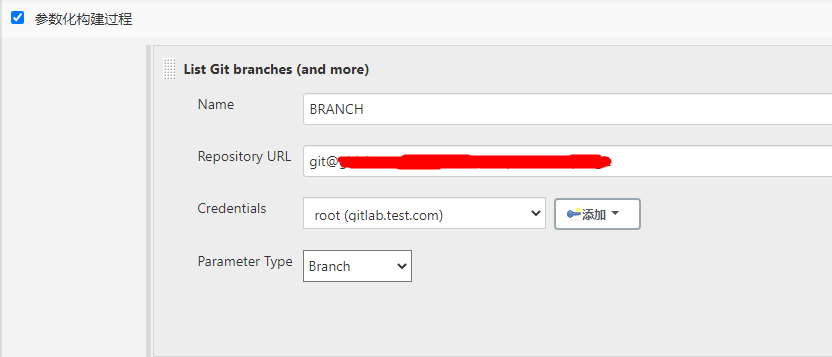
二、Pull Code阶段
- parallel:并发执行,该处是自动触发执行或者手动选择执行
- BRANCH:git的分支参数,可以在Jenkins中设置
- when:执行条件,当env.gitlabBranch为空时,即为手动选择分支执行,反之则是自动触发执行
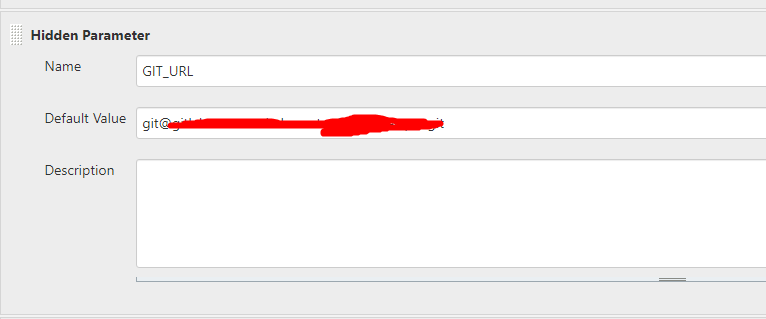
- GIT_URL:代码仓库地址,可以将其直接写入jenkinsfile,或者在Jenkins中设置为参数(Hidden Parameter在Jenkins执行页面不显示)
- CredentialsId:Jenkins中凭证的ID,用于拉去gitlab的代码
三、initConfiguration阶段
初始化一些参数
- CommitMessage/CommitID:获取代码提交时的一些信息,-1获取最近的一条信息
- trim():去掉空格
- TAG:制作docker镜像时的tag
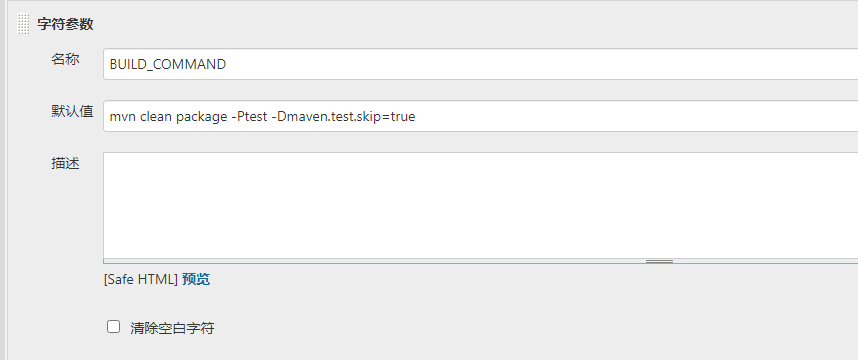
四、Build阶段
将构建命令提取出来,设置成Jenkins参数形式,方便修改
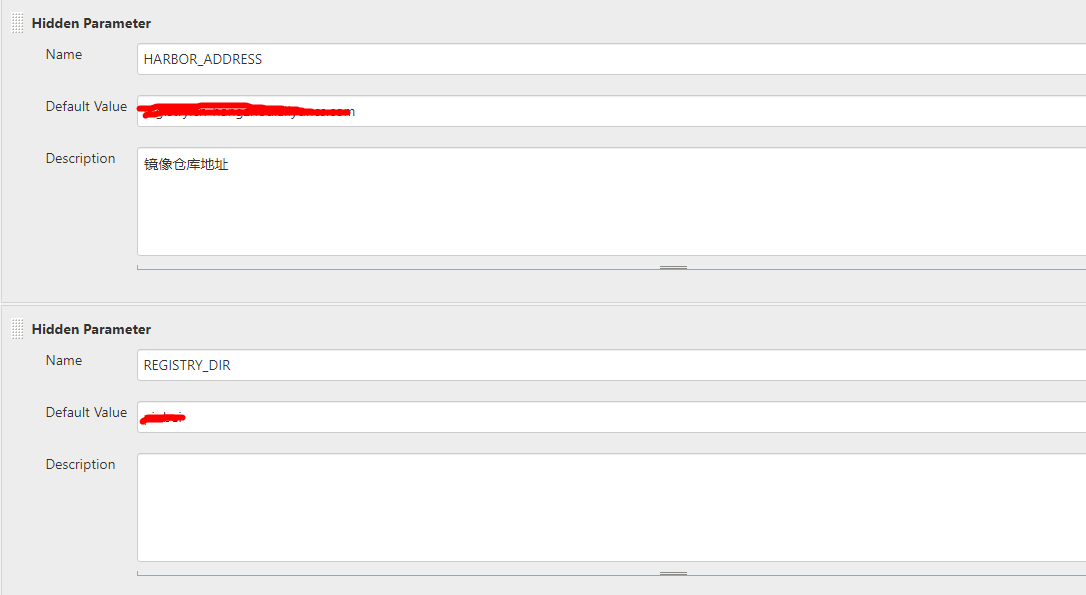
五、Build Dockerimage阶段
- withCredentials:将镜像上传到镜像仓库时,需要镜像仓库的登入信息。可以将登入信息预先写入Jenkins凭证中,通过withCredentials来获取用户名和密码
- Item_DIR:具体的构建项目目录
- HARBOR_ADDRESS/REGISTRY_DIR/IMAGE_NAME:都可以设置成Jenkins参数,
六、Deploy阶段
- DEPLOY_TYPE:Jenkins参数,可以是deployment、statefulSet等
- DEPLOY_LABEL:选择特定的资源label
- CONTAINER_NAME:需要更新资源的镜像名称

 浙公网安备 33010602011771号