
Elastic Stack之 Filebeat 6.7.1版本安装
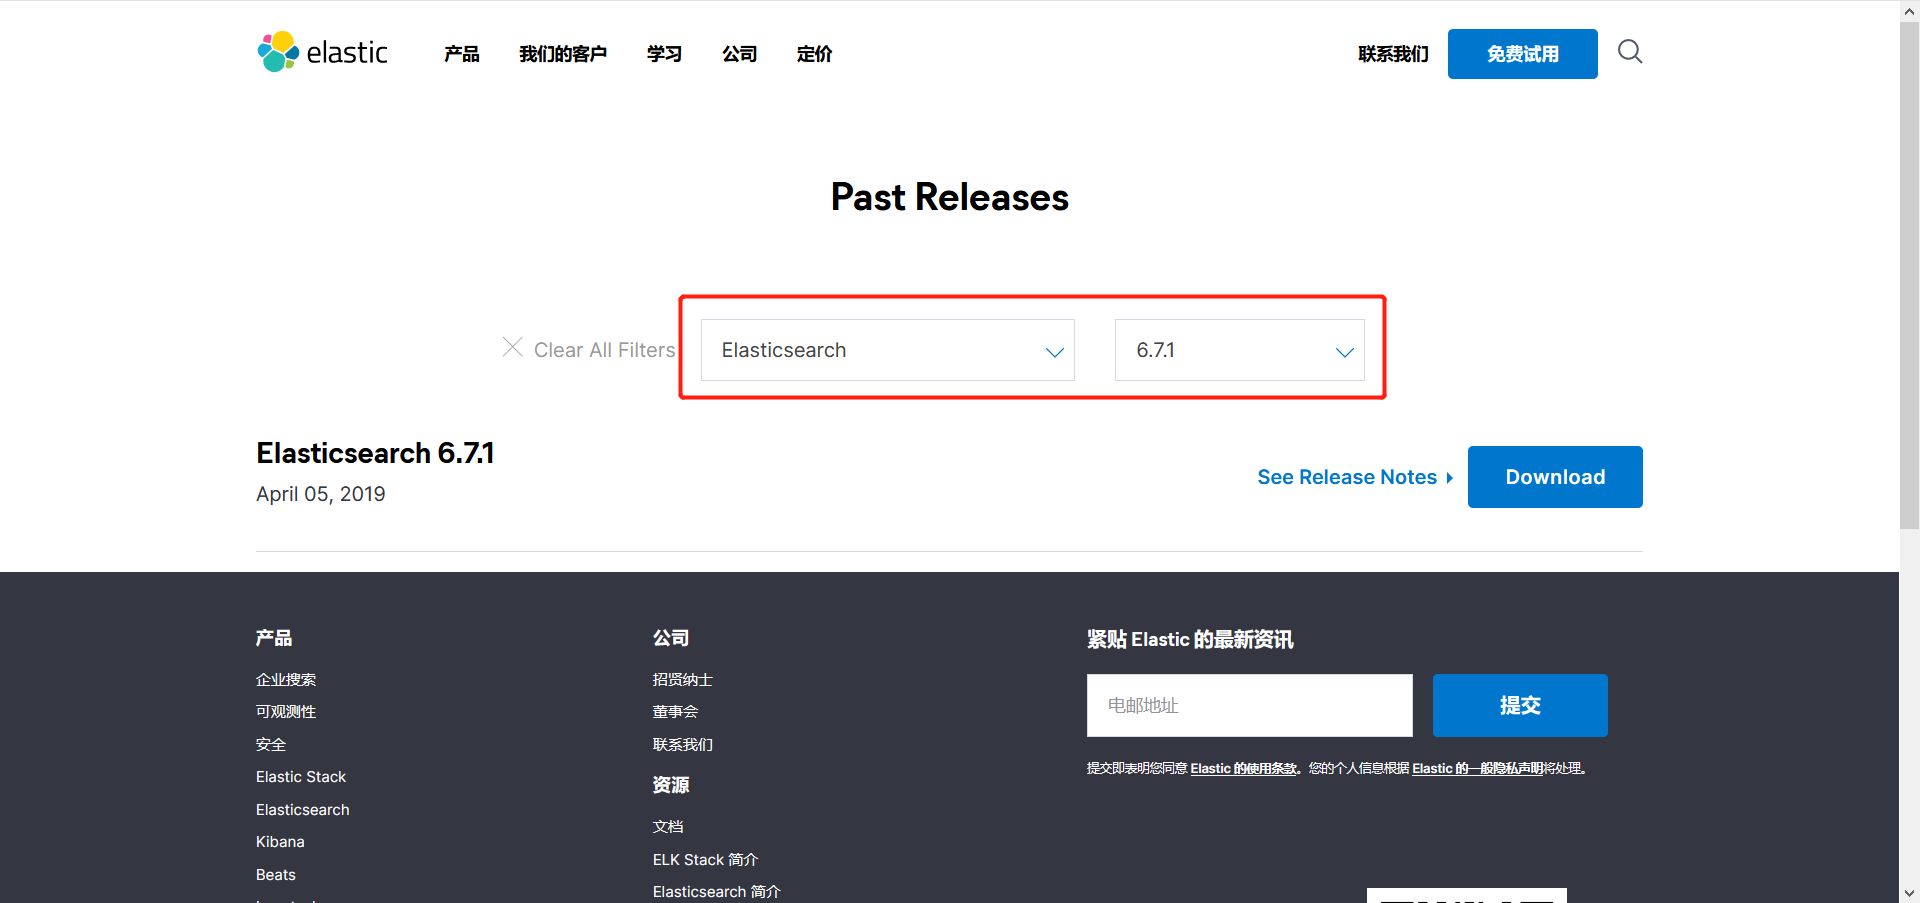
1、截至目前Elasticsearch 版本已经更新到了7.10.1版本了,这里先使用Filebeat 6.7.1版本,给一个下载地址,如下所示:
官方下载地址:https://www.elastic.co/cn/downloads/past-releases#elasticsearch
2、Beats入门学习。Lightweight Data Shipper,轻量级的数据传送者。
1)、Filebeat,主要用于日志文件处理。处理流程:输入Input、处理Filter、输出Output。
2)、Metricbeat,主要用来度量数据。要用来搜集cpu数据,内存数据,磁盘数据,nginx,mysql。
3)、Packetbeat,主要用来处理网络数据,主要针对网络数据,可以抓包进行分析。
4)、Winlogbeat,主要用来处理Windows数据。
5)、Auditbeat。
6)、Heartbeat建康检查。
7)、Functionbeat。
3、Filebeat,主要用于对日志文件进行处理,Filebeat的配置简介:
1)、Filebeat Input配置简介,使用的是yaml语法。input_type目前有两个类型,分别是log日志文件、stdin标准输入。
1 案例如下所示:
2 filebeat.prospectors:
3     -input_type:log  # 日志文件,有两个类型,分别是log日志文件、stdin标准输入。
4         paths:  # 日志文件路径
5             -/var/log/apache/httpd-*.log
6     -input_type:log
7         paths:
8             -/var/log/messages
9             -/var/log/*.log
2)、Filebeat Output配置简介,支持的Output对象包含,Console标准输出、Elasticsearch、Logstash、Kafka、Redis、File文件。
1 案例如下所示:
2 output.elasticsearch:
3     hosts:["http://localhost:9200"]      # 案例一,elasticsearch的连接地址
4     username:"admin"                     # 用户权限认证,需要配置账号密码
5     password:"123456"
6
7 output.console:                          # 案例二,输出到控制台,方便调试。
8     pretty:true                          # 输出做json的格式化。
3)、Filebeat Filter配置简介,Filbeat可以对输入内容进行一定处理的,包含Input时处理、Output前处理,如下所示:
a)、Input 时处理。
Include_lines : 达到某些条件的时候,读入这一行。
exclude_lines :达到某些条件的时候,不读入这一行。
exclude_files:当文件名符合某些条件的时候,不读取这个文件。
b)、output 前处理 --Processor。
drop_event :读取到某一条,满足了某个条件,不输出。
drop_fields :读取到某一条,满足了某个条件,不输出这个字段。
Decode_json_fields :把这条数据里面符合json格式的字段,去做json的解析。
Include_fields :加入一些字段,或者是只想取数据里面的某一些字段。
 1 案例如下所示:
 2 processors:    # 案例一
 3     -drop_event:
 4         when:
 5             regexp: # 正则表达式,当匹配到message字段以DBG开头的进行丢弃。
 6                 message:"^DBG:"
 7
 8 processors: # 案例二
 9     -decode_json_fields: # 将结果处理成正常的json格式的。
10         fields:["inner"]
4)、Filebeat高级使用简介:
Filebeat + Elasticsearch Ingest Node的组合使用,原因是因为Filebeat 缺乏数据转换的能力。
Elasticsearch Ingest Node介绍如下所示,新增的node类型,在数据写入es前对数据进行处理转换,使用的api是pipeline api。
4、将下载好的Filebeat上传到服务器,然后进行解压缩,然后将解压缩后的包授权给elsearch用户,如下所示:
1 [root@k8s-master package]# tar -zxvf filebeat-6.7.1-linux-x86_64.tar.gz -C /usr/local/elastic/
由于使用的是root进行解压缩操作的,将文件拥有者赋予给elsearch自己新建的用户和用户组。
 1 [root@k8s-master elastic]# ll
 2 total 0
 3 drwxr-xr-x  9 elsearch elsearch 155 Jan  9 23:08 elasticsearch-6.7.1
 4 drwxr-xr-x  5 root     root     212 Jan 10 19:27 filebeat-6.7.1-linux-x86_64
 5 drwxr-xr-x 13 elsearch elsearch 263 Jan  9 23:41 kibana-6.7.1-linux-x86_64
 6 [root@k8s-master elastic]# chown -R elsearch:elsearch filebeat-6.7.1-linux-x86_64/
 7 [root@k8s-master elastic]# ll
 8 total 0
 9 drwxr-xr-x  9 elsearch elsearch 155 Jan  9 23:08 elasticsearch-6.7.1
10 drwxr-xr-x  5 elsearch elsearch 212 Jan 10 19:27 filebeat-6.7.1-linux-x86_64
11 drwxr-xr-x 13 elsearch elsearch 263 Jan  9 23:41 kibana-6.7.1-linux-x86_64
12 [root@k8s-master elastic]# cd filebeat-6.7.1-linux-x86_64/
13 [root@k8s-master filebeat-6.7.1-linux-x86_64]# ll
14 total 36700
15 -rw-r--r--  1 elsearch elsearch   146747 Apr  2  2019 fields.yml
16 -rwxr-xr-x  1 elsearch elsearch 37162115 Apr  2  2019 filebeat
17 -rw-r--r--  1 elsearch elsearch    69996 Apr  2  2019 filebeat.reference.yml
18 -rw-------  1 elsearch elsearch     7714 Apr  2  2019 filebeat.yml
19 drwxr-xr-x  4 elsearch elsearch       24 Apr  2  2019 kibana
20 -rw-r--r--  1 elsearch elsearch    13675 Apr  2  2019 LICENSE.txt
21 drwxr-xr-x 21 elsearch elsearch      287 Apr  2  2019 module
22 drwxr-xr-x  2 elsearch elsearch     4096 Apr  2  2019 modules.d
23 -rw-r--r--  1 elsearch elsearch   163444 Apr  2  2019 NOTICE.txt
24 -rw-r--r--  1 elsearch elsearch      802 Apr  2  2019 README.md
25 [root@k8s-master filebeat-6.7.1-linux-x86_64]#
其中,进入到Filebeat的目录,里面的文件介绍,如下所示:
a)、data存储的是filebeat解析过程中会去存日志读到的位置。
b)、filebeat是可执行文件。
c)、module是filebeat支持的模块的功能,filebeat.yml是参考配置。
5、通过一个简单案例,使用Filebeat收集nginx的log日志,通过stdin收集日志。通过console输出结果。
注意:nginx的默认日志路径为/var/log/nginx/。
 1 [elsearch@k8s-master elastic]$ cd filebeat-6.7.1-linux-x86_64/
 2 [elsearch@k8s-master filebeat-6.7.1-linux-x86_64]$ ls
 3 fields.yml  filebeat  filebeat.reference.yml  filebeat.yml  kibana  LICENSE.txt  module  modules.d  NOTICE.txt  README.md
 4 [elsearch@k8s-master filebeat-6.7.1-linux-x86_64]$ ll
 5 total 36700
 6 -rw-r--r--  1 elsearch elsearch   146747 Apr  2  2019 fields.yml
 7 -rwxr-xr-x  1 elsearch elsearch 37162115 Apr  2  2019 filebeat
 8 -rw-r--r--  1 elsearch elsearch    69996 Apr  2  2019 filebeat.reference.yml
 9 -rw-------  1 elsearch elsearch     7714 Apr  2  2019 filebeat.yml
10 drwxr-xr-x  4 elsearch elsearch       24 Apr  2  2019 kibana
11 -rw-r--r--  1 elsearch elsearch    13675 Apr  2  2019 LICENSE.txt
12 drwxr-xr-x 21 elsearch elsearch      287 Apr  2  2019 module
13 drwxr-xr-x  2 elsearch elsearch     4096 Apr  2  2019 modules.d
14 -rw-r--r--  1 elsearch elsearch   163444 Apr  2  2019 NOTICE.txt
15 -rw-r--r--  1 elsearch elsearch      802 Apr  2  2019 README.md
16 [elsearch@k8s-master filebeat-6.7.1-linux-x86_64]$ cp filebeat.yml nginx.yml
17 [elsearch@k8s-master filebeat-6.7.1-linux-x86_64]$ ll
18 total 36708
19 -rw-r--r--  1 elsearch elsearch   146747 Apr  2  2019 fields.yml
20 -rwxr-xr-x  1 elsearch elsearch 37162115 Apr  2  2019 filebeat
21 -rw-r--r--  1 elsearch elsearch    69996 Apr  2  2019 filebeat.reference.yml
22 -rw-------  1 elsearch elsearch     7714 Apr  2  2019 filebeat.yml
23 drwxr-xr-x  4 elsearch elsearch       24 Apr  2  2019 kibana
24 -rw-r--r--  1 elsearch elsearch    13675 Apr  2  2019 LICENSE.txt
25 drwxr-xr-x 21 elsearch elsearch      287 Apr  2  2019 module
26 drwxr-xr-x  2 elsearch elsearch     4096 Apr  2  2019 modules.d
27 -rw-------  1 elsearch elsearch     7714 Jan 10 19:50 nginx.yml
28 -rw-r--r--  1 elsearch elsearch   163444 Apr  2  2019 NOTICE.txt
29 -rw-r--r--  1 elsearch elsearch      802 Apr  2  2019 README.md
30 [elsearch@k8s-master filebeat-6.7.1-linux-x86_64]$
这里我直接复制了一份filebeat.yml文件,然后重命名为nginx.yml。
 1 [elsearch@k8s-master filebeat-6.7.1-linux-x86_64]$
 2 [elsearch@k8s-master filebeat-6.7.1-linux-x86_64]$ head -n 10 /var/log/nginx/access.log
 3 192.168.110.1 - - [21/Jul/2019:21:52:34 +0800] "GET / HTTP/1.1" 200 612 "-" "Mozilla/5.0 (Windows NT 10.0; WOW64) AppleWebKit/537.36 (KHTML, like Gecko) Chrome/74.0.3729.131 Safari/537.36"
 4 192.168.110.1 - - [21/Jul/2019:21:52:34 +0800] "GET /favicon.ico HTTP/1.1" 404 570 "http://192.168.110.133/" "Mozilla/5.0 (Windows NT 10.0; WOW64) AppleWebKit/537.36 (KHTML, like Gecko) Chrome/74.0.3729.131 Safari/537.36"
 5 192.168.110.33 - - [10/Jan/2021:19:46:04 +0800] "GET / HTTP/1.1" 200 612 "-" "Mozilla/5.0 (Windows NT 10.0; WOW64) AppleWebKit/537.36 (KHTML, like Gecko) Chrome/87.0.4280.66 Safari/537.36"
 6 192.168.110.33 - - [10/Jan/2021:19:46:04 +0800] "GET /favicon.ico HTTP/1.1" 404 570 "http://192.168.110.133/" "Mozilla/5.0 (Windows NT 10.0; WOW64) AppleWebKit/537.36 (KHTML, like Gecko) Chrome/87.0.4280.66 Safari/537.36"
 7 192.168.110.33 - - [10/Jan/2021:19:46:23 +0800] "GET / HTTP/1.1" 304 0 "-" "Mozilla/5.0 (Windows NT 10.0; WOW64) AppleWebKit/537.36 (KHTML, like Gecko) Chrome/87.0.4280.66 Safari/537.36"
 8 192.168.110.33 - - [10/Jan/2021:19:46:23 +0800] "GET / HTTP/1.1" 304 0 "-" "Mozilla/5.0 (Windows NT 10.0; WOW64) AppleWebKit/537.36 (KHTML, like Gecko) Chrome/87.0.4280.66 Safari/537.36"
 9 192.168.110.33 - - [10/Jan/2021:19:46:23 +0800] "GET / HTTP/1.1" 304 0 "-" "Mozilla/5.0 (Windows NT 10.0; WOW64) AppleWebKit/537.36 (KHTML, like Gecko) Chrome/87.0.4280.66 Safari/537.36"
10 192.168.110.33 - - [10/Jan/2021:19:46:50 +0800] "GET / HTTP/1.1" 304 0 "-" "Mozilla/5.0 (Windows NT 10.0; WOW64) AppleWebKit/537.36 (KHTML, like Gecko) Chrome/87.0.4280.66 Safari/537.36"
11 192.168.110.33 - - [10/Jan/2021:19:46:50 +0800] "GET / HTTP/1.1" 304 0 "-" "Mozilla/5.0 (Windows NT 10.0; WOW64) AppleWebKit/537.36 (KHTML, like Gecko) Chrome/87.0.4280.66 Safari/537.36"
12 192.168.110.33 - - [10/Jan/2021:19:46:51 +0800] "GET / HTTP/1.1" 304 0 "-" "Mozilla/5.0 (Windows NT 10.0; WOW64) AppleWebKit/537.36 (KHTML, like Gecko) Chrome/87.0.4280.66 Safari/537.36"
13 [elsearch@k8s-master filebeat-6.7.1-linux-x86_64]$
14 [elsearch@k8s-master filebeat-6.7.1-linux-x86_64]$ ls
15 fields.yml  filebeat  filebeat.reference.yml  filebeat.yml  kibana  LICENSE.txt  module  modules.d  nginx.yml  NOTICE.txt  README.md
16 [elsearch@k8s-master filebeat-6.7.1-linux-x86_64]$ vim nginx.yml
17 [elsearch@k8s-master filebeat-6.7.1-linux-x86_64]$ vim nginx.yml
18 [elsearch@k8s-master filebeat-6.7.1-linux-x86_64]$ head -n 2 /var/log/nginx/access.log | ./filebeat -e -c nginx.yml
运行之后,可以看到,nginx的日志,已经在控制台进行输出了,如下所示:
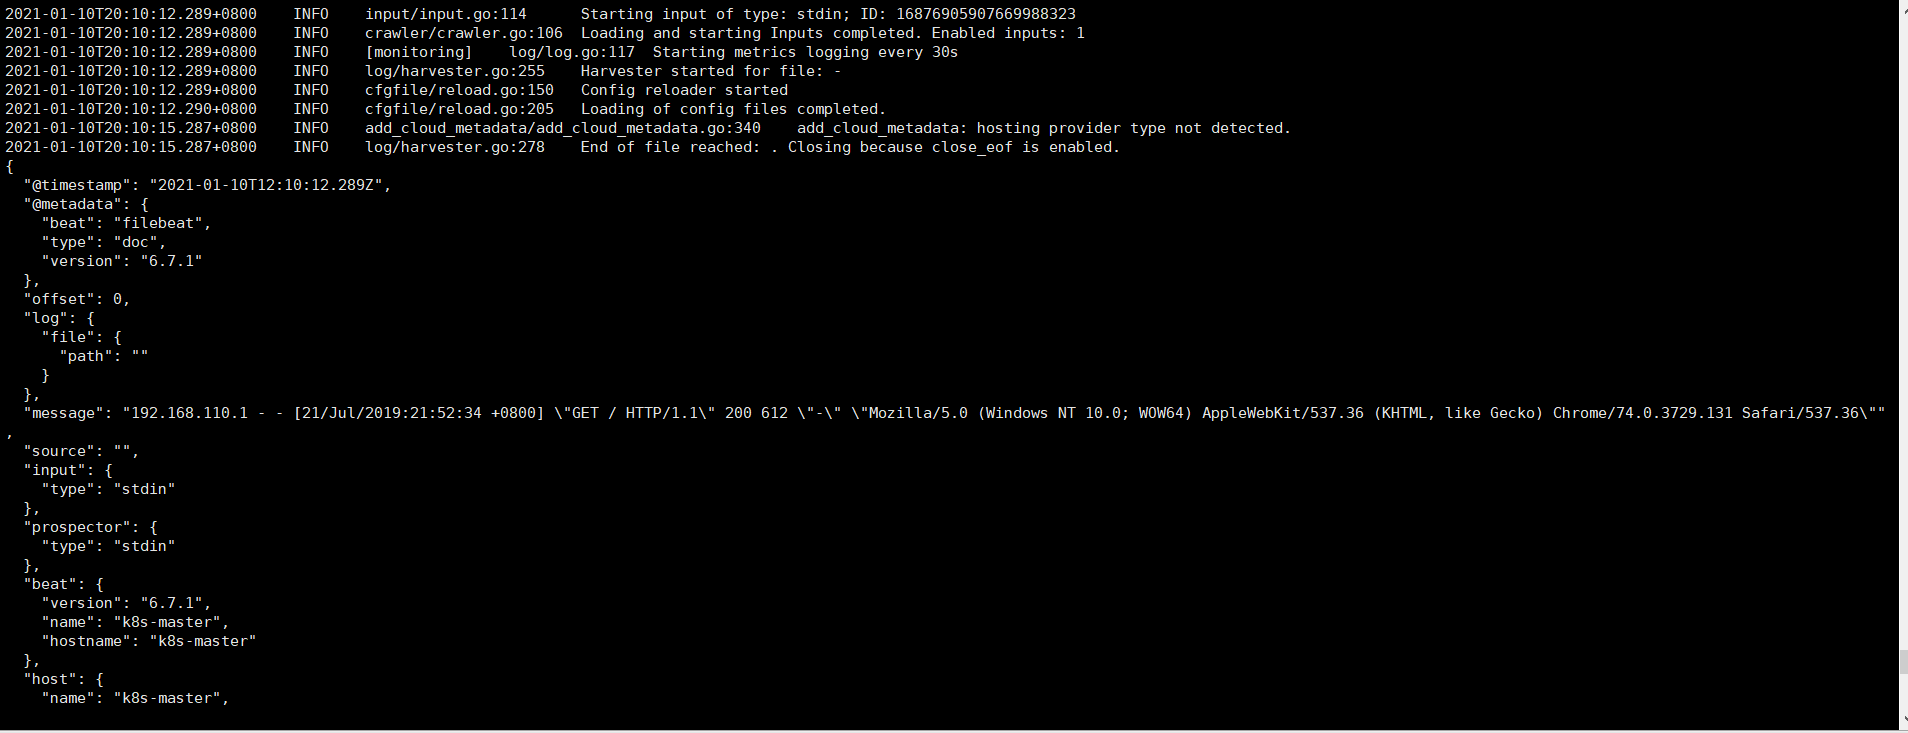
其中,nginx.yml的配置如下所示:
  1 [elsearch@k8s-master filebeat-6.7.1-linux-x86_64]$ cat nginx.yml
  2 ###################### Filebeat Configuration Example #########################
  3
  4 # This file is an example configuration file highlighting only the most common
  5 # options. The filebeat.reference.yml file from the same directory contains all the
  6 # supported options with more comments. You can use it as a reference.
  7 #
  8 # You can find the full configuration reference here:
  9 # https://www.elastic.co/guide/en/beats/filebeat/index.html
 10
 11 # For more available modules and options, please see the filebeat.reference.yml sample
 12 # configuration file.
 13
 14 #=========================== Filebeat inputs =============================
 15
 16 filebeat.inputs:
 17
 18 # Each - is an input. Most options can be set at the input level, so
 19 # you can use different inputs for various configurations.
 20 # Below are the input specific configurations.
 21
 22 - type: stdin
 23
 24   # Change to true to enable this input configuration.
 25   # enabled: false
 26
 27   # Paths that should be crawled and fetched. Glob based paths.
 28   # paths:
 29   #  - /var/log/*.log
 30     #- c:\programdata\elasticsearch\logs\*
 31
 32   # Exclude lines. A list of regular expressions to match. It drops the lines that are
 33   # matching any regular expression from the list.
 34   #exclude_lines: ['^DBG']
 35
 36   # Include lines. A list of regular expressions to match. It exports the lines that are
 37   # matching any regular expression from the list.
 38   #include_lines: ['^ERR', '^WARN']
 39
 40   # Exclude files. A list of regular expressions to match. Filebeat drops the files that
 41   # are matching any regular expression from the list. By default, no files are dropped.
 42   #exclude_files: ['.gz$']
 43
 44   # Optional additional fields. These fields can be freely picked
 45   # to add additional information to the crawled log files for filtering
 46   #fields:
 47   #  level: debug
 48   #  review: 1
 49
 50   ### Multiline options
 51
 52   # Multiline can be used for log messages spanning multiple lines. This is common
 53   # for Java Stack Traces or C-Line Continuation
 54
 55   # The regexp Pattern that has to be matched. The example pattern matches all lines starting with [
 56   #multiline.pattern: ^\[
 57
 58   # Defines if the pattern set under pattern should be negated or not. Default is false.
 59   #multiline.negate: false
 60
 61   # Match can be set to "after" or "before". It is used to define if lines should be append to a pattern
 62   # that was (not) matched before or after or as long as a pattern is not matched based on negate.
 63   # Note: After is the equivalent to previous and before is the equivalent to to next in Logstash
 64   #multiline.match: after
 65
 66
 67 #============================= Filebeat modules ===============================
 68
 69 filebeat.config.modules:
 70   # Glob pattern for configuration loading
 71   path: ${path.config}/modules.d/*.yml
 72
 73   # Set to true to enable config reloading
 74   reload.enabled: false
 75
 76   # Period on which files under path should be checked for changes
 77   #reload.period: 10s
 78
 79 #==================== Elasticsearch template setting ==========================
 80
 81 setup.template.settings:
 82   index.number_of_shards: 3
 83   #index.codec: best_compression
 84   #_source.enabled: false
 85
 86 #================================ General =====================================
 87
 88 # The name of the shipper that publishes the network data. It can be used to group
 89 # all the transactions sent by a single shipper in the web interface.
 90 #name:
 91
 92 # The tags of the shipper are included in their own field with each
 93 # transaction published.
 94 #tags: ["service-X", "web-tier"]
 95
 96 # Optional fields that you can specify to add additional information to the
 97 # output.
 98 #fields:
 99 #  env: staging
100
101 #================================ Outputs =====================================
102
103 # Configure what output to use when sending the data collected by the beat.
104
105 #-------------------------- Elasticsearch output ------------------------------
106 output.console:
107   pretty: true
108   # Array of hosts to connect to.
109   # hosts: ["192.168.110.133:9200"]
110
111   # Enabled ilm (beta) to use index lifecycle management instead daily indices.
112   #ilm.enabled: false
113
114   # Optional protocol and basic auth credentials.
115   #protocol: "https"
116   #username: "elastic"
117   #password: "changeme"
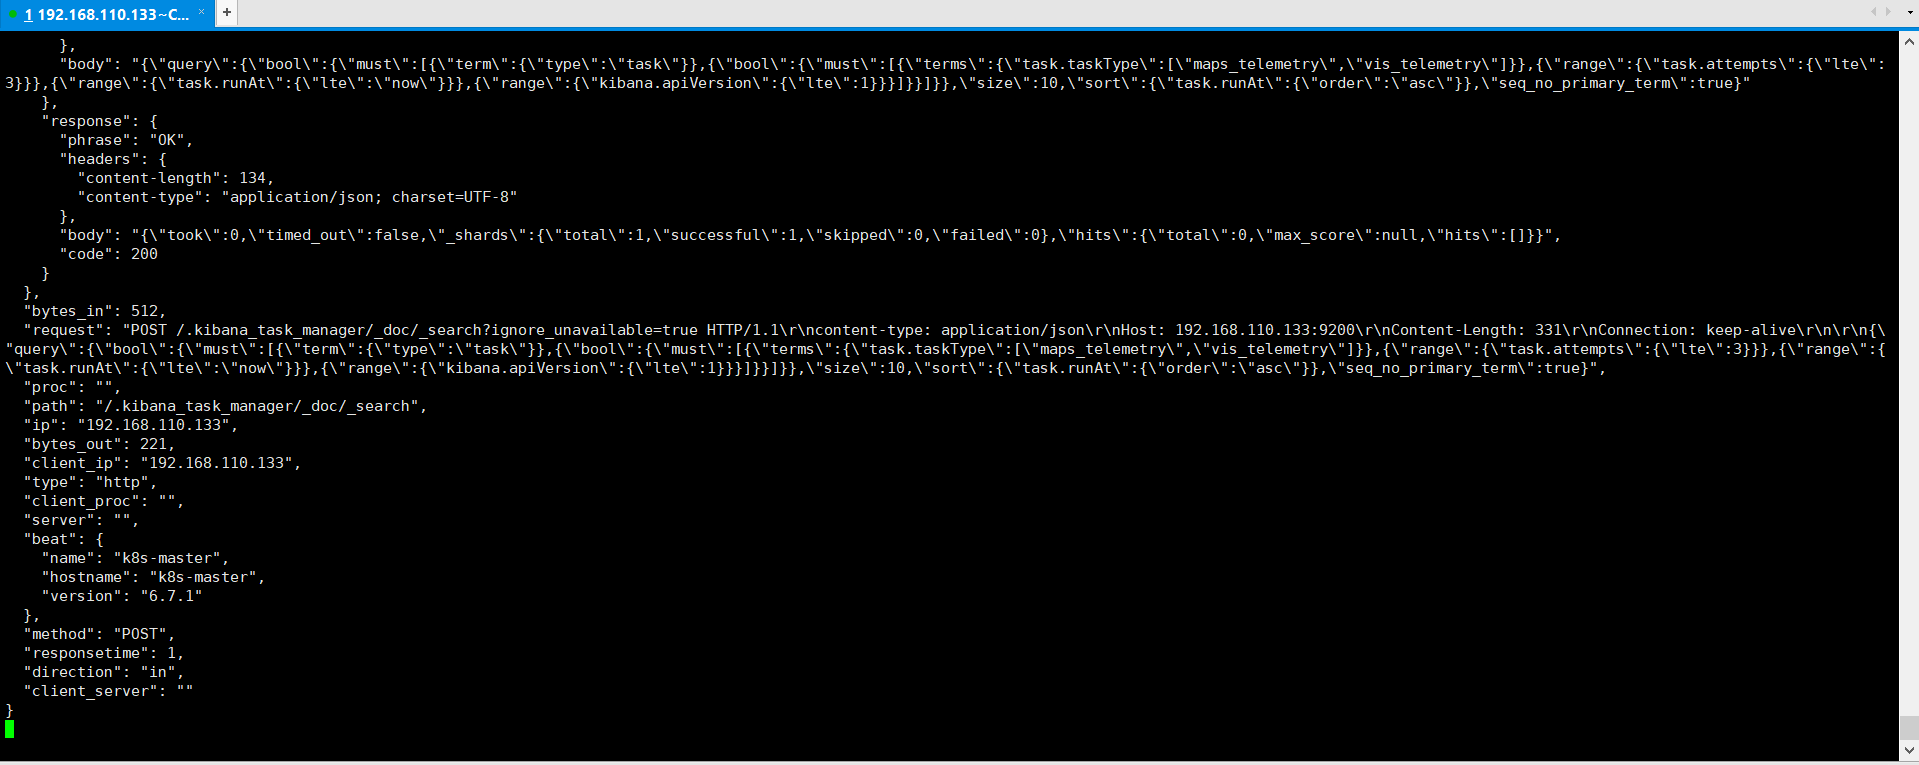
6、Packetbeat简介,可以实时抓取网络包,自动解析应用层协议(ICMP、DNS、HTTP、Mysql、Redis等等),Wireshark作为抓包工具,而Packetbeat作为轻量级的抓包工具。
Packetbeat解析http协议,比如解析elasticsearch http请求,如下所示:
1 packetbeat.interfaces.device:any    # 指定网络的网卡,any指定所有网卡
2 packetbeat.protocols.http: ports: [9200]    # 抓http协议的,端口是9200
3 send_request: true    # 记录http请求的request内容,默认是false
4 include_body_for: ["application/json","x-www-form-urlencoded"]    # 设置两种格式的数据都可以进行记录
5 output.console:
6     pretty: true    # 标准控制台输出
将packetbeat下载好上传到服务器进行解压缩,然后将权限授予elsearch自己创建的用户即可:
1 [root@k8s-master package]# tar -zxvf packetbeat-6.7.1-linux-x86_64.tar.gz -C /usr/local/elastic/
然后将权限授予elsearch用户,如下所示:
 1 [root@k8s-master elastic]# ll
 2 total 0
 3 drwxr-xr-x  9 elsearch elsearch 155 Jan  9 23:08 elasticsearch-6.7.1
 4 drwxr-xr-x  6 elsearch elsearch 241 Jan 10 20:05 filebeat-6.7.1-linux-x86_64
 5 drwxr-xr-x 13 elsearch elsearch 263 Jan  9 23:41 kibana-6.7.1-linux-x86_64
 6 drwxr-xr-x 13 elsearch elsearch 267 Jan 10 21:15 logstash-6.7.1
 7 drwxr-xr-x  3 root     root     187 Jan 10 22:50 packetbeat-6.7.1-linux-x86_64
 8 [root@k8s-master elastic]# chown -R elsearch:elsearch packetbeat-6.7.1-linux-x86_64/
 9 [root@k8s-master elastic]# ll
10 total 0
11 drwxr-xr-x  9 elsearch elsearch 155 Jan  9 23:08 elasticsearch-6.7.1
12 drwxr-xr-x  6 elsearch elsearch 241 Jan 10 20:05 filebeat-6.7.1-linux-x86_64
13 drwxr-xr-x 13 elsearch elsearch 263 Jan  9 23:41 kibana-6.7.1-linux-x86_64
14 drwxr-xr-x 13 elsearch elsearch 267 Jan 10 21:15 logstash-6.7.1
15 drwxr-xr-x  3 elsearch elsearch 187 Jan 10 22:50 packetbeat-6.7.1-linux-x86_64
16 [root@k8s-master elastic]#
Packetbeat运行命令:sudo ./packetbeat -e -c es.yml -strict.perms=false,抓包时候需要使用root权限,-strict.perms=false不再检查配置文件es.yml的权限,方便运行。
复制一个packetbeat.yml为es.yml,然后修改成,如下所示:
 1 #################### Packetbeat Configuration Example #########################
 2
 3 # This file is an example configuration file highlighting only the most common
 4 # options. The packetbeat.full.yml file from the same directory contains all the
 5 # supported options with more comments. You can use it as a reference.
 6 #
 7 # You can find the full configuration reference here:
 8 # https://www.elastic.co/guide/en/beats/packetbeat/index.html
 9
10 #============================== Network device ================================
11
12 # Select the network interface to sniff the data. On Linux, you can use the
13 # "any" keyword to sniff on all connected interfaces.
14 packetbeat.interfaces.device: any
15
16 packetbeat.protocols.http:
17   # Configure the ports where to listen for HTTP traffic. You can disable
18   # the HTTP protocol by commenting out the list of ports.
19   ports: [9200]
20   send_request: true
21   include_body_for: ["application/json", "x-www-form-urlencoded"]
22
23
24 #================================ Outputs =====================================
25
26 # Configure what outputs to use when sending the data collected by the beat.
27 # Multiple outputs may be used.
28
29 #-------------------------- Elasticsearch output ------------------------------
30 #output.elasticsearch:
31   # Array of hosts to connect to.
32   #  hosts: ["localhost:9200"]
33
34   # Optional protocol and basic auth credentials.
35   #protocol: "https"
36   #username: "elastic"
37   #password: "changeme"
38
39 output.console:
40     pretty: true
41
42 #================================ Logging =====================================
43
44 # Sets log level. The default log level is info.
45 # Available log levels are: critical, error, warning, info, debug
46 #logging.level: debug
47
48 # At debug level, you can selectively enable logging only for some components.
49 # To enable all selectors use ["*"]. Examples of other selectors are "beat",
50 # "publish", "service".
51 #logging.selectors: ["*"]
运行启动命令,如果报下面的错误,需要将elsearch用户加到配置文件中,如下所示:
1 [elsearch@k8s-master packetbeat-6.7.1-linux-x86_64]$ sudo ./packetbeat -e -c es.yml -strict.perms=false
2 [sudo] password for elsearch:
3 elsearch is not in the sudoers file.  This incident will be reported.
4 [elsearch@k8s-master packetbeat-6.7.1-linux-x86_64]$
解决方法,如下所示:
1 [elsearch@k8s-master packetbeat-6.7.1-linux-x86_64]$ su root
2 Password:
3 [root@k8s-master packetbeat-6.7.1-linux-x86_64]# chmod u+w /etc/sudoers
4 [root@k8s-master packetbeat-6.7.1-linux-x86_64]# vi /etc/sudoers
5 [root@k8s-master packetbeat-6.7.1-linux-x86_64]# vim /etc/sudoers
6 [root@k8s-master packetbeat-6.7.1-linux-x86_64]# chmod u-w /etc/sudoers
7 [root@k8s-master packetbeat-6.7.1-linux-x86_64]#
8 [root@k8s-master packetbeat-6.7.1-linux-x86_64]#
解决方案,步骤:
第一步,切换到root用户下: su root
第二步,添加sudo文件的写权限,命令是: chmod u+w /etc/sudoers
第三步,编辑sudoers文件: vim /etc/sudoers,找到这行 root ALL=(ALL) ALL,在他下面添加xxx ALL=(ALL) ALL (这里的xxx是你的用户名)。这里说下你可以sudoers添加下面四行中任意一条。
elsearch ALL=(ALL) ALL 第一行:允许用户elsearch执行sudo命令(需要输入密码)。
%elsearch ALL=(ALL) ALL 第二行:允许用户组elsearch里面的用户执行sudo命令(需要输入密码)。
elsearch ALL=(ALL) NOPASSWD: ALL 第三行:允许用户elsearch执行sudo命令,并且在执行的时候不输入密码。
%elsearch ALL=(ALL) NOPASSWD: ALL 第四行:允许用户组elsearch里面的用户执行sudo命令,并且在执行的时候不输入密码。
第四步。撤销sudoers文件写权限,命令: chmod u-w /etc/sudoers,这样普通用户就可以使用sudo了。


 浙公网安备 33010602011771号