
Linux 上安装 PostgreSQL
可以参考:https://www.cnblogs.com/freeweb/p/8006639.html#top
https://www.cnblogs.com/EasonJim/p/9057867.html
我这里使用的rpm方式,参考链接使用的是tar.gz的方式,看个人需求的吧,没有网络可以使用tar.gz下载好进行安装。
1、Linux查看版本当前操作系统发行信:cat /etc/centos-release。
1 [root@slaver1 ~]# cat /etc/centos-release
2 CentOS Linux release 7.7.1908 (Core)
3 [root@slaver1 ~]#
2、Linux查看版本当前操作系统内核信息:uname -a。
1 [root@slaver1 ~]# uname -a
2 Linux slaver1 3.10.0-957.el7.x86_64 #1 SMP Thu Nov 8 23:39:32 UTC 2018 x86_64 x86_64 x86_64 GNU/Linux
3 [root@slaver1 ~]#
3、PostgreSQL官网https://www.postgresql.org/
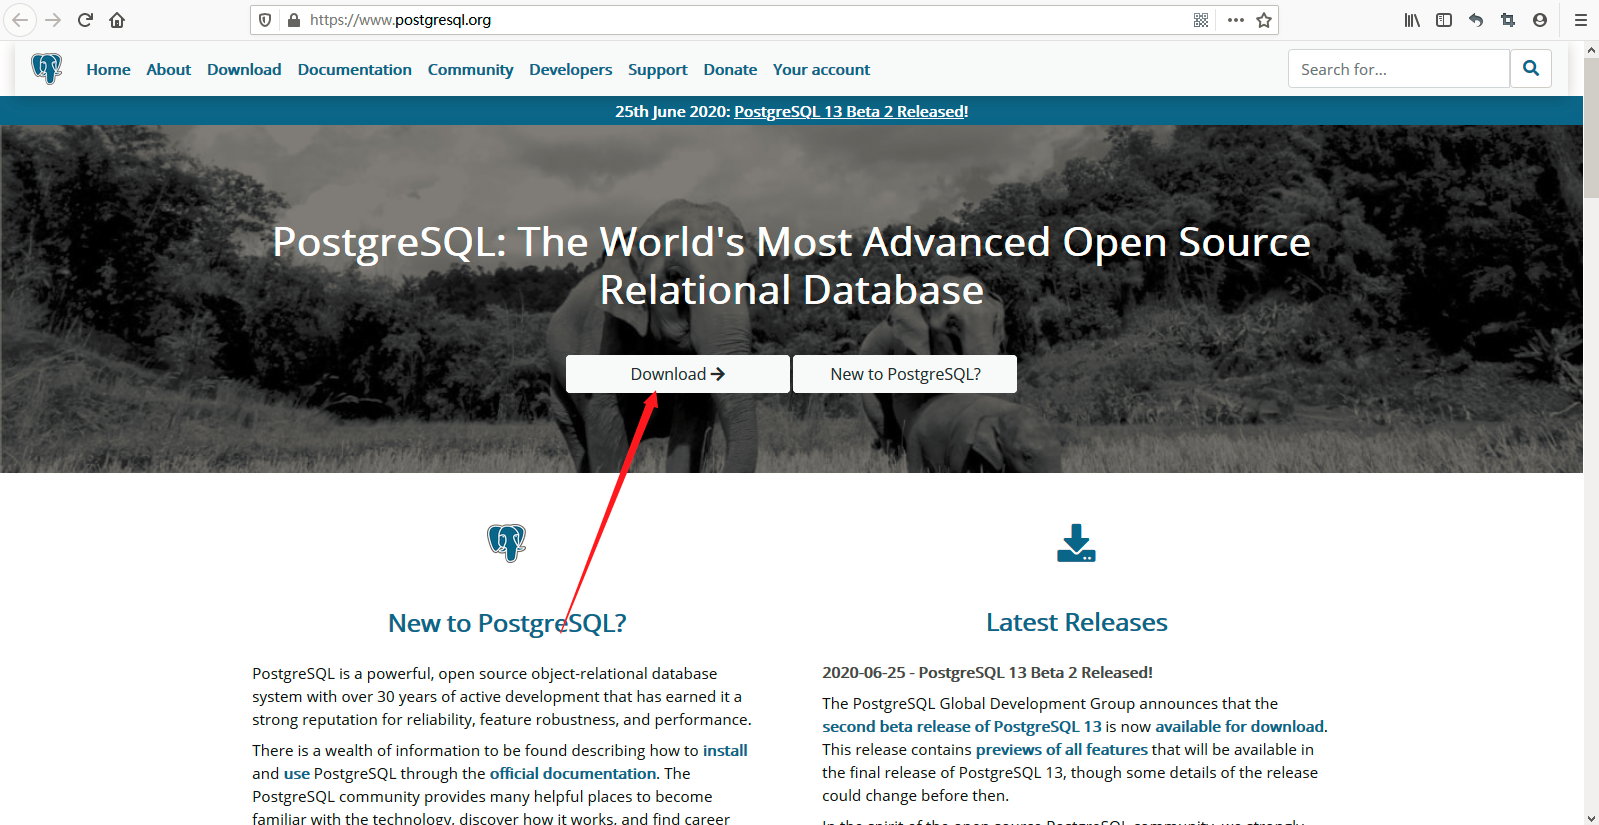
选择自己是什么操作系统, 然后选择对应得即可。
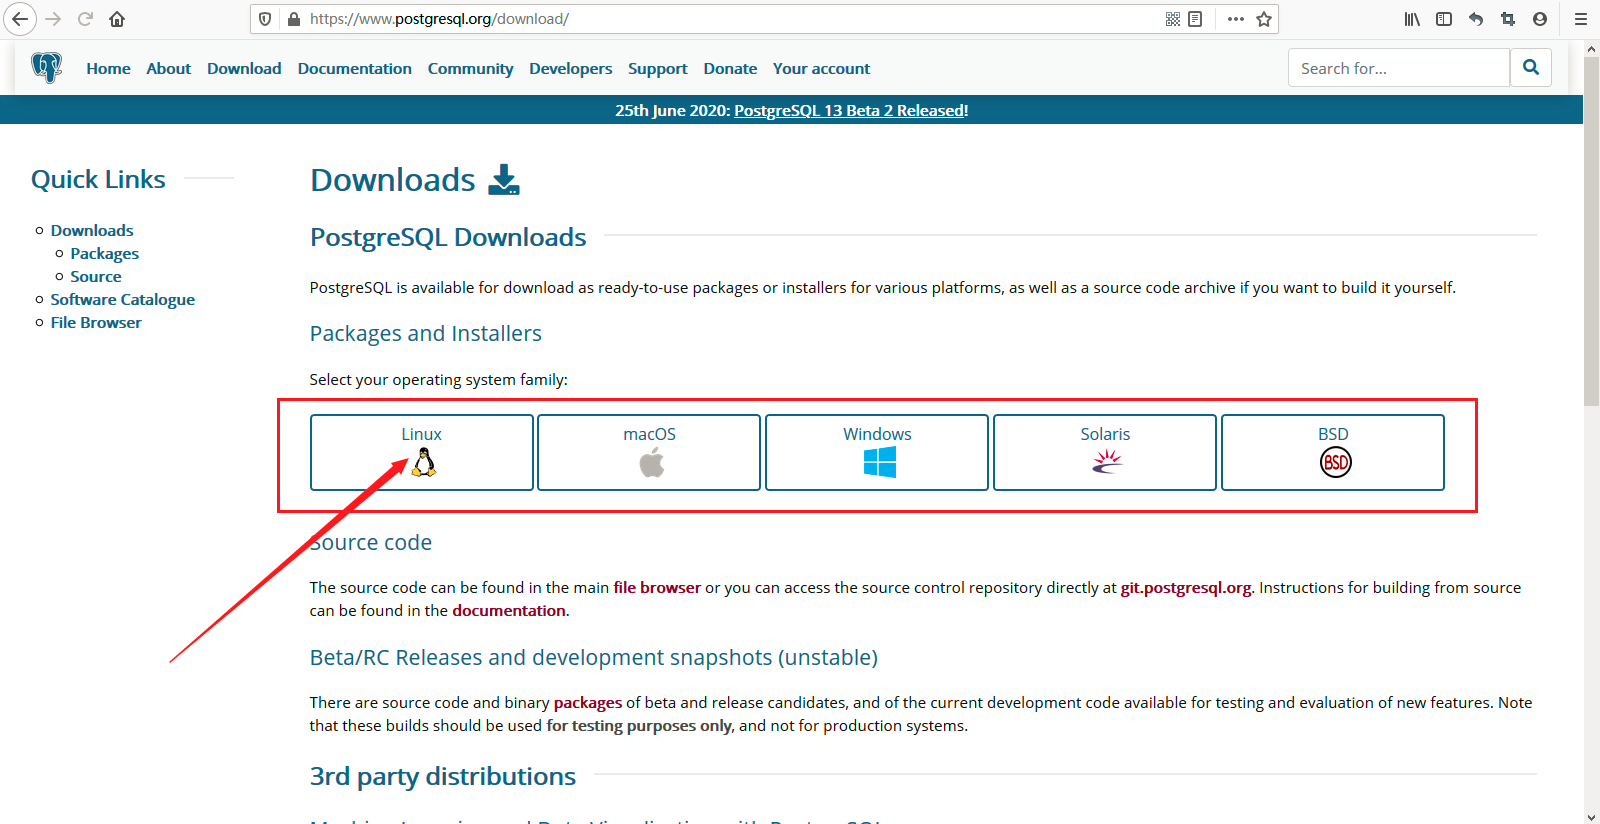
我的是Centos操作系统,如下所示:
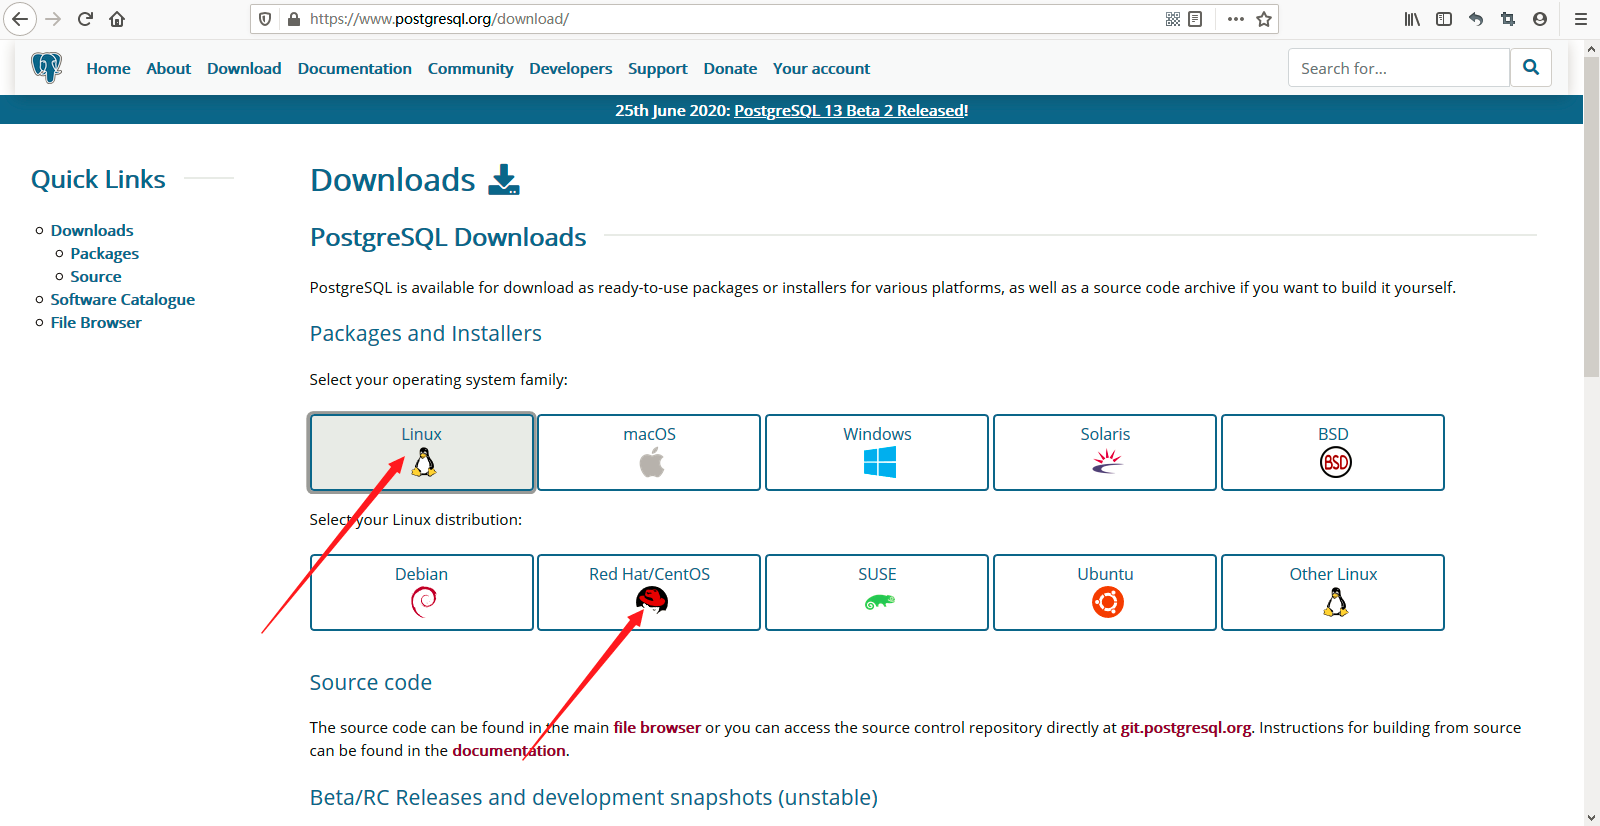
然后版本,操作系统版本,多少位的。

4、执行yum下载命令,将rpm包下载下来,如下所示:
 1 [root@slaver1 package]# yum install https://download.postgresql.org/pub/repos/yum/reporpms/EL-7-x86_64/pgdg-redhat-repo-latest.noarch.rpm
 2 已加载插件:fastestmirror, langpacks
 3 pgdg-redhat-repo-latest.noarch.rpm                                                                                                                                                                       | 6.5 kB  00:00:00
 4 正在检查 /var/tmp/yum-root-OuHt4M/pgdg-redhat-repo-latest.noarch.rpm: pgdg-redhat-repo-42.0-11.noarch
 5 /var/tmp/yum-root-OuHt4M/pgdg-redhat-repo-latest.noarch.rpm 将被安装
 6 正在解决依赖关系
 7 --> 正在检查事务
 8 ---> 软件包 pgdg-redhat-repo.noarch.0.42.0-11 将被 安装
 9 --> 解决依赖关系完成
10
11 依赖关系解决
12
13 ================================================================================================================================================================================================================================
14  Package                                                架构                                         版本                                           源                                                                     大小
15 ================================================================================================================================================================================================================================
16 正在安装:
17  pgdg-redhat-repo                                       noarch                                       42.0-11                                        /pgdg-redhat-repo-latest.noarch                                        11 k
18
19 事务概要
20 ================================================================================================================================================================================================================================
21 安装  1 软件包
22
23 总计:11 k
24 安装大小:11 k
25 Is this ok [y/d/N]: y
26 Downloading packages:
27 Running transaction check
28 Running transaction test
29 Transaction test succeeded
30 Running transaction
31   正在安装    : pgdg-redhat-repo-42.0-11.noarch                                                                                                                                                                             1/1
32   验证中      : pgdg-redhat-repo-42.0-11.noarch                                                                                                                                                                             1/1
33
34 已安装:
35   pgdg-redhat-repo.noarch 0:42.0-11
36
37 完毕!
5、然后开始安装postgresql服务器端,如下所示:
  1 [root@slaver1 package]# yum install postgresql10-server
  2 已加载插件:fastestmirror, langpacks
  3 /var/run/yum.pid 已被锁定,PID 为 78607 的另一个程序正在运行。
  4 Another app is currently holding the yum lock; waiting for it to exit...
  5   另一个应用程序是:PackageKit
  6     内存: 31 M RSS (451 MB VSZ)
  7     已启动: Thu Aug 13 09:51:43 2020 - 00:11之前
  8     状态  :睡眠中,进程ID:78607
  9 Another app is currently holding the yum lock; waiting for it to exit...
 10   另一个应用程序是:PackageKit
 11     内存: 32 M RSS (452 MB VSZ)
 12     已启动: Thu Aug 13 09:51:43 2020 - 00:13之前
 13     状态  :睡眠中,进程ID:78607
 14 Another app is currently holding the yum lock; waiting for it to exit...
 15   另一个应用程序是:PackageKit
 16     内存: 32 M RSS (452 MB VSZ)
 17     已启动: Thu Aug 13 09:51:43 2020 - 00:15之前
 18     状态  :睡眠中,进程ID:78607
 19 Another app is currently holding the yum lock; waiting for it to exit...
 20   另一个应用程序是:PackageKit
 21     内存: 32 M RSS (452 MB VSZ)
 22     已启动: Thu Aug 13 09:51:43 2020 - 00:17之前
 23     状态  :睡眠中,进程ID:78607
 24 Another app is currently holding the yum lock; waiting for it to exit...
 25   另一个应用程序是:PackageKit
 26     内存: 32 M RSS (452 MB VSZ)
 27     已启动: Thu Aug 13 09:51:43 2020 - 00:19之前
 28     状态  :睡眠中,进程ID:78607
 29 Another app is currently holding the yum lock; waiting for it to exit...
 30   另一个应用程序是:PackageKit
 31     内存: 32 M RSS (452 MB VSZ)
 32     已启动: Thu Aug 13 09:51:43 2020 - 00:21之前
 33     状态  :睡眠中,进程ID:78607
 34 Another app is currently holding the yum lock; waiting for it to exit...
 35   另一个应用程序是:PackageKit
 36     内存: 38 M RSS (459 MB VSZ)
 37     已启动: Thu Aug 13 09:51:43 2020 - 00:23之前
 38     状态  :运行中,进程ID:78607
 39 Another app is currently holding the yum lock; waiting for it to exit...
 40   另一个应用程序是:PackageKit
 41     内存:174 M RSS (594 MB VSZ)
 42     已启动: Thu Aug 13 09:51:43 2020 - 00:25之前
 43     状态  :运行中,进程ID:78607
 44 Another app is currently holding the yum lock; waiting for it to exit...
 45   另一个应用程序是:PackageKit
 46     内存:265 M RSS (685 MB VSZ)
 47     已启动: Thu Aug 13 09:51:43 2020 - 00:27之前
 48     状态  :运行中,进程ID:78607
 49 Another app is currently holding the yum lock; waiting for it to exit...
 50   另一个应用程序是:PackageKit
 51     内存:265 M RSS (685 MB VSZ)
 52     已启动: Thu Aug 13 09:51:43 2020 - 00:29之前
 53     状态  :睡眠中,进程ID:78607
 54 Another app is currently holding the yum lock; waiting for it to exit...
 55   另一个应用程序是:PackageKit
 56     内存:265 M RSS (685 MB VSZ)
 57     已启动: Thu Aug 13 09:51:43 2020 - 00:31之前
 58     状态  :睡眠中,进程ID:78607
 59 Loading mirror speeds from cached hostfile
 60  * base: mirrors.aliyun.com
 61  * epel: mirrors.yun-idc.com
 62  * extras: mirror.bit.edu.cn
 63  * updates: mirrors.aliyun.com
 64 正在解决依赖关系
 65 --> 正在检查事务
 66 ---> 软件包 postgresql10-server.x86_64.0.10.13-1PGDG.rhel7 将被 安装
 67 --> 正在处理依赖关系 postgresql10-libs(x86-64) = 10.13-1PGDG.rhel7,它被软件包 postgresql10-server-10.13-1PGDG.rhel7.x86_64 需要
 68 --> 正在处理依赖关系 postgresql10(x86-64) = 10.13-1PGDG.rhel7,它被软件包 postgresql10-server-10.13-1PGDG.rhel7.x86_64 需要
 69 --> 正在处理依赖关系 libpq.so.5()(64bit),它被软件包 postgresql10-server-10.13-1PGDG.rhel7.x86_64 需要
 70 --> 正在检查事务
 71 ---> 软件包 postgresql10.x86_64.0.10.13-1PGDG.rhel7 将被 安装
 72 ---> 软件包 postgresql10-libs.x86_64.0.10.13-1PGDG.rhel7 将被 安装
 73 --> 解决依赖关系完成
 74
 75 依赖关系解决
 76
 77 ================================================================================================================================================================================================================================
 78  Package                                                      架构                                            版本                                                        源                                               大小
 79 ================================================================================================================================================================================================================================
 80 正在安装:
 81  postgresql10-server                                          x86_64                                          10.13-1PGDG.rhel7                                           pgdg10                                          4.5 M
 82 为依赖而安装:
 83  postgresql10                                                 x86_64                                          10.13-1PGDG.rhel7                                           pgdg10                                          1.6 M
 84  postgresql10-libs                                            x86_64                                          10.13-1PGDG.rhel7                                           pgdg10                                          357 k
 85
 86 事务概要
 87 ================================================================================================================================================================================================================================
 88 安装  1 软件包 (+2 依赖软件包)
 89
 90 总下载量:6.5 M
 91 安装大小:28 M
 92 Is this ok [y/d/N]: y
 93 Downloading packages:
 94 警告:/var/cache/yum/x86_64/7/pgdg10/packages/postgresql10-libs-10.13-1PGDG.rhel7.x86_64.rpm: 头V4 DSA/SHA1 Signature, 密钥 ID 442df0f8: NOKEY                                                ] 128 kB/s | 416 kB  00:00:48 ETA
 95 postgresql10-libs-10.13-1PGDG.rhel7.x86_64.rpm 的公钥尚未安装
 96 (1/3): postgresql10-libs-10.13-1PGDG.rhel7.x86_64.rpm                                                                                                                                                    | 357 kB  00:00:05
 97 (2/3): postgresql10-10.13-1PGDG.rhel7.x86_64.rpm                                                                                                                                                         | 1.6 MB  00:02:40
 98 (3/3): postgresql10-server-10.13-1PGDG.rhel7.x86_64.rpm                                                                                                                                                  | 4.5 MB  00:02:44
 99 --------------------------------------------------------------------------------------------------------------------------------------------------------------------------------------------------------------------------------
100 总计                                                                                                                                                                                             39 kB/s | 6.5 MB  00:02:50
101 从 file:///etc/pki/rpm-gpg/RPM-GPG-KEY-PGDG 检索密钥
102 导入 GPG key 0x442DF0F8:
103  用户ID     : "PostgreSQL RPM Building Project <pgsqlrpms-hackers@pgfoundry.org>"
104  指纹       : 68c9 e2b9 1a37 d136 fe74 d176 1f16 d2e1 442d f0f8
105  软件包     : pgdg-redhat-repo-42.0-11.noarch (@/pgdg-redhat-repo-latest.noarch)
106  来自       : /etc/pki/rpm-gpg/RPM-GPG-KEY-PGDG
107 是否继续?[y/N]:y
108 Running transaction check
109 Running transaction test
110 Transaction test succeeded
111 Running transaction
112   正在安装    : postgresql10-libs-10.13-1PGDG.rhel7.x86_64                                                                                                                                                                  1/3
113   正在安装    : postgresql10-10.13-1PGDG.rhel7.x86_64                                                                                                                                                                       2/3
114   正在安装    : postgresql10-server-10.13-1PGDG.rhel7.x86_64                                                                                                                                                                3/3
115   验证中      : postgresql10-libs-10.13-1PGDG.rhel7.x86_64                                                                                                                                                                  1/3
116   验证中      : postgresql10-10.13-1PGDG.rhel7.x86_64                                                                                                                                                                       2/3
117   验证中      : postgresql10-server-10.13-1PGDG.rhel7.x86_64                                                                                                                                                                3/3
118
119 已安装:
120   postgresql10-server.x86_64 0:10.13-1PGDG.rhel7
121
122 作为依赖被安装:
123   postgresql10.x86_64 0:10.13-1PGDG.rhel7                                                                      postgresql10-libs.x86_64 0:10.13-1PGDG.rhel7
124
125 完毕!
126 [root@slaver1 package]#
6、开始初始化postgresql数据库,如下所示:
1 [root@slaver1 package]# /usr/pgsql-10/bin/postgresql-10-setup initdb
2 Initializing database ... OK
3
4 [root@slaver1 package]#
7、设置开机自启动,然后启动postgresql数据库,如下所示:
1 [root@slaver1 package]# systemctl enable postgresql-10
2 Created symlink from /etc/systemd/system/multi-user.target.wants/postgresql-10.service to /usr/lib/systemd/system/postgresql-10.service.
3 [root@slaver1 package]# systemctl start postgresql-10
4 [root@slaver1 package]#
8、查看postgresql的相关进程,如下所示:
 1 [root@slaver1 ~]# ps -ef | grep postgres
 2 postgres  79928      1  0 10:07 ?        00:00:00 /usr/pgsql-10/bin/postmaster -D /var/lib/pgsql/10/data/
 3 postgres  79931  79928  0 10:07 ?        00:00:00 postgres: logger process
 4 postgres  79933  79928  0 10:07 ?        00:00:00 postgres: checkpointer process
 5 postgres  79934  79928  0 10:07 ?        00:00:00 postgres: writer process
 6 postgres  79935  79928  0 10:07 ?        00:00:00 postgres: wal writer process
 7 postgres  79936  79928  0 10:07 ?        00:00:00 postgres: autovacuum launcher process
 8 postgres  79937  79928  0 10:07 ?        00:00:00 postgres: stats collector process
 9 postgres  79938  79928  0 10:07 ?        00:00:00 postgres: bgworker: logical replication launcher
10 root      84515  78910  0 10:56 pts/4    00:00:00 grep --color=auto postgres
11 [root@slaver1 ~]#
pgsql默认的端口号为5432,通过netstat命令或者lsof命令都可以看到监听情况:
 1 [root@slaver1 ~]# lsof -i:5432
 2 COMMAND     PID     USER   FD   TYPE DEVICE SIZE/OFF NODE NAME
 3 postmaste 79928 postgres    3u  IPv6 663083      0t0  TCP localhost:postgres (LISTEN)
 4 postmaste 79928 postgres    4u  IPv4 663084      0t0  TCP localhost:postgres (LISTEN)
 5 [root@slaver1 ~]# netstat -an | grep 5432
 6 tcp        0      0 127.0.0.1:5432          0.0.0.0:*               LISTEN
 7 tcp6       0      0 ::1:5432                :::*                    LISTEN
 8 unix  2      [ ACC ]     STREAM     LISTENING     663093   /var/run/postgresql/.s.PGSQL.5432
 9 unix  2      [ ACC ]     STREAM     LISTENING     663095   /tmp/.s.PGSQL.5432
10 [root@slaver1 ~]#
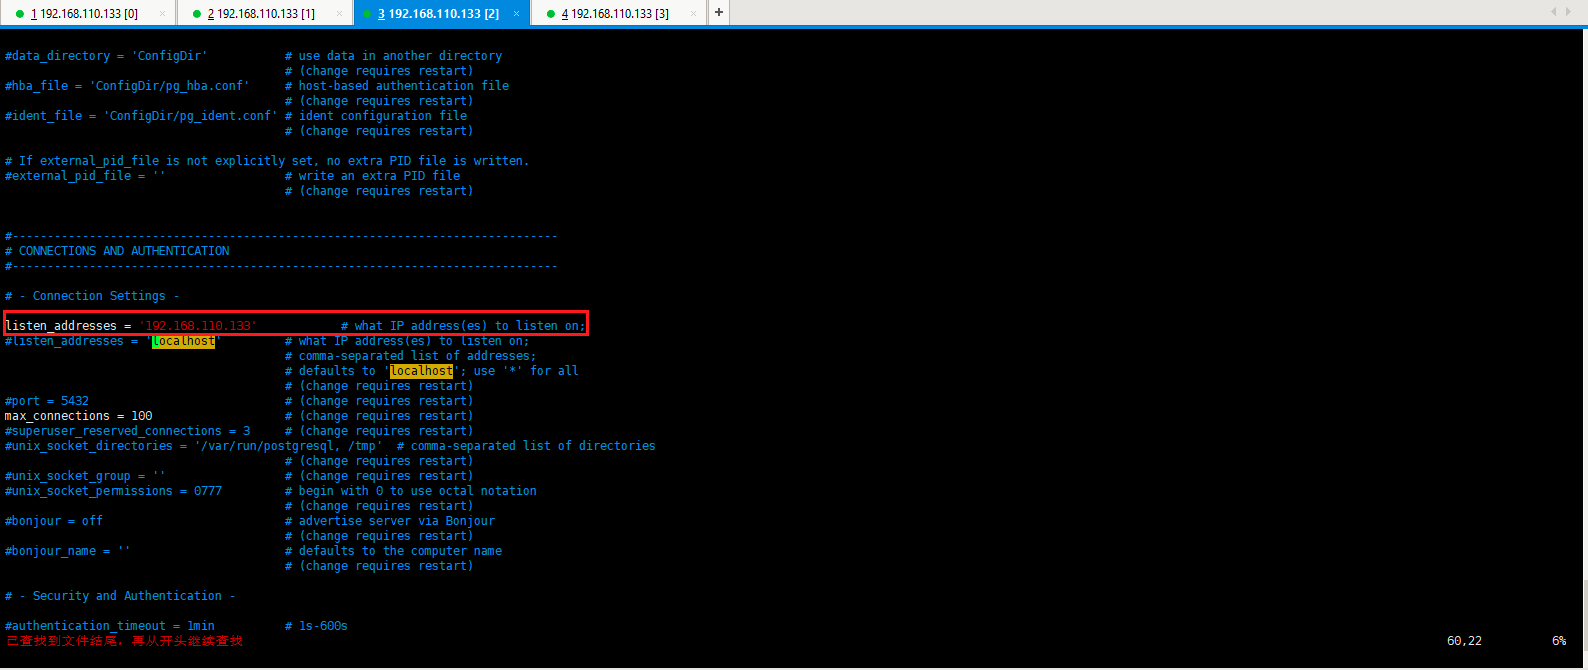
现在可以看到pgsql默认监听的是localhost或127.0.0.1,目前只能本机访问,如果远程访问就连接不上了,具体的配置文件是data目录下的postgresql.conf,可以通过修改这个配置文件来调整各个参数,比如:listen_addresses可以修改绑定的地址,默认是localhost,port可以修改监听的端口号,默认是5432,max_connections可以修改最大客户端连接数量,默认是100等等。
注意:我这里才用的是默认的安装方式,就使用find命令查找了一下postgresql.conf的配置位置,然后进行修改:
 1 [root@slaver1 /]# find -name postgresql.conf
 2 ./var/lib/pgsql/10/data/postgresql.conf
 3 ./usr/lib/tmpfiles.d/postgresql.conf
 4 [root@slaver1 /]# ll /var/lib/pgsql/10/data/
 5 总用量 60
 6 drwx------. 5 postgres postgres    41 8月  13 10:06 base
 7 -rw-------. 1 postgres postgres    30 8月  13 10:07 current_logfiles
 8 drwx------. 2 postgres postgres  4096 8月  13 10:20 global
 9 drwx------. 2 postgres postgres    32 8月  13 10:07 log
10 drwx------. 2 postgres postgres     6 8月  13 10:06 pg_commit_ts
11 drwx------. 2 postgres postgres     6 8月  13 10:06 pg_dynshmem
12 -rw-------. 1 postgres postgres  4269 8月  13 10:06 pg_hba.conf
13 -rw-------. 1 postgres postgres  1636 8月  13 10:06 pg_ident.conf
14 drwx------. 4 postgres postgres    68 8月  13 10:12 pg_logical
15 drwx------. 4 postgres postgres    36 8月  13 10:06 pg_multixact
16 drwx------. 2 postgres postgres    18 8月  13 10:07 pg_notify
17 drwx------. 2 postgres postgres     6 8月  13 10:06 pg_replslot
18 drwx------. 2 postgres postgres     6 8月  13 10:06 pg_serial
19 drwx------. 2 postgres postgres     6 8月  13 10:06 pg_snapshots
20 drwx------. 2 postgres postgres     6 8月  13 10:06 pg_stat
21 drwx------. 2 postgres postgres    63 8月  13 11:01 pg_stat_tmp
22 drwx------. 2 postgres postgres    18 8月  13 10:06 pg_subtrans
23 drwx------. 2 postgres postgres     6 8月  13 10:06 pg_tblspc
24 drwx------. 2 postgres postgres     6 8月  13 10:06 pg_twophase
25 -rw-------. 1 postgres postgres     3 8月  13 10:06 PG_VERSION
26 drwx------. 3 postgres postgres    60 8月  13 10:06 pg_wal
27 drwx------. 2 postgres postgres    18 8月  13 10:06 pg_xact
28 -rw-------. 1 postgres postgres    88 8月  13 10:06 postgresql.auto.conf
29 -rw-------. 1 postgres postgres 22985 8月  13 10:06 postgresql.conf
30 -rw-------. 1 postgres postgres    58 8月  13 10:07 postmaster.opts
31 -rw-------. 1 postgres postgres   104 8月  13 10:07 postmaster.pid
32 [root@slaver1 /]# vim /var/lib/pgsql/10/data/postgresql.conf
33 [root@slaver1 /]#
这里将localhost修改为192.168.110.133,如下所示:
9、命令行界面简单操作,pgsql和mysql一样可以通过交互式提示符连接操作,连接方式如下:
1 [root@slaver1 ~]# psql -h 127.0.0.1 -d postgres -U postgres -p 5432
2 psql: 致命错误:  用户 "postgres" Ident 认证失败
3 [root@slaver1 ~]#
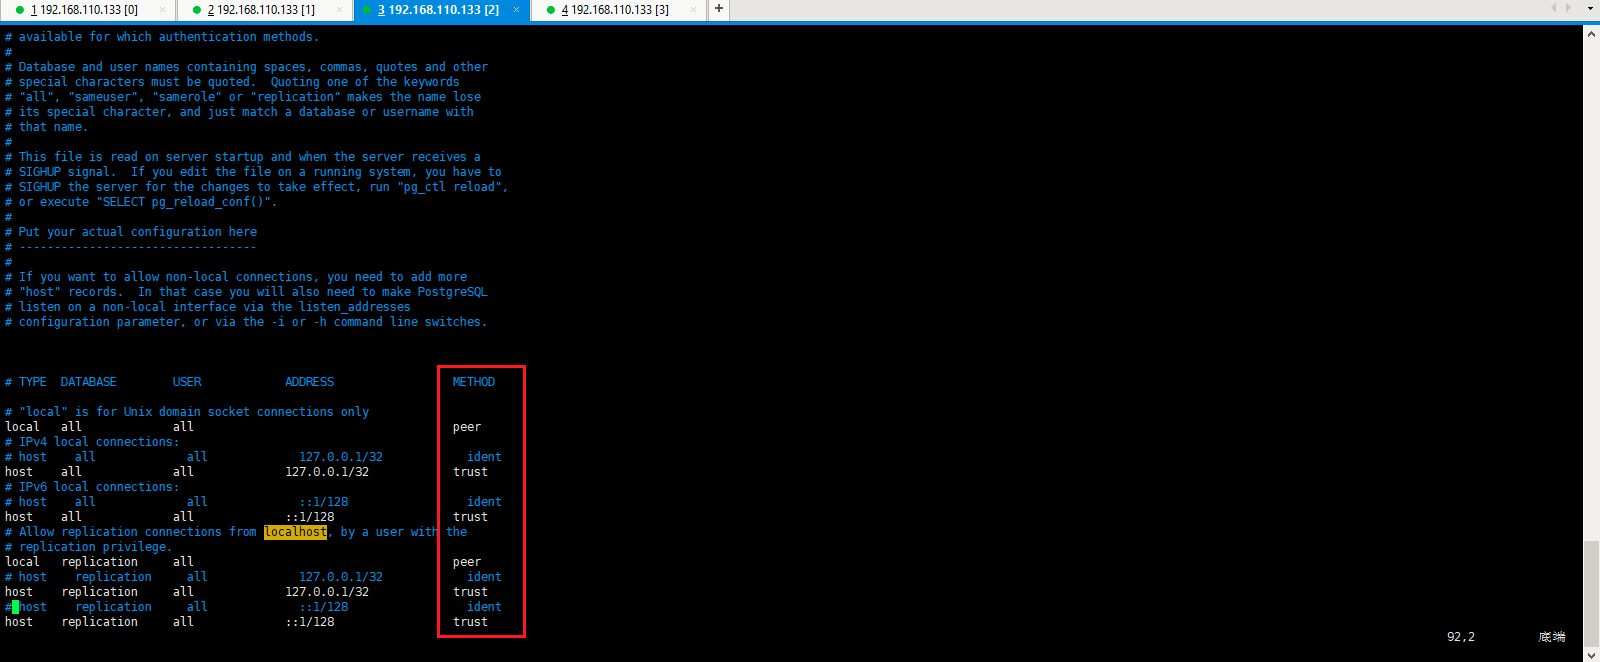
修改认证文件[root@slaver1 ~]# vim /var/lib/pgsql/10/data/pg_hba.conf,登陆使用密码。把这个配置文件中的认证 METHOD的ident修改为trust,可以实现用账户和密码来访问数据库,即解决psql: 致命错误: 用户 "postgres" Ident 认证失败 这个问题)。
重启postgresql服务器使设置生效,如下所示:
注意:其中-h参数指定服务器地址,默认为127.0.0.1,默认不指定即可,-d指定连接之后选中的数据库,默认也是postgres,-U指定用户,默认是当前用户,-p 指定端口号,默认是"5432",其它更多的参数选项可以执行: ./bin/psql --help 查看。
1 [root@slaver1 ~]# psql -h 127.0.0.1 -d postgres -U postgres -p 5432
2 psql: could not connect to server: 拒绝连接
3     Is the server running on host "127.0.0.1" and accepting
4     TCP/IP connections on port 5432?
5 [root@slaver1 ~]# psql -h 192.168.110.133 -d postgres -U postgres -p 5432
6 psql: 致命错误:  没有用于主机 "192.168.110.133", 用户 "postgres", 数据库 "postgres", SSL 关闭 的 pg_hba.conf 记录
7 [root@slaver1 ~]#
由于这里需要设置可以远程链接,将127.0.0.1的都改成自己ip地址,vim /var/lib/pgsql/10/data/pg_hba.conf,如下所示:

修改完毕,重启postgresql服务,如下所示:
 1 [root@slaver1 ~]# systemctl stop postgresql-10
 2 [root@slaver1 ~]# systemctl start postgresql-10
 3 [root@slaver1 ~]# ps -ef | grep postgres
 4 postgres  86970      1  2 11:23 ?        00:00:00 /usr/pgsql-10/bin/postmaster -D /var/lib/pgsql/10/data/
 5 postgres  86972  86970  0 11:23 ?        00:00:00 postgres: logger process
 6 postgres  86974  86970  0 11:23 ?        00:00:00 postgres: checkpointer process
 7 postgres  86975  86970  0 11:23 ?        00:00:00 postgres: writer process
 8 postgres  86976  86970  0 11:23 ?        00:00:00 postgres: wal writer process
 9 postgres  86977  86970  0 11:23 ?        00:00:00 postgres: autovacuum launcher process
10 postgres  86978  86970  0 11:23 ?        00:00:00 postgres: stats collector process
11 postgres  86979  86970  0 11:23 ?        00:00:00 postgres: bgworker: logical replication launcher
12 root      86982  78910  0 11:23 pts/4    00:00:00 grep --color=auto postgres
13 [root@slaver1 ~]# lsof -i:5432
14 COMMAND     PID     USER   FD   TYPE DEVICE SIZE/OFF NODE NAME
15 postmaste 86970 postgres    3u  IPv4 797866      0t0  TCP slaver1:postgres (LISTEN)
16 [root@slaver1 ~]# ps -ef | grep postgres
17 postgres  86970      1  0 11:23 ?        00:00:00 /usr/pgsql-10/bin/postmaster -D /var/lib/pgsql/10/data/
18 postgres  86972  86970  0 11:23 ?        00:00:00 postgres: logger process
19 postgres  86974  86970  0 11:23 ?        00:00:00 postgres: checkpointer process
20 postgres  86975  86970  0 11:23 ?        00:00:00 postgres: writer process
21 postgres  86976  86970  0 11:23 ?        00:00:00 postgres: wal writer process
22 postgres  86977  86970  0 11:23 ?        00:00:00 postgres: autovacuum launcher process
23 postgres  86978  86970  0 11:23 ?        00:00:00 postgres: stats collector process
24 postgres  86979  86970  0 11:23 ?        00:00:00 postgres: bgworker: logical replication launcher
25 root      86994  78910  0 11:24 pts/4    00:00:00 grep --color=auto postgres
26 [root@slaver1 ~]#
然后使用命令行的方式连接postgresql数据库,如下所示:
1 [root@slaver1 ~]# psql -h 192.168.110.133 -d postgres -U postgres -p 5432
2 psql (9.2.24, 服务器 10.13)
3 警告:psql 版本9.2, 服务器版本10.0.
4 一些psql功能可能无法工作.
5 输入 "help" 来获取帮助信息.
6
7 postgres=#
登录进去默认界面,命令提示符前面的就是当前的数据库,使用 \l 查看当前的数据库列表,如下所示:
 1 [root@slaver1 ~]# psql -h 192.168.110.133 -d postgres -U postgres -p 5432
 2 psql (9.2.24, 服务器 10.13)
 3 警告:psql 版本9.2, 服务器版本10.0.
 4 一些psql功能可能无法工作.
 5 输入 "help" 来获取帮助信息.
 6
 7 postgres=#
 8 postgres=# \l
 9                                      资料库列表
10    名称    |  拥有者  | 字元编码 |  校对规则   |    Ctype    |       存取权限
11 -----------+----------+----------+-------------+-------------+-----------------------
12  postgres  | postgres | UTF8     | zh_CN.UTF-8 | zh_CN.UTF-8 |
13  template0 | postgres | UTF8     | zh_CN.UTF-8 | zh_CN.UTF-8 | =c/postgres          +
14            |          |          |             |             | postgres=CTc/postgres
15  template1 | postgres | UTF8     | zh_CN.UTF-8 | zh_CN.UTF-8 | =c/postgres          +
16            |          |          |             |             | postgres=CTc/postgres
17 (3 行记录)
18
19 postgres=#
创建一个简单的数据表可以执行下面的命令:
1 postgres=# CREATE TABLE student (
2 postgres(#   id integer NOT NULL,
3 postgres(#   name character(32),
4 postgres(#   number char(5),
5 postgres(#   CONSTRAINT student_pkey PRIMARY KEY (id)
6 postgres(# );
7 CREATE TABLE
8 postgres=#
9 postgres=#
创建表之后可以使用 \d student; 查看表的详细信息,如下:
 1 postgres=# \d student;
 2      资料表 "public.student"
 3   栏位  |     型别      | 修饰词
 4 --------+---------------+--------
 5  id     | integer       | 非空
 6  name   | character(32) |
 7  number | character(5)  |
 8 索引:
 9     "student_pkey" PRIMARY KEY, btree (id)
10
11 postgres=#
现在可以插入一条测试数据: INSERT INTO student (id, name, number) VALUES (1, '张三', '1023');
然后可以查询这条数据: SELECT * FROM student WHERE id=1;
1 postgres=# INSERT INTO student (id, name, number) VALUES (1, '张三', '1023');
2 INSERT 0 1
3 postgres=# SELECT * FROM student WHERE id=1;
4  id |                name                | number
5 ----+------------------------------------+--------
6   1 | 张三                               | 1023
7 (1 行记录)
8
9 postgres=#
最后可以执行 \q 退出交互式界面。
1 postgres=# \q
2 [root@slaver1 ~]#
10、问题:致命错误: 用户 "postgres" Ident 认证失败?
说明:这个是由于没有配置远程访问且认证方式没改造成的,只需要更改使用账号密码认证即可。
解决:找到pg_hba.conf(find / -name pg_hba.conf),METHOD的ident修改为md5,且把ip端改为0.0.0.0/0,或者想要的IP地址即可。修改完成后直接reload即可。
11、METHOD指定如何处理客户端的认证。常用的有ident,md5,password,trust,reject
1)、ident是Linux下PostgreSQL默认的local认证方式,凡是能正确登录服务器的操作系统用户(注:不是数据库用户)就能使用本用户映射的数据库用户不需密码登录数据库。用户映射文件为pg_ident.conf,这个文件记录着与操作系统用户匹配的数据库用户,如果某操作系统用户在本文件中没有映射用户,则默认的映射数据库用户与操作系统用户同名。比如,服务器上有名为user1的操作系统用户,同时数据库上也有同名的数据库用户,user1登录操作系统后可以直接输入psql,以user1数据库用户身份登录数据库且不需密码。很多初学者都会遇到psql -U username登录数据库却出现“username ident 认证失败”的错误,明明数据库用户已经createuser。原因就在于此,使用了ident认证方式,却没有同名的操作系统用户或没有相应的映射用户。解决方案:第一种、在pg_ident.conf中添加映射用户;第二种、改变认证方式。
2)、METHOD指定如何处理客户端的认证,如下所示:
a、md5是常用的密码认证方式,如果你不使用ident,最好使用md5。密码是以md5形式传送给数据库,较安全,且不需建立同名的操作系统用户。
b、password是以明文密码传送给数据库,建议不要在生产环境中使用。
c、trust是只要知道数据库用户名就不需要密码或ident就能登录,建议不要在生产环境中使用。
d、reject是拒绝认证。
3)、在文件查找 listen_addresses,他的值说明:
a、如果希望只能从本地计算机访问PostgreSQL数据库,就将该项设置为'localhost';
b、如果希望从局域网访问PostgreSQL数据库,就将该项设置为PostgreSQL数据库的局域网IP地址;
c、如果希望从互联网访问PostgreSQL数据库,就将该项设置为PostgreSQL数据库的互联网IP地址;
d、如果希望从任何地方都可以访问PostgreSQL数据库,就将该配置项设置为“*”;
通过ident的描述可以看到上面出现错误(解决psql: 致命错误: 用户 "postgres" Ident 认证失败)的原因是什么了,是因为自己的linux的用户没有和postgresql匹配的用户,才导致出现的错误的,其实这里根据上面的描述有好几种解决方法,由于postgresql数据库会默认生成一个名为postgres的数据库和一个名为postgres的数据库用户,此时,可以同时生成了一个名为postgres的Linux系统用户。但是又不能直接使用root账号切换到postgresql账号,所以需要额外创建一个linux用户用来切换到postgresql账号。
参考:http://www.ruanyifeng.com/blog/2013/12/getting_started_with_postgresql.html

 浙公网安备 33010602011771号