


通过注解实现IOC
实现实体类
package com.zhongge.entity;

import jakarta.annotation.Resource;
import org.springframework.beans.factory.annotation.Value;
import org.springframework.stereotype.Component;

/**
 * @ClassName User
 * @Description TODO
 * @Author zhongge
 * @Version 1.0
 */
@Component("user01")
public class User {
    public String getName() {
        return name;
    }

    public void setName(String name) {
        this.name = name;
    }

    public Address getAddress() {
        return address;
    }

    public void setAddress(Address address) {
        this.address = address;
    }

    @Override
    public String toString() {
        return "User{" +
                "name='" + name + '\'' +
                ", address=" + address +
                '}';
    }

    @Value("李华")
    private String name;
    @Resource
    private Address address;
}

package com.zhongge.entity;


import org.springframework.beans.factory.annotation.Value;
import org.springframework.stereotype.Component;

/**
 * @ClassName Address
 * @Description TODO
 * @Author zhongge
 * @Version 1.0
 */
@Component
public class Address {
    public String getLoc() {
        return loc;
    }

    public void setLoc(String loc) {
        this.loc = loc;
    }

    @Override
    public String toString() {
        return "Address{" +
                "loc='" + loc + '\'' +
                '}';
    }

    @Value("毕节")
    private String loc;

    public Address(String loc) {
        this.loc = loc;
    }


    public Address() {
    }
}
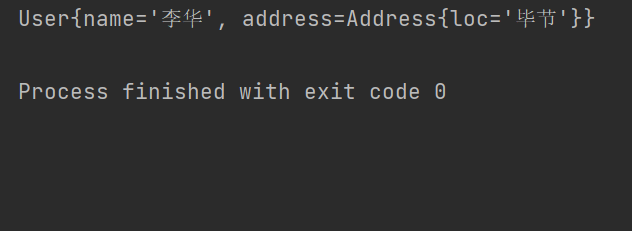
测试结果
package com.zhongge.test;

import org.springframework.context.ApplicationContext;
import org.springframework.context.annotation.AnnotationConfigApplicationContext;

/**
 * @ClassName Main
 * @Description TODO
 * @Author zhongge
 * @Version 1.0
 */
public class Main {
    public static void main(String[] args) {
        //通过注解获取IOC容器
        ApplicationContext applicationContext = new AnnotationConfigApplicationContext("com.zhongge.entity");
        //通过IOC容器获取对象
        System.out.println(applicationContext.getBean("user01"));
    }
}
结果:
补充知识
要通过注解实现 Spring IOC,需遵循以下核心步骤,结合注解扫描、Bean 标记和依赖注入来完成容器管理:
一、核心注解说明
Spring 提供了一系列注解来替代 XML 配置,实现“零 XML”式 IOC:
| 注解 | 作用 |
|---|---|
@Component |
通用组件注解,标记类为 Spring 管理的 Bean(可用于任何层)。 |
@Service |
语义化注解,专用于业务逻辑层(Service 层),功能同 @Component。 |
@Repository |
语义化注解,专用于数据访问层(DAO 层),功能同 @Component。 |
@Controller |
语义化注解,专用于控制层(如 SpringMVC 的 Controller)。 |
@Autowired |
自动依赖注入,按类型匹配 Bean(可结合 @Qualifier 按名称匹配)。 |
二、步骤 1:开启注解扫描(替代 XML 的 <context:component-scan>)
在 Spring 配置类中用 @ComponentScan 指定需要扫描的包(若用 XML 则需配置 <context:component-scan>)。
方式 1:纯注解配置(推荐 Spring Boot)
@Configuration  // 标记为 Spring 配置类
@ComponentScan(basePackages = "com.zhongge")  // 扫描指定包及其子包下的注解
public class AppConfig {
    // 无需额外配置,注解扫描由 @ComponentScan 完成
}
方式 2:XML 配置(兼容传统 Spring)
若仍需保留 XML,在 applicationContext.xml 中添加:
<!-- 开启注解扫描,Spring 会自动处理 @Component/@Service 等注解 -->
<context:component-scan base-package="com.zhongge"/>
三、步骤 2:用注解标记 Bean(替代 XML 的 <bean> 标签)
将需要由 Spring 管理的类用 @Component/@Service/@Repository/@Controller 标记。
以你之前的 Address 和 Student 为例:
// com.zhongge.entity.Address
@Component  // 标记为 Spring Bean(也可用 @Service/@Repository 等,语义化可选)
public class Address {
    private String loc;

    // Getter/Setter/toString 略
}

// com.zhongge.entity.Student
@Component
public class Student {
    @Autowired  // 自动注入 Address 类型的 Bean
    private Address address;
    private Integer id;
    private String name;
    private Integer age;

    // 构造器/Setter/toString 略
}
四、步骤 3:依赖注入(用 @Autowired 替代 XML 的 <property>/<constructor-arg>)
@Autowired 支持字段注入、构造器注入、Setter 注入三种方式,推荐构造器注入(更符合 Spring 官方推荐)。
1. 字段注入(最简单,直接在属性上标记)
@Component
public class Student {
    @Autowired  // 直接注入 Address 类型的 Bean
    private Address address;
    // 其他属性略...
}
2. 构造器注入(Spring 推荐,更利于依赖检查)
@Component
public class Student {
    private final Address address;
    private Integer id;
    private String name;
    private Integer age;

    @Autowired  // 构造器上标记,Spring 会自动传入 Address Bean
    public Student(Address address) {
        this.address = address;
    }

    // Setter/toString 略...
}
3. Setter 注入(需提供 Setter 方法)
@Component
public class Student {
    private Address address;
    // 其他属性略...

    @Autowired  // 在 Setter 方法上标记
    public void setAddress(Address address) {
        this.address = address;
    }
}
五、测试注解版 IOC(编写 Main 类)
public class Main {
    public static void main(String[] args) {
        // 加载注解配置类(或 XML 配置)
        ApplicationContext context = new AnnotationConfigApplicationContext(AppConfig.class);
        // 或加载 XML:new ClassPathXmlApplicationContext("applicationContext.xml");

        Student student = context.getBean(Student.class);
        System.out.println(student); // 应输出包含 Address 的 Student 对象
    }
}
六、进阶:多 Bean 冲突时的处理
若同一接口有多个实现类(如 Address 有子类 HomeAddress 和 SchoolAddress),需结合 @Qualifier 按名称注入:
// 多个 Address 实现类
@Component("homeAddress")
public class HomeAddress extends Address { ... }

@Component("schoolAddress")
public class SchoolAddress extends Address { ... }

// Student 中指定注入名称
@Component
public class Student {
    @Autowired
    @Qualifier("homeAddress") // 明确注入名称为 "homeAddress" 的 Bean
    private Address address;
    // ...
}
七、注解 vs XML:优缺点对比
| 方式 | 优点 | 缺点 | 适用场景 |
|---|---|---|---|
| 注解 | 简洁、无 XML 冗余、开发效率高 | 配置与代码耦合(需修改类) | 大多数场景,尤其是 Spring Boot 项目 |
| XML | 配置与代码分离、便于统一管理 | 冗余代码多、维护成本高 | 需频繁修改配置(如环境切换)、旧项目兼容 |
而且注解一次只可以实现一个类
通过注解实现 IOC 后,Spring 会自动扫描、创建 Bean 并完成依赖注入,大幅简化了配置流程。如果你的项目是 Spring Boot,只需在主类上加 @SpringBootApplication(内部包含 @ComponentScan),即可零配置实现 IOC。

 浙公网安备 33010602011771号