

springboot2.x——依赖的统一管理
springboot2.x——依赖的统一管理
1、创建统一管理依赖库的项目:dependencies
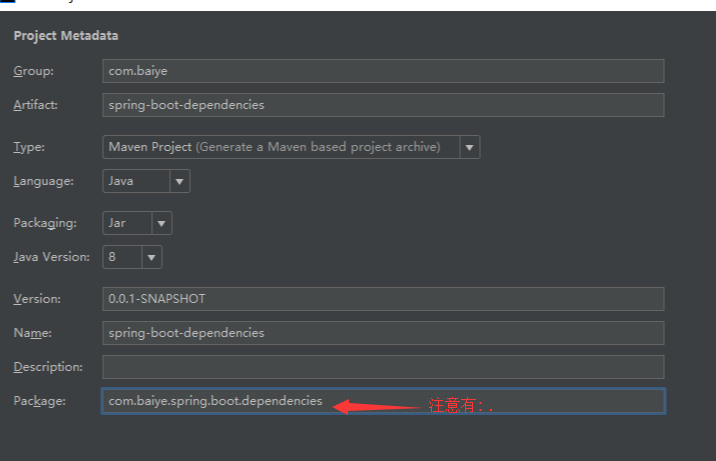
这个项目仅仅对依赖库的管理,pom.xml文件简单引入springboot的父工程:
 1 <?xml version="1.0" encoding="UTF-8"?>
 2 <project xmlns="http://maven.apache.org/POM/4.0.0" xmlns:xsi="http://www.w3.org/2001/XMLSchema-instance"
 3          xsi:schemaLocation="http://maven.apache.org/POM/4.0.0 http://maven.apache.org/xsd/maven-4.0.0.xsd">
 4     <modelVersion>4.0.0</modelVersion>
 5
 6     <!--工程信息-->
 7     <groupId>com.baiye</groupId>
 8     <artifactId>spring-boot-dependencies</artifactId>
 9     <version>1.0.0-SNAPSHOT</version>
10     <packaging>pom</packaging>
11
12     <name>spring-boot-dependencies</name>
13     <description></description>
14     <!--spring-boot 依赖的父工程-->
15     <parent>
16         <groupId>org.springframework.boot</groupId>
17         <artifactId>spring-boot-starter-parent</artifactId>
18         <version>2.0.3.RELEASE</version>
19         <relativePath/> <!-- lookup parent from repository -->
20     </parent>
21     <!--设置第三方依赖库版本号-->
22     <properties>
23         <project.build.sourceEncoding>UTF-8</project.build.sourceEncoding>
24         <project.reporting.outputEncoding>UTF-8</project.reporting.outputEncoding>
25         <java.version>1.8</java.version>
26     </properties>
27     <!--设置第三方依赖库-->
28     <dependencies>
29         <dependency>
30             <groupId>org.springframework.boot</groupId>
31             <artifactId>spring-boot-starter-thymeleaf</artifactId>
32         </dependency>
33         <dependency>
34             <groupId>org.springframework.boot</groupId>
35             <artifactId>spring-boot-starter-web</artifactId>
36         </dependency>
37         <dependency>
38             <groupId>mysql</groupId>
39             <artifactId>mysql-connector-java</artifactId>
40             <scope>runtime</scope>
41         </dependency>
42         <dependency>
43             <groupId>org.springframework.boot</groupId>
44             <artifactId>spring-boot-starter-test</artifactId>
45             <scope>test</scope>
46         </dependency>
47     </dependencies>
48
49    <!-- <build>
50         <plugins>
51             <plugin>
52                 <groupId>org.springframework.boot</groupId>
53                 <artifactId>spring-boot-maven-plugin</artifactId>
54             </plugin>
55         </plugins>
56     </build>-->
57
58
59 </project>
打包方式是pom形式。
2、创建hello项目测试,步骤与dependencies类似。不同的是:pom.xml不需要引入springboot的父工程,而是引入dependencies。
 1 <?xml version="1.0" encoding="UTF-8"?>
 2 <project xmlns="http://maven.apache.org/POM/4.0.0" xmlns:xsi="http://www.w3.org/2001/XMLSchema-instance"
 3          xsi:schemaLocation="http://maven.apache.org/POM/4.0.0 http://maven.apache.org/xsd/maven-4.0.0.xsd">
 4     <modelVersion>4.0.0</modelVersion>
 5
 6     <groupId>com.baiye</groupId>
 7     <artifactId>spring-boot-hello</artifactId>
 8     <version>1.0.0-SNAPSHOT</version>
 9     <packaging>jar</packaging>
10
11     <name>spring-boot-hello</name>
12     <description></description>
13
14     <!--自定义继承父工程dependencies-->
15     <parent>
16         <groupId>com.baiye</groupId>
17         <artifactId>spring-boot-dependencies</artifactId>
18         <version>1.0.0-SNAPSHOT</version>
19         <!--相对路径:引入父工程的pom.xml-->
20         <relativePath>../spring-boot-dependencies/pom.xml</relativePath>
21     </parent>
22     <!--设置本项目特有的第三方依赖库-->
23     <dependencies>
24
25     </dependencies>
26
27     <build>
28         <plugins>
29             <plugin>
30                 <groupId>org.springframework.boot</groupId>
31                 <artifactId>spring-boot-maven-plugin</artifactId>
32             </plugin>
33         </plugins>
34     </build>
35
36
37 </project>
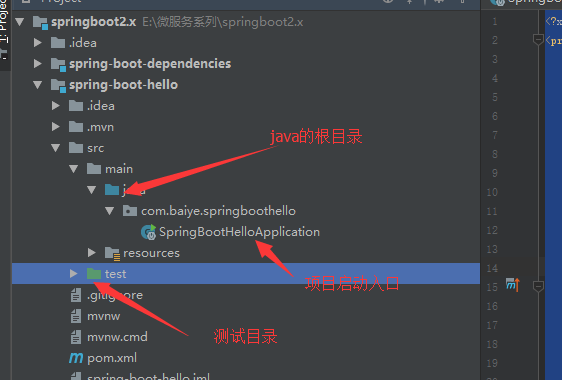
至此项目构建完毕,请仔细观看项目的目录结构:
接下来简单写一个hello例子,测试是否成功自定义的父类依赖,目录结构如下:
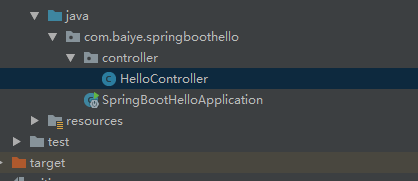
HelloController.java
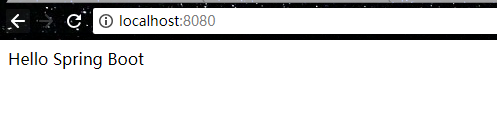
 1 package com.baiye.springboothello.controller;
 2
 3
 4 import org.springframework.web.bind.annotation.RequestMapping;
 5 import org.springframework.web.bind.annotation.RequestMethod;
 6 import org.springframework.web.bind.annotation.RestController;
 7
 8 @RestController
 9 public class HelloController {
10     @RequestMapping(value = {"/",""},method = RequestMethod.GET)
11     public String hello(){
12         return "Hello Spring Boot";
13     }
14 }
启动main函数,运行如下:
与传统web项目对比:
- 没有配置 web.xml
- 没有配置 application.xml,Spring Boot 帮你配置了
- 没有配置 application-mvc.xml,Spring Boot 帮你配置了
- 没有配置 Tomcat,Spring Boot 内嵌了 Tomcat 容器
没有最终的成功,也没有致命的失败,最可贵的是继续前进的勇气......

 浙公网安备 33010602011771号