
springboot 框架
用于存放springboot微服务框架原理
添加静态资源
  <dependency>
            <groupId>org.webjars</groupId>
            <artifactId>jquery</artifactId>
            <version>3.7.1</version>
  </dependency>
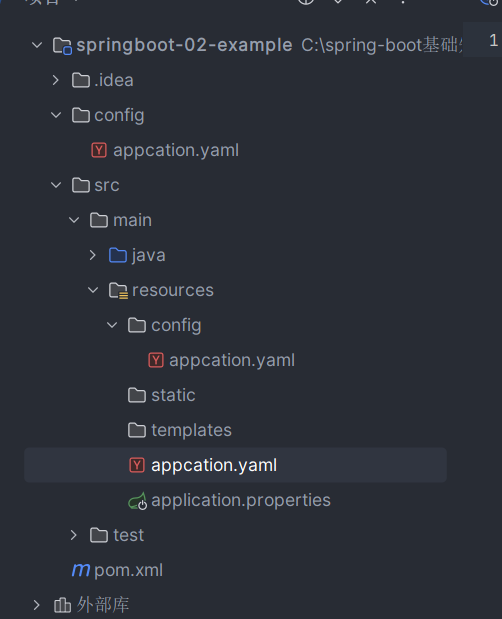
总结:1. 在springboot,我们可以使用以下的方式来处理静态资源
- webjars localhast:8080/webjars/
- public,static,resourse
2.优先级:resources>static>public
引入静态图标资源
 所支持的springboot的版本为2.1.7.RELEASE
  <parent>
     <groupId>org.springframework.boot</groupId>
     <artifactId>spring-boot-starter-parent</artifactId>
     <version>2.1.7.RELEASE</version>
     <relativePath/> <!-- lookup parent from repository -->
 </parent>
在静态配置application.properties 中 引入取消默认图标样式
spring.mvc.favicon.enabled=false
并在静态资源中创建 favicon.ico 从而实现效果为

thymeleaf依赖
    <dependency>
          <groupId>org.thymeleaf.extras</groupId>
          <artifactId>thymeleaf-extras-java8time</artifactId>
      </dependency>
      <dependency>
          <groupId>org.thymeleaf</groupId>
          <artifactId>thymeleaf-spring5</artifactId>
      </dependency>
而在thymeleaf的依赖情况下,只能通过controller来进行跳转
SpringMVC配置原理
Spring MVC 是Spring Framework的后续产品,属于全功能的MVC模块 ,可以分离控制器,模型控制器,视图。它本身是一个基于MVC设计模式的轻量级web框架
,类似于Struts,但更加灵活。
如果你想实现这个功能可以通过在类的下方添加注解@Configuration就可以定义一个专属MVC架构类,通过继承(implements ViewResolver)从而实现视图解析器方法
在此基础上配置bean从而达到让Springboot自动装配的一个效果
      package com.kuang.config;

import org.springframework.context.annotation.Bean;
import org.springframework.context.annotation.Configuration;
import org.springframework.web.servlet.View;
import org.springframework.web.servlet.ViewResolver;
import org.springframework.web.servlet.config.annotation.WebMvcConfigurer;

import java.util.Locale;

//全面接管springMVC
@Configuration
public class MyMvcConfig implements WebMvcConfigurer {

//    public interface viewResolver 实现了视图解析器接口类,我们就可以把它看成视图解析器


   @Bean
   public  ViewResolver myViewResolver(){
         return  new MyViewResolver();
   }

//    实现视图解析器方法
   public  static  class  MyViewResolver implements ViewResolver{

       @Override
       public View resolveViewName(String s, Locale locale) throws Exception {
           return null;
       }
   }

}
在springboot中,有非常多的 xxx COnfiguration 帮助我们进行拓展配置,只有看到这样的注解,可以多看看源码
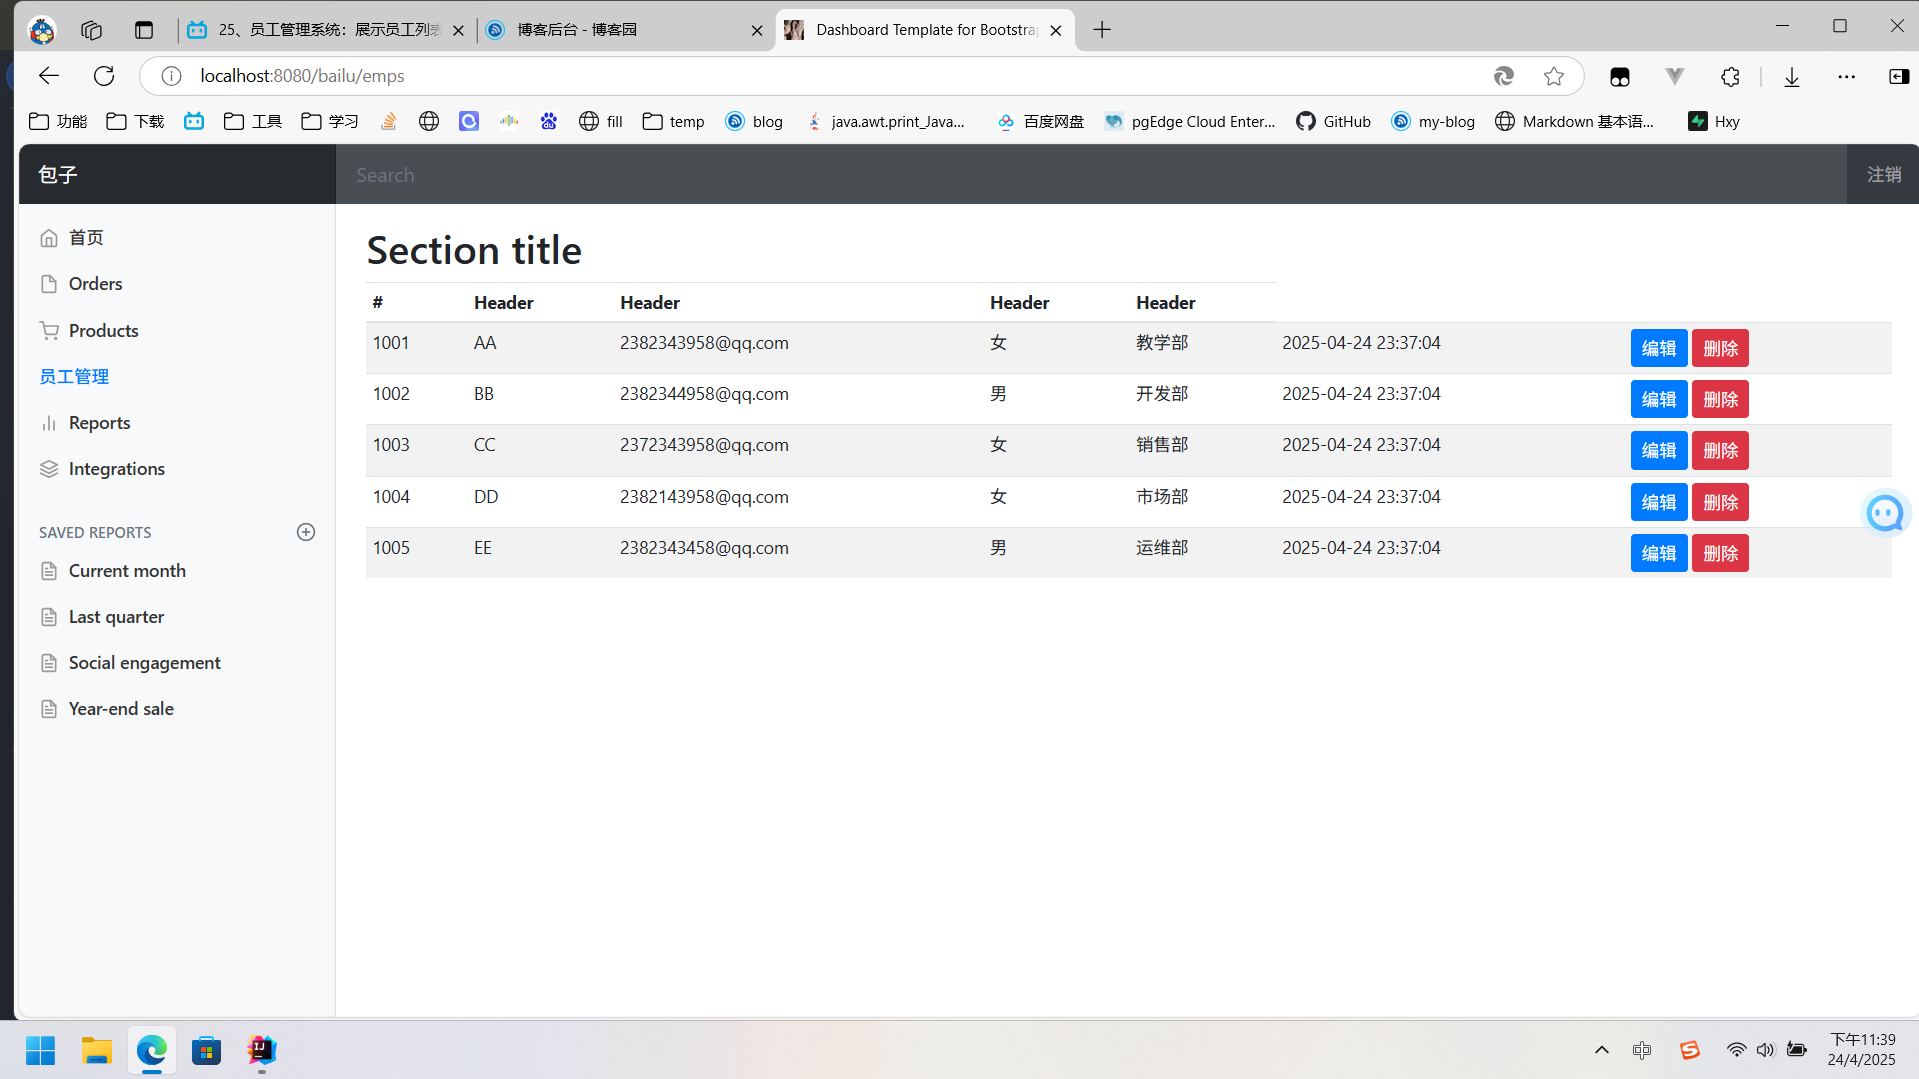
信息管理系统的搭建
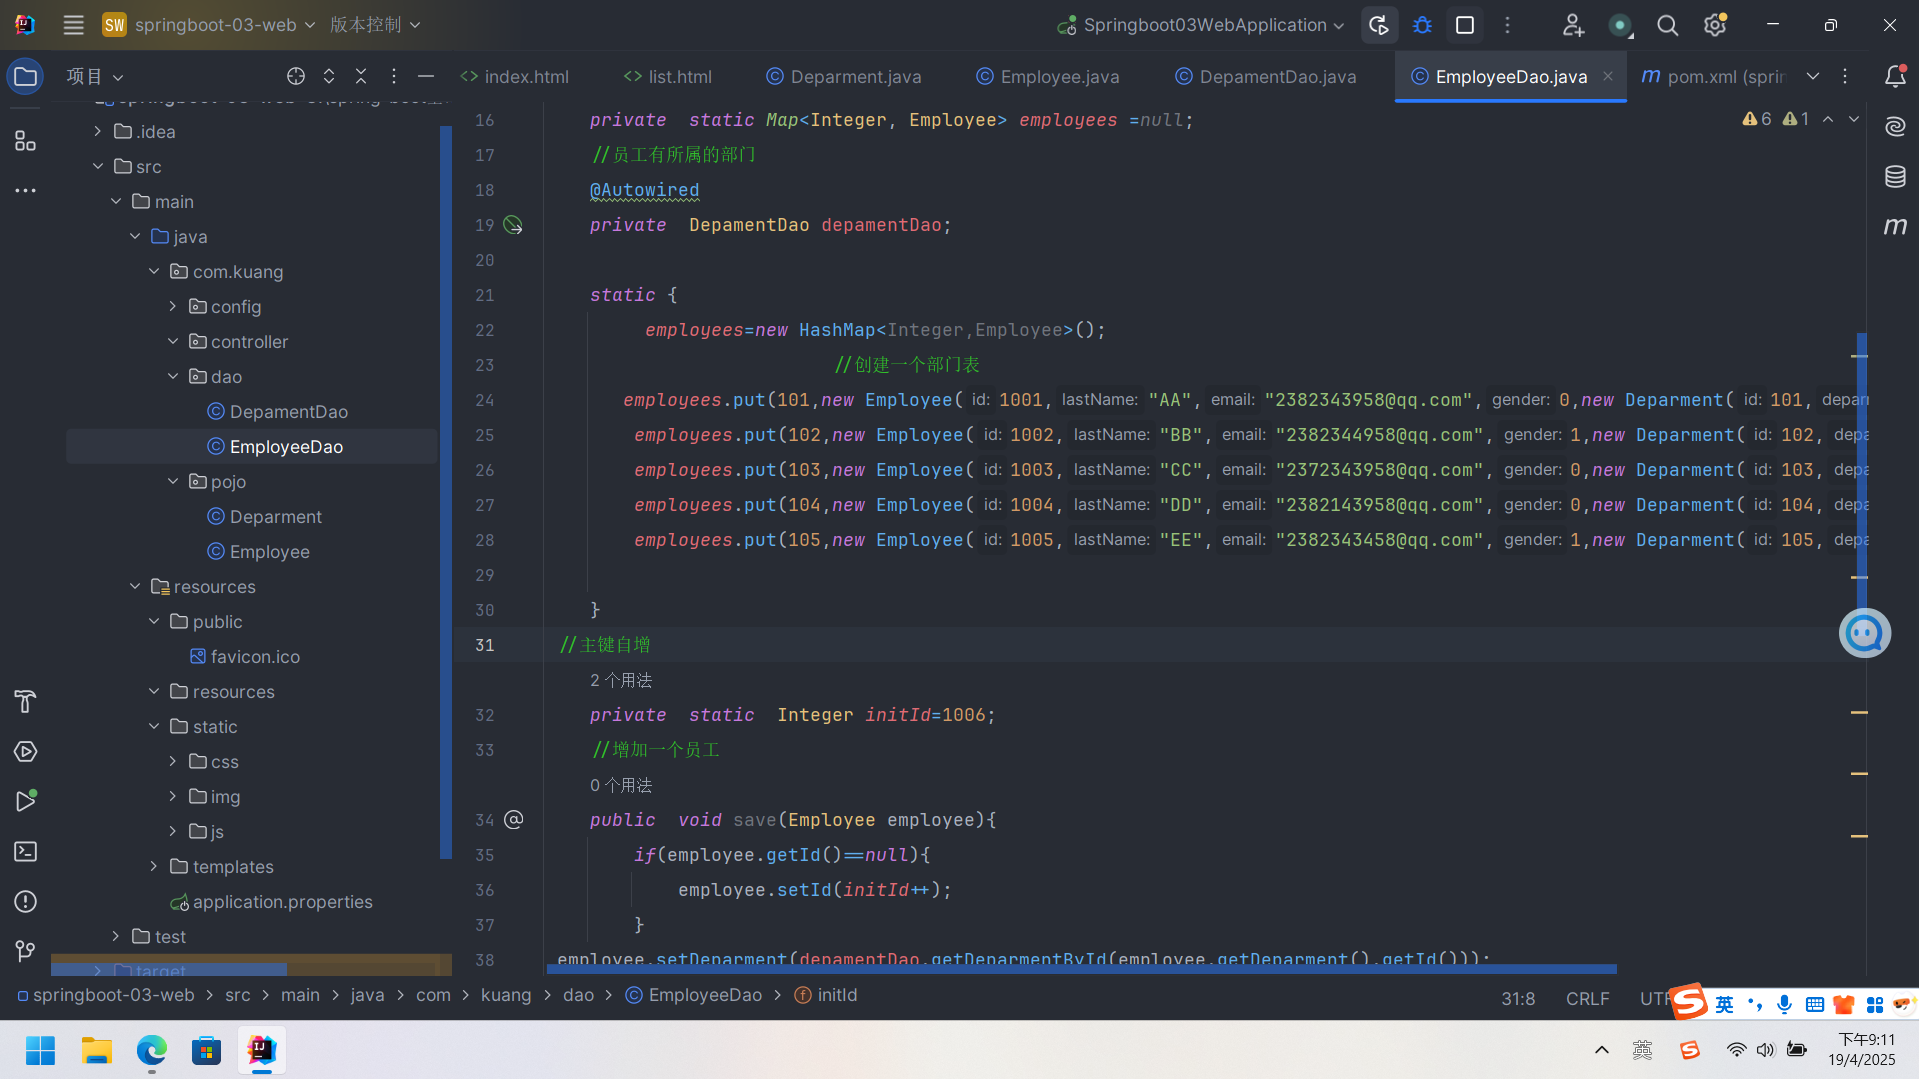
>本篇的案例是运用了bootstrap的模板作为静态资源进行一个前后端的搭建。同时在业务层先进行对数据库的模拟,以及实现增删改查。pojo层用来存放基本的数据库数据,dao进行业务上一个实现
package com.kuang.dao;

import com.kuang.pojo.Deparment;
import com.kuang.pojo.Employee;
import org.springframework.beans.factory.annotation.Autowired;
import org.springframework.stereotype.Repository;

import java.util.Collection;
import java.util.HashMap;
import java.util.Map;

//员工dao
@Repository
public class EmployeeDao {
  //模拟数据库中的数据
  private  static Map<Integer, Employee> employees =null;
  //员工有所属的部门
  @Autowired
  private  DepamentDao depamentDao;

  static {
       employees=new HashMap<Integer,Employee>();
                        //创建一个部门表
     employees.put(101,new Employee(1001,"AA","2382343958@qq.com",0,new Deparment(101,"教学部")));
      employees.put(102,new Employee(1002,"BB","2382344958@qq.com",1,new Deparment(102,"开发部")));
      employees.put(103,new Employee(1003,"CC","2372343958@qq.com",0,new Deparment(103,"销售部")));
      employees.put(104,new Employee(1004,"DD","2382143958@qq.com",0,new Deparment(104,"市场部")));
      employees.put(105,new Employee(1005,"EE","2382343458@qq.com",1,new Deparment(105,"运维部")));

  }
//主键自增
  private  static  Integer initId=1006;
  //增加一个员工
  public  void save(Employee employee){
      if(employee.getId()==null){
          employee.setId(initId++);
      }
employee.setDeparment(depamentDao.getDeparmentById(employee.getDeparment().getId()));
employees.put(employee.getId(),employee);


  }
  //查询员工信息
  public Collection<Employee> getAll(){
      return  employees.values();
  }
  //通过id查询员工信息
  public  Employee getEmployById(Integer id){
      return  employees.get(id);
  }
  //删除员工信息
  public  void delete(){
      employees.remove(initId);
  }

}
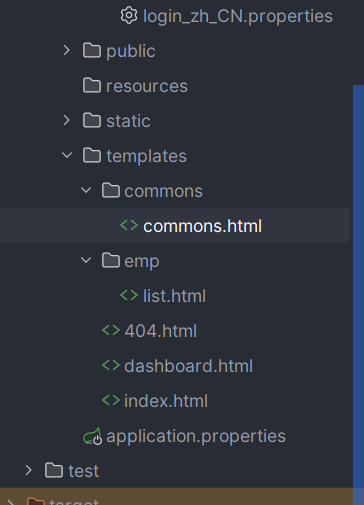
- 首页配置:注意点所有配置的页面都需要加上thymeleaf接管
页面国际化
 1.首先需要设置语言为UTF-8 ,在资源包中创建login_zh_CN.properties文件 在aalication.properties中引入spring.messages.basename=i18n.login
 2.在html标签中使用thymeleaf的引用类型同时在语言标签中引入th:href="@{/index.html(l='en_US')}"
 3.config包下创建MyLocaleResovler方法 ,这个可以看一下源码是实现国际化的一个自动配置。
 4.在MyLcaleREsolver中实现对LcoalResovser的重写
登录功能的业务逻辑,这里同样的.我们接受来着首页的 username和password 同时在Controller文件下实现密码接受以及验证的逻辑。当用于信息不正确时候进行首页信息的一个提示<p style="color: red" th:text="${msg}"th:if="${not #strings.isEmpty(msg)}">
当成功的时候将路由路径改为 MVC接管
package com.kuang.controller;

import org.springframework.stereotype.Controller;
import org.springframework.ui.Model;
import org.springframework.web.bind.annotation.RequestMapping;
import org.springframework.web.bind.annotation.RequestParam;
import org.springframework.web.bind.annotation.ResponseBody;
import org.thymeleaf.util.StringUtils;

@Controller
public class LoginController {
  @RequestMapping("/user/login")

    public  String login(
//            接受index页面的 两个参数
            @RequestParam("username")String username,
            @RequestParam("password") String password,
            Model  model){
//具体的业务:
//    如果用户名不为空 并且等于密码的equals
    if(!StringUtils.isEmpty(username)&&"123456".equals(password)){
//      当页面成功时跳转到 config-MyMVc
      return  "redirect:/main.html";
    }else{
      model.addAttribute("msg","用户名或密码错误!");
      return  "index";
    }


  }
}
登录拦截器
作用当没有进行用户登录的时候无法进入到内部的一些页面
在config包下创建LoginHandInterceptor 通过实现这个接口来进行一些业务的控制

package com.kuang.config;

import org.springframework.web.servlet.HandlerInterceptor;
import org.springframework.web.servlet.ModelAndView;

import javax.servlet.http.HttpServletRequest;
import javax.servlet.http.HttpServletResponse;


public class LoginHandInterceptor implements HandlerInterceptor {
    @Override
    public boolean preHandle(HttpServletRequest request, HttpServletResponse response, Object handler) throws Exception {
//        登录成功之后,应该有用户的session
      Object  loginUser=  request.getSession().getAttribute("loginUser");
  if(loginUser==null){
//      没有登录
      request.setAttribute("msg","请登录");
      request.getRequestDispatcher("/index.html").forward(request,response);
      return  false;
  }else{
      return  true;
  }

    }

}
同时在MyMvcConfig中实现对页面的拦截效果控制
package com.kuang.config;

import org.springframework.context.annotation.Bean;
import org.springframework.context.annotation.Configuration;
import org.springframework.web.servlet.LocaleResolver;
import org.springframework.web.servlet.config.annotation.InterceptorRegistry;
import org.springframework.web.servlet.config.annotation.ViewControllerRegistry;
import org.springframework.web.servlet.config.annotation.WebMvcConfigurer;

//全面接管springMVC
@Configuration
public class MyMvcConfig implements WebMvcConfigurer {
    @Override
    public void addViewControllers(ViewControllerRegistry registry) {
      registry.addViewController("/").setViewName("index");
      registry.addViewController("/index.html").setViewName("index");
//      当页面为dashboard时,显示的路由地址为main
        registry.addViewController("/main.html").setViewName("dashboard");
    }

//    自定义国家化组件生效
    @Bean
    public LocaleResolver localeResolver(){
        return  new MyLocaleResolver();
    }

    @Override
    public void addInterceptors(InterceptorRegistry registry) {
        registry.addInterceptor(new LoginHandInterceptor())
                .addPathPatterns("/**")
                .excludePathPatterns("/index.html","/","/user/login","/css/**","/js/**","/img/**");

    }
}
增删改查
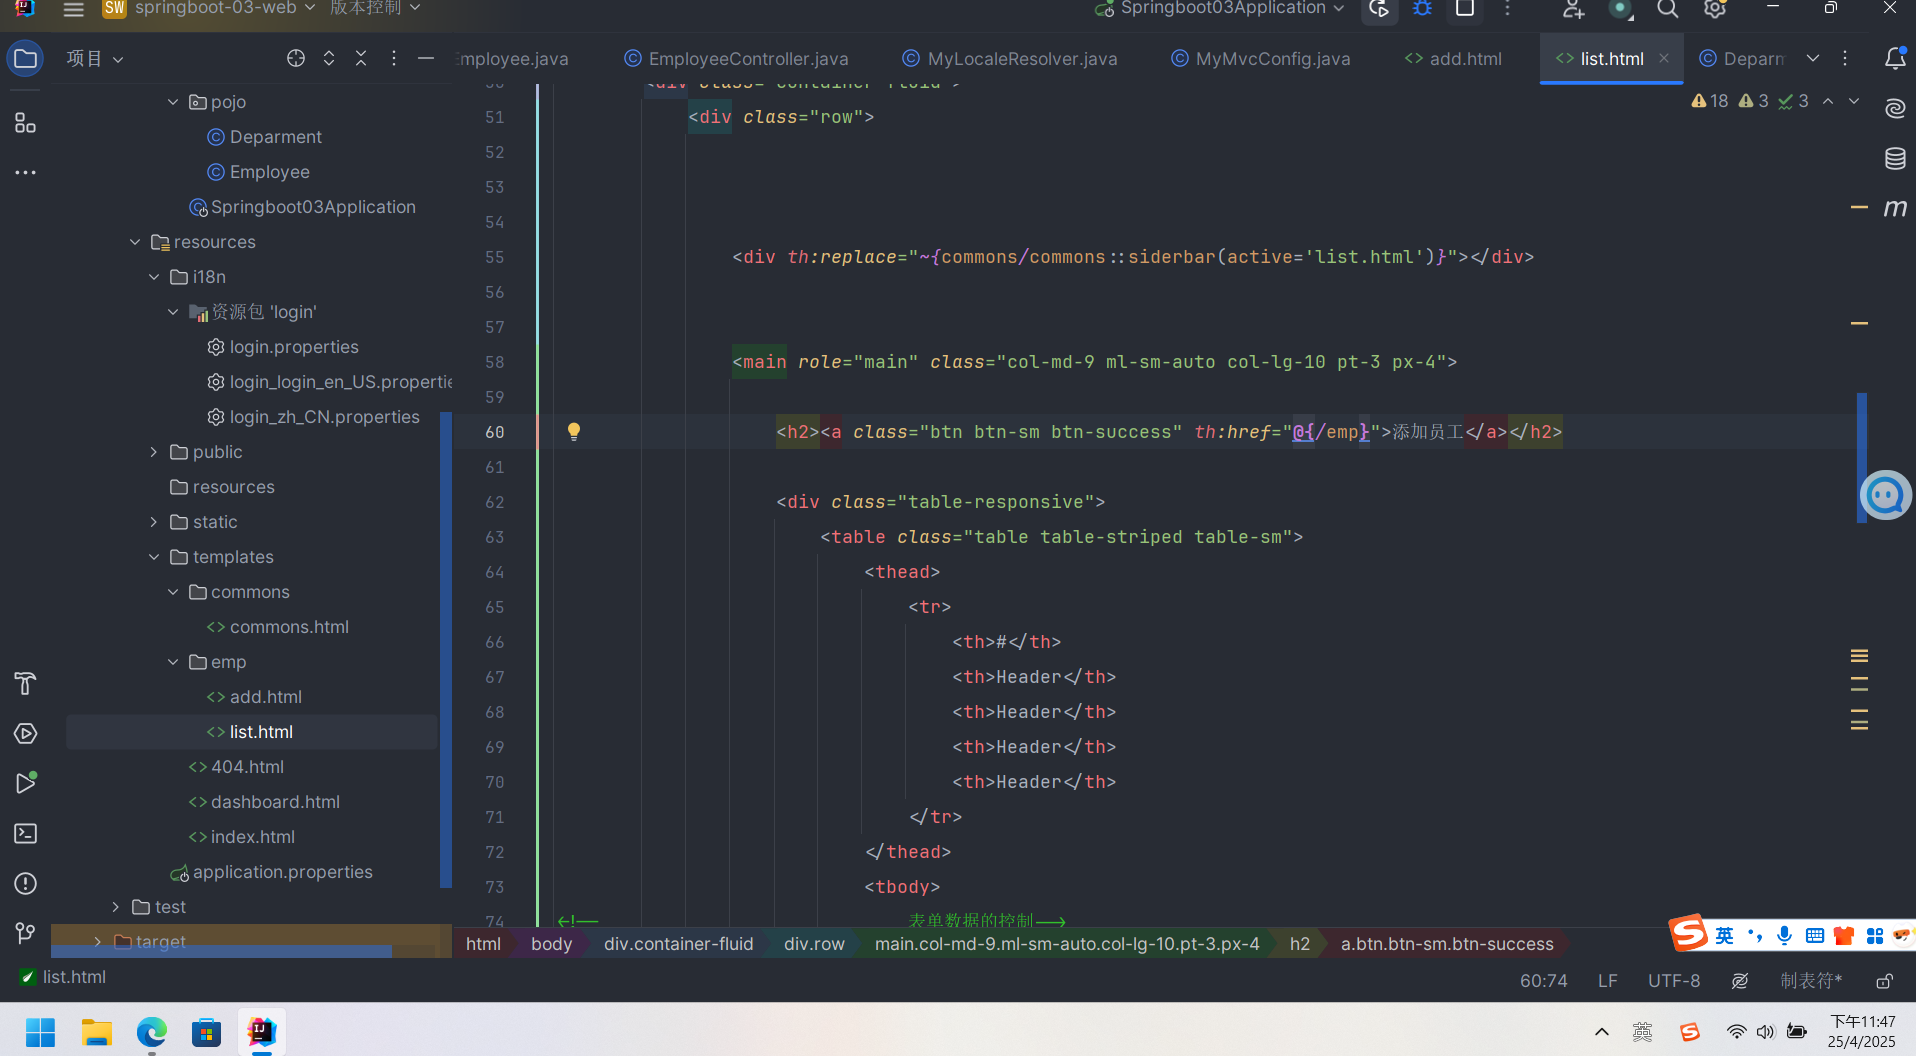
1.提取部分页面作为组件。同时在边框栏高亮部分也做为一个活动的选择 这里我们在静态资源目录下创建commons目录来进行分割页面共同部分,这一部分实现了将员工列表引入到页面当中。
2.在此基础上我们需要有一些vue的知识点,这里我们需要实现模拟数据库中的数据就需要将表中的列表改为动态的sql标签
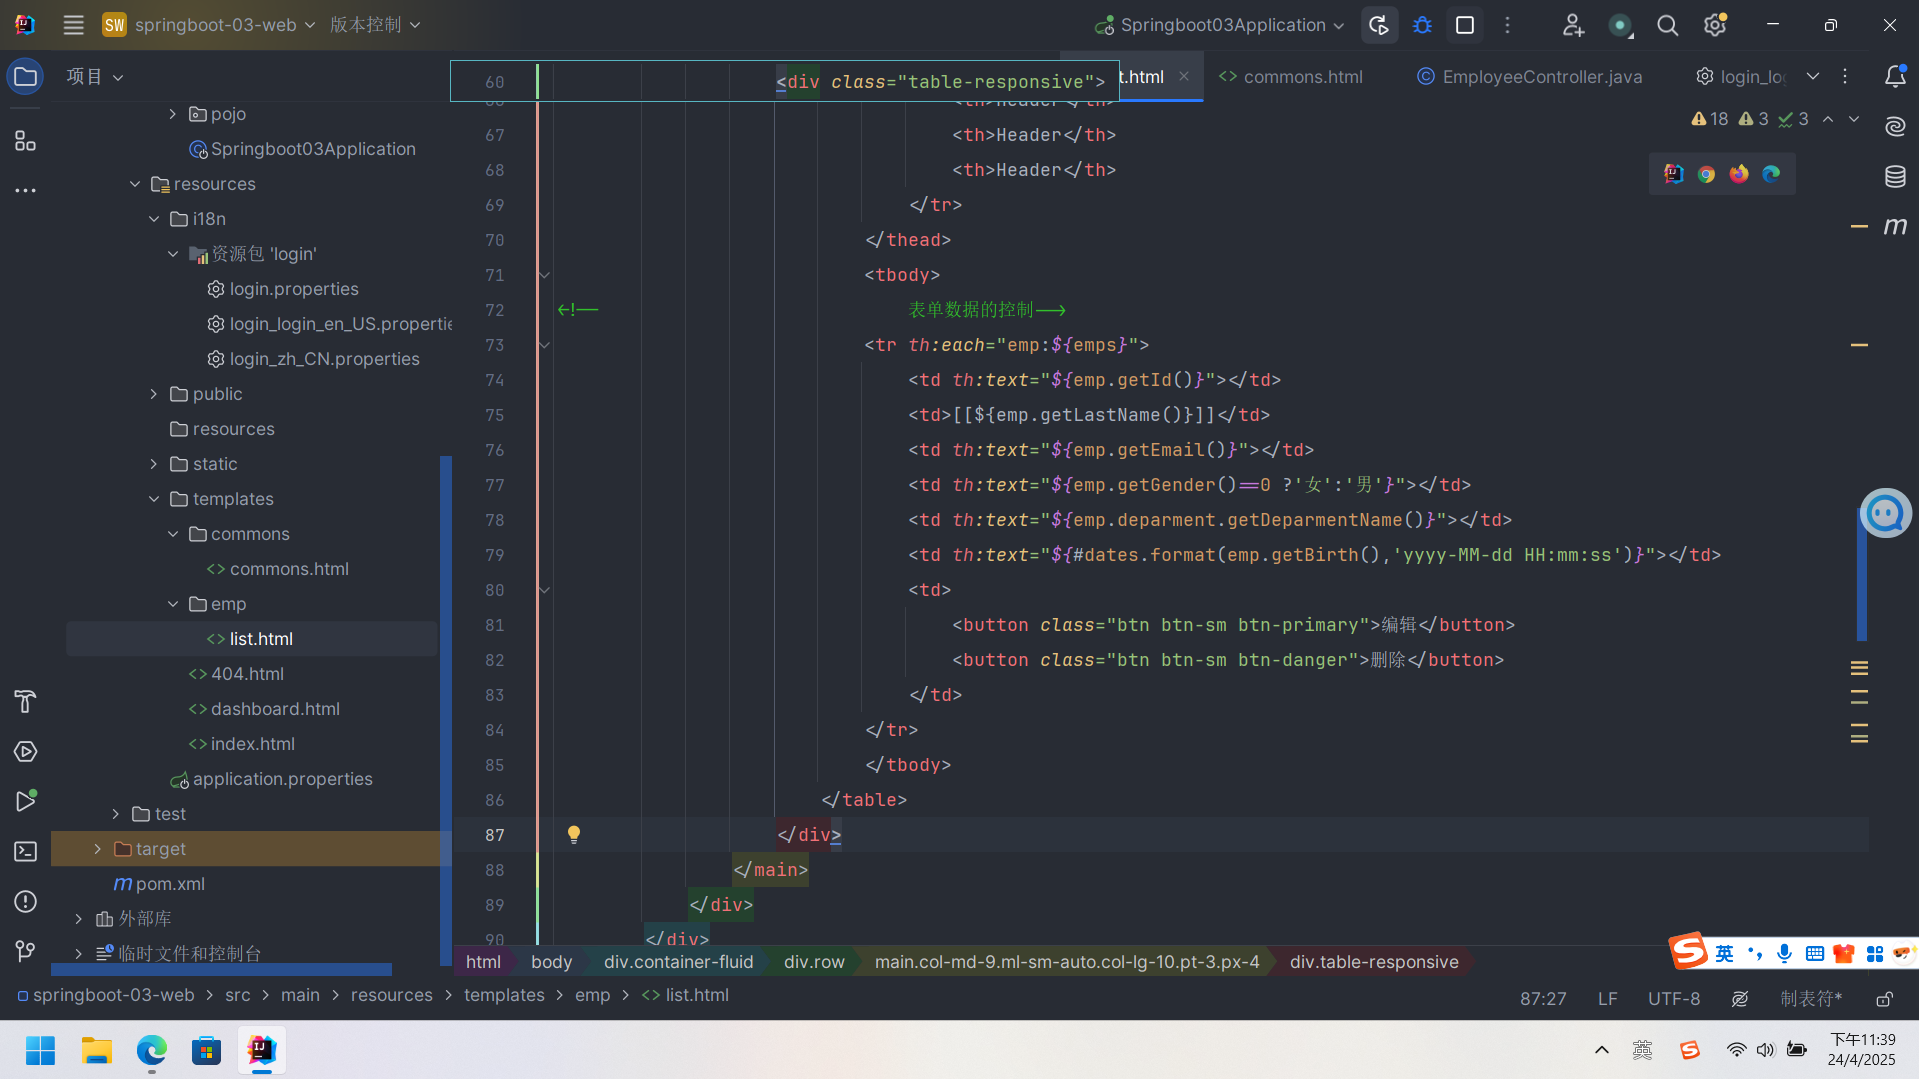
3.新增用户功能的实现
首先需要在list.html的基础上添加一个新的页面add.html ,这里前端的页面基本上是通过themleaf实现的。修改添加员工的路由为emp
修改add表单,这里也可以用bootstrap3中的组件
<form th:action="@{/emp}" method="post">
						<div class="form-group">
							<label>LastName</label>
							<input type="text"  name="lastName" class="form-control" placeholder="豆包">
						</div>
						<div class="form-group">
							<label>Email</label>
							<input type="email"  name="email" class="form-control" placeholder="1176244270@qq.com">
						</div>
						<div class="form-group">
							<label>Gender</label><br>
							<div class="form-check form-check-inline">
								<input class="form-check-input" type="radio" name="gender" value="1">
								<label class="form-check-label">男</label>
							</div>
							<div class="form-check form-check-inline">
								<input class="form-check-input" type="radio" name="gender" value="0">
								<label class="form-check-label">女</label>
							</div>
						</div>
						<div class="form-group">
                           <label>department</label>
							<select class="form-control" name="department.id">
<!--								这里进行一个遍历部门信息-->
								<option th:each="dept:${departments}" th:text="${dept.getDeparmentName()}" th:value="${dept.getId()}">1</option>

							</select>
						</div>
						<div class="form-group">
                           <label>Birth</label>
							<input type="text" name="birth" class="form-control" th:placeholder="bailu">
						</div>
						<button type="submit" class="btn btn-primary">添加</button>
							</form>
同时在employeeController添加增加功能
    @GetMapping("/emp")
public  String toAddpage(Model model){
//    查出所有部门的信息
    Collection<Deparment> departments = depamentDao.getDepartments();
    model.addAttribute("departments",departments);
    return  "emp/add";
}

    @PostMapping("/emp")
    public  String addEmp(Employee employee){
        System.out.println("save=>"+employee);
    employeeDao.save(employee);
//    调用底层业务来保存员工信息
//    添加操作
        return  "redirect:/emps";
    }
这里需要添加一个级关系配置来解决department出现的空指针问题在此基础上也可以增加Service防御性质从而对department进行检验
    public  Deparment getDeparment(){
        if(deparment ==null){
            deparment =new Deparment();
        }
        return  deparment;
    }
基于JDBC实现数据库搭建
什么是JDBC
它本身是sun公司定义的数据库接口,我们可以用过这个接口从而实现对多种数据库的连接到后台, 这里实现通过springboot实现增删改查 。所运用的jdk版本为17,

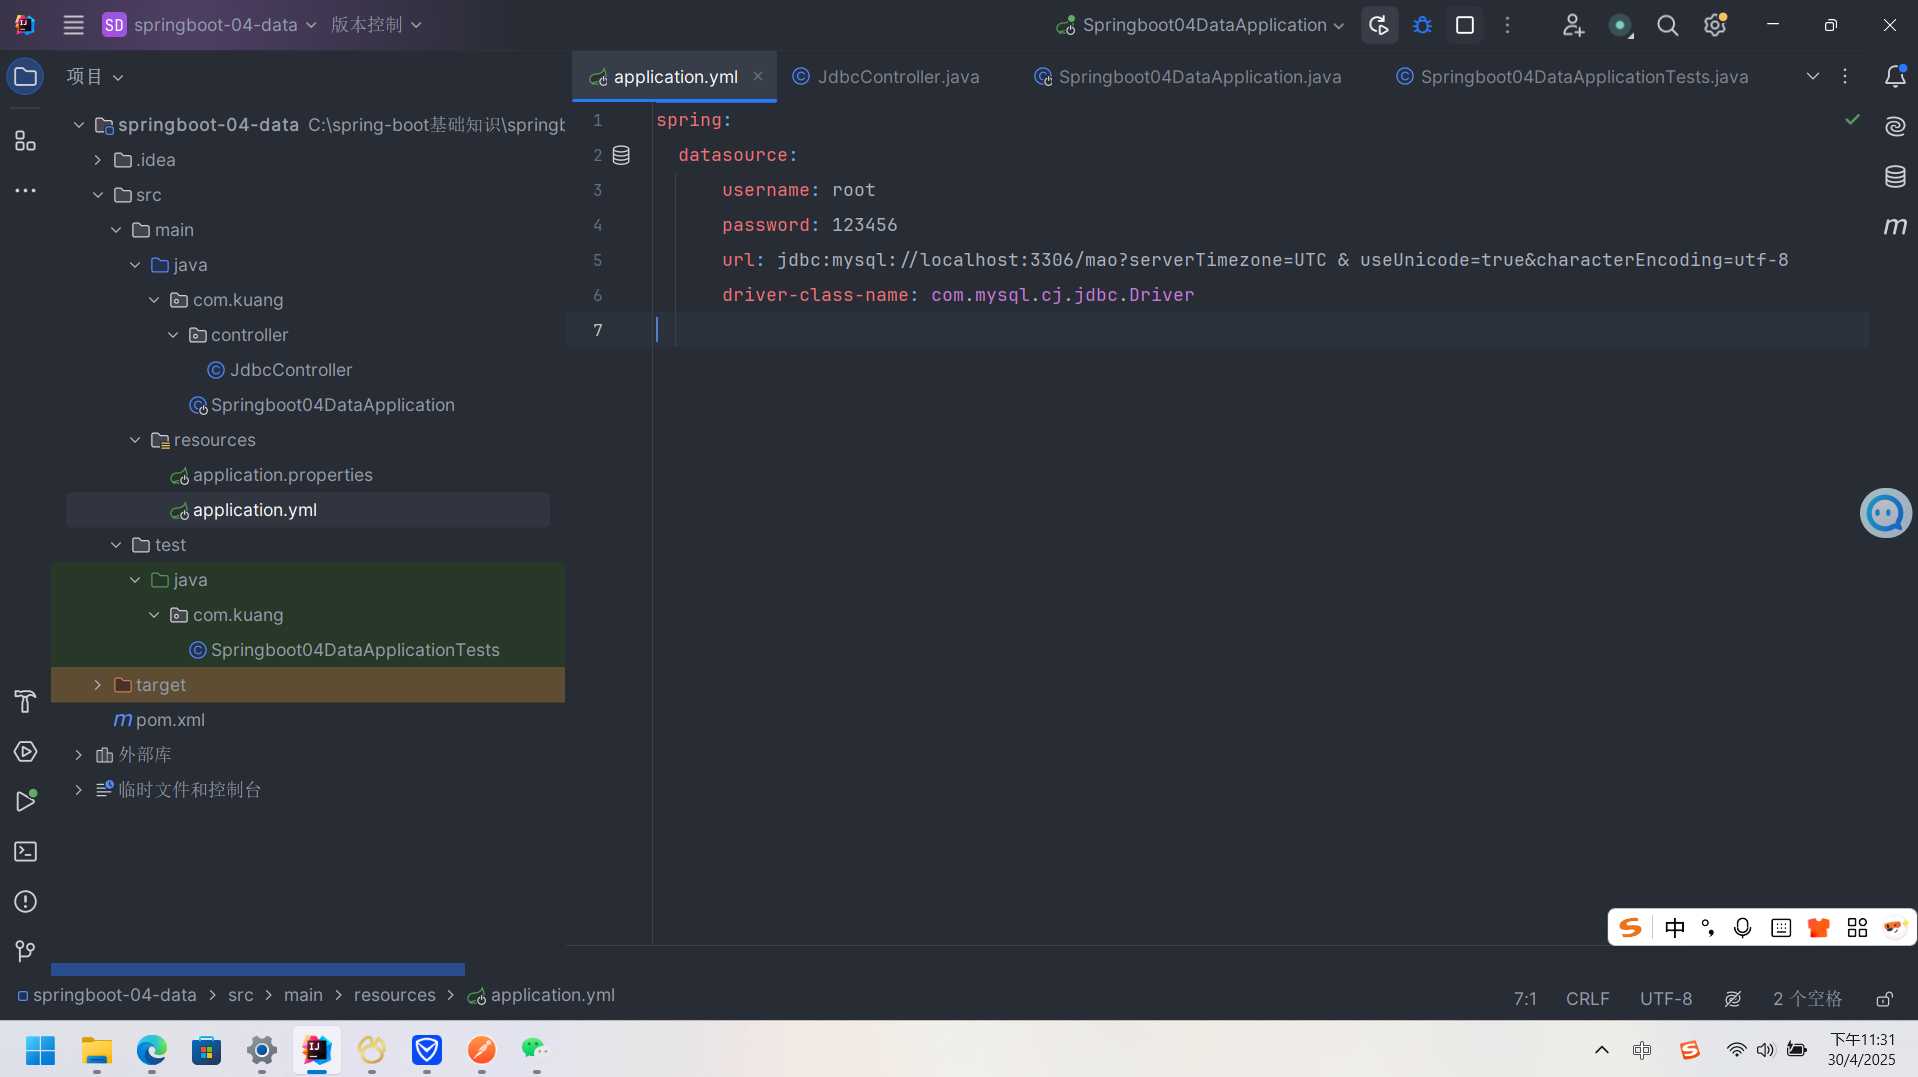
1.第一步是先导入我们的数据库,在因此需要保证你的数据库中存在对应的表,这里为yml文件的一个配置
spring:
  datasource:
      username: root
      password: 123456
      url: jdbc:mysql://localhost:3306/mao?serverTimezone=UTC & useUnicode=true&characterEncoding=utf-8
      driver-class-name: com.mysql.cj.jdbc.Driver
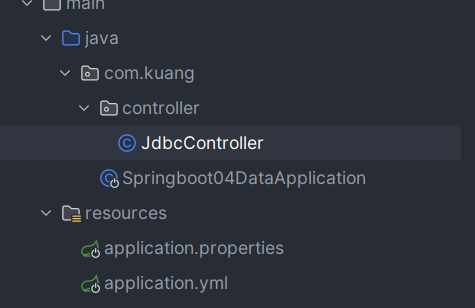
目录的结构为
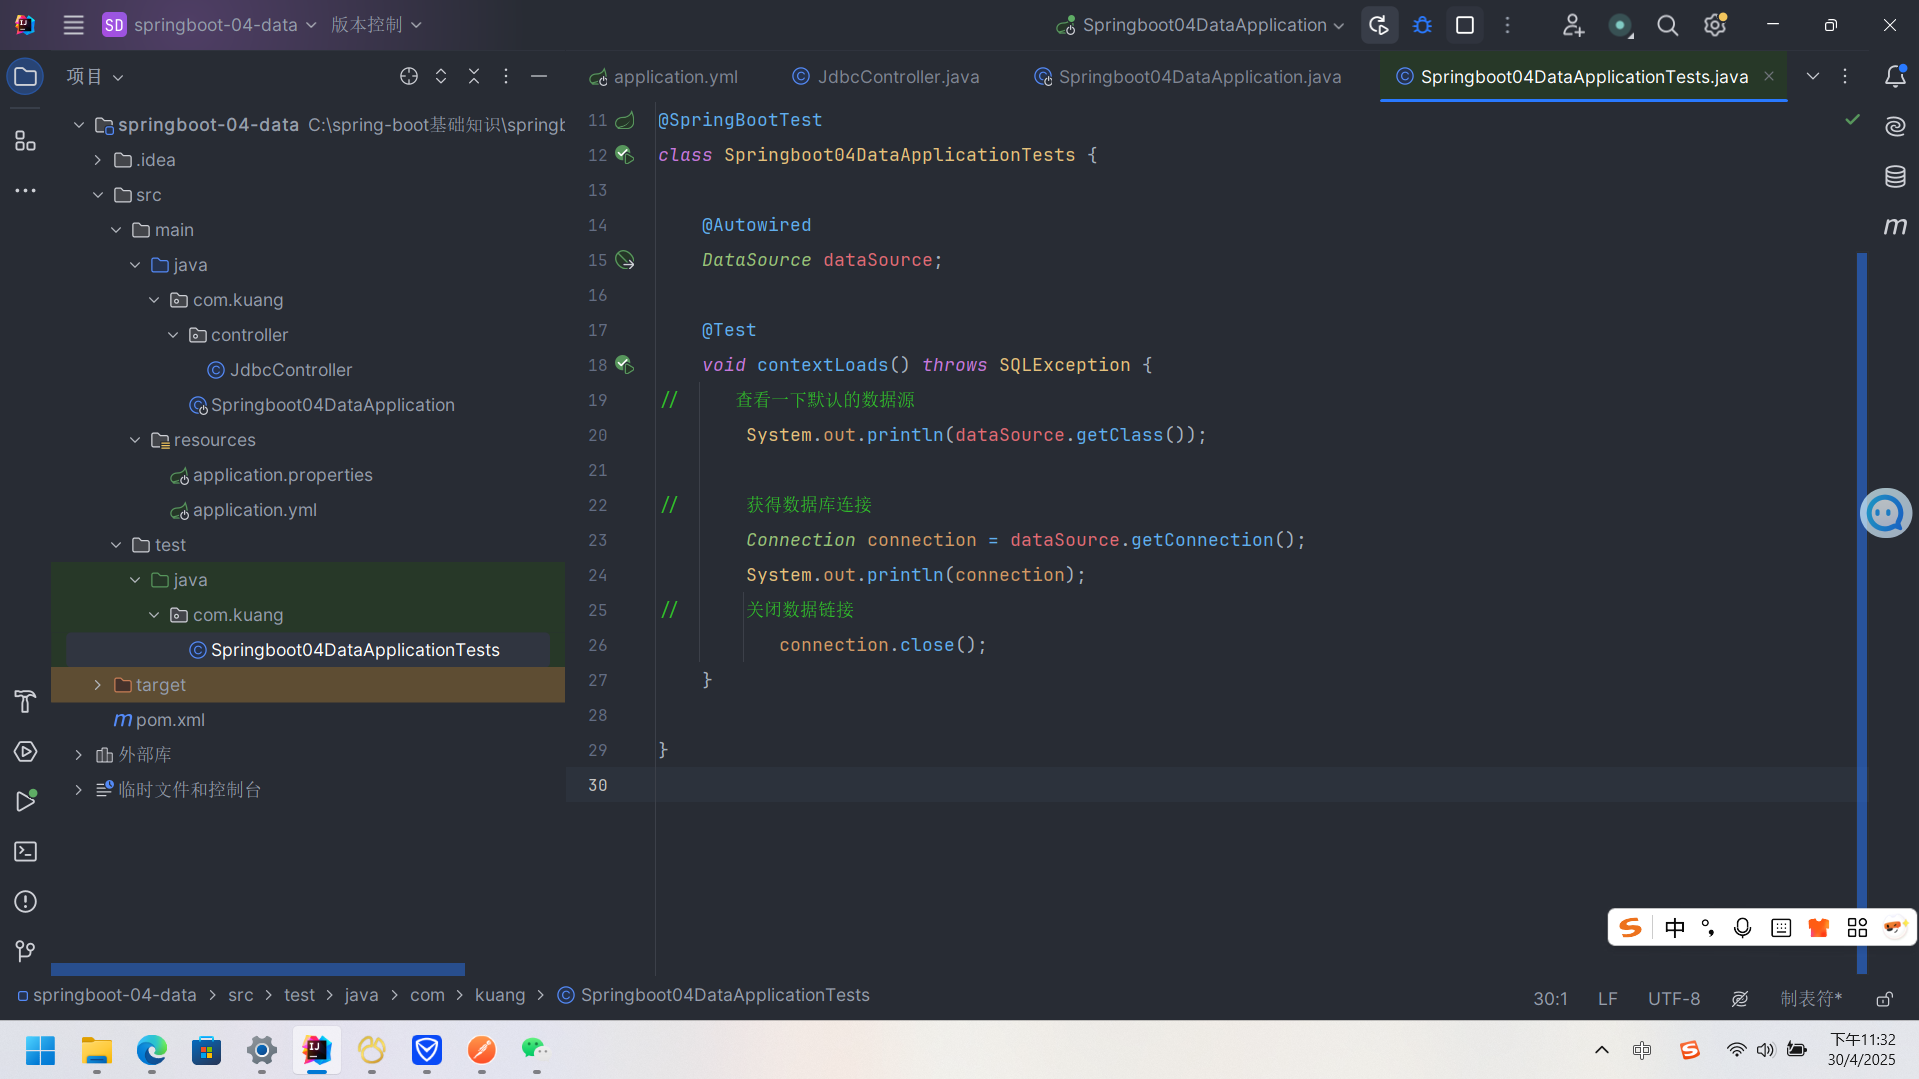
2.第二步在启动类中实现数据库的一些基础检查
3.第三步创建jdbcController,在MVC架构中,Controller为接口控制层,当数据端发出请求时Controller能够进行即使处理,同时对业务层Sercice进行业务的处理,将业务逻辑处理结果进行封装成适当的数据结构,并通过Http响应给客户端
以下为jdbcController代码
package com.kuang.controller;


import org.springframework.beans.factory.annotation.Autowired;
import org.springframework.jdbc.core.JdbcTemplate;
import org.springframework.web.bind.annotation.GetMapping;
import org.springframework.web.bind.annotation.PathVariable;
import org.springframework.web.bind.annotation.PostMapping;
import org.springframework.web.bind.annotation.RestController;

import java.util.List;
import java.util.Map;
import java.util.Objects;

@RestController
public class JdbcController {

    @Autowired
     JdbcTemplate jdbcTemplate;

//    查询所有数据库的连接并显示在网页上
    @GetMapping("/userlist")
    public List<Map<String,Object>> userList(){
        String sql ="select * from pet";
        List<Map<String, Object>> list_maps = jdbcTemplate.queryForList(sql);
        return  list_maps;
    }
//增加
    @GetMapping("/addUser")
    public  String addUser(){
        String sql ="insert into mao.pet(pet_1,pet_name,pet_age,pet_sex,pet_salary) "+
                "value( 4,'二蛋',5,'母',9000)";
        jdbcTemplate.update(sql);
        return "add data-ok";
    }
//修改
    @GetMapping("/updateUser/{id}")
    public  String updateUser(@PathVariable("id") int id){
        String sql ="update  mao.pet set pet_name=? ,pet_salary=?  where id="+id;
//        封装
        Object [] objects =new Object[2];
        objects[0]="豆包四号";
        objects[1]="9000";
        jdbcTemplate.update(sql,objects);
        return "update-ok";
    }

//    删除
@GetMapping("/deleteUser/{id}")
public  String deleteUser(@PathVariable("id") int id){
    String sql ="delete  from  mao.pet where id=?";

    jdbcTemplate.update(sql,id);
    return "delete-ok";
}


}
SpringSecurity
满足开发的安全需求,例如过滤器,拦截器。以及多级用户控制
- 功能权限
- 访问权限
- 菜单权限
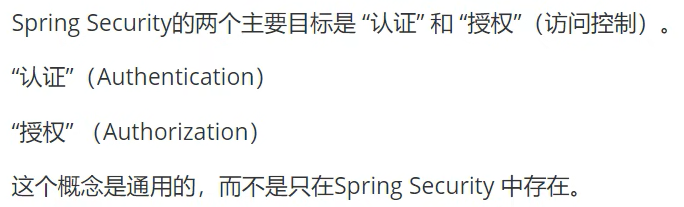
用户的认证和授权
Spring Security是针对spring项目的一个安全框架,也是springboot底层的安全模块技术,它可以实现强大的web安全控制功能,这里我们对于security的使用只需要引入spring-boot-starter-security就可以实现其功能
  <dependency>
            <groupId>org.springframework.boot</groupId>
            <artifactId>spring-boot-starter-security</artifactId>
        </dependency>
同时我们还需要记住几个重要的类
- webSecurityCOnfigurerAdapter:自定义Security策略
- AuthenticationManagerBuilder: 自定义认证策略
- @EnableWebSecurity:开启WebSecurity模式
而Spring Security的目标主要有两个 认证和授权
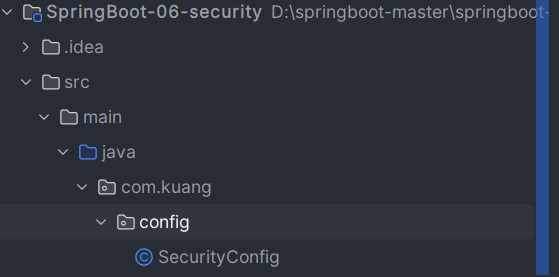
这里我们在kuang文件夹下创建config文件夹,并在config文件夹下创建SecurityCOnfig类
这里我们需要继承 WebSecurityCOnfigurerAdapter,并且重载我们的httpSecurity方法
这里我们通过http的请求来控制用户的访问权限,例如首页是所有用户都可以访问的,同时再对接下来的页面进行用户分级管理

而security实现了一个内部的登录页面 http.formLogin();当没有权限的时候可以跳转到这个页面

接下来我们开始实现多级权限用户功能
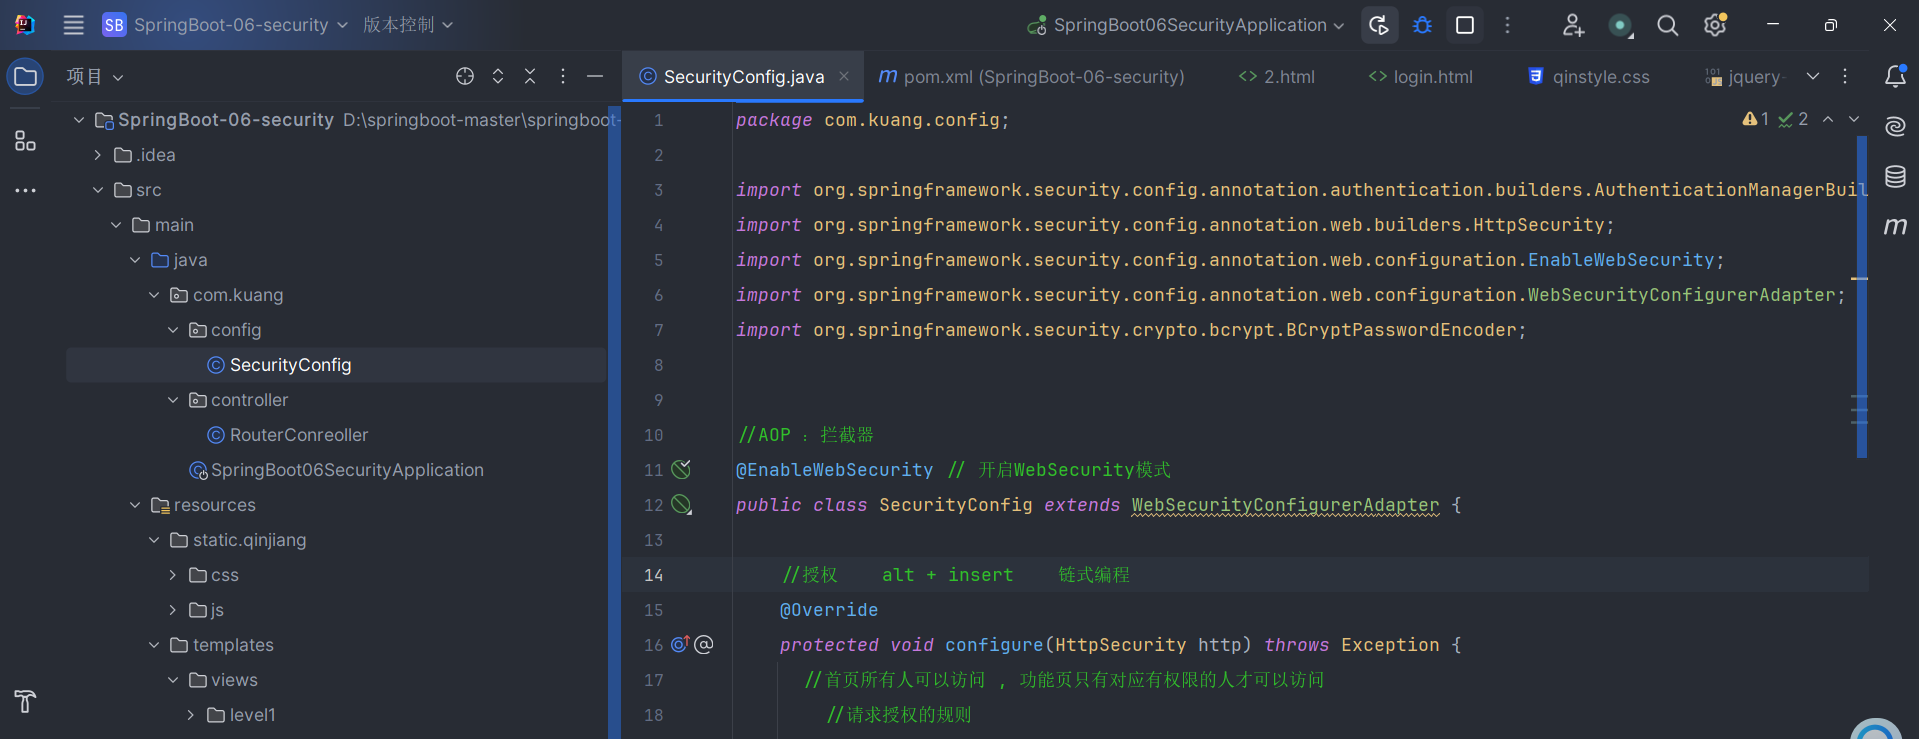
以下为Securityconfig的整体代码
package com.kuang.config;
import org.springframework.security.config.annotation.authentication.builders.AuthenticationManagerBuilder;
import org.springframework.security.config.annotation.web.builders.HttpSecurity;
import org.springframework.security.config.annotation.web.configuration.EnableWebSecurity;
import org.springframework.security.config.annotation.web.configuration.WebSecurityConfigurerAdapter;
import org.springframework.security.crypto.bcrypt.BCryptPasswordEncoder;
//AOP :拦截器
@EnableWebSecurity // 开启WebSecurity模式
public class SecurityConfig extends WebSecurityConfigurerAdapter {
//授权 alt + insert 链式编程
@Override
protected void configure(HttpSecurity http) throws Exception {
//首页所有人可以访问 , 功能页只有对应有权限的人才可以访问
//请求授权的规则
http.authorizeRequests()
.antMatchers("/").permitAll()
.antMatchers("/level1/**").hasRole("vip1")
.antMatchers("/level2/**").hasRole("vip2")
.antMatchers("/level3/**").hasRole("vip3");
//没有权限默认会到登录页面 , 需要开启登录的页面
// /login 原来只有这一段代码的情况下http.formLogin() 访问的login请求 , 现在我们自己写了个界面所以用自己的请求 ,toLogin
//定制登录页 http.formLogin().loginPage("/toLogin");
http.formLogin().loginPage("/toLogin");
// 当前端的信息与后端默认的东西不匹配时:比如前段提交的name 为 user, pwd 提交的请求非要为/login 就是后端走tolOgin 请求 , 前端提交的请求为
//login
//http.formLogin().loginPage("/toLogin").usernameParameter("user").passwordParameter("pwd").loginProcessingUrl("/login");
//防止网站工具: get post
http.csrf().disable();// 默认开启,关闭失败, ,肯定存在原因
//注销 开启了注销功能 , 跳到首页
http.logout().logoutSuccessUrl("/");
//开启记住我功能 cookie cookie 默认保存两周 , 自定义接收前段的参数
//http.rememberMe();
http.rememberMe().rememberMeParameter("remember");
}
// 认证 springboot 2.1.x 可以直接使用
// 密码编码: passwordEncoder
//在spring secutiry 5.0 +
@Override
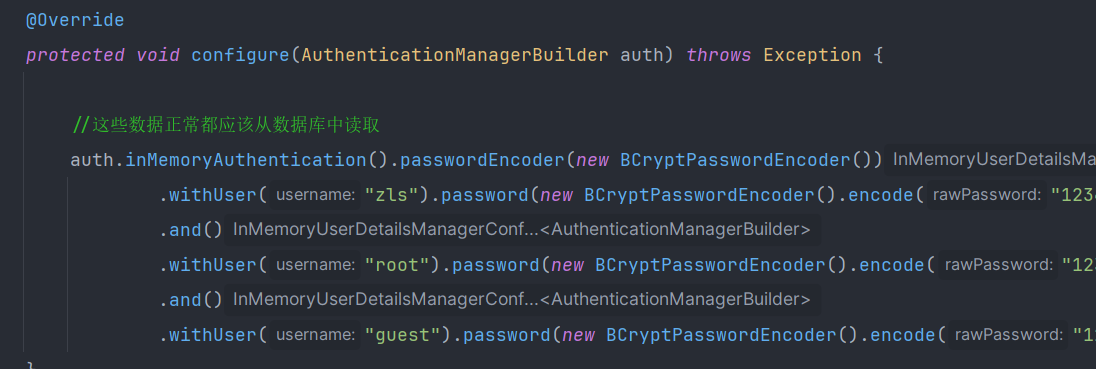
protected void configure(AuthenticationManagerBuilder auth) throws Exception {
//这些数据正常都应该从数据库中读取
auth.inMemoryAuthentication().passwordEncoder(new BCryptPasswordEncoder())
.withUser("zls").password(new BCryptPasswordEncoder().encode("123456")).roles("vip2","vip3")
.and()
.withUser("root").password(new BCryptPasswordEncoder().encode("123456")).roles("vip1","vip2","vip3")
.and()
.withUser("guest").password(new BCryptPasswordEncoder().encode("123456")).roles("vip1");
}
}
注销用户以及权限控制
在SecurityConfig中通过 http.logout();实现注销的功能,同时我们在前端实现注销的前端页面 。这里我们要实现,登录用户权限匹配对应的显示列表。因此我们再次引入依赖
  <dependency>
            <groupId>org.thymeleaf.extras</groupId>
            <artifactId>thymeleaf-extras-springsecurity5</artifactId>
            <version>3.0.4.RELEASE</version>
        </dependency>
同时我们需要再进行引入命名空间,目的是为了防止出现报错
<html lang="en" xmlns:th="http://www.thymeleaf.org"
     xmlns:sec="http://www.thymeleaf.org/extras/spring-security">
这里我们提供一个思想,当我们没有登录的时候显示的为登录,如果你已经登录则显示用户名以及注销
 <!--如果未登录-->
                <div sec:authorize="!isAuthenticated()">
                    <a class="item" th:href="@{/toLogin}">
                        <i class="address card icon"></i> 登录
                    </a>
                </div>

                <!--如果登录了 , 显示用户名与注销按钮-->
                <div sec:authorize="isAuthenticated()">
                    <a class="item">
                        用户名: <span sec:authentication="name"></span>
                        角色: <span sec:authentication="principal.authorities"></span>
                    </a>
                </div>
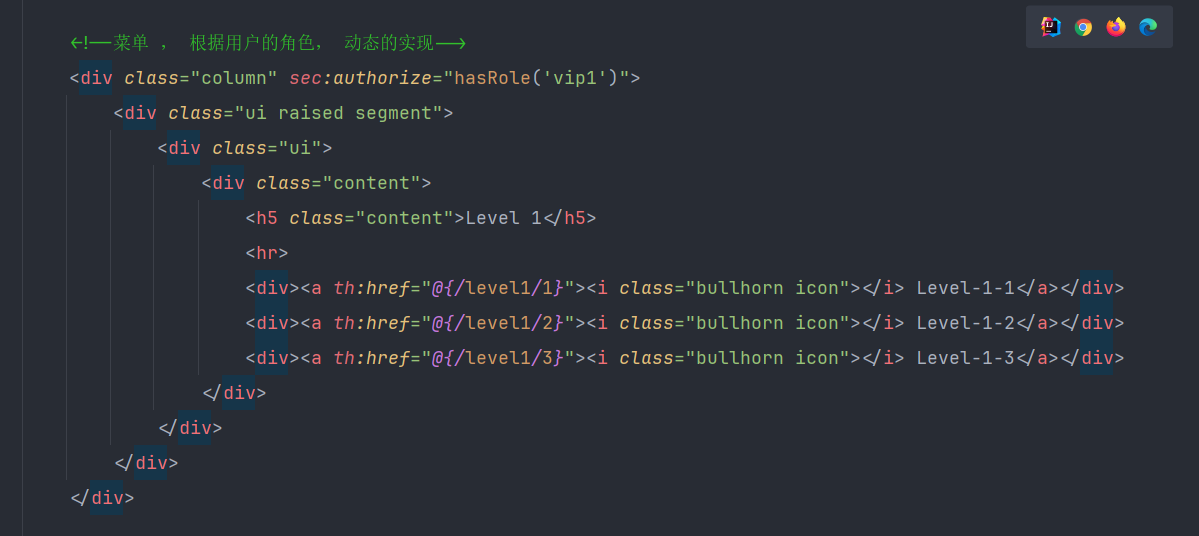
这里我们只需要通过一个前端的函数就可以控制表单根据用户权限显示,也就是我们平时所说的 sec:authorize="hasRole('vip1')"
记住我以及首页定制
我们平时首次登录的时候,会有一个记住我功能的提示,因此我们在这里也同样实现这样的功能,同样的这种功能也会在你的开发过程中,更有利你对业务的完善。同样的,这个功能也很容易实现
我们只需要使用http.remember()
http.rememberMe().rememberMeParameter("remember");
shiro

对于shiro的使用,我们可以分为三个步骤,同时这也是我们快速实现的开始
* 配置相关的依赖
* 配置 log4j.properties 以及 shiro.ini
* 引入Quickstart.java
对于这种必要的配置,如果你想了解的更加具体,我推荐你可以看一下官方的文档,我想这会为你提供很多帮助https://shiro.apache.org/download.html
点击查看代码
<?xml version="1.0" encoding="UTF-8"?>
<project xmlns="http://maven.apache.org/POM/4.0.0"
         xmlns:xsi="http://www.w3.org/2001/XMLSchema-instance"
         xsi:schemaLocation="http://maven.apache.org/POM/4.0.0 http://maven.apache.org/maven-v4_0_0.xsd">

    <modelVersion>4.0.0</modelVersion>
    <groupId>org.apache.shiro.tutorials</groupId>
    <artifactId>shiro-tutorial</artifactId>
    <version>1.0.0-SNAPSHOT</version>
    <name>First Apache Shiro Application</name>
    <packaging>jar</packaging>

    <properties>
        <project.build.sourceEncoding>UTF-8</project.build.sourceEncoding>
    </properties>

    <build>
        <plugins>
            <plugin>
                <groupId>org.apache.maven.plugins</groupId>
                <artifactId>maven-compiler-plugin</artifactId>
                <version>3.8.0</version>
                <configuration>
                    <source>1.8</source>
                    <target>1.8</target>
                </configuration>
            </plugin>

            <!-- This plugin is only to test run our little application.  It is not
                 needed in most Shiro-enabled applications: -->
            <plugin>
                <groupId>org.codehaus.mojo</groupId>
                <artifactId>exec-maven-plugin</artifactId>
                <version>1.1</version>

                <configuration>
                    <classpathScope>test</classpathScope>
                    <mainClass>Tutorial</mainClass>
                </configuration>
            </plugin>
        </plugins>
    </build>

    <dependencies>
        <dependency>
            <groupId>org.apache.shiro</groupId>
            <artifactId>shiro-core</artifactId>
            <version>2.0.4</version>
        </dependency>
        <!-- Shiro uses SLF4J for logging.  We'll use the 'simple' binding
             in this example app.  See https://www.slf4j.org for more info. -->
        <dependency>
            <groupId>org.slf4j</groupId>
            <artifactId>slf4j-simple</artifactId>
            <version>1.7.21</version>
            <scope>test</scope>
        </dependency>
        <dependency>
            <groupId>org.slf4j</groupId>
            <artifactId>jcl-over-slf4j</artifactId>
            <version>2.0.13</version>
            <scope>test</scope>
        </dependency>
        <dependency>
            <groupId>org.slf4j</groupId>
            <artifactId>slf4j-api</artifactId>
            <version>1.7.30</version>
        </dependency>
        <dependency>
            <groupId>ch.qos.logback</groupId>
            <artifactId>logback-classic</artifactId>
            <version>1.2.3</version>
        </dependency>
        <dependency>
            <groupId>commons-logging</groupId>
            <artifactId>commons-logging</artifactId>
            <version>1.3.3</version>
        </dependency>

    </dependencies>

</project>
接下来我们开始讲解这段代码 首先是我们通过核心代码SecurityUtils.getSubject();来获取当前用户的对象,并通过当前用户拿到session,通过log.info我们可以拿到用户的取值。接下来通过if条件来判断是否被认证。来获取令牌,当我们获取了令牌,便通过 token.setRememberMe(true); // 设备记住我从而实现授权的功能,通过用户可以获得的角色,来进行颗粒度的匹配,同时这也为我们提供了多级用户权限功能。 这里我们将提供源码
点击查看代码
import org.apache.shiro.SecurityUtils;
import org.apache.shiro.authc.*;
import org.apache.shiro.mgt.DefaultSecurityManager;
import org.apache.shiro.realm.text.IniRealm;
import org.apache.shiro.session.Session;
import org.apache.shiro.subject.Subject;
import org.slf4j.Logger;
import org.slf4j.LoggerFactory;

/**
 * @ClassName Quickstart
 * @Description TODO
 * @Author zoe_zls
 * @Date 2022/11/26
 * @Version 2.0
 **/
public class Quickstart {

    private static final transient Logger log = LoggerFactory.getLogger(Quickstart.class);


    public static void main(String[] args) {

        DefaultSecurityManager defaultSecurityManager=new DefaultSecurityManager();
        IniRealm iniRealm=new IniRealm("classpath:shiro.ini");
        defaultSecurityManager.setRealm(iniRealm);
        SecurityUtils.setSecurityManager(defaultSecurityManager);

        //核心代码 1. 获取当前的用户对象 , Subject
        Subject currentUser = SecurityUtils.getSubject();

        //核心代码: 2. 通过当前用户拿到Session
        Session session = currentUser.getSession();
        session.setAttribute("someKey", "aValue");
        String value = (String) session.getAttribute("someKey");
        if (value.equals("aValue")) {
            log.info("Subject=>session[" + value + "]");
        }


        //核心代码 3. 测试当前的用户是否被认证
        if (!currentUser.isAuthenticated()) {

            // token 令牌:没有获取随机设置的
            UsernamePasswordToken token = new UsernamePasswordToken("lonestarr", "vespa");
            token.setRememberMe(true); // 设备记住我

            try {
                currentUser.login(token); // 执行登录操作
            } catch (UnknownAccountException uae) {
                log.info("用户名不存在 " + token.getPrincipal());
            } catch (IncorrectCredentialsException ice) {
                log.info("密码" + token.getPrincipal() + "不对");
            } catch (LockedAccountException lae) {
                log.info("用户" + token.getPrincipal() + "被锁定" +
                        "Please contact your administrator to unlock it.");
            }

            catch (AuthenticationException ae) {
                //unexpected condition?  error?
            }
        }

        //say who they are:
        //print their identifying principal (in this case, a username):
        log.info("User [" + currentUser.getPrincipal() + "] logged in successfully.");

        //test a role:
        if (currentUser.hasRole("schwartz")) {
            log.info("May the Schwartz be with you!");
        } else {
            log.info("Hello, mere mortal.");
        }

        //粗粒度权限
        //test a typed permission (not instance-level)
        if (currentUser.isPermitted("lightsaber:wield")) {
            log.info("You may use a lightsaber ring.  Use it wisely.");
        } else {
            log.info("Sorry, lightsaber rings are for schwartz masters only.");
        }

        //细粒度的
        //a (very powerful) Instance Level permission:
        if (currentUser.isPermitted("winnebago:drive:eagle5")) {
            log.info("You are permitted to 'drive' the winnebago with license plate (id) 'eagle5'.  " +
                    "Here are the keys - have fun!");
        } else {
            log.info("Sorry, you aren't allowed to drive the 'eagle5' winnebago!");
        }

        //注销
        //all done - log out!
        currentUser.logout();

        //结束
        System.exit(0);
    }
}
springboot 整合shiro
pom.xml文件
<?xml version="1.0" encoding="UTF-8"?>
<project xmlns="http://maven.apache.org/POM/4.0.0"
         xmlns:xsi="http://www.w3.org/2001/XMLSchema-instance"
         xsi:schemaLocation="http://maven.apache.org/POM/4.0.0 http://maven.apache.org/xsd/maven-4.0.0.xsd">
    <modelVersion>4.0.0</modelVersion>
    <parent>
        <groupId>org.springframework.boot</groupId>
        <artifactId>spring-boot-starter-parent</artifactId>
        <version>2.7.5</version>
        <relativePath/> <!-- lookup parent from repository -->
    </parent>
    <groupId>com.kuang</groupId>
    <artifactId>shiro-springboot</artifactId>
    <version>0.0.1-SNAPSHOT</version>
    <name>shiro-springboot</name>
    <description>shiro-springboot</description>
    <properties>
        <java.version>8</java.version>
    </properties>

    <dependencies>


        <dependency>
            <groupId>log4j</groupId>
            <artifactId>log4j</artifactId>
            <version>1.2.17</version>
        </dependency>

        <dependency>
            <groupId>com.alibaba</groupId>
            <artifactId>druid</artifactId>
            <version>1.1.12</version>
        </dependency>

        <dependency>
            <groupId>org.projectlombok</groupId>
            <artifactId>lombok</artifactId>
            <version>1.18.24</version>
        </dependency>

        <!--shiro 整合SpringBoot 的包-->
        <dependency>
            <groupId>org.apache.shiro</groupId>
            <artifactId>shiro-spring-boot-web-starter</artifactId>
            <version>1.4.1</version>
        </dependency>

        <dependency>
            <groupId>org.springframework.boot</groupId>
            <artifactId>spring-boot-starter-web</artifactId>
            <version>2.7.5</version>
        </dependency>

        <!--thymeleaf 模板-->
        <dependency>
            <groupId>org.thymeleaf</groupId>
            <artifactId>thymeleaf-spring5</artifactId>
            <version>3.0.12.RELEASE</version>
        </dependency>
        <dependency>
            <groupId>org.thymeleaf.extras</groupId>
            <artifactId>thymeleaf-extras-java8time</artifactId>
            <version>3.0.4.RELEASE</version>
        </dependency>

        <dependency>
            <groupId>org.springframework.boot</groupId>
            <artifactId>spring-boot-starter-test</artifactId>
            <scope>test</scope>
        </dependency>
        <dependency>
            <groupId>org.apache.shiro</groupId>
            <artifactId>shiro-core</artifactId>
            <version>1.10.1</version>
            <scope>compile</scope>
        </dependency>
    </dependencies>

    <build>
        <plugins>
            <plugin>
                <groupId>org.springframework.boot</groupId>
                <artifactId>spring-boot-maven-plugin</artifactId>
            </plugin>
        </plugins>
    </build>

</project>
我们需要先了解最基础的配置,当你遇到一些问题的时候,基本上就是依赖的问题。这里我们在此基础上实现一些效果,多级用户管理,考虑到代码比较多,所以我今后会把代码以及相关的小项目放在gitee上,你可以随意复制链接,同时结合一些总结的知识
接下来我们来实现拦截器的功能,对应了我们平时所说的多级用户,同样的拦截器也是在ShiroConfig层面

 浙公网安备 33010602011771号