笔记6:Django基础
Django-MVT
(1)查看python版本号:
python -m django --version
(2) 创建Django项目
django-admin startproject mysite
(3)测试开发服务器是否成功
Desktop\bncDjango\mysite>python manage.py runserver
Django 自带一个用纯 Python 写的轻量级的 Web 服务器。为了让你能快速的开发出想要的东西,因为你不需要进行配置生产级别的服务器(比如 Apache)方面的工作,除非你已经准备好投入生产环境了。千万不要 将这个服务器用于和生产环境相关的任何地方。这个服务器只是为了开发而设计的。(我们在 Web 框架方面是专家,在 Web 服务器方面并不是。)
(4)创建应用模块
python manage.py startapp polls
Application definition
INSTALLED_APPS = [

'django.contrib.admin', #  管理员站点

'django.contrib.auth', #  认证授权系统

'django.contrib.contenttypes', # 内容类型框架

'django.contrib.sessions', # 会话框架

'django.contrib.messages', # 消息框架

'django.contrib.staticfiles', #管理静态文件的框架

'polls', # 投票模块

]
(5)polls模型下编辑视图view
from django.shortcuts import render
Create your views here.
from django.http import HttpResponse
def index(request):

return HttpResponse("Hello,this is my frist polls index.")
(6)polls模块下映射url
from django.urls import path
from . import views
urlpatterns = [

path('', views.index,name='index'),

]
(7)mysite主模块下配置url
from django.contrib import admin
from django.urls import path,include # 注意导入include模块
urlpatterns = [

path('polls/', include('polls.urls')), # 配置polls子模板url,支持正则

path('admin/', admin.site.urls),

]
(8)网页查询http://localhost:8000/polls/

(9)数据库配置与迁移
DATABASES = {

'default': {

# 'django.db.backends.sqlite3',

# 'django.db.backends.postgresql',

# 'django.db.backends.mysql',

# 'django.db.backends.oracle'

'ENGINE': 'django.db.backends.sqlite3',

'NAME': os.path.join(BASE_DIR, 'db.sqlite3'),

},

# MySQL数据库配置

# 'mysql': {

#     'ENGINE': 'django.db.backends.mysql',

#     'NAME': 'all_news', # 数据库名

#     'USER': 'root',

#     'PASSWORD': 'root',

#     'HOST': '127.0.0.1',

#     'PORT': '3306',

# }

}
python manage.py migrate
(10)编写模型M
from django.db import models
Create your models here.
class Question(models.Model):

question_text = models.CharField(max_length=200)

pub_data = models.DateField('date published')
def str(self):

return self.question_text
class Choice(models.Model):

question = models.ForeignKey(Question,on_delete=models.CASCADE)

choice_text = models.CharField(max_length=200)

votes = models.IntegerField(default=0)
def str(self):

return self.choice_text
(11)激活模型
为模型的改变生成迁移文件
python manage.py makemigrations polls

另一种查看,选择执行接收一个迁移的名称,然后返回对应的 SQL
python manage.py sqlmigrate polls 0001
应用数据库迁移
python manage.py migrate
(12)全自动后台管理页面
12.1 创建一个能登录管理页面的用户,均为admin
python manage.py createsuperuser
12.2 启动开发服务器:
python manage.py runserver
http://127.0.0.1:8000/admin/login/?next=/admin/
12.3 进入站点
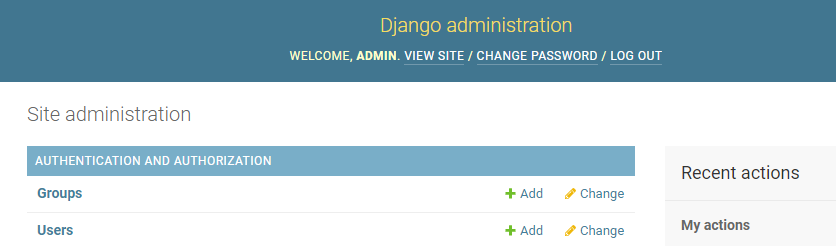
12.4 管理页面中加入配置应用
from django.contrib import admin
Register your models here.
from .models import Question,Choice
admin.site.register(Question)

admin.site.register(Choice)
(13)编写更多视图
13.1 polls下的views
from django.shortcuts import render

from django.http import HttpResponse
问题索引页
def index(request):

return HttpResponse("Hello,this is my frist polls index.")
问题详情页
def detail(request,question_id):

return HttpResponse("You're looking at question %s." % question_id)
问题结果页
def results(request,question_id):

return HttpResponse("You're looking at the results of question %s."  % question_id)
投票处理器
def vote(request,question_id):

return HttpResponse("You're voting on question %s." % question_id)
13.2 polls下的urls记得添加命名空间
from django.urls import path
from . import views
app_name = 'polls' #添加命名空间
urlpatterns = [
    # ex: /polls/
    path('', views.index,name='index'),
    # ex: /polls/5/
    path('/', views.detail, name='detail'),
    # ex: /polls/5/results/
    path('/results/', views.results, name='results'),
    # ex: /polls/5/vote/
    path('/vote/', views.vote, name='vote'),
]
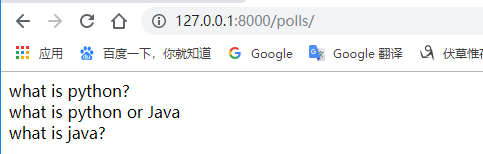
13.3 查询数据库信息并页面显示
# 问题索引页
def index(request):
    latest_question_list = Question.objects.order_by('pub_data')[:3]
    output = '
'.join([q.question_text for q in latest_question_list])
HttpResponse(template.render(context,request))
    return HttpResponse(output)
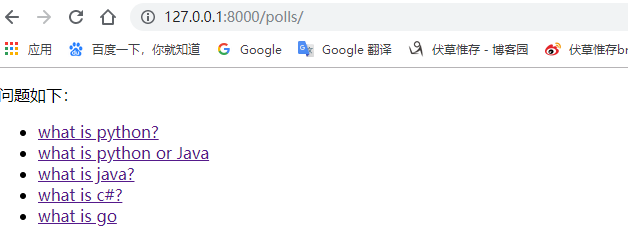
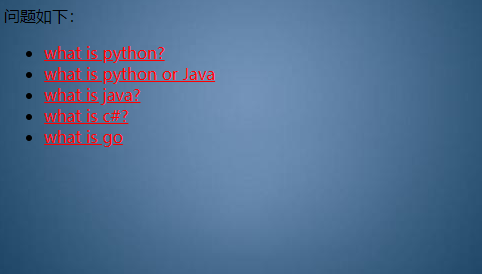
(14)编写模板T
14.1 在mysite下创建templates,并创建polls文件夹下创建index.html
投票页面
{% if latest_question_list %}
{% for question in latest_question_list %}
- {{ question.question_text }}
{% endfor %}
{% else %}
No polls are available.
{% endif %}
可以修改为(常用).想改成 polls/specifics/12/ ,你不用在模板里修改任何东西(包括其它模板),只要在 polls/urls.py 里稍微修改一下就行:
{{ question.question_text }}
{% endfor %}
14.2 在mysite的settings修改DIRS
TEMPLATES = [
    {
        'BACKEND': 'django.template.backends.django.DjangoTemplates',
        'DIRS': [os.path.join(BASE_DIR,'template/')],
        'APP_DIRS': True,
        'OPTIONS': {
            'context_processors': [
                'django.template.context_processors.debug',
                'django.template.context_processors.request',
                'django.contrib.auth.context_processors.auth',
                'django.contrib.messages.context_processors.messages',
            ],
        },
    },
]
14.3 polls/views.py 修改
from django.shortcuts import render
from django.http import HttpResponse
from django.template import loader
from polls.models import Question
问题索引页
def index(request):

latest_question_list = Question.objects.order_by('pub_data')[:5]

# output = '
'.join([q.question_text for q in latest_question_list])

template = loader.get_template('polls/index.html')

context = {

'latest_question_list': latest_question_list,

}

return HttpResponse(template.render(context,request))
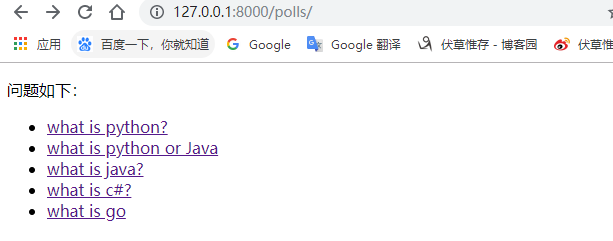
进一步可以修改为(常用):
# 问题索引页
def index(request):
    latest_question_list = Question.objects.order_by('pub_data')[:5]
    context = {'latest_question_list': latest_question_list}
    return render(request,'polls/index.html',context)
14.4 在浏览器访问 "/polls/" 查看:
(15)查看详细页面
15.1 polls下views.py
from django.http import Http404
问题详情页
def detail(request,question_id):

try:

question = Question.objects.get(pk=question_id)

except Question.DoesNotExist:

raise Http404("Question does not exist")

return render(request,'polls/detail.html', {'question':question,'question_id':question_id})
优化后的算法(常用)
from django.shortcuts import render,get_object_or_404
问题详情页
def detail(request,question_id):

question = get_object_or_404(Question, pk=question_id)

return render(request, 'polls/detail.html', {'question': question,'question_id':question_id})
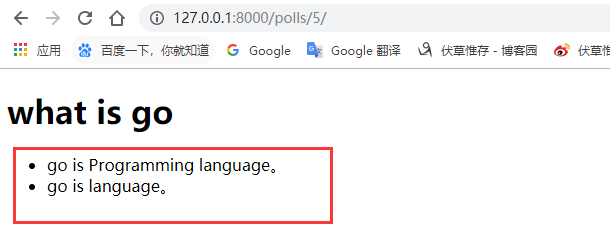
15.2 template下detail.html
详细问题页面
{{ question.question_text }}
{% for choice in question.choice_set.all %}
- {{ choice.choice_text }}
{% endfor %}
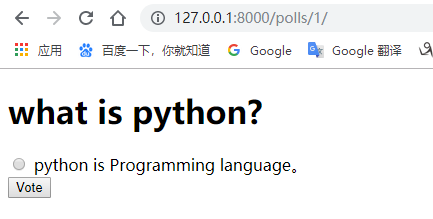
15.3 运行结果
(16)polls/detail.html详细页面添加一个表单form
{{ question.question_text }}
{% if error_message %}
{{ error_message }}
{% endif %}
-
每个单选按钮的
value属性是对应的各个 Choice 的 ID。每个单选按钮的name是"choice"。这意味着,当有人选择一个单选按钮并提交表单提交时,它将发送一个 POST 数据choice=#,其中# 为选择的 Choice 的 ID。这是 HTML 表单的基本概念。 -
我们设置表单的
action为{% url 'polls:vote' question.id %},并设置method="post"。使用 method="post"是非常重要的,因为这个提交表单的行为会改变服务器端的数据。当你需要创建一个改变服务器端数据的表单时,请使用``method="post"` 。这不是 Django 的特定技巧;这是优秀的网站开发技巧。 -
forloop.counter指示for标签已经循环多少次。 -
由于我们创建一个 POST 表单(它具有修改数据的作用),所以我们需要小心跨站点请求伪造。 谢天谢地,你不必太过担心,因为 Django 已经拥有一个用来防御它的非常容易使用的系统。 简而言之,所有针对内部 URL 的 POST 表单都应该使用
{% csrf_token %}模板标签。
(17) polls/views.py 视图编辑
# 投票处理器
def vote(request,question_id):
    question = get_object_or_404(Question, pk=question_id)
    try:
        selected_choice = question.choice_set.get(pk=request.POST['choice'])
    except (KeyError, Choice.DoesNotExist):
        return render(request, 'polls/detail.html', {
            'question': question,
            'error_message': "You didn't select a choice.",})
    else:
        selected_choice.votes +=1
        selected_choice.save()
        return HttpResponseRedirect(reverse('polls:results', args=(question.id,)))
request.POST是一个类字典对象,让你可以通过关键字的名字获取提交的数据。 这个例子中,request.POST['choice']以字符串形式返回选择的 Choice 的 ID。request.POST的值永远是字符串。- 如果在
request.POST['choice']数据中没有提供choice, POST 将引发一个KeyError。上面的代码检查KeyError,如果没有给出choice将重新显示 Question 表单和一个错误信息。 - 在增加 Choice 的得票数之后,代码返回一个
HttpResponseRedirect而不是常用的HttpResponse、HttpResponseRedirect只接收一个参数:用户将要被重定向的 URL。构造函数中使用reverse()函数。这个函数避免了我们在视图函数中硬编码 URL。重定向的 URL 将调用'results'视图来显示最终的页面。
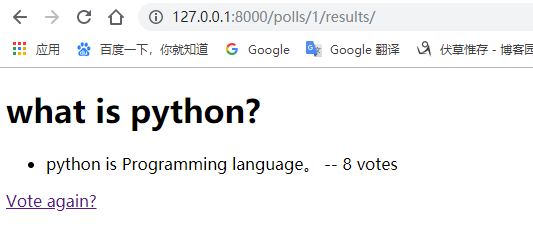
(18) 重定向results.html
from django.shortcuts import get_object_or_404, render
def results(request, question_id):

question = get_object_or_404(Question, pk=question_id)

return render(request, 'polls/results.html', {'question': question})
(19)通用视图,代码重构
19.1 detail() 视图几乎一模一样。唯一的不同是模板的名字。
# 问题索引页
def index(request):
    latest_question_list = Question.objects.order_by('pub_data')[:5]
    return render(request,'polls/index.html',{'latest_question_list': latest_question_list})
问题详情页
def detail(request,question_id):

question = get_object_or_404(Question, pk=question_id)

return render(request, 'polls/detail.html', {'question': question,'question_id':question_id})
问题结果页
def results(request,question_id):

question = get_object_or_404(Question, pk=question_id)

return render(request, 'polls/results.html', {'question': question})
19.2 创建一个 polls/results.html 模板
{{ question.question_text }}
{% for choice in question.choice_set.all %}
- {{ choice.choice_text }} -- {{ choice.votes }} vote{{ choice.votes|pluralize }}
{% endfor %}
19.3 通用视图系统
通用视图将常见的模式抽象化,可以使你在编写应用时甚至不需要编写Python代码。将我们的投票应用转换成使用通用视图系统,这样我们可以删除许多我们的代码。我们仅仅需要做以下几步来完成转换,
- 转换 URLconf。
- 删除一些旧的、不再需要的视图。
- 基于 Django 的通用视图引入新的视图
1 改良URLconf
打开 polls/urls.py 这个 URLconf 并将它修改成:路径字符串中匹配模式的名称已经由 <question_id> 改为 <pk>。
from django.urls import path
from . import views
app_name = 'polls'

urlpatterns = [

path('', views.IndexView.as_view(), name='index'),

path('int:pk/', views.DetailView.as_view(), name='detail'),

path('int:pk/results/', views.ResultsView.as_view(), name='results'),

path('int:question_id/vote/', views.vote, name='vote'),

]
2 改良视图
删除旧的 index, detail, 和 results 视图,并用 Django 的通用视图代替。打开 polls/views.py 文件,并将它修改成:
from django.http import HttpResponseRedirect
from django.shortcuts import get_object_or_404, render
from django.urls import reverse
from django.views import generic
from .models import Choice, Question
class IndexView(generic.ListView):

template_name = 'polls/index.html'

context_object_name = 'latest_question_list'
def get_queryset(self):

return Question.objects.order_by('pub_date')[:5]
class DetailView(generic.DetailView):

model = Question

template_name = 'polls/detail.html'
class ResultsView(generic.DetailView):

model = Question

template_name = 'polls/results.html'
def vote(request,question_id):

question = get_object_or_404(Question, pk=question_id)

try:

selected_choice = question.choice_set.get(pk=request.POST['choice'])

except (KeyError, Choice.DoesNotExist):

return render(request, 'polls/detail.html', {

'question': question,

'error_message': "You didn't select a choice.",

})

else:

selected_choice.votes +=1

selected_choice.save()

return HttpResponseRedirect(reverse('polls:results', args=(question.id,)))
- 每个通用视图需要知道它将作用于哪个模型。 这由
model属性提供。 DetailView期望从 URL 中捕获名为"pk"的主键值,所以我们为通用视图把question_id改成pk。
19.4 运行程序
主页面
子页面
详情页面
(20)自动化测试
20.1 测试的策略
- 测试驱动:写代码之前先写测试。「测试驱动」的开发方法只是将问题的描述抽象为了 Python 的测试样例。
- 更普遍的情况是,一个刚接触自动化测试的新手更倾向于先写代码,然后再写测试。
- 如果你才写了几千行 Python 代码,选择从哪里开始写测试确实不怎么简单。如果是这种情况,那么在你下次修改代码(比如加新功能,或者修复 Bug)之前写个测试是比较合理且有效的。
20.2 第一个测试
需求:我们的要求是如果 Question 是在一天之内发布,was_published_recently()方法将会返回True,然而现在这个方法在Question的pub_date` 字段比当前时间还晚时也会返回 True
编写测试代码:
from django.test import TestCase
Create your tests here.
from django.utils import timezone

from .models import Question
class QuestionModelTests(TestCase):

def test_was_published_recently_with_future_question(self):

"""

was_published_recently() returns False for questions whose pub_date

is in the future.

"""

time = timezone.now() + datetime.timedelta(days=30)

future_question = Question(pub_date=time)

self.assertIs(future_question.was_published_recently(), False)
运行代码:$ python manage.py test polls
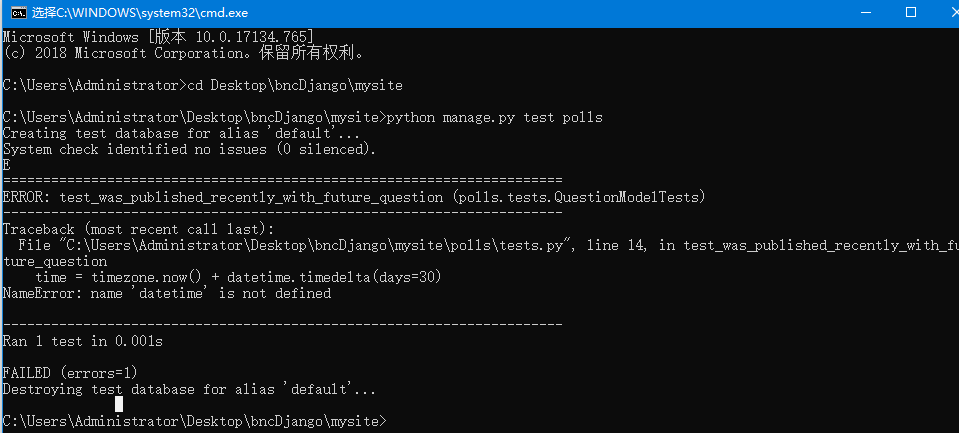
测试结果:
python manage.py test polls将会寻找polls应用里的测试代码- 它找到了
django.test.TestCase的一个子类 - 它创建一个特殊的数据库供测试使用
- 它在类中寻找测试方法——以
test开头的方法。 - 在
test_was_published_recently_with_future_question方法中,它创建了一个pub_date值为 30 天后的Question实例。 - 接着使用
assertls()方法,发现was_published_recently()返回了True,而我们期望它返回False。
测试系统通知我们哪些测试样例失败了,和造成测试失败的代码所在的行号。
(21)静态文件(图片/脚本/样式)
对于小项目来说,静态文件随便放在哪,只要服务程序能够找到它们就行。然而在大项目中,处理不同应用所需要的静态文件的工作就显得有点麻烦了。这就是 django.contrib.staticfiles 存在的意义
创建的 static 文件夹中创建 polls 的文件夹,再在 polls 文件夹中创建一个名为 style.css 的文件。样式表路径应是 polls/static/polls/style.css。因为 AppDirectoriesFinder 的存在,你可以在 Django 中简单地使用以 polls/style.css 的形式引用此文件,类似你引用模板路径的方式。
li a {
    color: green;
}
polls的index.html引用
    投票页面
    {% load static %}
添加图片
我们会创建一个用于存在图像的目录。在 polls/static/polls 目录下创建一个名为 images 的子目录。在这个目录中,放一张名为 background.gif 的图片。换言之,在目录 polls/static/polls/images/background.jpg 中放一张图片。
body {
    background: white url("images/background.gif") no-repeat;
}
更多关于设置和框架的资料,参考 静态文件解惑 和 静态文件指南。部署静态文件 介绍了如何在真实服务器上使用静态文件。
(22) 编写第一个django应用
22.1 polls/admin定义后台表单,列表为字段显示顺序
from django.contrib import admin
Register your models here.
from .models import Question,Choice
class QuestionAdmin(admin.ModelAdmin):
fieldsets = [
('问题内容', {'fields': ['question_text']}),
('发布时间', {'fields': ['pub_data']}),
]
fields = ['pub_data', 'question_text']
list_display = ('question_text', 'pub_data')
admin.site.register(Question, QuestionAdmin)
class ChoiceAdmin(admin.ModelAdmin):

# fields = ['question','choice_text', 'votes']

list_display = ('question','choice_text', 'votes')
admin.site.register(Choice, ChoiceAdmin)
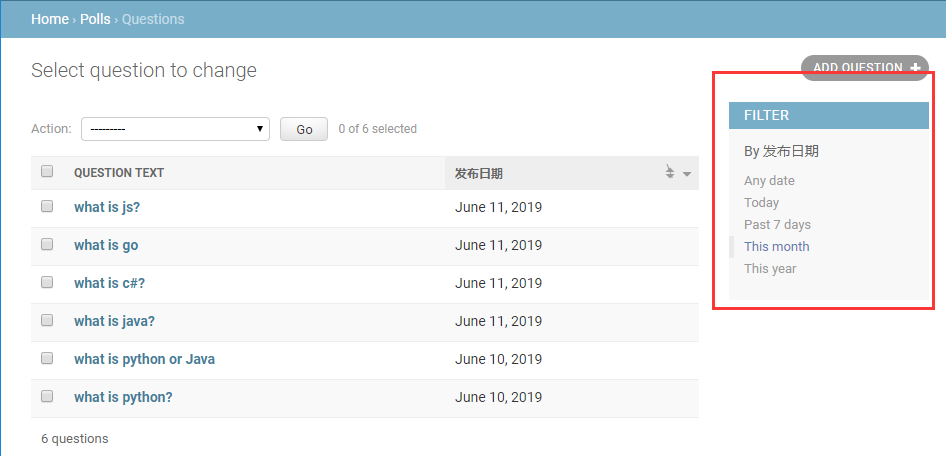
22.2 字段过滤器
class QuestionAdmin(admin.ModelAdmin):
    list_display = ('question_text', 'pub_data')
    list_filter = ['pub_data'] # 过滤器
admin.site.register(Question, QuestionAdmin)
22.3 自定义后台界面与风格
-
在
templates目录内创建名为admin的目录,随后,将存放 Django 默认模板的目录(django/contrib/admin/templates)内的模板文件admin/base_site.html复制到这个目录内。Django 的源文件在哪里?$ python -c "import django; print(django.path)"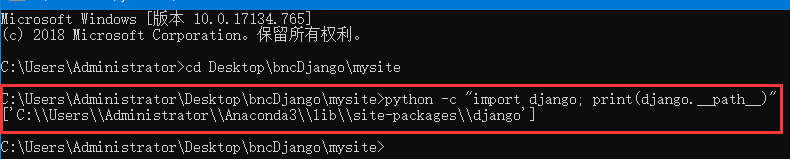
-
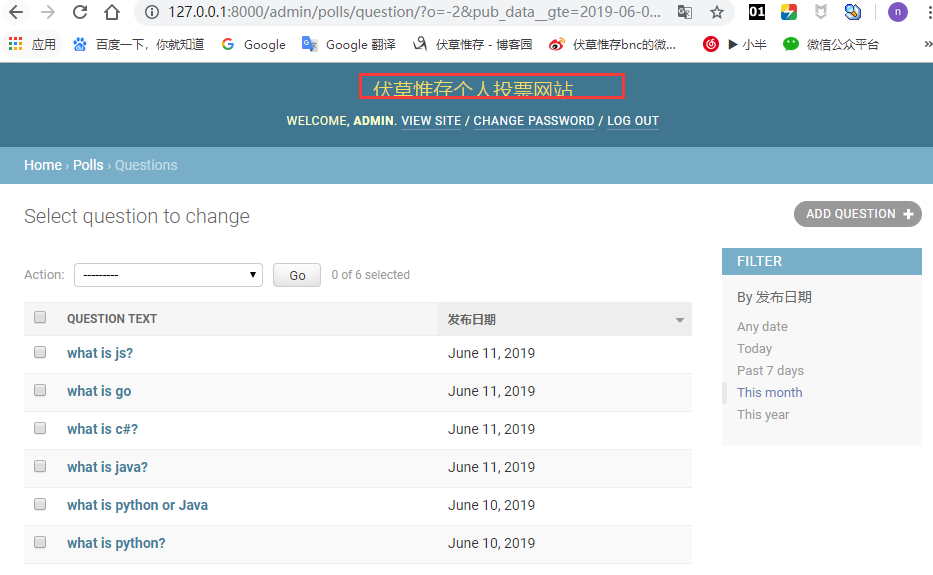
接着,用你站点的名字替换文件内的 [
](https://docs.djangoproject.com/zh-hans/2.2/intro/tutorial07/#id1){{ site_header|default:_('Django administration') }}(包含大括号)。完成后,你应该看到如下代码:
{% block branding %}
Polls Administration
{% endblock %}
作者:白宁超,工学硕士,现工作于四川省计算机研究院,研究方向是自然语言处理和机器学习。曾参与国家自然基金项目和四川省科技支撑计划等多个省级项目。著有《自然语言处理理论与实战》一书。 自然语言处理与机器学习技术交流群号:436303759 。
出处:http://www.cnblogs.com/baiboy/
本文版权归作者和博客园共有,欢迎转载,但未经作者同意必须保留此段声明,且在文章页面明显位置给出原文连接,否则保留追究法律责任的权利。

 浙公网安备 33010602011771号