

第三章. 业务功能开发--登录验证(使用拦截器)
第三章. 业务功能开发--登录验证(使用拦截器)
需求
登录验证.
	用户访问任何业务资源,都需要进行登录验证.
	*只有登录成功的用户才能访问业务资源
	*没有登录成功的用户访问业务资源,跳转到登录页面
结构:
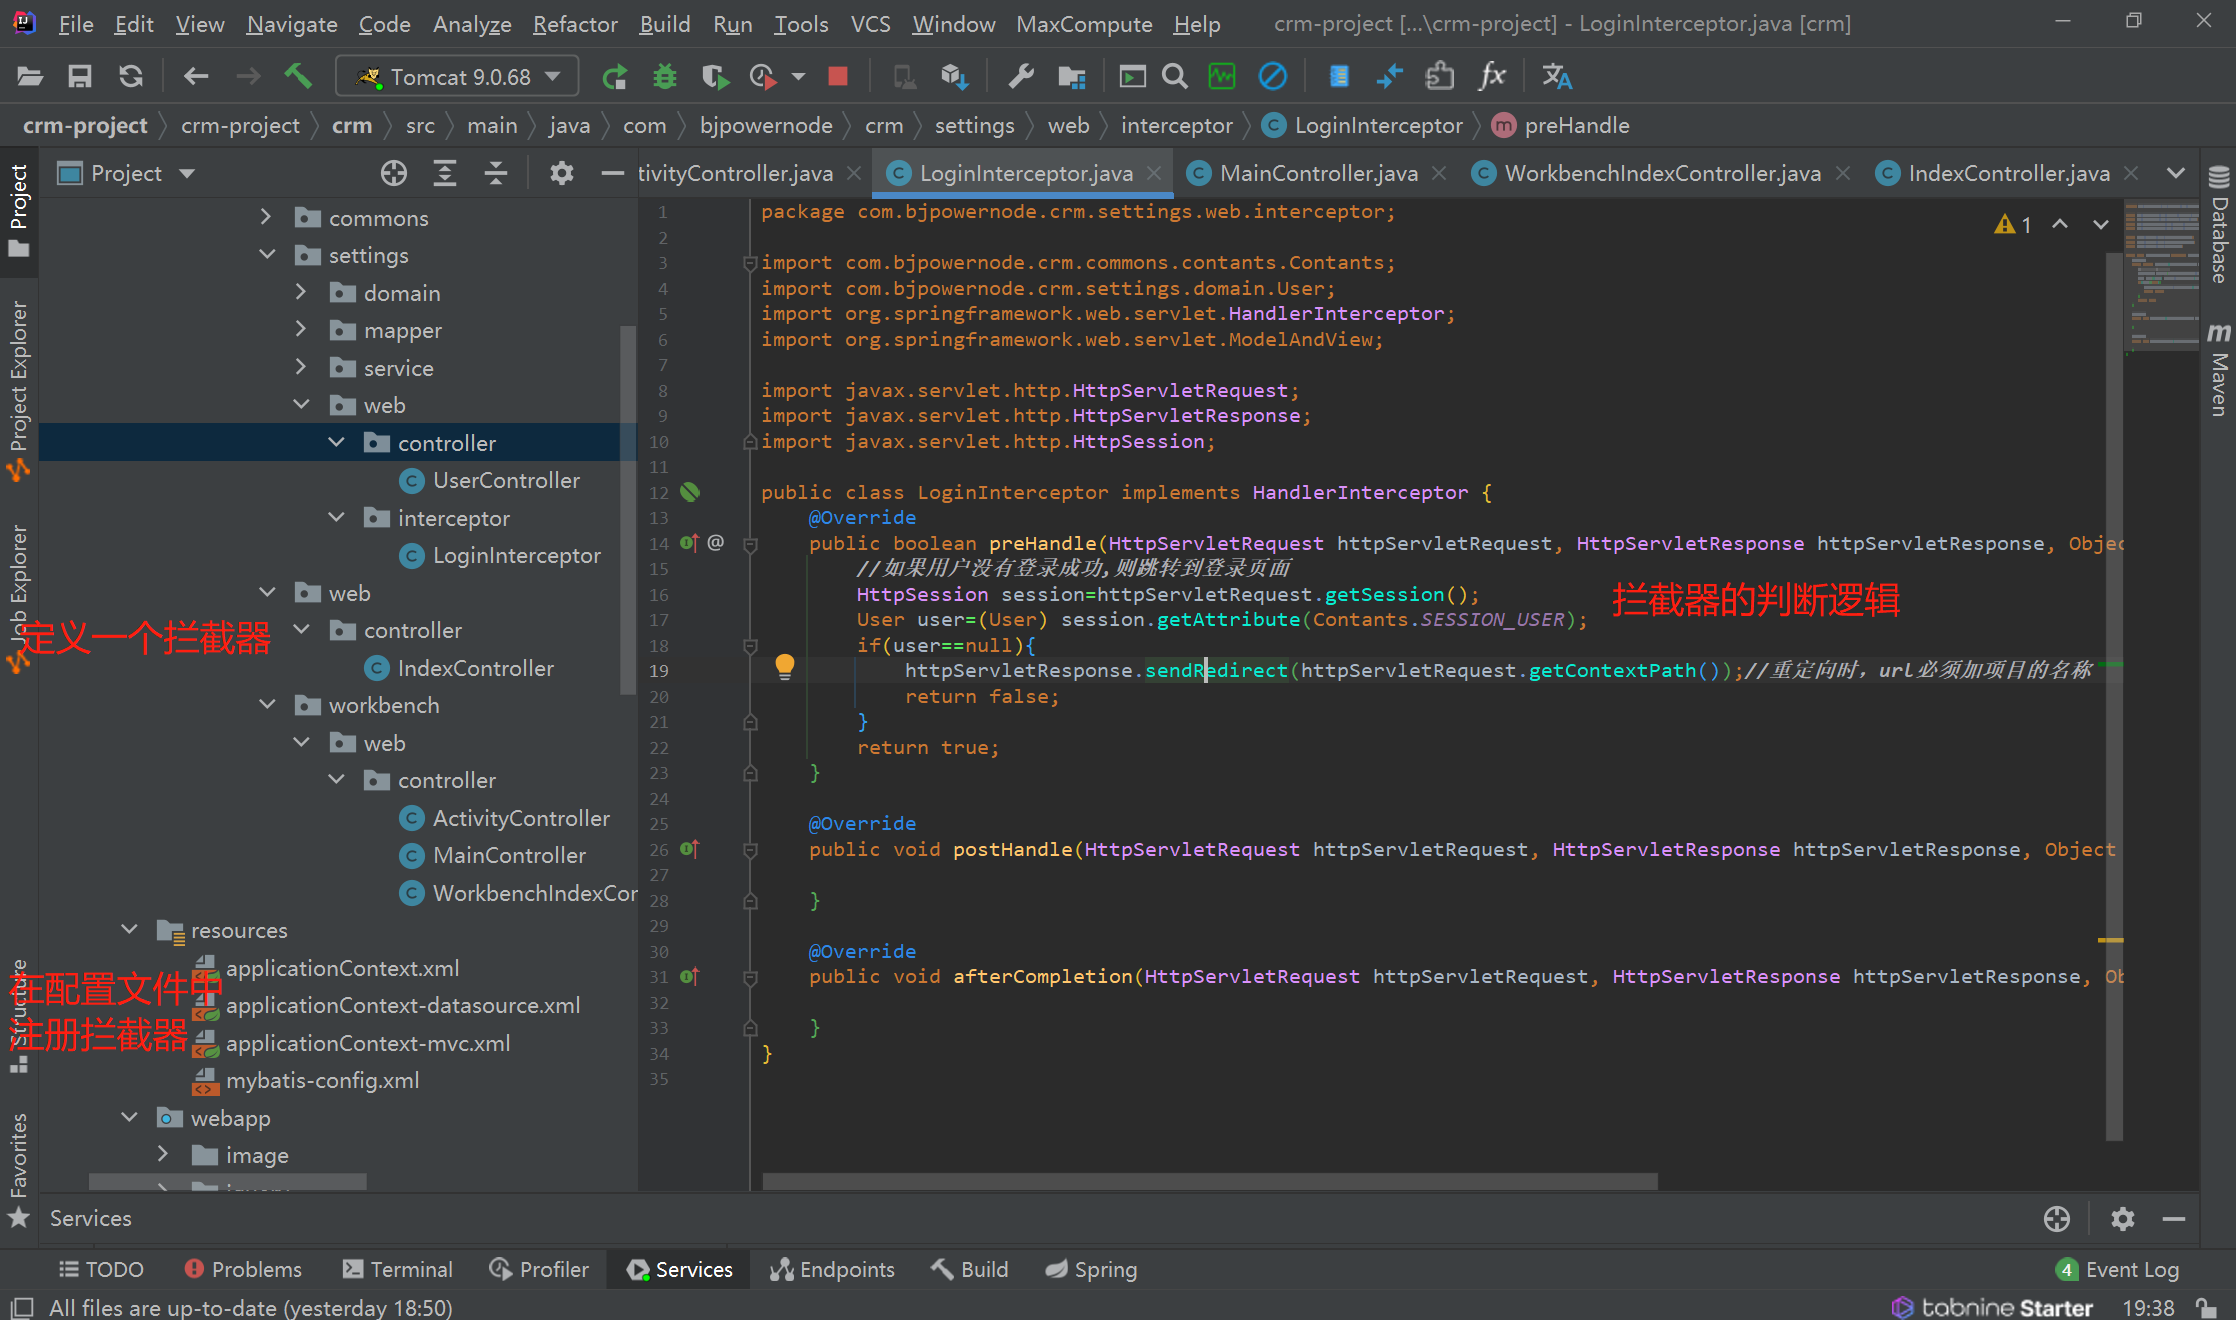
1.拦截器
-
定义一个拦截器:
package com.bjpowernode.crm.settings.web.interceptor; import com.bjpowernode.crm.commons.contants.Contants; import com.bjpowernode.crm.settings.domain.User; import org.springframework.web.servlet.HandlerInterceptor; import org.springframework.web.servlet.ModelAndView; import javax.servlet.http.HttpServletRequest; import javax.servlet.http.HttpServletResponse; import javax.servlet.http.HttpSession; public class LoginInterceptor implements HandlerInterceptor { @Override public boolean preHandle(HttpServletRequest httpServletRequest, HttpServletResponse httpServletResponse, Object o) throws Exception { //如果用户没有登录成功,则跳转到登录页面 HttpSession session=httpServletRequest.getSession(); User user=(User) session.getAttribute(Contants.SESSION_USER); if(user==null){ httpServletResponse.sendRedirect(httpServletRequest.getContextPath());//重定向时,url必须加项目的名称 return false; } return true; } @Override public void postHandle(HttpServletRequest httpServletRequest, HttpServletResponse httpServletResponse, Object o, ModelAndView modelAndView) throws Exception { } @Override public void afterCompletion(HttpServletRequest httpServletRequest, HttpServletResponse httpServletResponse, Object o, Exception e) throws Exception { } } -
注册拦截器
注意哪些应该拦截,哪些不应该拦截。拦截成功之后往哪里跳转。
<?xml version="1.0" encoding="UTF-8"?>
<beans xmlns="http://www.springframework.org/schema/beans"
       xmlns:xsi="http://www.w3.org/2001/XMLSchema-instance"
       xmlns:context="http://www.springframework.org/schema/context"
       xmlns:p="http://www.springframework.org/schema/p"
       xmlns:util="http://www.springframework.org/schema/util"
       xmlns:aop="http://www.springframework.org/schema/aop"
       xmlns:tx="http://www.springframework.org/schema/tx"
       xmlns:mvc="http://www.springframework.org/schema/mvc"
       xsi:schemaLocation="
http://www.springframework.org/schema/beans
http://www.springframework.org/schema/beans/spring-beans.xsd
http://www.springframework.org/schema/context
http://www.springframework.org/schema/context/spring-context.xsd
http://www.springframework.org/schema/tx
http://www.springframework.org/schema/tx/spring-tx.xsd
http://www.springframework.org/schema/aop
http://www.springframework.org/schema/aop/spring-aop.xsd
http://www.springframework.org/schema/mvc
http://www.springframework.org/schema/mvc/spring-mvc.xsd
http://www.springframework.org/schema/util
http://www.springframework.org/schema/util/spring-util.xsd">
    <!-- dispatcherServlet截获所有URL请求 -->
    <mvc:default-servlet-handler />
    <!-- spring mvc 扫描包下的controller -->
    <context:component-scan base-package="com.bjpowernode.crm.web.controller"/>
    <context:component-scan base-package="com.bjpowernode.crm.settings.web.controller"/>
    <context:component-scan base-package="com.bjpowernode.crm.workbench.web.controller"/>
    <!-- 配置注解驱动 -->
    <mvc:annotation-driven/>
    <!-- 配置视图解析器 -->
    <bean id="viewResolver"
          class="org.springframework.web.servlet.view.InternalResourceViewResolver">
        <property name="prefix" value="/WEB-INF/pages/"/>
        <property name="suffix" value=".jsp"/>
    </bean>

    <mvc:interceptors>
        <mvc:interceptor>
            <!--配置拦截的请求-->
            <mvc:mapping path="/settings/**"/>
            <mvc:mapping path="/workbench/**"/>
            <!--配置排除拦截的请求(优先级高)-->
            <mvc:exclude-mapping path="/settings/qx/user/toLogin.do"/>
            <mvc:exclude-mapping path="/settings/qx/user/login.do"/>
            <!--拦截器类-->
            <bean class="com.bjpowernode.crm.settings.web.interceptor.LoginInterceptor"/>
        </mvc:interceptor>
    </mvc:interceptors>

    <!-- 配置文件上传解析器 id:必须是multipartResolver-->
    <!--<bean id="multipartResolver" class="org.springframework.web.multipart.commons.CommonsMultipartResolver">
        <property name="maxUploadSize" value="#{1024*1024*80}"/>
        <property name="defaultEncoding" value="utf-8"/>
    </bean>-->
</beans>
2. 总结:拦截器,页面切割技术,模态窗口
1,登录验证:

   1)过滤器:
     a)implements Filter{
         --init
	 --doFilter
	 --destroy
       }
     b)配置过滤器:web.xml
   2)拦截器:
     a)提供拦截器类:implements HandlerInterceptor{
			  --pre
			  --post
			  --after
                     }
     b)配置拦截器:springmvc.xml

2,页面切割技术:
  1)<frameset>和<frame>:
    <frameset>:用来切割页面.
                <frameset cols="20%,60%,20%" rows="10%,80%,10%">
    <frame>:显示页面.
                <frame src="url">

		<frameset cols="20%,60%,20%">
			<frame src="url1" name="f1">
			<frame src="url2" name="f2">
			<frame src="url3" name="f3">
		</frameset>

             每一个<frame>标签就是一个独立的浏览器窗口。

	     <a href="url" target="f3">test</a>
  2)<div>和<iframe>:
    <div>:切割页面。
            <div style="height:10%;width=20%">
   <iframe>:显示页面。
            <div style="height:10%;width=20%">
		<iframe href="url">
	    </div>
3,创建市场活动:

  模态窗口:模拟的窗口,本质上是<div>,通过设置z-index大小来实现的;
            初始时,z-index初始参数是<0,所以不显示;
	    需要显示时,z-index值设置成>0即可。

	    bootstrap来控制z-index的大小。
  控制模态窗口的显示与隐藏:
            1)方式一:通过标签的属性data-toggle="modal" data-target="模态窗口的id"
	    2)方式二:通过js函数控制:
	              选择器(选中div).modal("show");//显示选中的模态窗口
		      选择器(选中div).modal("hide");//关闭选中的模态窗口
            3)方式三:通过标签的属性data-dismiss=""
		      点击添加了data-dismiss=""属性的标签,自动关闭该标签所在的模态窗口。
  模态窗口的意义:
            window.open("url","_blank");
	    模态窗口本质上就是原来页面中的一个<div>,只有一个页面;所有的操作都是在同一个页面中完成。

 浙公网安备 33010602011771号