
Stabel Diffusion复现过程记录
SD模型是比较热门的一个潜在文生图模型,这里给出它的复现过程与我遇到的bug,希望给后续学习者提供一些帮助
环境配置
安装python\cuda
显存大于4GB
下载相关文件
1.下载stable-diffusion项目
https://github.com/CompVis/stable-diffusion.git
2.下载权重模型
CompVis (CompVis) (huggingface.co),我选择的是diffusion-v1-4,选择下载ckpt文件,下载好后要放在models文件夹中
3.下载clip-vit-large-patch14,下载以下文件
pytorch_model.bin config.json merges.txt preprocessor_config.json special_tokens_map.json tokenizer.json tokenizer_config.json vocab.json
下载完成后,在工程根目录创建文件夹openai\clip-vit-large-patch14,将下载的内容放入其中。
4.下载CompVis/stable-diffusion-v1-4 at main (huggingface.co)
主要下载以下文件
pytorch_model.bin(约1.13GB)
config.json
还需要下载一个文件 ,主要是用于特征提取器的配置文件:
CompVis/stable-diffusion-v1-4 at main (huggingface.co)
下载完成后,在工程根目录创建文件夹CompVis\stable-diffusion-safety-checker,将下载三个文件的内容放入其中.
项目构建
1,创建虚拟环境:
conda env create -f environment.yaml conda activate ldm
2.此时我出现了导入包的报错,搜索了一下之后用https://blog.csdn.net/qq_45791526/article/details/134757194d 方法解决了,就是把txt2img文件拉到根目录
3.在项目根目录下激活环境,运行脚本:
python txt2img.py --ckpt "sd-v1-4.ckpt" --prompt "a photograph of an astronaut riding a horse" --plms --H 256 --W 256
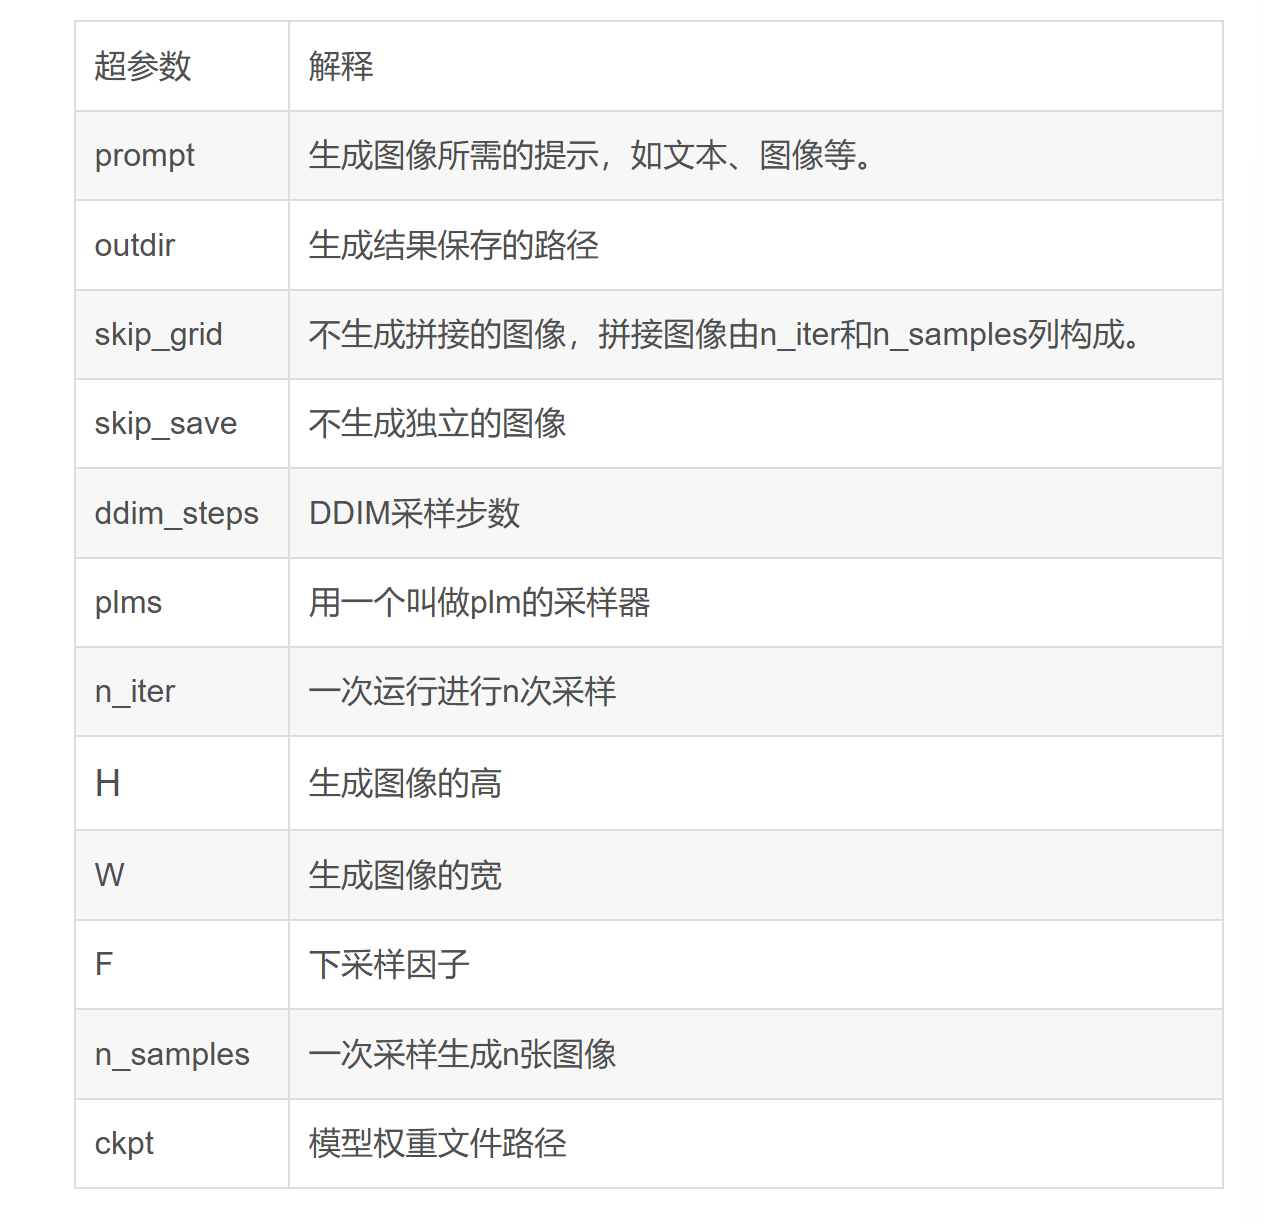
相关参数:

 浙公网安备 33010602011771号