linux(centos8):安装配置consul集群(consul 1.8.4 | centos 8.2.2004)
一,什么是consul?
1,Consul 是 HashiCorp 公司推出的开源软件,用于实现分布式系统的服务发现与配置。
Consul 是分布式的、高可用的、 可横向扩展的
2,官方网站:
https://www.consul.io/
3,Consul 集群间使用了 Gossip 协议通信和 raft 一致性算法
4,Consul和Eureka的不同之处:
Eureka只需要在项目中加入服务端依赖,就可以作为服务端使用;
Consul需要从官网下载,并单独安装
5,本文演示用3台服务器组建一个consul的集群
说明:刘宏缔的架构森林是一个专注架构的博客,
网站:https://blog.imgtouch.com
本文: https://blog.imgtouch.com/index.php/2023/05/25/centos8-linux-an-zhuang-pei-zhi-consul-ji-qun-consul-1-8-4/
对应的源码可以访问这里获取: https://github.com/liuhongdi/
说明:作者:刘宏缔 邮箱: 371125307@qq.com
二,下载consul软件
1,下载地址:
https://www.consul.io/downloads
选择64位linux版本下载
2,把consul的安装文件解压:
[root@localhost consul]# cd /usr/local/source/consul
[root@localhost consul]# ls
consul_1.8.4_linux_amd64.zip
[root@localhost consul]# unzip consul_1.8.4_linux_amd64.zip
Archive:  consul_1.8.4_linux_amd64.zip
  inflating: consul
[root@localhost consul]# ls
consul  consul_1.8.4_linux_amd64.zip
3,复制到到各服务器的/usr/local/soft目录下
三,在第一台consul服务器上运行:
1,生成数据目录:
[root@consul1 /]# mkdir /data/
[root@consul1 /]# mkdir /data/consul/
[root@consul1 /]# mkdir /data/consul/data
[root@consul1 /]# chmod 777 /data/consul/data
2,运行consul
-server:以server身份启动
-bootstrap-expect=2:集群要求的最少server数量
-bind:监听的ip
-client:客户端ip,0.0.0.0表示不限制客户端ip
-data-dir:指定存放数据的目录
-node:指定节点id,注意:同一集群内节点id不允许重复
[root@consul1 /]# nohup /usr/local/soft/consul agent -server -bind=172.17.0.2 -client=0.0.0.0 -bootstrap-expect=2 -data-dir=/data/consul/da -node=server-2 >/dev/null 2>&1 &
[1] 549
[root@consul1 /]#
查看是否在运行中,这里我们选择查看端口:
[root@consul1 /]# ss -lntp
State       Recv-Q       Send-Q              Local Address:Port              Peer Address:Port
LISTEN      0            4096                   172.17.0.2:8300                   0.0.0.0:*           users:(("consul",pid=549,fd=6))
LISTEN      0            4096                   172.17.0.2:8301                   0.0.0.0:*           users:(("consul",pid=549,fd=12))
LISTEN      0            4096                   172.17.0.2:8302                   0.0.0.0:*           users:(("consul",pid=549,fd=8))
LISTEN      0            4096                            *:8500                         *:*           users:(("consul",pid=549,fd=16))
LISTEN      0            4096                            *:8600                         *:*           users:(("consul",pid=549,fd=15))
可以看到consul已经在守护端口中,而且consul启用了多个端口
3,查看consul的版本:
[root@consul1 /]# /usr/local/soft/consul --version
Consul v1.8.4
Revision 12b16df32
Protocol 2 spoken by default, understands 2 to 3 (agent will automatically use protocol >2 when speaking to compatible agents)
4,查看consul的集群成员数量
[root@consul1 /]# /usr/local/soft/consul members
Node      Address          Status  Type    Build  Protocol  DC   Segment
server-2  172.17.0.2:8301  alive   server  1.8.4  2         dc1  <all>
只有一台机器,正常
5,查看当前节点的信息:
[root@consul1 /]# /usr/local/soft/consul info
agent:
        check_monitors = 0
        check_ttls = 0
        checks = 0
        services = 0
build:
        prerelease =
        revision = 12b16df3
        version = 1.8.4
consul:
        acl = disabled
        bootstrap = false
        known_datacenters = 1
        leader = false
        leader_addr =
        server = true
raft:
        applied_index = 0
        commit_index = 0
        fsm_pending = 0
        last_contact = never
        last_log_index = 0
        last_log_term = 0
        last_snapshot_index = 0
        last_snapshot_term = 0
        latest_configuration = []
        latest_configuration_index = 0
        num_peers = 0
        protocol_version = 3
        protocol_version_max = 3
        protocol_version_min = 0
        snapshot_version_max = 1
        snapshot_version_min = 0
        state = Follower
        term = 0
runtime:
        arch = amd64
        cpu_count = 2
        goroutines = 79
        max_procs = 2
        os = linux
        version = go1.14.6
serf_lan:
        coordinate_resets = 0
        encrypted = false
        event_queue = 0
        event_time = 1
        failed = 0
        health_score = 0
        intent_queue = 0
        left = 0
        member_time = 1
        members = 1
        query_queue = 0
        query_time = 1
serf_wan:
        coordinate_resets = 0
        encrypted = false
        event_queue = 0
        event_time = 1
        failed = 0
        health_score = 0
        intent_queue = 0
        left = 0
        member_time = 1
        members = 1
        query_queue = 0
        query_time = 1
四,在第二台consul服务器上运行相同的操作,
启动的命令需要修改ip和节点名:
[root@consul2 /]# nohup /usr/local/soft/consul agent -server -bind=172.17.0.3 -client=0.0.0.0 -bootstrap-expect=2 -data-dir=/data/consul/da -node=server-3 >/dev/null 2>&1 &
[1] 371
查看集群成员:
[root@consul2 /]# /usr/local/soft/consul members
Node      Address          Status  Type    Build  Protocol  DC   Segment
server-3  172.17.0.3:8301  alive   server  1.8.4  2         dc1  <all>
把当前节点加入到第一台consul服务器的ip:
[root@consul2 /]# /usr/local/soft/consul join 172.17.0.2
Successfully joined cluster by contacting 1 nodes.
加入成功后再次查看节点:
[root@consul2 /]# /usr/local/soft/consul members
Node      Address          Status  Type    Build  Protocol  DC   Segment
server-2  172.17.0.2:8301  alive   server  1.8.4  2         dc1  <all>
server-3  172.17.0.3:8301  alive   server  1.8.4  2         dc1  <all>
五,在第三台consul服务器上运行相同的操作:
命令修改ip和节点名:并允许访问ui
-ui:允许访问web ui
[root@consul3 /]# nohup /usr/local/soft/consul agent -server -bind=172.17.0.4 -client=0.0.0.0 -bootstrap-expect=2 -data-dir=/data/consul/da -node=server-4 -ui >/dev/null 2>&1 &
[1] 229
[root@consul3 /]#
查看成员
[root@consul3 /]# /usr/local/soft/consul members
Node      Address          Status  Type    Build  Protocol  DC   Segment
server-4  172.17.0.4:8301  alive   server  1.8.4  2         dc1  <all>
加入集群
[root@consul3 /]# /usr/local/soft/consul join 172.17.0.2
Successfully joined cluster by contacting 1 nodes.
成功后再次查看成员
[root@consul3 /]# /usr/local/soft/consul members
Node      Address          Status  Type    Build  Protocol  DC   Segment
server-2  172.17.0.2:8301  alive   server  1.8.4  2         dc1  <all>
server-3  172.17.0.3:8301  alive   server  1.8.4  2         dc1  <all>
server-4  172.17.0.4:8301  alive   server  1.8.4  2         dc1  <all>
六,访问在第三台consul服务器上启用的web ui:
访问:
http://172.17.0.4:8500/
返回:
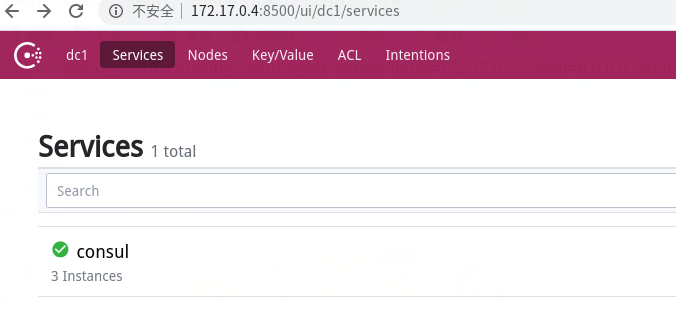
点击后可以查看集群内3个实例:
如图:

点击每台机器可查看其状态:

七,consul的退出:
leave指令触发一个优雅的离开动作并关闭agent,节点离开后不会尝试重新加入集群中
在第二台consul服务器上执行:
[root@consul2 /]# /usr/local/soft/consul leave
Graceful leave complete
查看端口:
[root@consul2 /]# ss -lntp
State            Recv-Q             Send-Q                          Local Address:Port                         Peer Address:Port
可以看到守护进程已退出
在其他节点查看成员:
[root@consul3 /]# /usr/local/soft/consul members
Node      Address          Status  Type    Build  Protocol  DC   Segment
server-2  172.17.0.2:8301  alive   server  1.8.4  2         dc1  <all>
server-3  172.17.0.3:8301  left    server  1.8.4  2         dc1  <all>
server-4  172.17.0.4:8301  alive   server  1.8.4  2         dc1  <all>
可以看到server-3的状态已变更为left
从web ui查看:

已看不到 server-3
八,查看linux的版本:
[root@localhost liuhongdi]# cat /etc/redhat-release
CentOS Linux release 8.2.2004 (Core)

 浙公网安备 33010602011771号