(傲娇的白狐)Mybatis-plus代码自动生成
Mybatis-plus代码自动生成
为我们省去大量复杂繁多重复的代码。我们不写代码,我们只是搬运工!
废话不多说,直接上代码!
-除了最基本的 连接数据库所需的包 还要
<!--模板引擎-->
<dependency>
<groupId>org.apache.velocity</groupId>
<artifactId>velocity-engine-core</artifactId>
<version>2.2</version>
</dependency>
<!--freemarker-->
<dependency>
<groupId>org.freemarker</groupId>
<artifactId>freemarker</artifactId>
<version>2.3.30</version>
</dependency>
<!--beetl-->
<dependency>
<groupId>com.ibeetl</groupId>
<artifactId>beetl</artifactId>
<version>3.1.8.RELEASE</version>
</dependency>
<!--mybatis-plus-->
<dependency>
<groupId>com.baomidou</groupId>
<artifactId>mybatis-plus-boot-starter</artifactId>
<version>3.0.5</version>
</dependency>
<!--lombak-->
<dependency>
<groupId>org.projectlombok</groupId>
<artifactId>lombok</artifactId>
</dependency>
-以及开启swapper 所需
<!-- https://mvnrepository.com/artifact/io.springfox/springfox-swagger2 -->
<dependency>
<groupId>io.springfox</groupId>
<artifactId>springfox-swagger2</artifactId>
<version>2.9.2</version>
</dependency>
<dependency>
<groupId>org.springframework.boot</groupId>
<artifactId>spring-boot-starter-web</artifactId>
</dependency>
之后
在配置文档里
server.port=9100


spring.datasource.username=root
spring.datasource.password=
spring.datasource.url=jdbc:mysql://localhost:3306/user?useSSL=true&useUnicode=true&characterEncoding=utf-8&serverTimezone=GMT%2B8
spring.datasource.driver-class-name=com.mysql.cj.jdbc.Driver

#       配置日志
mybatis-plus.configuration.log-impl=org.apache.ibatis.logging.nologging.NoLoggingImpl
#       逻辑删除时为1
mybatis-plus.global-config.db-config.logic-delete-value=1
#       没逻辑删除时为0
mybatis-plus.global-config.db-config.logic-not-delete-value=0

#      性能分析插件配置
spring.profiles.active=dev
public static void main(String[] args) {
// 代码生成器
AutoGenerator mpg = new AutoGenerator();
// --- 1.全局配置
GlobalConfig gc = new GlobalConfig();
// 获取当前用户信息
String property = System.getProperty("user.dir");
// 生成到那个目录下
gc.setOutputDir(property + "/src/main/java");
// 自动添加作者
gc.setAuthor("zyk");
// 是否打开资源管理器
gc.setOpen(false);
// 是否覆盖原来生成的
gc.setFileOverride(false);
// 去除接口的前缀 I
gc.setServiceName("%sService");
// id生成策略
gc.setIdType(IdType.AUTO);
// 时间更新
gc.setDateType(DateType.ONLY_DATE);
// swagger
gc.setSwagger2(true);
// 将其丢到自动生成器里
mpg.setGlobalConfig(gc);
// --- 2. 设置数据源
DataSourceConfig dsc = new DataSourceConfig();
dsc.setUrl("jdbc:mysql://localhost:3306/user?useSSL=true&useUnicode=true&characterEncoding=utf-8&serverTimezone=GMT%2B8");
dsc.setDriverName("com.mysql.cj.jdbc.Driver");
dsc.setUsername("root");
dsc.setPassword("");
// 数据库类型
dsc.setDbType(DbType.MYSQL);
// 选择当前配置环境
mpg.setDataSource(dsc);
// --- 3.包配置
PackageConfig pc = new PackageConfig();
pc.setModuleName("automa");
pc.setParent("com.zyk");
pc.setEntity("pojo");
pc.setController("controller");
pc.setService("service");
mpg.setPackageInfo(pc);
// --- 4. 策略配置
StrategyConfig strategy = new StrategyConfig();
// 要自动生成那些表
strategy.setInclude("userceshi","visrge");
// 下划线转驼峰命名
strategy.setNaming(NamingStrategy.underline_to_camel);
strategy.setColumnNaming(NamingStrategy.underline_to_camel);
strategy.setEntityLombokModel(true);
/// 逻辑删除
strategy.setLogicDeleteFieldName("deleted");
// 自动填充
TableFill inserfiled = new TableFill("create_time", FieldFill.INSERT);
TableFill updatefiled = new TableFill("update_time", FieldFill.INSERT_UPDATE);
ArrayList<TableFill> array=new ArrayList<>();
array.add(inserfiled);
array.add(updatefiled);
strategy.setTableFillList(array);
// 乐观锁
strategy.setVersionFieldName("version");
// 开启 Restfro风格 驼峰
strategy.setRestControllerStyle(true);
// 开启后 前端请求就会变为 /hello?id=1 改为 //hello_id_2
strategy.setControllerMappingHyphenStyle(true);
mpg.setStrategy(strategy);
// 开启
mpg.execute();
}
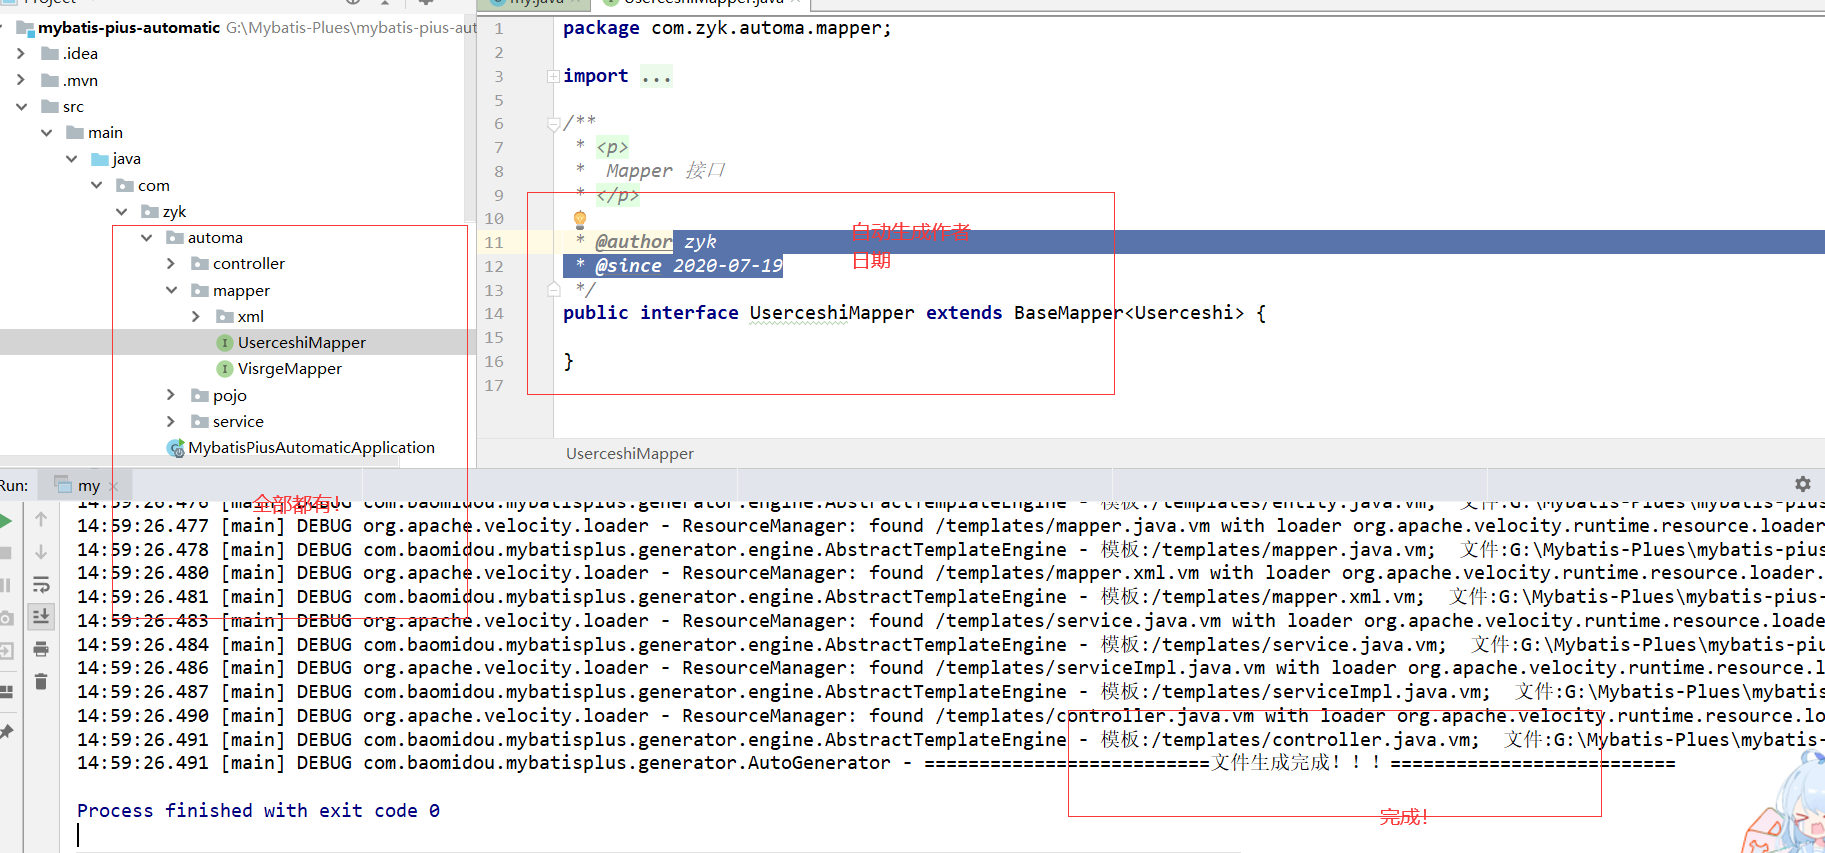
启动前:

启动后:用了打码生成器后

 浙公网安备 33010602011771号